• Going Out
    • Phx Restaurants
    • How To Order At Starbucks
  • Running
    • My Running Story
    • Race Calendar
    • Race Recaps & Results
  • Blogroll
  • Bucket List
  • Video

Ari's Menu

Little changes making a big difference.

  • Home
  • Recipes
  • Weight Loss
    • My Story
    • Common Swaps
  • Who’s Who
  • Contact
    • Policies & Disclosure
  • Press

Thai Chicken Kabobs

July 31, 2013 · by Ari ·

Thai Chicken Kabobs

Is there anything more fun than food on a stick? I mean, sure, eating it can be tricky and you run the risk of stabbing your husband while playing swords with your food (because that’s a totally normal and acceptable thing to do, yes?), but really, how many foods can you make into a sword anyway?

Thai Chicken Kabobs

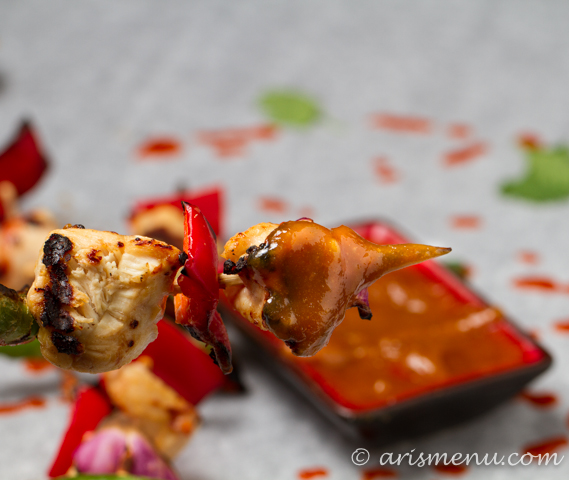
I’ve actually never made kabobs before this one, and let me tell you, I am in love. I loved having my chicken on my veggies all on one stick. I loved how fun they were to eat and dip in the peanut sauce, and I also loved how food on a stick meant there were next to no dishes to clean up. Seriously, I hate cleaning almost as much as I love cooking.

Thai Chicken Kabobs

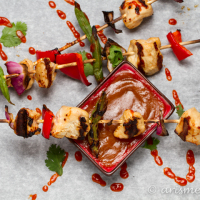
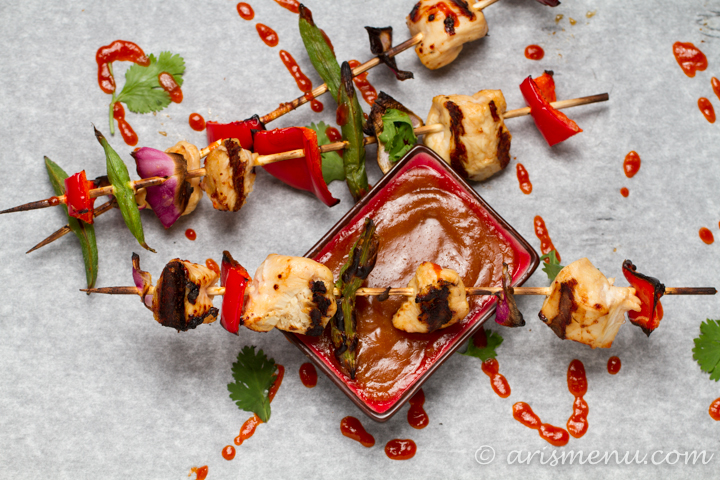
The chicken marinates in the peanut sauce to soak up all that delicious Thai peanut flavor, then gets grilled up with your veggies and dunked in lots more peanut-y deliciousness as you eat. You end up eating a lot less of the calorie-dense peanut sauce than if you were to eat traditional Pad Thai. Not to mention getting rid of the noodles and adding a bunch of veggies gives you all the flavors of classic Pad Thai with a fraction of the calories, and sticking it all on kabob skewers to grill up gives them an awesome summery touch!

Thai Chicken Kabobs

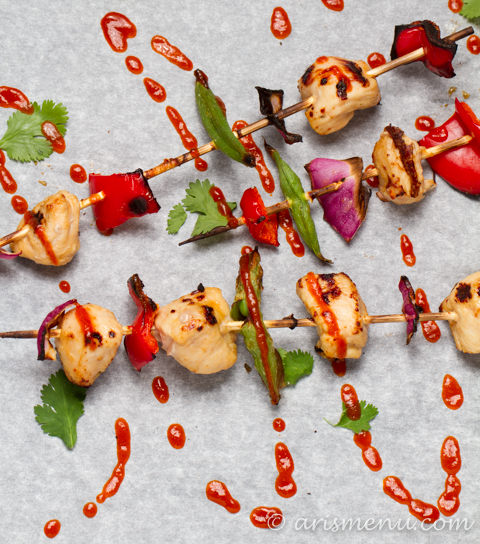
They are topped off with fresh cilantro (my favorite food–I don’t care if you say it’s an “herb”, it’s still my favorite) and drizzles with sriracha for an extra spicy kick. Of course, those are option if you’re one of those weirdos who doesn’t like spicy food, or worse, you have that genetic “mutation” where you don’t like cilantro. Have you heard about that? Apparently it’s a genetic thing where to some people it tastes like soap. So glad I pulled the long straw on that one. 😉

Print
Thai Chicken Kabobs

Prep Time: 1 hour, 15 minutes

Cook Time: 5 minutes

Total Time: 1 hour, 20 minutes

Yield: 9 kabobs

Serving Size: 3 kabobs

Thai Chicken Kabobs

Ingredients

  • 1/2 cup peanut butter
  • 1 1/2 tbsp fresh lime juice
  • 1 tbsp coconut aminos or soy sauce
  • 1 tsp sriracha + extra for drizzling
  • approx 1/2 cup water, divided
  • 1 1/2 lbs boneless skinless chicken breast, cut into 1" chunks
  • 1 large red bell pepper, cut into 1" chunks
  • approx 1 cup sugar snap peas
  • 1/2 red onion, cut into 1" chunks
  • fresh cilantro, optional

Instructions

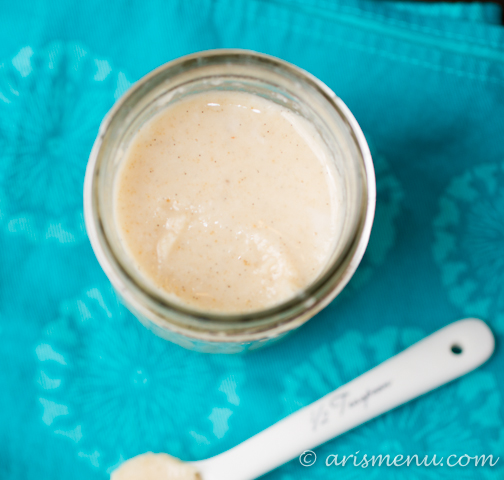
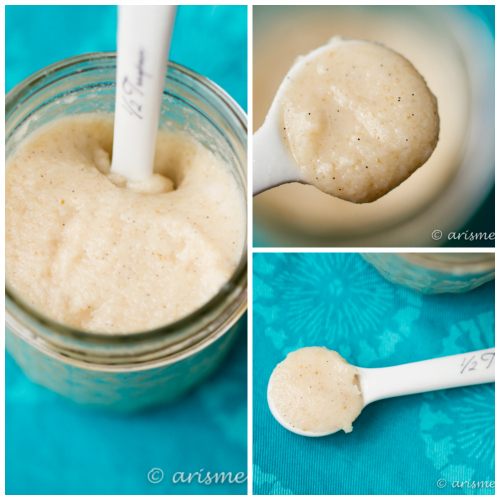
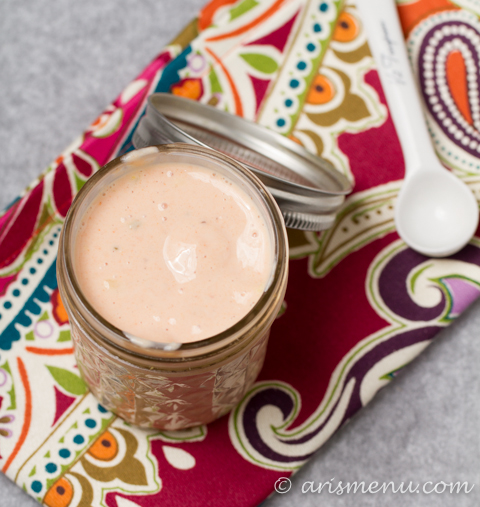
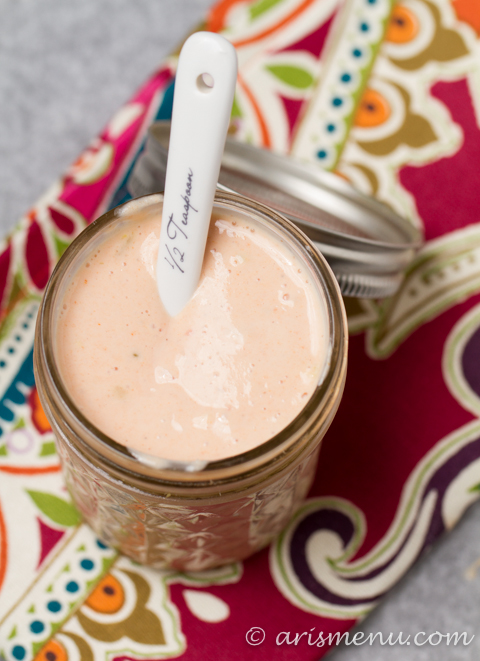
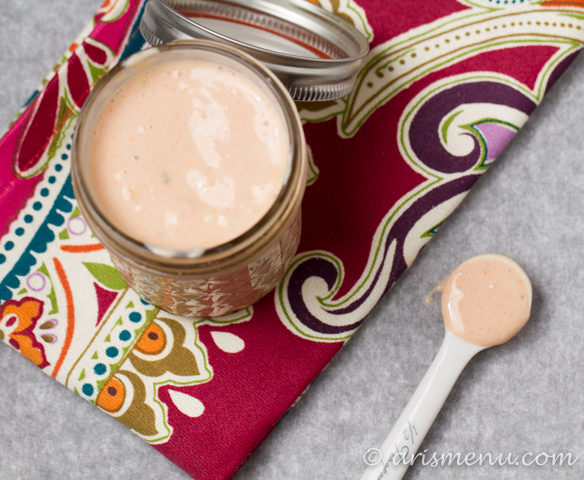
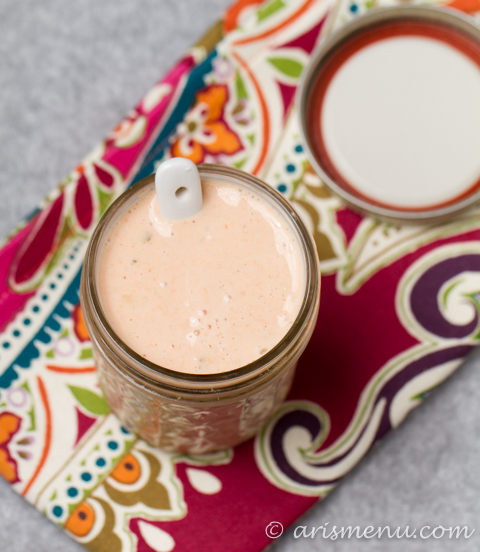
  1. In a medium bowl, whisk together peanut butter, lime juice, coconut aminos, sriracha and 1/4 cup water. Remove half the mixture (eyeball it), cover and set aside.
  2. Add 1/4 cup water to remaining mixture. Whisk to combine. Continue to slowly add water until it has reached the consistency of a marinade. I used about 1/4-1/3 cup. Place chicken and marinade in a large freezer bag or medium tupperware and marinate in the refrigerator for 1 hour (alternately, feel free to do this step up to 24 hours ahead of time).
  3. If using wooden skewers, soak skewers for 30 minutes before cooking (if you use metal, this is not necessary). Alternately place chicken, bell pepper, onion, and snap peas onto your skewers (you will most likely have room for about 2 of each) close together, but not crowding.
  4. Grill on medium-high heat until chicken is cooked throughout, about 5-7 minutes. Sprinkle with fresh cilantro and drizzle with srirach. Serve immediately with remaining peanut dipping sauce.

Notes

You may wish to heat the peanut sauce before serving. It can get quite thick while it sits, so microwaving for about 15 seconds and adding a tablespoon of water should get it back to your ideal consistency.

3.1
https://arismenu.com/thai-chicken-kabobs/

Filed Under: Entree, Gluten-free, Holiday & Seasonal, Low Carb, Paleo · Tagged: chicken, dinner, gluten free, grilling, peanut butter, recipe, summer, thai

Vanilla Bean Coconut Butter

July 23, 2013 · by Ari ·

Vanilla Bean Coconut Butter

So, if it weren’t for other blogs, I wouldn’t even know coconut butter was a thing. Coconut is, like, the next big thing in the food world it seems. Coconut milk, coconut oil, coconut butter, COCONUT EVERYTHING!

Vanilla Bean Coconut Butter

I didn’t even have an idea what it would actually taste like, but one day I just threw some coconut in my food processor, and decided to give it a try. I do love anything with the word ‘butter’ in the name, so I figured there was no way it could be bad…

Vanilla Bean Coconut Butter

In fact, you could tell me that broccoli butter is a thing, and I’d probably be convinced I needed to get in the kitchen and make it rightthatsecond.

Vanilla Bean Coconut Butter

Turns out, coconut butter is good. Like, really good. It’s like a combination of creamy, drippy homemade peanut butter with chewy coconut flavor and texture. It’s great on toast, bananas, and especially smoothies. It’s actually kind of magical in smoothies.

Vanilla Bean Coconut Butter

The coconut is already slightly sweet, so you don’t need a lot of sugar. I used 1/2 tbsp, and I probably would have REALLY loved it with 1-2 tbsp, but I wouldn’t use more than 2. Also, if you don’t like to add sugar, you can totally leave it out. Either way, you are in for a creamy, drippy jar of deliciousness.

Print
Vanilla Bean Coconut Butter

Prep Time: 10 minutes

Total Time: 10 minutes

Yield: Scant 1/2 pint

Serving Size: 2 tbsp

Vanilla Bean Coconut Butter

Creamy, simple and delicious coconut butter with bold vanilla bean and lightly sweetened with brown sugar.

Ingredients

  • 2 cups unsweetened shredded coconut
  • 1 vanilla bean (or 1 tbsp vanilla bean paste)
  • 1/2 tbsp brown sugar*

Instructions

  1. Blend coconut in your food processor until a creamy, peanut-butter-like texture forms, about 5-7 minutes. Split vanilla bean length wise and scrape seeds into coconut mixture. Add brown sugar and continue to pulse until well combined, about an other 1-2 minutes. Store in an airtight container at room temperature, or in the refrigerator. Stir before serving.

Notes

*You can omit the brown sugar if you wish, or if you like things sweeter, add up to 2 tbsp. I would add it 1/2 tbsp at a time, and taste as you go.

I've had my jar for over 2 weeks and it is still going strong. If it will last you longer than that, you may wish to keep refrigerated.

3.1
https://arismenu.com/vanilla-bean-coconut-butter/

Filed Under: DIY/How To, Gluten-free, Miscellaneous, Paleo, Sauces & Spreads, Snacks, Vegan · Tagged: coconut, coconut butter, easy, gluten free, recipe, simple, spreads, vanilla, vanilla bean, vegan

Sugar-free Rosemary Lemonade

July 11, 2013 · by Ari ·

Rosemary Lemonade #sugarfree

Is there anything more refreshing in the summer than an ice cold lemonade? Okay, maybe those frozen ones at Disneyland (ahhh Disneyland–WANT TO BE THERE NOW!), but even those can be so syrupy sweet that I end up thirstier than when I started.

Rosemary Lemonade #sugarfree

I’m not usually into the artificial sweeteners. I used to use a lot of Splenda, then as I began to care about actually health, and not just caloric values, I began to steer myself away from fake sweeteners. Minus my coffee and sometimes a diet coke. Let’s just say it’s a work in progress. 😉

Rosemary Lemonade #sugarfree

Anyway, they say that stevia won’t kill you, so I decided to give it a shot. I know, I’m totally late to the party. If you’ve decided that “they” are liars and have it all wrong, you could totally sub in some agave nectar for a nice natural sweetness.

Rosemary Lemonade #sugarfree

When I first started thinking about creating a rosemary lemonade, I thought it was this new, unique idea that most people would find crazy, until they tried it and discovered my visionary genius qualities. Then they started popping up all over the internet. Womp womp. Still, it’s delicious, fresh, summery, and totally not as weird as it sounds. I make mine on the tart end because I want that more natural taste, but feel free to add a little extra sweetness if you prefer. Either way, you will love this lemonade!

Print
Sugar-free Rosemary Lemonade

Yield: 7 cups

Serving Size: 1 cup

Sugar-free Rosemary Lemonade

Ingredients

  • 6 cups filtered water
  • 3-4 sprigs rosemary
  • Juice from 6 large lemons (or about 1 cup fresh lemon juice)
  • 20 drops stevia (or 2/3 cup agave nectar)

Instructions

  1. Bring one cup water to a boil Add rosemary, remove from heat and allow to cool completely. Add 5 cups cold water, lemon juice and stevia. You may discard rosemary sprigs or allow to stay in for some extra rosemary flavor.
  2. Store refrigerated in an airtight container for up to one week. Serve over ice with extra rosemary and lemon slices if desired.
3.1
https://arismenu.com/sugar-free-rosemary-lemonade/

Filed Under: Drinks, Gluten-free, Holiday & Seasonal, Low Carb, Paleo, Vegan · Tagged: drink, gluten free, lemonade, recipe, rosemary, sugar free, summer, vegan

Magic Shell Cups

July 7, 2013 · by Ari ·

Magic Shell Cups #vegan #glutenfree

Remember Dibs? They were so popular when they first came out. Dangerously good, and finally brought ice cream as a “snack” to movie theaters. I was pretty obsessed, but as I’ve mentioned, I’m pretty obsessed with anything that includes ice cream. 😉

Magic Shell Cups #vegan #glutenfree

I tried to make you Dibs. I tried to many ways. I made a mess of my kitchen. Chocolate and fro-yo everywhere. And I’m not one of those roll with the punches people who keeps it cool when things don’t work out. No. I work in an embarrassingly fragile state in the kitchen where I am known to have legit freak out when things don’t turn out the way I want them to. It’s really fun being married to me. 😉

Magic Shell Cups #vegan #glutenfree

Anyway, after several failed attempts, I decided to change things up a little. Last year I was obsessed with making these cups. Then after selling hundreds of them for fundraising and spending pretty much every weekend making them, I decided I never wanted to make a single candy cup again for the rest of my life. Good thing these are ice cream cups instead. They did bring back some painful memories, but man were they worth it in the end!

Magic Shell Cups #vegan #glutenfree

These cups are everything you love about a magic shell ice cream cone in tiny, bite-sized cups that are perfect for when you just want a little bit of sweetness. They are also extremely versatile. You could put rice krispies in the chocolate for some added crunch, you can use any type of ice cream/fro-yo you like (I like it best with nonfat vanilla fro-yo or coconut milk ice cream), you can add sprinkles (no brainer for me!) for color and crunch, and you could even put in some peanut butter, granola or pretzels to add some variety!

Print
Magic Shell Cups

Prep Time: 20 minutes

Total Time: 20 minutes

Yield: 26-30 cups

Serving Size: 2 cups

Magic Shell Cups

Ingredients

  • 20 oz dark chocolate, roughly chopped (or dark chocolate chips)
  • 1 tbsp coconut oil
  • Approx 1 cup ice cream/frozen yogurt of choice (I used coconut milk ice cream and nonfat vanilla fro-yo. If vegan, use coconut milk or other nondairy ice cream.)
  • Sprinkles for topping, optional

Instructions

  1. Line mini muffin tins with paper liners.
  2. In a medium bowl, heat chocolate and coconut oil in the microwave in 20 second intervals, stirring after each, until melted.
  3. Spoon enough chocolate to cover the bottom of each baking cup. Add scant tablespoon fro-yo or ice cream. Cover with more chocolate. Add sprinkles if desired.
  4. Freeze for at least one hour or until set. Cups will stay kept in the refrigerator for up to one month.
3.1
https://arismenu.com/magic-shell-cups/

Filed Under: Dessert, Gluten-free, Holiday & Seasonal, Ice Cream & Fro-yo, Snacks · Tagged: candy, chocolate, cups, dessert, fro yo, gluten free, ice cream, magic shell, recipe, sprinkles, vegan

Turkey Sloppy Joes

July 4, 2013 · by Ari ·

Turkey Sloppy Joes

The first time I ever heard of sloppy joes was when I was watching that movie with the Olsen twins. I think it’s called It Takes Two? With Kirstie Alley and they go to summer camp and find out that they were twins separated at birth, then they switch places? There’s a scene in the cafeteria where they have sloppy joes and then they have a food fight. Food fights always look fun in the movies, but the idea of being literally covered in food in real life is surprisingly unappealing to me. As much as I love food, I do not love it on my body instead of in it.

Turkey Sloppy Joes

Sloppy joes were just never something my mom made, so when I did finally have one, it seemed like a special treat and I fell in love. I tried to make them once before with no ketchup (I used tomato sauce) and no sugar. It tasted like bad meat sauce. It was a total failure, and I’m pretty sure I threw a temper tantrum during the time Steve ate his entire serving and went back for seconds. Anyway, I knew I needed to try again.

Turkey Sloppy Joes

This time, I stuck to the simple and traditional, and ended up with a total treat that made me feel like a little kid again. It was totally messy, and got all over my face and clothes in the best way possible. It had that sweetness you imagine with a sloppy joe without any refined sugar, and the sriracha adds a little kick that I love. But then again, I put sriracha on just about everything.

Turkey Sloppy Joes

This is one of those perfect healthy meal for anyone who has kids (or lives with people that act like kids), or just likes simple, delicious foods. It’s healthy, nutritious, super filling and so easy to make that you will be making it over and over again!

Print
Turkey Sloppy Joes

Prep Time: 5 minutes

Cook Time: 40 minutes

Total Time: 45 minutes

Yield: 4 servings

Turkey Sloppy Joes

Ingredients

  • 1 tsp olive oil
  • 1 sweet onion, finely chopped
  • 1 red bell pepper, finely chopped
  • 3 cloves garlic, minced
  • 1 lb lean ground turkey (I used 93%)
  • 3/4 cup reduced sugar ketchup
  • 2-3 tsp molasses
  • pinch each salt and pepper
  • dash worcestershire sauce
  • dash sriracha or other hot sauce, optional
  • whole grain buns for serving (whole wheat, brown rice, etc.), optional

Instructions

  1. In a large pan over medium heat, saute onion, bell pepper and garlic in olive oil until tender and fragrant, about 7-10 minutes. Add ground turkey and brown until cooked throughout.
  2. Stir in ketchup, molasses, salt, pepper, worcestershire and sriracha. Bring to a light boil. Reduce heat and simmer until thickened, about 30 minutes.
  3. Serve immediately on buns, or over a salad, or any way you like.
3.1
https://arismenu.com/turkey-sloppy-joes/

Filed Under: Entree, Gluten-free, Sandwiches · Tagged: dairy free, dinner, easy, gluten free, lunch, recipe, sandwich, sloppy joe, turkey

Chocolate Chip Zucchini Almond Meal Muffins

June 18, 2013 · by Ari ·

Soft & fluffy zucchini muffins stuffed with dark chocolate chips. Grain-free, refined sugar-free, vegan & paleo!

Chocolate Chip Zucchini Almond Meal Muffins #vegan #glutenfree

Did I ever tell you about the time I ate 3 zucchinis in one sitting because I wanted a snack and was trying to be healthy? I called up one of my best friends and said “I think I just over ate zucchinis. Is that even a thing?” I love them. Sauteed, roasted, grilled, BAKED!

zucchinimuffins-19Chocolate Chip Zucchini Almond Meal Muffins #vegan #glutenfree

Okay, these muffins taste nothing like zucchinis. Just like carrot cake doesn’t actually taste like carrots. But the zucchinis add some extra veggie goodness, and also produce some of the softest, (insert gross word) and tender muffins I have ever tasted.

Chocolate Chip Zucchini Almond Meal Muffins #vegan #glutenfree

As soon as I decided I wanted to make zucchini almond meal muffins, I hit up my girl Gina’s blog for some inspiration. She has the best paleo recipes, and although I don’t eat paleo, I love baking with nut flours, and her blog is always a great place to start. She made some ridiculously good looking zucchini bread that I used as a guideline, but ended up with muffins with chocolate chips inside. Shocking, right?

Chocolate Chip Zucchini Almond Meal Muffins #vegan #glutenfree

The muffins tasted EXACTLY like I wanted–lightly sweet, hearty and filling without being heavy. They didn’t last long, and whether you normally use grain-free flours or not, you will absolutely love them!

Print
Chocolate Chip Zucchini Almond Meal Muffins

Prep Time: 10 minutes

Cook Time: 25 minutes

Total Time: 35 minutes

Yield: 1 dozen

Serving Size: 1 muffin

Chocolate Chip Zucchini Almond Meal Muffins

Soft & fluffy zucchini muffins stuffed with dark chocolate chips. Grain-free, refined sugar-free, vegan & paleo!

Ingredients

  • 3/4 cup unsweetened vanilla almond milk
  • 1/2 tsp apple cider vinegar
  • 1 1/2 cups almond meal
  • 1 1/2 tsp baking soda
  • dash salt
  • 1 tsp cinnamon
  • 1 ripe banana, mashed
  • 3 tbsp natural liquid sweetener of choice (honey, agave, maple syrup, etc.)
  • 1 tbsp coconut oil, melted
  • 1 tsp vanilla extract
  • 1 cup finely grated zucchini, squeezed dry
  • heaping 1/2 cup mini dark chocolate chips

Instructions

  1. Preheat oven to 350. Line muffin tins with paper liners. Set aside.
  2. Measure milk in your measuring cup. Add apple cider vinegar and whisk lightly. Set aside.
  3. In a large bowl, whisk together almond meal, baking soda, salt and cinnamon. Add almond milk mixture, banana, sweetener, coconut oil, and vanilla. Mix until just combined. Fold in zucchini and chocolate chips.
  4. Evenly divide batter between between 12 prepared muffin molds.
  5. Bake until golden and a toothpick inserted in the center comes out clean, about 20-25 minutes.

Notes

Adapted from Running to the Kitchen

3.1
https://arismenu.com/chocolate-chip-zucchini-almond-meal-muffins/

Filed Under: Breads & Muffins, Breakfast, Dessert, Gluten-free, Holiday & Seasonal, Paleo, Summer, Vegan · Tagged: almond meal, breakfast, chocolate, dessert, gluten free, grain free, muffin, recipe, vegan, zucchini

Black Bean Burger Salad

June 16, 2013 · by Ari ·

Black Bean Burger Salad with Cilantro Lime Vinaigrette #glutenfree

In the summertime, the only things I crave other than burgers (and grilled food in general) are big, delicious, cool and refreshing salads. I’m not talking the kind of “salad” that is some lettuce thrown on a plate and then drowned with ranch dressing. My salads need to be loaded with flavor, and they have to have a little something special to keep me interested.

Black Bean Burger Salad with Cilantro Lime Vinaigrette #glutenfree

I also always love a new way to eat one of my favorite foods. I fell head over heels for these black bean burgers at first bite, and since I almost never make the same meal twice, I wanted a new way to enjoy them. I have to say, I like them even better this way!

Black Bean Burger Salad with Cilantro Lime Vinaigrette #glutenfree

The bold, spicy burgers balance perfectly with the fresh, crisp lettuce and cucumber, and the sweet tomatoes, peppers, roasted corn and dried cranberries. And that tangy, creamy goat cheese on top? Flavor heaven. Not to mention the sweet and spicy cilantro lime vinaigrette. It is legit the best salad dressing I have ever tasted.

Black Bean Burger Salad with Cilantro Lime Vinaigrette #glutenfree

If you don’t do dairy, you could leave the goat cheese off and replace it with avocado. I mean, you should probably just add avocado anyway to all things, but especially if you leave the cheese off. This salad is perfect for summer (or any time), and I even continued to make it with my left over black bean burgers for the entire rest of the week! You can also easily double or triple it if you’re serving a bigger group!

Print
Black Bean Burger Salad with Cilantro Lime Vinaigrette

Prep Time: 10 minutes

Cook Time: 1 hour

Total Time: 1 hour, 10 minutes

Yield: 2 servings

Black Bean Burger Salad with Cilantro Lime Vinaigrette

Ingredients

  • 2 ears corn
  • 1 tbsp olive oil
  • salt and pepper
  • 1 heart of romain, chopped
  • 1 cup cherry tomatoes, halved
  • 1 red bell pepper, chopped
  • 1 large cucumber, chopped
  • 1/3 cup dried cranberries
  • 2 black bean burgers*
  • 3 oz goat cheese
  • For the Cilantro Lime Vinaigrette:
  • 2 limes
  • 1/4 cup olive oil
  • 2/3 cup cilantro
  • 1/2 jalapeno, seeds removed
  • 1 clove garlic
  • 1 tbsp honey
  • 1 tbsp balsamic vinegar
  • 2 tbsp water
  • 1 tsp cumin
  • pinch salt

Instructions

  1. Drizzle corn with olive oil and season with salt and pepper. Roast at 400 until golden and tender, about an hour.
  2. Prepare the dressing by adding the zest of 1 lime, and the juice of two with all remaining ingredients in your food processor and pulsing until combined and smooth, about 1 minute.
  3. For the salad, gently toss together roasted corn, lettuce, tomato, bell pepper, cucumber, and cranberries. Transfer to serving dishes. Crumble 1 black bean burger and 1.5 oz goat cheese on top of each salad. Serve with prepared dressing.

Notes

*Store bought/frozen black bean burgers may be used. Cook per package instructions before adding to your salad.

**To keep vegan, avocado may be subbed for goat cheese and agave may be subbed for honey in the dressing.

3.1
https://arismenu.com/black-bean-burger-salad/

Filed Under: Appetizers, Dinner, Entree, Gluten-free, Holiday & Seasonal, Lunch, Salads, savory, Summer, Vegetarian · Tagged: beans, black bean burger, cheese, cilantro, corn, dinner, gluten free, lunch, recipe, salad, summer, vegetarian

Fat Free Thousand Island Dressing

June 11, 2013 · by Ari ·

Fat Free Thousand Island Dressing

Does anyone actually eat thousand island on a salad? I mean, don’t get me wrong, I find it delicious, and I absolutely love it on sandwiches, burgers, and as a dipping sauce, but on a salad? I don’t think I’ve ever seen anyone eat it like that.

Fat Free Thousand Island Dressing

I told Hermano I made my own thousand island, and he told me I needed to recreate the big mac. I had totally forgotten that thing even exists, but I feel like now I have to tackle it. Especially since I’m apparently obsessed with burgers lately.

Fat Free Thousand Island Dressing

I used to get thousand island on my sandwiches all the time, but I kicked the habit to the curb when I started my weight loss journey. There aren’t a lot of options at the store if you want a healthier version, and most of them are filled with ingredients I don’t want to go anywhere near, so I figured I’d try my hand at my own version.

Fat Free Thousand Island Dressing

You guys…making your own salad dressing (or sandwich dressing, or dipping sauce) is SO EASY. Seriously. There is no reason to buy this stuff. It only requires a handful of ingredients, and about 5 minutes of your time.

Fat Free Thousand Island Dressing

Nonfat plain Greek yogurt is the secret to making it thick and creamy without any fat. From there, I just added a little bit of reduced sugar ketchup (available at most grocery stores), some sweet relish, honey for added sweetness, vinegar, and some seasonings. Aside from the relish, I had all of the ingredients in my house already! And with hardly any added time, I had a delicious sandwich with sweet and creamy thousand island in minutes *hint hint*.

Print
Fat Free Thousand Island Dressing

Prep Time: 5 minutes

Total Time: 5 minutes

Yield: 3/4 cup

Serving Size: 2 tbsp

Fat Free Thousand Island Dressing

Ingredients

  • 1/2 cup nonfat plain Greek yogurt
  • 2 tbsp reduced sugar ketchup
  • 1 tbsp white vinegar
  • 1-2 tsp honey (depending on desired sweetness)
  • 2 tsp sweet pickle relish1 teaspoon white onion, finely minced
  • pinch onion powder
  • dash each salt and pepper

Instructions

  1. Whisk all ingredients together in a medium bowl. Store refrigerated in an airtight container for 7-10 days. Serve completely chilled.
3.1
https://arismenu.com/fat-free-thousand-island-dressing/


Filed Under: DIY/How To, Gluten-free, Miscellaneous, Sauces & Spreads · Tagged: dip, diy, dressing, easy, fast, gluten free, recipe, sauce, thousand island

Roasted Corn Black Bean Salad

June 5, 2013 · by Ari ·

Roasted Corn Black Bean Salad #vegan #glutenfree

You guys…it is HOT here. Have I mentioned that? Complained about highs of 110*?? Wahhhh, I live in Arizona and 5 months out of the year, I strongly question my life choices.

sted Corn Black Bean Salad #vegan #glutenfree

It’s okay though, because I’ve only got an other 10 days of this madness before I head to the northwest for SIX WEEKS!!! I’m starting with a little vacation in San Francisco to visit my friend Karisa with my New York Husband, then working at a theatre camp in Portland for 5 weeks. I went last summer, and this actually marks my 11th summer between my time as a first student, then counselor and now teacher. I love it. It’s my happy place, and this time of year I always need the recharge of a new environment to remind me why I love what I do.

sted Corn Black Bean Salad #vegan #glutenfree

Anyway, I guess you were maybe here to read about food? Well, I swear the heat relates to the food. You see….it’s hot (redundant, part of 1), and I don’t want to eat anything that doesn’t taste like summer. You know what is, like, the most summeriest food??? CORN!!!!

sted Corn Black Bean Salad #vegan #glutenfree

I just used the words “most summeriest”. Honestly, sometimes I’m not sure why you guys read a word a say. Oh yeah….the food.

sted Corn Black Bean Salad #vegan #glutenfree

This salad is light, refreshing and filled with “most summeriest” flavor. Fresh roasted corn, cherry tomatoes, crunchy cucumber, sweet red peppers, spicy jalapeno and protein-packed black beans come together with just a little olive oil, vinegar, some honey or agave (I love honey, but my bee loving friends are free to use agave!), fresh lime juice, and of course, my favorite food–cilantro! So many of my favorite things in one summer salad. I also love that with all the protein, it can be used as a meal, or a side dish–your choice. I’ve been eating it on the side with my 5 billion different burgers, but I also like it for lunch. However you eat it, you will love the light, fresh taste and bold flavor profile!

Print
Roasted Corn Black Bean Salad

Prep Time: 10 minutes

Cook Time: 1 hour

Total Time: 1 hour, 10 minutes

Yield: approx 16

Serving Size: 1/2 cup

Roasted Corn Black Bean Salad

This simple, easy, vegan and gluten-free summer salad is refreshing, and easy to put together in bulk for lunches, dinner sides or a BBQ!

Ingredients

  • 3 ears corn, husked
  • 2 1/2 tbsp olive oil, divided
  • 3 tsp rice vinegar
  • 1 tbsp honey or agave
  • 1 1/2 tbsp fresh lime juice
  • 1/2 cup finely chopped red onion
  • 1 cup cherry tomatoes, halved
  • 2 red bell peppers, chopped
  • 3 persian (or 1 large) cucumbers, chopped
  • 1/2 jalapeno, seeded and finely chopped (optional)
  • 2 16 oz cans black beans, drained and rinsed
  • 1/3 cup cilantro leaves, finely chopped
  • 1 tsp cumin
  • generous pinch each salt and pepper

Instructions

  1. Drizzle corn with 1 tbsp olive oil and roast at 400 until golden, about an hour.
  2. Meanwhile, in a medium bowl, whisk together 1 1/2 tbsp olive oil, rice vinegar, honey/agave, and lime juice. Set aside.
  3. Cut kernels from cooked corn and place in a large bowl. Add onion, tomatoes, bell peppers, cucumbers, jalapeno, black beans and cilantro. Season with cumin, salt and pepper. Add prepared dressing and toss lightly. Serve immediately or store in an airtight container in the refrigerator for 7-10 days.
3.1
https://arismenu.com/roasted-corn-black-bean-salad/

Filed Under: Gluten-free, Holiday & Seasonal, Side Dish, Vegan, Vegetarian · Tagged: bbq, black beans, corn, gluten free, lunch.dinner, salad, side, summer, vegan, vegetables, vegetarian

How To: Toddy {Cold Brewed Iced Coffee}

June 3, 2013 · by Ari ·

How to Make Iced Coffee

Have we ever discussed my coffee habit? It’s pretty embarrassing the amount of money I have spent on going out to coffee in my life. I just never got into the habit of making my own in the morning, but I did fall very easily into the habit of going to Dutch Bros TWICE a day. Somehow my bank account and I cannot seem to agree on this habit. Shocking, right?

How to Make Iced Coffee

Anyway, I don’t remember exactly when it was that I discovered toddy–probably a little over a year ago. Toddy is basically the best, smoothest, and most caffeinated way to drink coffee. Pretty much, it wins in every coffee contest ever.

How to Make Iced Coffee

And did I mention it is ridiculously easy to make? It does take just over 24 start to finish, but really most of that time you are sleeping, baking, and eating fro yo. Or…at least that’s what I was doing… 😉

This is literally the best coffee I have ever tasted. Better than any coffee shop, better than any latte. It comes out so smooth with next to no bitterness, and full of bold flavor. It doesn’t need a whole lot–a little sweetener and some almond milk will do ya, but if you like sweeter, creamier coffee, it’s your cup o’ jo! You can make it however you want. Add chocolate syrup and make an iced mocha, blend it up into a homemade frappe, or put some in your brownies!

Okay, let’s get started. The first thing you need is a 2.5 gallon airtight container (or 1.75 for a half batch), and 1 lb of coarsely ground coffee. I like a strong, bold coffee, but use whatever you like. Pour that coffee right into your container.

How to Make Iced CoffeeThen top it with 2 gallons of purified water. If you want, you can also stick a vanilla bean in there to add some flavor. I do sometimes, and I love it!

How to Make Iced Coffee

Give it a little pat down at the top to make sure all of the coffee is incorporated into the water, and not just floating at the top. I don’t mess around with the possibility of losing coffee flavor!

How to Make Iced Coffee

Cover and store for 24 (or up to 36) hours. You can let this happen in the fridge, or at room temperature. It is completely up to you. I usually don’t have room in the fridge, so I stick to room temperature. Once your 24-36 are up, take a fine mesh strainer to scoop out as much of the coffee grounds as possible.

How to Make Iced Coffee

Rinse our your strainer, then set it on top of a 1 gallon jug–you will need two of these because you end up with about 1.75 gallons of coffee when all is said and done. Top the strainer with a double layer of cheesecloth. Use a measuring cup to pour coffee over the strainer. You may just pour from your container if you wish, but that sounds like a coffee disaster for an accident prone gal like yours truly. You might be better at that sort of thing than me, however…

How to Make Iced Coffee

Once you’ve filtered all of the coffee, you are DONE! Store your coffee jugs in the fridge. It is important to note, this recipe creates a coffee CONCENTRATE. When you make your coffee, add an inch or 2 of water to your cup to dilute it a bit. Trust me, I love strong coffee as much as anyway, but it does need to be diluted a bit. Do some trial and error to figure out the best balance for you. Serve it over ice with whatever cream and sweetener you like.

How to Make Iced CoffeeI have officially kicked my coffee shop habit to the curb (with the exception of going with friends on occasion–just like eating out is fun occasionally!) with this stuff. I am in love, obsessed, over the moon for it. It’s super easy, full proof, and super budget friendly. It’s about a $30 investment for all the storage initially, but that’s a one time deal, and then you’re set! Not to mention, there is nothing to brew in the morning! I wake up, poor myself a glass, and go about my breakfasting/blog reading. You will love it!

Print
Toddy {Cold Brewed Iced Coffee}

Prep Time: 30 minutes

Total Time: 24 hours, 30 minutes

Yield: 12-15 cups (approx 1.75 gallons)

Serving Size: 1 cup

Toddy {Cold Brewed Iced Coffee}

Ingredients

  • 1 lb good quality bold coffee, coarsely ground
  • 2 gallons water

Instructions

  1. Pour ground coffee into a 2.5 gallon airtight container. Top with 2 gallons filtered water. Pat down the top to ensure all coffee is incorporated. Cover and store for 24-36 hours.
  2. Scoop out as much of the grounds as possible with a fine mesh strainer. Rinse strainer, then cover with a double layer of cheesecloth. Place covered strainer over a 1 gallon jug Use a measuring cup to pour coffee over your covered strainer to filter any remaining grounds. Repeat until jug is mostly full, then repeat with a second 1 gallon jug. If your coffee begins to have trouble filtering through, change your cheesecloth out for a fresh one.
  3. To serve, fill glass with ice and add 1-2 inches of water. Add coffee, and any desired cream or sweetener.
3.1
https://arismenu.com/how-to-toddy-cold-brewed-iced-coffee/


Filed Under: DIY/How To, Drinks, Gluten-free, Low Carb, Miscellaneous, Paleo, Vegan · Tagged: coffee, cold brew, drinks, gluten free, how to, iced coffee, toddy, vegan

Guacamole Chicken Salad

May 30, 2013 · by Ari ·

Guacamole Chicken Salad #glutenfree #dairyfree

My name is Ari, and I have a chicken salad problem.

Guacamole Chicken Salad #glutenfree #dairyfree

There, I admit it. I just…I get on these kicks, and I have to make something every way humanly possible until I decide I’m bored, then I move on to the next best thing. Right now, I enjoy about 3 meals. Burgers, hot dogs (just you wait…so many are coming), and chicken salad (duh). At least my tastes seem to be seasonal?

http://arismenu.com/curried-chicken-salad/

So I actually realized I’ve been holding out on you guys. I’ve never actually posted my guacamole recipe. That’s probably because, until now, I had absolutely no idea what it was. I always just messed with a few key ingredients until it tasted the way I wanted. That’s the best part about guacamole–mess it up? Oh, just add more of something else, and it’s sure to even out eventually.

Guacamole Chicken Salad #glutenfree #dairyfree

So for the first time in my life, I measured out every single ingredient for my guacamole. Because I didn’t think using instructions like “Add salt until it’s salty enough” really counted as “quality content”. And I don’t mean to brag, but my guacamole is AWESOME! Spicy, fresh and creamy–it gets requested all.the.time.

Guacamole Chicken Salad #glutenfree #dairyfree

So I made it, then I added a rotisserie chicken, some tomatoes, and after all the photography was done, I had the brilliant idea to add dried cranberries. Oh Em Gee. ADD THE DRIED CRANBERRIES!!! I’m sorry they’re not in the picture. Add them anyway. You’re welcome.

This is legit the best chicken salad I have EVER tasted. It lasted about 3 days, and Steve and I were fighting each other for it. It’s perfect for all you dairy-free folk, and anyone who loves guacamole, or chicken, or food in general.

Print
Guacamole Chicken Salad

Prep Time: 10 minutes

Total Time: 10 minutes

Yield: 6-8 servings

Guacamole Chicken Salad

Ingredients

  • 2 large (or 3 small) avocados, peeled and pitted
  • 1 lime, zest & juice
  • small handful fresh cilantro
  • 3 cloves garlic, finely chopped
  • 1/2 jalapeno, finely chopped (remove stems and heat for less heat)
  • 1 tsp cumin
  • generous pinch each salt and pepper
  • 1/4 cup red onion, finely chopped
  • 1/2 cup cherry tomatoes, halved
  • 1/3 cup dried cranberries (optional, but recommended)
  • 10-12 oz cooked and shredded chicken (I used one rotisserie)

Instructions

  1. In a large bowl, combine avocado, lime (zest and juice), cilantro, garlic, jalapeno, cumin, salt and pepper. Use an immersion blender to blend all ingredients together until smooth and creamy, about 1 minute. Blend for less time if you like a thick and chunky consistency.
  2. Stir in onion, tomatoes, cranberries and chicken. Serve immediately, or store in an airtight container with half a lime (this prevent browning) for up to 5 days.
3.1
https://arismenu.com/guacamole-chicken-salad/

Want more chicken salad options? I have lots (and none of them have mayo)!

Curried Chicken Salad

Buffalo Chicken Salad

Cranberry Apple Chicken Salad

Filed Under: Dinner, Entree, Gluten-free, Holiday & Seasonal, Low Carb, Lunch, Paleo, Salads, savory, Summer · Tagged: avocado, chicken, chicken salad, dairy free, dinner, easy, gluten free, guacamole, lunch, quick, recipe, simple

Drink & Dish: Loaded Baked Potato Salad

May 21, 2013 · by Ari ·

Loaded Baked Potato Salad

I realllllly hope you like this recipe. I almost lost a leg creating it for you. I mean, “lost a leg” might be sliiiiightly dramatic, but I did end up with a pretty massive and nasty burn on my leg. I’ve had quite a few kitchen casualties recently, and I’m just considering it an opportunity to toughen up.

Loaded Baked Potato Salad

I’m pretty much a wimp about hurting myself. I will push through tons of pain when I run, but the second I SEE the physical pain happen, I kind of cry like a baby. It’s not my best character trait, but I mean it could be worse, right?

Loaded Baked Potato Salad

Ya know, for all my whining, this dish totallllly made up for it. I’ve made it before, but not for a long time, and with one bite I remembered just how dangerously delicious it was. In fact, after several days of nonstop picking at it and eating bites here and there, I finally had to throw in the towel and send the rest of the leftovers off with my family.

Loaded Baked Potato Salad

It literally tastes like a loaded baked potato. It has all the good stuff, and gets rid of a large amount of the bad. No butter (the original recipe calls for TWO STICKS–gross), no sour cream, and lighter cheese and bacon options. If you’re not a meat or bacon eater, I guess you cooouuulllld leave it out, but I feel like it’s totally worth the little extra splurge here. Plus, center cut bacon is like 35 caloies a slice, so unless you just don’t like it, I’d keep it. 😉

Loaded Baked Potato Salad

The only time consuming part of this salad is waiting for the potatoes to bake. Literally, the rest is 5 minutes of throwing things together in a bowl. The flavors and textures come together perfectly with the starchy potatoes, creamy greek yogurt and crunchy, salty bacon.

Loaded Baked Potato Salad

Make sure you check out the latest episode of Drink & Dish, and if you want a fun summer treat for Memorial Day or lounging by the pool, check out Nicole’s delicious vodka lemonade slush.


Print
Drink & Dish: Loaded Baked Potato Salad

Prep Time: 10 minutes

Cook Time: 45 minutes

Total Time: 1 hour

Yield: 6-8 servings

Drink & Dish: Loaded Baked Potato Salad

Simple, easy, and lightened up loaded baked potato salad perfect for summer BBQs.

Ingredients

  • 2 lbs red skinned potatoes
  • 1/2 tbsp olive oil
  • 1/2 lb center cut bacon, cooked and crumbled
  • 1 heaping cup nonfat plain Greek yogurt
  • 1/4 cup scallions, thinly sliced
  • 1/3 cup reduced fat shredded cheddar cheese
  • Generous pinch salt and pepper

Instructions

  1. Preheat oven to 400. Pierce potatoes several times with a fork. Transfer to a large baking dish and lightly drizzle with olive oil. Cook until softened, about 45 minutes. Let cool for 15-20 minutes.
  2. Cut baked potatoes into 1" cubes. Place all ingredients in a large bowl, and lightly toss until combined. Serve immediately or store in an airtight container for up to 5 days.

Notes

Adapted from Rachel Ray

3.1
https://arismenu.com/drink-dish-loaded-baked-potato-salad/

Filed Under: Appetizers, Drink & Dish, Gluten-free, Holiday & Seasonal, Salads, savory, Side Dish, Snacks, Summer · Tagged: bacon, baked potato, cheese, gluten free, greek yogurt, grilling, potato, potato salad, recipe, salad, side, summer

« Previous Page
Next Page »
Image Map

Popular Posts

Tart Cherry Margaritas: The perfect, refreshing margarita--lightly sweet with a punch of tequila

Tart Cherry Margaritas

90+ Healthy Recipes for Breakfast, Lunch, Dinner & Dessert

90+ Healthy Recipes for Breakfast, Lunch, Dinner & Dessert

The Ultimate Peanut Butter Cup Brownie Cookies: Rich, fudgy, brownie-like chocolate cookies stuffed with melty peanut butter cups!

Ultimate Peanut Butter Cup Brownie Cookies

Drink & Dish: Cafe Au Lait Cupcakes

Crockpot Chicken Enchilada Soup

Subscribe via Email:

Enter your email address:

Save an additional $30 on Blendtec Factory Recertified Blenders + Free Shipping

Featured Here

recipe redux
Certified Yummly Recipes on Yummly.com

Member Of…

FitFluential Is Fitness Found
AZ Bloggers Network
az 150 photo az150_zpsfb093d32.gif

Archives


Image Map

Copyright © 2025 | Innovative Child Theme by The Pixelista | Built on the Genesis Framework


Loading Comments...