• Going Out
    • Phx Restaurants
    • How To Order At Starbucks
  • Running
    • My Running Story
    • Race Calendar
    • Race Recaps & Results
  • Blogroll
  • Bucket List
  • Video

Ari's Menu

Little changes making a big difference.

  • Home
  • Recipes
  • Weight Loss
    • My Story
    • Common Swaps
  • Who’s Who
  • Contact
    • Policies & Disclosure
  • Press

Chocolate Hazelnut Macarons with Vanilla Bean Buttercream

December 3, 2014 · by Ari ·

Chocolate Hazelnut Macarons {with Vanilla Bean Buttercream}: Macarons have never been easier or more delicious!

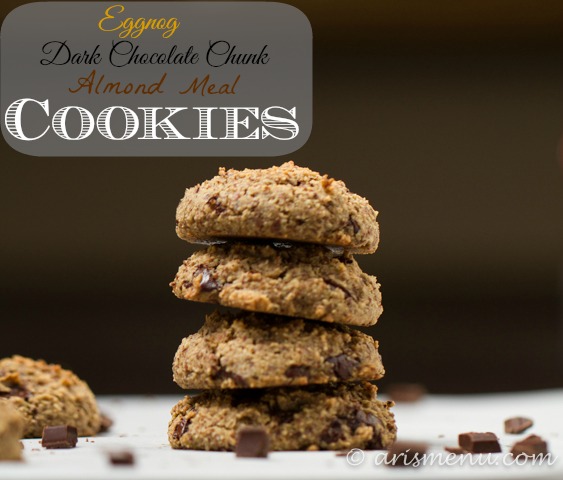
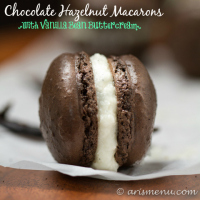
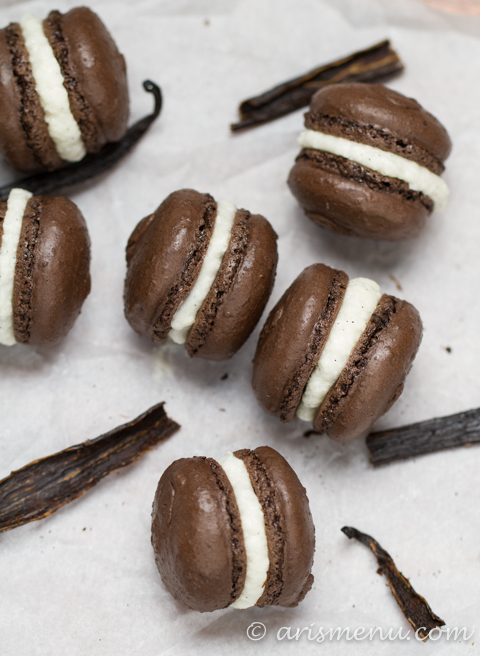
Chocolate hazelnut macarons with vanilla bean buttercream taste like Nutella and they are so much EASIER than you think! Make this foolproof recipe to impress all your family and friends this holiday season.

Chocolate Hazelnut Macarons {with Vanilla Bean Buttercream}: Macarons have never been easier or more delicious!

Oh macarons…you tricky little things, with your harsh rep and amazing taste. A perfectly baked macaron is one of the most impressive things you can bring to any gathering, but so many people steer clear of them because they’re so intimidating. Aged egg whites, weighing ingredients…yikes. Well, I’m a rebel, and I don’t do any of that jazz. Yet I’ve still made many the successful macaron.

Chocolate Hazelnut Macarons {with Vanilla Bean Buttercream}: Macarons have never been easier or more delicious!

I promise they are so much easier than you think. Trust me, I do not have a good track record for cooking things that are difficult. If I can make them, so can you! And once you get the hang of it, it becomes so easy to change it up, and do your own creations. Or, after you make these, you might just want to keep making them over and over again. 😉

Chocolate Hazelnut Macarons {with Vanilla Bean Buttercream}: Macarons have never been easier or more delicious!

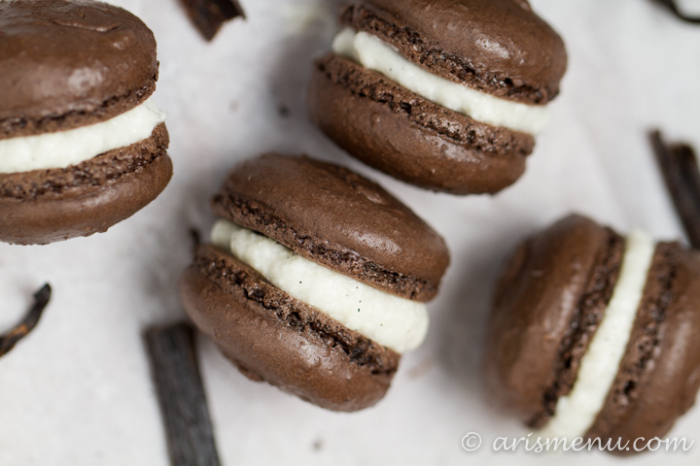
I mean, chocolate and hazelnut are pretty much made for each other. Why else is Nutella so freaking irresistible? And I have a weakness for anything vanilla bean, so the combo together is one of my favorites. I guarantee if you bring them to your next holiday gathering, they will be a hit! In fact, the last party I brought these two, someone I didn’t even know tracked me down to find out who made the macarons.

Chocolate Hazelnut Macarons with Vanilla Bean Buttercream
Recipe Type: Dessert
Author: Ari Ziskin
Ingredients
  • For the Chocolate Hazelnut Macarons:
  • 1 cup powdered sugar
  • 1/2 cup hazelnut flour
  • 1/4 cup unsweetened cocoa powder (preferably Dutch process)
  • 2 egg whites
  • 1/4 cup sugar
  • For the Vanilla Bean Buttercream:
  • 1 stick butter
  • 1 cup powdered sugar
  • seeds from 1/2 vanilla bean
  • 1/2 teaspoon vanilla extract
  • 1 tablespoon milk
Instructions
  1. Preheat oven to 325. Line two large baking sheets with parchment paper. Set aside.
  2. In your food processor, combine powdered sugar, hazelnut flour and unsweetened cocoa powder. Process until very fine. Sift mixture into a large bowl. You may need to reprocess any large chunks that can’t make it through the sifter.
  3. In a stand mixer, beat egg whites using the whisk on medium speed until light and frothy. Reduce speed to low and slowly add sugar. Increase speed to high and beat until stiff peaks form. Be patient, it will take a few minutes. They should look like the top photo when you take the whisk out.
  4. Add the dry ingredients to egg whites and gently fold together using a spatula. Once ingredients are combined, fold for just an other few turns of the wrist–this is where you need to be very careful! Under-mix and you will have pointy shells, over-mix and you will have a soupy mess. You want the batter to just barely stream off the spatula when you remove it. I err on the side of caution and smooth out points later if they arise.
  5. Transfer batter to a pastry bag fitted with a 1/2″ round tip. Carefully pipe mixture into circles about 1 1/2″ in size. If tops are pointy, you may run your finger under water and gently smooth them. Let them stand for 30 minutes until tops are glossy and smooth to the touch.
  6. Bake until just set, about 10-12 minutes.Place baking sheets on wire racks and allow to cool completely.
  7. To make the buttercream, beat butter until smooth. Add powdered sugar and vanilla bean seeds and beat until well combined. Add vanilla extract and milk if necessary (if the texture seems good, leave out the milk) and beat for an other minute. If you prefer a thinner buttercream, add addition milk 1/2 tbsp at a time until desired consistency is reached.
  8. Gently remove macarons from baking sheet and place a small spoonful of filling on half of the shells, then top with remaining halves. Store refrigerated in an airtight container for up to one week.
Notes
*If you cannot find hazelnut flour, you can make your own in the food processor or using a nut grinder, or you may buy online, or sub almond flour. [br]*Macarons are best the next day. Make 24 hours in advance if possible. [br]*Adapted from [url href=”http://ohsweetday.com/2013/04/my-perfect-macaron.html” target=”_blank”]Oh Sweet Day[/url]
3.2.2885


Filed Under: Christmas, Cookies, Dessert, Gluten-free, Holiday & Seasonal · Tagged: chocolate, chocolate macarons, christmas, christmas cookie, hazelnut, hazelnut macarons, macarons, vanilla, vanilla bean

Ultimate Peanut Butter Cup Brownie Cookies

November 30, 2014 · by Ari ·

The Ultimate Peanut Butter Cup Brownie Cookies: Rich, fudgy, brownie-like chocolate cookies stuffed with melty peanut butter cups!

The ultimate peanut butter cup brownie cookies – rich, fudgy, brownie-like chocolate cookies stuffed with melty peanut butter cups. These cookies are the ultimate treat, and they will disappear in seconds anywhere you bring them.

The Ultimate Peanut Butter Cup Brownie Cookies: Rich, fudgy, brownie-like chocolate cookies stuffed with melty peanut butter cups!

So..I bake a lot. I’m sure you’re surprised by this. I bake a lot for the blog, and because I have a sweet tooth the size of Texas.

In terms of things I love to eat it goes something like: dessert, goat cheese, dessert, sweet potatoes, dessert, carbs, dessert.

Oh, and cilantro! For a long time I wondered WHY IS THE RICE AT CHIPOTLE SO GOOD? The answer? Cilantro. WHY CAN I NEVER GET ENOUGH MEXICAN FOOD? Cilantro.

Don’t worry, there’s not cilantro in these cookies. That’s too much, even for me.

The Ultimate Peanut Butter Cup Brownie Cookies: Rich, fudgy, brownie-like chocolate cookies stuffed with melty peanut butter cups!

Anyway, since there are cookies in and out (gotta get them out, always get them out!) of my house pretty much 24/7, it’s not too often that Steve and I freak out and literally lose our minds over a cookie.

In fact, I’m normally on pins and needles awaiting some huge amazed response from Steve about how he can’t believe the amazing-ness of my cookies and how Betty Crocker should pretty much hang it up because my cookies trump ALL OTHER COOKIES.

Then he normally says something along the lines of “Yep. Pretty good.”

The Ultimate Peanut Butter Cup Brownie Cookies: Rich, fudgy, brownie-like chocolate cookies stuffed with melty peanut butter cups!

Most of the time, we each eat a cookie or two, then we send them off to work/the bike shop/my mom’s house/pretty much anywhere to avoid temptation.

But these cookies?

Well, let’s just say neither of us quite had the willpower to send them off, and I’m pretty sure I ate something like 3 in one day because I couldn’t stop. They were that good.

The Ultimate Peanut Butter Cup Brownie Cookies: Rich, fudgy, brownie-like chocolate cookies stuffed with melty peanut butter cups!

In fact, as I was scrolling through my photos deciding which cookie recipe to post, as soon as I got to these I exclaimed “YES!!! MY FAVORITES!!”

Well, I didn’t realize they were my favorites, but now that I think about it, it seems pretty obvious. I’m in deep love/obsession/transfixed magic with the chocolate brownie cookie, and these are stuffed with every kind of Reese’s peanut butter cup imaginable.

I bought the variety pack, and the combo of milk, dark and white chocolate is absolutely to die for.

The Ultimate Peanut Butter Cup Brownie Cookies: Rich, fudgy, brownie-like chocolate cookies stuffed with melty peanut butter cups!

So what are you waiting for? Get on into your kitchen and make yourself some cookies!

Ultimate Peanut Butter Cup Brownie Cookies
Recipe Type: Dessert
Author: Ari Ziskin
Prep time: 15 mins
Cook time: 10 mins
Total time: 25 mins
Serves: 2 dozen
The ultimate peanut butter cup brownie cookies–rich, fudgy, brownie-like chocolate cookies stuffed with melty peanut butter cups. These cookies are the ultimate treat, and they will disappear in seconds anywhere you bring them.
Ingredients
  • 1 cup [url href=”http://arismenu.com/gluten-free-baking-blend” target=”_blank”]gluten-free baking blend[/url] (or white whole wheat flour)
  • 1/4 cup unsweetened cocoa powder
  • 1 teaspoon baking powder
  • dash salt
  • 8 ounces dark chocolate, melted and cooled
  • 2 large eggs
  • 2 teaspoons vanilla extract
  • 5 tablespoons apple butter
  • 2/3 cup brown sugar
  • 1/4 cup granulated sugar
  • 2 cups mini Reese’s cups, quartered*
Instructions
  1. In a medium bowl, whisk together baking blend, cocoa powder, baking powder and salt. Set aside.
  2. In a large bowl, beat together chocolate, egg, vanilla, apple butter, and sugars until well combined, then slowly beat in dry ingredients until just combined. Fold in peanut butter cups. Cover and chill for 30 minutes. Do not chill for too long or chocolate will re-harden and dough will become stuck to your bowl.
  3. Preheat oven to 350. Line 2 baking sheets with parchment paper or silpat. Use a small cookie scoop to transfer dough to prepared cookie sheets. Use a small piece of parchment paper sprayed with nonstick spray to lightly press down dough balls to flatten slightly (they don’t spread when they bake, so if you don’t flatten them, you will end up with round cookies).
  4. Bake for minutes until just set, about 9-11 minutes Let stand for 10 minutes, then transfer to a wire rack to cool completely. Store in an airtight container for one week (these cookies stay pretty darn soft and gooey for days!).
Notes
*I used a variety of dark, white and milk chocolate mini Reese’s, which is what I’d recommend. Measure mini cups before quartering.
3.2.2885

Filed Under: Christmas, Cookies, Dessert, Gluten-free, Holiday & Seasonal, Popular Posts, Winter · Tagged: chocolate, christmas cookies, cookies, gluten free, peanut butter, reese's, reese's cookies

Salted Caramel Mocha Banana Bread

November 9, 2014 · by Ari ·

Salted Caramel Mocha Banana Bread: Your favorite cold weather beverage in a decadent banana bread! {gf}

Ultra soft banana bread with espresso, dark chocolate and a salted caramel swirl. All the flavors of your favorite cold weather beverage turned into your new favorite banana bread.

Salted Caramel Mocha Banana Bread: Your favorite cold weather beverage in a decadent banana bread! {gf}

So I don’t know if I’ve mentioned it, but I have this teeny, tiny, huge, ridiculous obsession with salted desserts. It all started when Starbucks first released their salted caramel mocha. I turned my nose up, and asked the barista if that was even good. She must have been really convincing because I wasn’t one for trying new things back then, but for some reason I gave it a shot. That was a big mistake.

Salted Caramel Mocha Banana Bread: Your favorite cold weather beverage in a decadent banana bread! {gf}

I’m pretty sure I ended up drinking at least one daily for that entire winter. Ya know that whole balance/self control thing? I don’t really have it. This year I rediscovered Bahama Bucks, and all of the sudden I was going multiple times per week. I am the biggest weakling when it comes to my sweet tooth.

Salted Caramel Mocha Banana Bread: Your favorite cold weather beverage in a decadent banana bread! {gf}

As much as I love dessert, I love the bite and depth of flavor that adding a little salt brings. I don’t love things that are too sweet. Steve drinks his coffee with like 700 sweet ‘n lows (also…really? Why would anyone choose the pink packets???) in his coffee and it always grosses me out! You also won’t find me digging into those loft house sugar cookies that taste like they are made entirely of frosting. I like my dessert with a little attitude.

Salted Caramel Mocha Banana Bread: Your favorite cold weather beverage in a decadent banana bread! {gf}

I must not be alone because this is one of the most popular desserts I have ever made. I brought the leftovers into work and it disappeared in minutes. Everyone kept raving about it and asking for the recipe! So soft, tender and decadent, this will be your go-to snack for to make for your out of town guests this whole holiday season!


Print
Salted Caramel Mocha Banana Bread

Prep Time: 20 minutes

Cook Time: 1 hour

Total Time: 1 hour, 20 minutes

Yield: 12-16 slices

Serving Size: 1 slice

Salted Caramel Mocha Banana Bread

Ultra soft banana bread with espresso, dark chocolate and a salted caramel swirl. All the flavors of your favorite cold weather beverage turned into your new favorite banana bread.

Ingredients

  • 1 3/4 cups gluten-free baking blend (or white whole wheat flour)
  • 1/4 cup cocoa powder (preferably Dutch process)
  • 2 tablespoons cornstarch
  • 2 teaspoons espresso powder
  • 1 1/2 teaspoons baking soda
  • 1/2 teaspoon baking powder
  • 1/2 teaspoon salt
  • 3 extra ripe medium bananas, mashed
  • 1/3 cup unsweetened applesauce
  • 2/3 cup brown sugar
  • 1/2 cup sugar
  • 1 tsp vanilla extract
  • 3/4 cup reduced fat buttermilk*
  • 1/2 cup fleur de sel caramel sauce* (+ more for drizzling)

Instructions

  1. Preheat oven to 350. Spray a 9x5" loaf pan with nonstick spray. Set aside.
  2. In a medium bowl, whisk together baking blend, cocoa powder, cornstarch, espresso powder, baking soda, baking powder and salt. In a large bowl or stand mixer, beat together bananas, applesauce, sugars and vanilla until well combined. Stir in half the flour mixture, then buttermilk, then remaining flour mixture.
  3. Transfer half the batter to prepared loaf pan. Pour caramel sauce on top, then add remaining batter. Use a butter knife to gently swirl caramel into the batter. Bake until a toothpick inserted in the center comes out with just a few crumbs, about one hour. Set loaf pan on a wire rack to cool completely. Serve drizzled with extra fleur de sel caramel sauce, if desired. Store in an airtight container for up to one week.

Notes

*To make vegan, replace buttermilk with 3/4 cup unsweetened almond milk + 1 teaspoon apple cider vinegar and use a vegan salted caramel sauce.

3.1
https://arismenu.com/salted-caramel-mocha-banana-bread/

Filed Under: Breads & Muffins, Dessert, Fall, Gluten-free, Holiday & Seasonal, Vegan, Winter · Tagged: banana bread, caramel, caramel banana bread, chocolate, fleur de sel, gluten free, mocha, mocha banana bread, salted caramel, vegan

Snickers Stuffed Chocolate Brownie Cookies

October 27, 2014 · by Ari ·

Snickers Stuffed Chocolate Brownie Cookies

Rich, fudgy, brownie-like chocolate cookies stuffed with melty mini Snickers and topped with sea salt for the perfect extra bite. These gluten-free Snickers Stuffed Chocolate Brownie Cookies are the perfect way to use up Halloween candy, a great Christmas cookie, or perfect for any occasion!

Snickers Stuffed Chocolate Brownie Cookies

Oh, hello cookie. Cookie that tastes and feels like a brownie. Cookie that is stuffed with one of my very favorite candies. Cookie with melty chocolate, caramel and nougat in every bite. Cookie with big sea salt crystals adding the perfect balance to all that candy sweetness. Just wanted to say heyyyyy.

Snickers Stuffed Chocolate Brownie Cookies

Let’s chat about candy for a second. I have really strong opinions. For example, 3 Musketeers–WHAT IS THE POINT? It’s just so fluffy, and soooo overly sweet, and there’s nothing to it. Ick. And then there’s Milky Way. That’s just like a lesser Snickers. It’s like it’s trying to be a Snickers for the poor people with nut allergies, but without the salty peanuts to add crunchy and bite, what is even the point?? Then we get to the good ones. Snickers, Butterfinger, Reese’s and Twix.  Those are the ones that, come Halloween time (okay…any time), I can’t resist grabbing a mini, or 7. In fact, the leftover Snickers from these cookies were totally bad news. I usually end up taking them into work and using them as bribery to toss at the kids that impress me in rehearsals. I know, I know…I should give them carrot sticks, probably, but I’m a terrible influence.

Snickers Stuffed Chocolate Brownie Cookies

Snickers Stuffed Chocolate Brownie Cookies

Anyway, these cookies are a bit indulgent, but they are whole grain, gluten-free, and shockingly don’t contain any butter or oil! They taste like a rich, buttery brownie, so you’ll never notice the little healthier adjustments. Of course, you are free to use real butter and white flour–they will still be great, but I honestly can’t taste the difference!

Print
Snickers Stuffed Chocolate Brownie Cookies

Prep Time: 1 hour, 10 minutes

Cook Time: 10 minutes

Total Time: 1 hour, 20 minutes

Yield: 2 dozen

Serving Size: 1 cookie

Snickers Stuffed Chocolate Brownie Cookies

Rich, fudgy, brownie-like chocolate cookies stuffed with melty mini Snickers and topped with sea salt for the perfect extra bite. These gluten-free Snickers Stuffed Chocolate Brownie Cookies are the perfect way to use up Halloween candy, a great Christmas cookie, or perfect for any occasion!

Ingredients

  • 1 cup gluten-free baking blend (or white whole wheat flour)
  • 1/4 cup unsweetened cocoa powder (I use Hershey's special dark or Dutch process)
  • 1 teaspoon baking powder
  • dash salt
  • 8 ounces dark chocolate, melted and cooled
  • 2 large eggs
  • 2 teaspoons vanilla extract
  • 5 tablespoons apple butter
  • 2/3 cups brown sugar
  • 1/4 cup granulated sugar
  • 24 mini Snickers candies (I bought a combination bag with regular, peanut butter and dark chocolate)
  • coarse sea salt for sprinkling (optional)

Instructions

  1. In a medium bowl, whisk together baking blend, cocoa powder, baking powder and salt. Set aside.
  2. In a large bowl, beat together melted chocolate, eggs, vanilla, apple butter, and sugars until well combined, then slowly beat in dry ingredients until just combined. Cover and chill for 30 minutes.
  3. Preheat oven to 350. Line 2 baking sheets with parchment paper or silpat. Spray hands with nonstick spray (this sounds weird, but it will prevent dough from sticking to your hands during rolling) and roll dough into about 1" balls. Press the center with your thumb to make a whole for the Snickers. Gently press 1 mini Snickers into the center and then re-roll dough around it. Make sure dough is completely covering the candy. Add more dough if necessary. Place onto prepared baking sheet and repeat with remaining dough. Sprinkle each cookie with a small pinch of coarse sea salt (if desired) just before baking.
  4. Bake for 10 minutes until just set. Cool completely on pan. Store in an airtight container for one week (these cookies stay pretty darn soft and gooey for days!).
3.1
https://arismenu.com/snickers-brownie-cookies/

Filed Under: Christmas, Cookies, Dessert, Gluten-free, Halloween, Holiday & Seasonal · Tagged: candy, chocolate, christmas, christmas cookie, cookie, gluten free, gluten free chocolate cookie, halloween, halloween candy, snickers, snickers cookie

Almond Butter Chocolate Chip Mocha Bites {The Recipe ReDux}

August 21, 2014 · by Ari ·

Rich & fudgy Almond Butter Chocolate Chip Mocha Bites are super easy to make with just a handful of wholesome ingredients. They are paleo, gluten-free, vegan and delicious enough to please any crowd!

Almond Butter Chocolate Chip Mocha Bites: Healthy paleo, gluten-free & vegan dessert or snack bites

I have a pet peeve. I seriously hate when people call things “brownies” or “cookie dough” when it literally tastes like a protein bar. I’m glad you like it, and I’m sure it really is “OMG so delicious”, but let’s be real for a second: a protein bar does not taste like a brownie. It might taste like a chocolate protein bar that is so good you could enjoy it for dessert, but that does not a brownie make. Almond Butter Chocolate Chip Mocha Bites: Healthy paleo, gluten-free & vegan dessert or snack bites

So, that being said, I almost called these brownie bites. They are so ridiculously rich and fudgy that you could probably call them brownie bites and no one would call you on  it. But, at the end of the day, they do not have the flakey top, and they are more the consistency of cookie dough, so we’ll stick with Almond Butter Chocolate Chip Mocha Bites. Because I am incapable of coming up with a title less than 40 characters long. Almond Butter Chocolate Chip Mocha Bites: Healthy paleo, gluten-free & vegan dessert or snack bites

Okay so while they may not technically be “brownies” that doesn’t stop these little guys from feeling like a totally indulgent treat. In fact, they are like a totally indulgent treat that works like a snack! The ingredients are kind of all rock stars in the way they fill you up and give you energy. I found myself kind of addicted. Every time I wanted something sweet, I kept reaching in the fridge to grab an other one.

Almond Butter Chocolate Chip Mocha Bites: Healthy paleo, gluten-free & vegan dessert or snack bites

I had to bring them into work because I couldn’t stop, and Steve was so upset that he only got 2. I strongly  suggest you let them sit in the fridge for a few hours. I tried one right after I made them and liked it enough, but the texture is much better cold, and the flavors are even more delicious after they’ve had some time to meld together.

Almond Butter Chocolate Chip Mocha Bites: Healthy paleo, gluten-free & vegan dessert or snack bites

They are the perfect after school or pre/post workout snack, or you can even grab a couple for breakfast as you’re walking out the door, and they are without a doubt delicious enough to be eaten for dessert too!

Print
Almond Butter Chocolate Chip Mocha Bites

Prep Time: 10 minutes

Total Time: 1 hour, 10 minutes

Yield: approx 16 bites

Serving Size: 1 bite

Almond Butter Chocolate Chip Mocha Bites

Rich & fudgy Almond Butter Chocolate Chip Mocha Bites are super easy to make with just a handful of wholesome ingredients. They are paleo, gluten-free, vegan and delicious enough to please any crowd!

Ingredients

  • 1/4 cup almond butter (or any nut butter of your choice)
  • 2 tablespoons coconut oil, softened but not melted
  • 3 tablespoons honey or pure maple syrup
  • 2 teaspoons vanilla extract
  • 1 1/4 cups almond meal*
  • 1/2 cup cocoa powder (I used Hershey's Special Dark)
  • 2 teaspoons espresso powder
  • small pinch sea salt
  • 2/3 cup mini dark chocolate chips

Instructions

  1. In a large bowl, stir together almond butter, coconut oil, honey/maple syrup and vanilla until mostly combined. Add almond meal, cocoa powder, espresso powder and sea salt. Use your hands to mix ingredients together. Once dough is mostly formed add chocolate chips and incorporate.
  2. Roll dough into 1-1 1/2" balls (or however large you'd like them). Refrigerate for 1-2 hours before serving. Store in an airtight container in the refrigerator for up to 5 days.

Notes

*If you use maple syrup (or even a store bought honey), it will not be as thick and you may need to increase almond meal. If the mixture is still sticking to your hands/the bowl, increase almond meal by 1 tablespoon until you reach the desired texture.

3.1
https://arismenu.com/almond-butter-chocolate-chip-mocha-bites/

Filed Under: Dessert, Gluten-free, Low Carb, Paleo, Snacks, Vegan · Tagged: bites, chocolate, gluten free, mocha, paleo, vegan

Tart Cherry Fro-yo {with White & Dark Chocolate Chips}

August 17, 2014 · by Ari ·

The following post is sponsored by FitFluential LLC on behalf of the Cherry Marketing Institute.

Ultra thick and creamy tart cherry frozen yogurt loaded with dark chocolate and white chocolate chips. So decadent, you’d never guess the base is FAT FREE!

Tart Cherry Fro-yo with White & Dark Chocolate Chips: Easy, ultra creamy and healthy!

After an incredible summer in Portland, I’m back in Phoenix. Back to real work, and back to 100++ degrees. And again I’m wondering…WHY DON’T I LIVE IN PORTLAND? Well, a fantastic husband, my puppies and an entire life time of family and friends make the heat livable I suppose.

Tart Cherry Fro-yo with White & Dark Chocolate Chips: Easy, ultra creamy and healthy!

Totally unreasonable amounts of frozen yogurt don’t hurt either. 😉 You may have noticed that before I left I was on a bit of an ice cream kick. I finally figured out my ice cream maker, and I just couldn’t stop. The real deal, full fat ice cream is just so hard to recreate that I was a little nervous to go back to homemade fro-yo. I mean, I am a HUGE fan of soft serve, and I will eat it any time, any day, but it is just so hard to make something at home that doesn’t turn into an icy mess.

Tart Cherry Fro-yo with White & Dark Chocolate Chips: Easy, ultra creamy and healthy!

The good news? This is by far the BEST frozen yogurt I have ever made! The base is so rich and creamy, and packed with tart cherry flavor. You may remember a little bit about the benefits of tart cherries from this Tart Cherry Lime Elixir. They are said to reduce soreness and oxidative stress, and aid in recovery. Also, they are delicious. I’ve been drinking tart cherry juice plain for the 7 Day Cherry Juice Challenge, and it is the perfect amount of sweet and tart.

Tart Cherry Juice Challenge

This challenge is great leading up to a big race or event, and it’s incredibly easy to incorporate! If you love the taste of tart cherry juice, just drink 8 ounces a day, or you can use 2 tablespoons of the concentrate as a shot–college flash backs anyone? Except I like the idea of actually feeling better the next day instead of worse (the woes of getting older)–or diluted in another beverage.

Tart Cherry Fro-yo with White & Dark Chocolate Chips: Easy, ultra creamy and healthy!

Okay, back to the fro-yo. We all know that cherries pair magically with chocolate. White chocolate, dark chocolate, chocolate syrup, you name it. I went for a combination of white and dark chocolate to create more flavors, but you are free to use whatever you’d like. Or, if you’d like to keep this 100% fat free, feel free to skip the chocolate all together, and it will still be delicious!

Print
Tart Cherry Fro-yo {with White & Dark Chocolate Chips}

Prep Time: 5 minutes

Total Time: 1 hour, 30 minutes

Yield: 4 servings

Serving Size: 1/2 cup

Tart Cherry Fro-yo {with White & Dark Chocolate Chips}

Ultra thick and creamy tart cherry frozen yogurt loaded with dark chocolate and white chocolate chips. So decadent, you'd never guess the base is FAT FREE!

Ingredients

  • 2 cups nonfat plain Greek yogurt
  • 1/3-1/2 cup sugar
  • 1 tablespoon tart cherry juice concentrate
  • 1 teaspoon vanilla extract
  • ½ tablespoon bourbon or vodka, optional
  • ¼ cup dark chocolate chips
  • ¼ cup white chocolate chips

Instructions

  1. In a large bowl, whisk together yogurt, sugar, tart cherry juice concentrate and vanilla extract until combined and sugar is fully dissolved. Cover and refrigerate for 1 hour.
  2. Freeze according to ice cream maker instructions. Add bourbon or vodka in the last 2-3 minutes of freezing. This is optional, but recommended—it keeps the frozen yogurt from freezing hard and icy. Fold in chocolate chips. Frozen yogurt is best served immediately, but can also be stored in a freezer safe container, just allow 10-15 minutes thawing time before scooping.
3.1
https://arismenu.com/tart-cherry-fro-yo/

To learn more about tart cherries and their benefits, check out ChooseCherries.com, or follow their Facebook / Twitter /Pinterest / YouTube!


Filed Under: Dessert, Gluten-free, Holiday & Seasonal, Ice Cream & Fro-yo · Tagged: cherry, chocolate, dessert, fro yo, frozen yogurt, summer, tart cherry, white chocolate

Snickers Ice Cream

July 8, 2014 · by Ari ·

Ultra soft and creamy sweet cream ice cream loaded with chopped Snickers bars. The perfect summer treat that you will want to repeat all year round!

Psssst…Stick around for a super awesome giveaway at the end of this post!

Snickers Ice Cream

Can we talk about homemade ice cream? It took me so long to get it right, which is silly because it is stupid easy. I’m just lazy and I never read the instructions on my ice cream maker. Sometimes I’m surprised I can even boil water.

Snickers Ice Cream

I kept not chilling my ingredients well enough, and then after, like, 10 minutes I would give up on the churning because it had been soooooo loooong and nothing was happening. So I’d throw it in the freezer where it would then become hard as a rock and proceed to eat it anyway because ice cream is freaking delicious. Frozen solid or not.

Snickers Ice Cream

So this perfectly made ice cream is a recent development and I cant stop, won’t stop. I am obsessed, and I don’t care that I have probably gained like 17 pounds from my summer ice cream obsession. Totally worth it. Plus, running makes up for all calories, right? Shhhh, don’t rain on my parade.

Snickers Ice Cream

This is without a doubt, the richest, creamiest ice cream I have ever tasted. I have to admit, after this one, I lowered my fat content a bit on future ice cream recipes, but sometimes you just need the full fatty goodness, and I’m not going to keep that from you. You absolutely can play with the amounts of whole milk / heavy cream depending on what you’re in the mood for. This ice cream is half milk / half cream, and let me tell ya, the texture is so soft and creamy that I would dare to call it perfection.

Snickers Ice Cream

I loaded up this baby with about 100 Snickers bars (yeahhh, we’ve already established that it’s not healthy, and I’m not even sorry), but you could also use Reese’s or Butterfinger, or really whatever you want. I personally love it with Snickers. The way the caramel and chocolate freeze and get extra chewy. It’s totally dreamy.

Print
Snickers Ice Cream

Prep Time: 10 minutes

Total Time: 8 hours

Yield: about 1 quart

Serving Size: 1/2 cup

Ultra soft and creamy sweet cream ice cream loaded with chopped Snickers bars. The perfect summer treat that you will want to repeat all year round!

Ingredients

  • 1 1/2 cups whole milk
  • 2/3 cup sugar
  • 1 1/2 cups heavy cream
  • 2 teaspoons vanilla extract
  • 1 cup chopped Snickers bars

Instructions

  1. In a medium pot, combine whole milk and sugar over medium to medium-low heat. Stir constantly until sugar is fully dissolved and incorporated. Remove from heat. Let cool to room temperature then add heavy cream and vanilla. Whisk to combine. Cover and chill for 4 hours or up to overnight.
  2. Freeze according to ice cream maker instructions, then fold in chopped Snickers. Transfer to freezer safe container to finish freezing completely.
3.1
https://arismenu.com/snickers-ice-cream/

And nooowwww for a very exciting giveaway! I, along with some of my friends, am giving away a $125 Target gift card, a $125 Amazon gift card and a $50 Starbucks gift card. Pretty much all of my favorite things. 😉 Giveaway opens July 9th at 12am EST and will remain open until July 23rd at 11:59pm EST. Open to US residents only. Good luck!
a Rafflecopter giveaway

As I said, this giveaway is sponsored by some of my favorite people. Check them out and see what they’re up to. 🙂

Julie from White Lights on Wednesday | Aubrey from Real Housemoms | Nancy from The Bitter Side of Sweet | Becca from It’s Yummi! | Brianne from Cupcakes and Kale Chips | Alyssa from What’s Cooking, Love? | Raquel from Organized Island | Deb from Cooking on the Front Burner | Jenn from Endlessly Inspired | Melissa from Persnickety Plates | Megan from The Pink Flour | Heather from French Press | Nicole from The Marvelous Misadventures of a Foodie | Kelley from Miss Information | Paula from Call Me PMc

Filed Under: Dessert, Gluten-free, Holiday & Seasonal, Ice Cream & Fro-yo · Tagged: chocolate, gluten free, ice cream, recipe, snickers, summer

Chocolate Donuts with Orange Glaze

December 21, 2013 · by Ari ·

Rich, fluffy, chocolatey donuts topped with a smooth, bright, citrusy orange glaze. The perfect flavor combination. 

Chocolate Donuts with Orange Glaze {gluten-free}

Have I ever told you about how my husband refuses to use the correct name for the cooling rack? He insists on calling it the “drying rack”, and whenever I ask him to get out the cooling rack, he corrects me. And every time I make sure I let him know that he’s wrong. The drying rack is for dirty dishes; the cooling rack is for delicious baked goods.

Chocolate Donuts with Orange Glaze {gluten-free}

At this point he (obviously) knows the difference, but I’m pretty sure finding ways to annoy me is his favorite past time. In fact, I’m pretty sure everyone who knows me gets a deep sense of joy out of getting a rise out of me. Probably because I make it so easy. I am the first one to get all fired up about things that absolutely don’t matter. I think they call that “dramatic”.

Chocolate Donuts with Orange Glaze {gluten-free}

So, this morning I made donuts. I never make things the day I post them, but this is what happens when I sign up for things. I forget all about them until, like, the day before, and then I’m like “Oh crap, I have to make donuts”. Anyway, I made donuts, argued my husband about the term for the rack where I placed the donuts, ate the donuts (totally the best part), and, well, here I am. Sharing donuts with you.

Chocolate Donuts with Orange Glaze {gluten-free}

This month’s theme for The Recipe Redux is good luck foods for the new year. Apparently, I live under a rock because I didn’t even know that was a thing, but luckily Google told me that round foods symbolize good luck, and in my opinion chocolate always means good luck, so I made you round, chocolatey good luck charms, and they are unbelievably good. They are the softest, fluffiest donuts I have ever made, and they are 10 million times better than so many of the dry, deep-fried cake donuts I’ve tasted before. Seriously, I would choose these instead any day, and I am usually one that believes the deep fryer automatically makes everything taste better. 😉

Chocolate Donuts with Orange Glaze {gluten-free}

The bright orange flavor of the glaze is the perfect contrast to the rich chocolate, and the recipe all comes together in about half an hour, so it’s easy to make at the last minute if you have guests, and want to give them a little treat. We had my family over for brunch this morning, and everyone was super impressed with these! My mom kept talking about how “professional” they were. Then my brother proceeded to eat 3. I don’t blame him.

Print
Chocolate Donuts with Orange Glaze

Prep Time: 15 minutes

Cook Time: 12 minutes

Total Time: 35 minutes

Yield: 2 dozen

Serving Size: 1 donut

Chocolate Donuts with Orange Glaze

Rich, fluffy, chocolatey donuts topped with a smooth, bright, citrusy orange glaze. The perfect flavor combination.

Ingredients

  • 4 oz dark chocolate
  • 1 tbsp coconut oil
  • 1 1/4 cup gluten-free baking blend (or white whole wheat flour)
  • 1/2 tsp baking soda
  • 1 tsp cornstarch
  • dash salt
  • 1/2 cup brown sugar
  • 1 egg
  • 1/2 cup reduced fat buttermilk
  • 2 tbsp applesauce
  • 1 tsp vanilla extract
  • For the glaze:
  • 1 heaping cup powdered sugar
  • 4-6 tbsp fresh orange juice

Instructions

  1. Preheat oven to 325. Spray donut pan with nonstick spray. Set aside.
  2. Place dark chocolate and coconut oil in a small microwave-safe bowl. Microwave on increments of 30 seconds stirring after each until melted. Let cool while preparing other ingredients.
  3. In a medium bowl, combine baking blend, baking soda, cornstarch and salt. In a large bowl, beat together brown sugar, egg, buttermilk, applesauce and vanilla. Slowly beat in melted chocolate, then beat in dry ingredients until just combined.
  4. Fill donut molds about 3/4 and smooth out with a spoon. Bake for 11-13 minutes until set and donut springs back when gently pressed with your finger. Place donut pan on a wire rack and cool completely. Once cooled, remove from pan.
  5. To make the glaze, place powdered sugar in a medium bowl. Slowly add orange juice 1 tbsp at a time stirring constantly until glaze reaches desired consistency. I went with a thinner glaze for this donut. Thickness will depend on liquid added. It is important to go slowly and mix thoroughly before adding more liquid. If you find you glaze is too thin, add more powdered sugar until it reaches your desired consistency. Drizzle glaze onto donuts and let set until dry, about 10 minutes. Store in an airtight container for up to 5 days. Donuts will stay fresh best if you store them unglazed and glaze before serving.
3.1
https://arismenu.com/chocolate-donuts-orange-glaze/

Filed Under: Breakfast, Dessert, Donuts, Gluten-free · Tagged: breakfast, chocolate, dessert, donuts, gluten free, orange, recipe, recipe redux

Eggnog Dark Chocolate Chunk Almond Meal Cookies

December 15, 2013 · by Ari ·

Soft, nutty almond meal cookies with bold eggnog flavor, and melty chunks of dark chocolate. Vegan, gluten-free and unlike any cookie you’ve ever tasted!

Eggnog Dark Chocolate Chunk Almond Meal Cookies {vegan + gluten-free}

How do you feel about eggnog? It seems to be one of those holiday things that people either LOVE or find totally disgusting. I never understood how anyone could dislike it, but then again, if I had it my way, I’d eat my cereal with half and half. 😉 Rich, thick and creamy has never been something I turn down. In fact, in my, um…less healthy days, I could probably drink a carton of eggnog in one sitting. Okay, now that does actually gross me out now, but that’s how much I love it.

Eggnog Dark Chocolate Chunk Almond Meal Cookies {vegan + gluten-free}

But don’t worry, if drinking eggnog isn’t your thing, these cookies have got you covered in the flavor department, without that creamy texture. They also use the soy nog. I’m usually not a big fan of soy anything, but I’m also a big fan of saving calories, and it really is the lightest one around. Not to mention, it means you can share it with all your vegan and lactose intolerant friends. Or keep them all to yourself, because you probably won’t want to share. That’s where using the lowest calorie eggnog comes in handy. 😉

Eggnog Dark Chocolate Chunk Almond Meal Cookies {vegan + gluten-free}

If you’ve never had almond meal cookies, they are unlike any other cookie you will ever eat. It’s not one of those times where I’m gonna be like “I swear, it tastes exactly the same!” because it doesn’t, but not in a bad way, but in a totally unique, surprising kind of way. The almond meal gives them tons of texture without having huge chunks of nuts in your cookies. I hate that. I love nuts, but I don’t usually like them in my desserts. I like to save room for things I love more. Like chocolate, which these babies are loaded with.

Eggnog Dark Chocolate Chunk Almond Meal Cookies {vegan + gluten-free}

Okay so about the chocolate…You want to use the good stuff. I mean, don’t spend a fortune, but don’t buy one from the check out stand. I always use a salted dark chocolate. It’s my favorite. I’m a 65-75% kinda girl. Some people love their 90%, and I don’t think that’s dessert, but if you like it, more power to you! Pretty much, just use what you like because you will be the one unable to keep your hands off these little gems. On second thought, maybe you should use something you hate…

Eggnog Dark Chocolate Chunk Almond Meal Cookies {vegan + gluten-free}

A couple hints before you get started: Don’t worry if the dough seems really wet, and more like muffin batter. It will firm up a bit when it chills, but it still won’t be a traditional cookie dough. Use a scoop if you want your cookies to come out not looking like aliens. You can use a large spoon as well, but the scoop will yield much prettier and more even cookies. DO NOT try to roll them in your hands unless you like doughy fingers. Oh, and if you love these as much as I do, you have got to try this version using Baileys instead of eggnog!

Print
Eggnog Dark Chocolate Chunk Almond Meal Cookies

Prep Time: 10 minutes

Cook Time: 12 minutes

Total Time: 1 hour

Yield: 2 dozen

Serving Size: 1 cookie

Eggnog Dark Chocolate Chunk Almond Meal Cookies

Soft, nutty almond meal cookies with bold eggnog flavor, and melty chunks of dark chocolate. Vegan, gluten-free and unlike any cookie you've ever tasted!

Ingredients

  • 3 cups almond meal
  • 1/2 teaspoon baking soda
  • 2 tbsp cornstarch
  • 1/4 cup brown sugar
  • dash freshly ground nutmeg
  • dash salt
  • 1/2 cup soy nog (or light eggnog)
  • 1 1/2 tsp vanilla extract
  • 1/4 tsp rum extract
  • 5 oz dark chocolate, chopped into chunks

Instructions

  1. Line a large baking sheet with silpat or parchment paper. Set aside.In a medium bowl, whisk together almond meal, baking soda, cornstarch, brown sugar, nutmeg and salt. Add eggnog and extracts. Mix until well combined. Fold in dark chocolate. Cover and chill for 30-60 minutes.
  2. Preheat oven to 350. Use a small cookie scoop to drop onto prepared baking pan. Bake until tops just begin to brown, about 11-14 minutes. Cool completely on cookie sheet. Store in an airtight container at room temperature for up to 5 days.
3.1
https://arismenu.com/eggnog-dark-chocolate-chunk-almond-meal-cookies/

Filed Under: Cookies, Dessert, Gluten-free, Holiday & Seasonal, Vegan · Tagged: almond meal, chocolate, christmas, cookies, dessert, eggnog, gluten free, recipe, vegan

Peppermint Blossom Crinkle Cookies

December 12, 2013 · by Ari ·

Ultra soft and fudgy mint chocolate crinkle cookies topped with a smooth and creamy peppermint Hershey’s kiss.

Peppermint Blossom Crinkle Cookies

All my life, I’ve always been obsessed with those peanut butter cookies with the chocolate Hershey’s kiss on top. I know, I know…they’re called “Peanut Butter Blossoms”, but to me, they will always be those peanut butter cookies with the chocolate Hershey’s kiss on top.

Peppermint Blossom Crinkle Cookiespeppermintblossomcrinklecookies-2

If I ever saw them at a party, I’d immediately grab a couple, and then try to secretly make my way back all night long. What can I say, I’m a classy lady.

Peppermint Blossom Crinkle Cookies

A few years ago, Heather and I made some peppermint crinkle cookies during our holiday baking extravaganza. This baking extravaganza was no joke. Heather made a spreadsheet dictating how many pounds of butter, flour and sugar we needed to stock up on at Winco. Oh Winco…best grocery store ever.

Peppermint Blossom Crinkle Cookies

Then we baked for probably a solid 24 hours, and gave away our treats to the entire musical theatre department, and used our talents to suck up to our professors. How could we not be your favorite voice student when we made you 70 pounds worth of holiday dessert???

Peppermint Blossom Crinkle Cookies

So I took two of my favorite cookies, and I made them one. I made them for a couple of Christmas parties last year, and they were the first thing everyone flocked to (we all have similar tastes it seems 😉 ), and immediately asked “WHAT ARE THESE????” Then they quickly disappeared. Fluffy powdered sugar covering a rich peppermint chocolate cookie with a smooth, melty peppermint kiss on top. It’s everything you could ask out of your holiday cookie.

**Note: All photos on this post were taken by my husband. I made these last year before I was exclusively taking the photos for my site. I could make them again (they are so good), but his photos are gorgeous, so I decided to keep them. 🙂

Print
Peppermint Blossom Crinkle Cookies

Prep Time: 15 minutes

Cook Time: 10 minutes

Total Time: 2 hours, 30 minutes

Yield: approx 4 dozen

Serving Size: 1 cookie

Peppermint Blossom Crinkle Cookies

Ultra soft and fudgy mint chocolate crinkle cookies topped with a smooth and creamy peppermint Hershey's kiss.

Ingredients

  • 2 cups white whole wheat flour (or gluten-free baking blend)*
  • 2 tsp baking powder
  • 1 and 1/3 cup sugar
  • 2 eggs
  • 1/2 cup light cream cheese
  • 4 oz unsweetened baking chocolate, melted
  • 1 tsp vanilla extract
  • 1 tsp peppermint extract
  • Approx 1 cup powdered sugar for rolling
  • 48 peppermint kisses (the mint truffle kisses would also be delicious!)

Instructions

  1. In a medium bowl, whisk together flour and baking powder. Set aside.
  2. In a large bowl, beat together sugar, eggs and cream cheese. Beat in melted chocolate and extracts until well combined. Slowly beat in flour mixture. If dough becomes too thick, use your hands to mix the rest of the way. Cover and chill for 2 hours (or longer).
  3. Preheat oven to 375. Line baking sheet with parchment paper or lining sheet. Pour powdered sugar into a wide, shallow bowl. Shape dough into 1" balls and roll in powdered sugar until coated, then drop onto prepared baking sheet.
  4. Bake for 8-10 minutes until set and crinkles have formed. Immediately press a kiss into the top of each cookie. Let stand on cookie sheet for 10-15 minutes before transferring to a wire rack to cool completely.

Notes

*Recipe tested with white whole wheat flour, but I have subbed the gluten-free baking blend in many similar recipes and it has worked perfectly. Cooking time may be lower, so check cookies at 7-8 minutes.

3.1
https://arismenu.com/peppermint-blossom-crinkle-cookies/

Filed Under: Cookies, Dessert, Gluten-free, Holiday & Seasonal · Tagged: blossom, chocolate, christmas, cookies, crinkle, dessert, holidays, peppermint, recipe, seasonal

Inside Out Buckeye Cookies

December 11, 2013 · by Ari ·

Soft and chewy peanut butter cookies stuffed with melty dark chocolate and covered with powdered sugar–just like an inside out buckeye! Vegan, gluten-free, and seriously addicting.

Inside Out Buckeye Cookies

You know it’s Christmas time when I post cookies 3 days in a row. Okay, that’s a lie. I always post cookies. I love cookies. Everyone has their “thing”, their go-to dessert, that one thing they feel like they do significantly better than all other baking. Mine is totally cookies. In fact, I mess up brownies more times than I get them right, and I constantly have to remake cupcakes because I under bake them (because that works with cookies…not so much with cakes…).

Inside Out Buckeye Cookies

For part of my segment for Health2Fit (read more about the whole experience here), Natalie asked me to bring in some health(ier) cookies so she could demonstrate some creative ways to package them for swaps. That was awesome for me since I love to bake things, and then I totally fail at packaging in any sort of attractive manner. They were a huge hit at the studio, and everyone said they wouldn’t have been able to tell that they were lightened up, vegan & gluten-free!

Inside Out Buckeye Cookies

I’ve made these with both white whole wheat flour, and then more recently with my gluten-free baking blend. The only adjustment for the gluten-free version included baking time. They cooked about 1-2 minutes quicker than the original. In fact, the first batch I second guessed myself, left them in too long, and ended up with overly chewy (not the good kind of chewy), flat cookies. I was worried that they wouldn’t work, but the next batch, I took out as soon as they set, and they were awesome! Not quiiiite as puffy as these, but certainly not flat, and the taste was identical.

Inside Out Buckeye Cookies

Oh, and I guess maybe we should discuss what buckeyes actually are? Because I had no idea until the last year when I saw them floating around the blog world. It’s kind of like a Reese’s cup crossed with a truffle. They are little balls of peanut butter mixed with powdered sugar covered (mostly) with chocolate, but leaving one little “eye” remaining, So these cookies are…the opposite! Dark chocolate in the middle, with the peanut butter and powdered sugar on the outside. I love melty dark chocolate in the center of my cookies, and I am a peanut butter fanatic. The powdered sugar is that perfect extra touch that makes these cookies the first to go at parties or cookie swaps!

Print
Inside Out Buckeye Cookies

Prep Time: 30 minutes

Cook Time: 10 minutes

Total Time: 1 hour, 10 minutes

Yield: 1 1/2 dozen

Serving Size: 1 cookie

Inside Out Buckeye Cookies

Soft and chewy peanut butter cookies stuffed with melty dark chocolate and covered with powdered sugar--just like an inside out buckeye! Vegan, gluten-free, and seriously addicting.

Ingredients

  • 1 1/4 cup gluten-free baking blend or white whole wheat flour*
  • 3/4 tsp baking soda
  • 1/2 tsp baking powder
  • 1 tbsp corn starch
  • 1/2 cup apple butter
  • 1 cup peanut butter
  • 3/4 cup brown sugar
  • 1/2 cup granulated sugar
  • 1 tsp vanilla extract
  • 4 oz good quality dark chocolate, in small squares or roughly chopped
  • approx 1/2 cup powdered sugar for rolling ( + more for dusting)

Instructions

  1. In a medium bowl, combine flour, baking soda, baking powder, and corn starch. Set aside.
  2. In a large bowl, beat the apple butter, peanut butter, sugars, and vanilla until smooth. Beat in dry ingredients until well combined, scraping down the sides of the bowl as necessary. Refrigerate for 30 minutes.
  3. Preheat oven to 350 degrees. Line 2 large cookie sheets with silpat or parchment paper. Pour powdered sugar in a shallow bowl. Roll dough into 1" balls then press a square of dark chocolate inside. Re-roll dough around chocolate. Make sure no chocolate is showing. Add more dough if necessary. Roll in powdered sugar, then transfer to prepared baking sheet.
  4. Bake until edges are just set, about 8-10 minutes. Do not over bake. Cool completely on cookie sheet. Store in an airtight container at room temperature for up to 1 week.

Notes

*Gluten-free cookies will bake 1-2 minutes faster than if you use white whole wheat flour. Check gf cookies at 7 minutes, and wheat cookies may be in for closer to 11 depending on your oven.

3.1
https://arismenu.com/buckeye-cookies/

PS: Don’t forget to check out the segment this Saturday (12/14) @ 11am AZ time. Local channel 7, cable 13.

Filed Under: Cookies, Dessert, Gluten-free, Holiday & Seasonal, Vegan · Tagged: buckeyes, chocolate, cookies, dessert, gluten free, holidays, peanut butter, recipe, vegan

Dark Chocolate Cranberry Snack Mix

December 8, 2013 · by Ari ·

The perfect holiday snack mix with sweet and salty kettle corn, crunchy Chex, soft cranberries, and bold, creamy dark chocolate–you won’t be able to stay away from it. Vegan, gluten-free & even nut-free!

Dark Chocolate Cranberry Snack Mix

A couple of weeks ago, I had the amazing opportunity to film a segment with Health2Fit on (edible) DIY holiday gifts. The whole thing was kinda surreal, like too good to be true. I got to go to a real studio (eeee!), and although I was super nervous, everyone was so nice and welcoming! Natalie asked me to share 3 treats, so I baked up some of my new favorite cookies (those are coming very soon 😉 ), put together my DIY Brownie Mix Jars, and made this snack mix.

Dark Chocolate Cranberry Snack Mix

The whole thing was a blast! I was (of course) really nervous while we were filming, but I’m excited to see how it all turned out. It was totally a dream come true, and I (and YOU!) get to see the final product this Saturday! The segment will air on local channel 7, cable channel 13, Saturday 12/14 at 11am (AZ time)! I will also be posting the video on here if you guys want to see it.

Dark Chocolate Cranberry Snack Mix

I actually don’t make a lot of snack mixes. I an such a snack monster that the last thing I need lying around the house is tempting snack food like this, but it’s always a hit at parties, and this one is actually pretty light for a dessert snack mix! Or at least that makes me feel better about the copious amount I consumed…

Dark Chocolate Cranberry Snack Mix

I love all of the different flavors and textures that come together in perfect harmony. The dark chocolate, by the way? Totally mandatory. And it has to be melted. I tried making it with chocolate chips, and although everything still tasted good, the melted dark chocolate is what really bring everything together. When it cools, it gives you those big, dreamy clusters that snack mix are all about. You could also use white chocolate–that’s been on my to-do list ever since I made this!

Print
Dark Chocolate Cranberry Snack Mix

Prep Time: 5 minutes

Total Time: 35 minutes

Yield: approx 5 cups

Dark Chocolate Cranberry Snack Mix

The perfect holiday snack mix with sweet and salty kettle corn, crunchy Chex, soft cranberries, and bold, creamy dark chocolate--you won't be able to stay away from it. Vegan, gluten-free & even nut-free!

Ingredients

  • 3 cups popped 94% fat free kettle corn
  • 2 cups Rice Chex cereal
  • 1 cup reduced sugar dried cranberries (or regular dried cranberries)
  • generous pinch sea salt
  • 1/3 cup chopped dark chocolate (or dark chocolate chips)
  • 1/2 tsp coconut oil

Instructions

  1. Evenly spread popcorn in a single layer over parchment paper. Top with Rice Chex, then cranberries. The goal is for all ingredients to be evenly dispersed. Sprinkle with sea salt.
  2. Melt chocolate and coconut oil in a medium microwave safe bowl by heating in 30 second increments, stirring after each, until chocolate is melted and smooth. Drizzle chocolate over other ingredients. Cool completely. Store in an airtight container at room temperature for up to one week.
3.1
https://arismenu.com/dark-chocolate-cranberry-snack-mix/

Filed Under: Dessert, Gluten-free, Holiday & Seasonal, Snacks, Vegan · Tagged: chocolate, christmas, cranberry, kettle corn, pop corn, recipe, snack, snack mix, winter

Next Page »
Image Map

Popular Posts

Tart Cherry Margaritas: The perfect, refreshing margarita--lightly sweet with a punch of tequila

Tart Cherry Margaritas

90+ Healthy Recipes for Breakfast, Lunch, Dinner & Dessert

90+ Healthy Recipes for Breakfast, Lunch, Dinner & Dessert

The Ultimate Peanut Butter Cup Brownie Cookies: Rich, fudgy, brownie-like chocolate cookies stuffed with melty peanut butter cups!

Ultimate Peanut Butter Cup Brownie Cookies

Drink & Dish: Cafe Au Lait Cupcakes

Crockpot Chicken Enchilada Soup

Subscribe via Email:

Enter your email address:

Save an additional $30 on Blendtec Factory Recertified Blenders + Free Shipping

Featured Here

recipe redux
Certified Yummly Recipes on Yummly.com

Member Of…

FitFluential Is Fitness Found
AZ Bloggers Network
az 150 photo az150_zpsfb093d32.gif

Archives


Image Map

Copyright © 2025 | Innovative Child Theme by The Pixelista | Built on the Genesis Framework


Loading Comments...