• Going Out
    • Phx Restaurants
    • How To Order At Starbucks
  • Running
    • My Running Story
    • Race Calendar
    • Race Recaps & Results
  • Blogroll
  • Bucket List
  • Video

Ari's Menu

Little changes making a big difference.

  • Home
  • Recipes
  • Weight Loss
    • My Story
    • Common Swaps
  • Who’s Who
  • Contact
    • Policies & Disclosure
  • Press

Roasted Butternut Bourbon

November 12, 2014 · by Ari ·

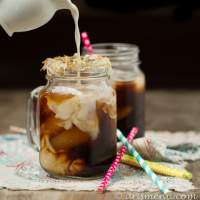
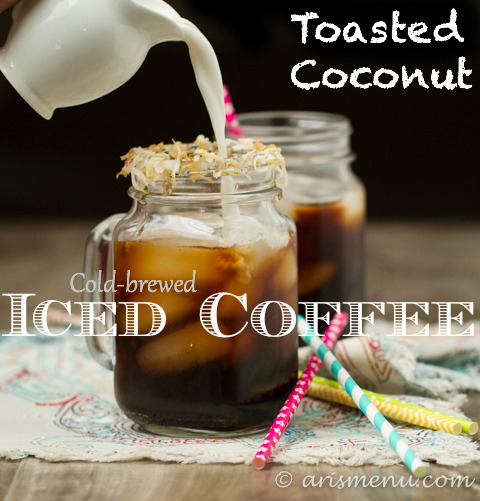
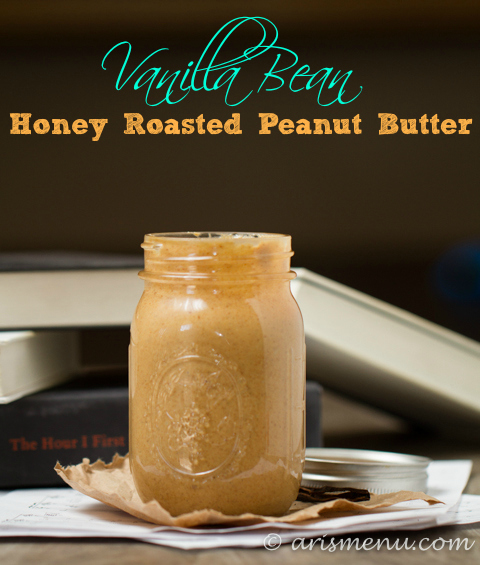
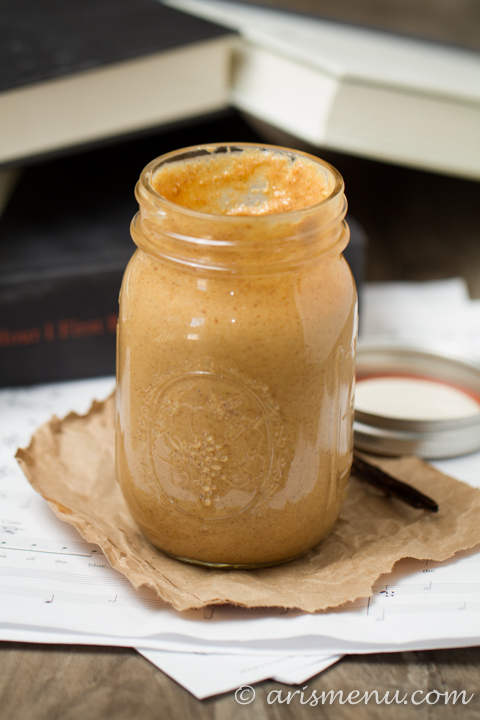
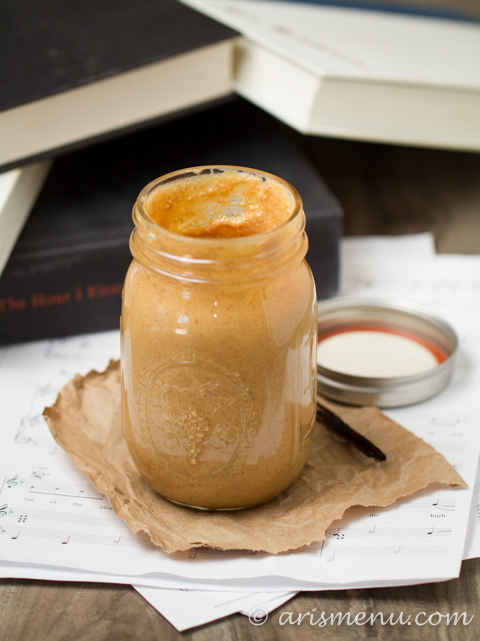
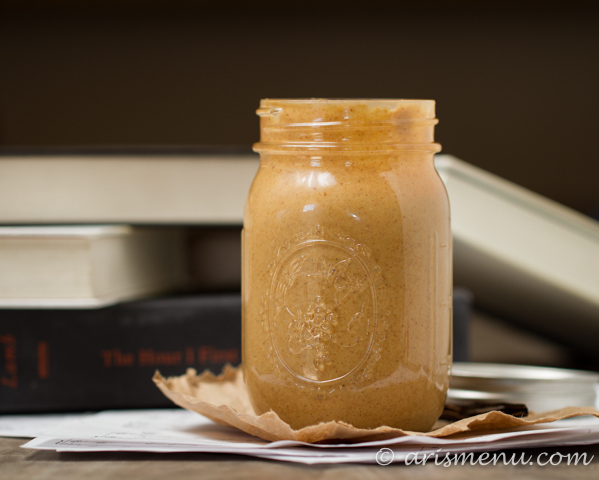
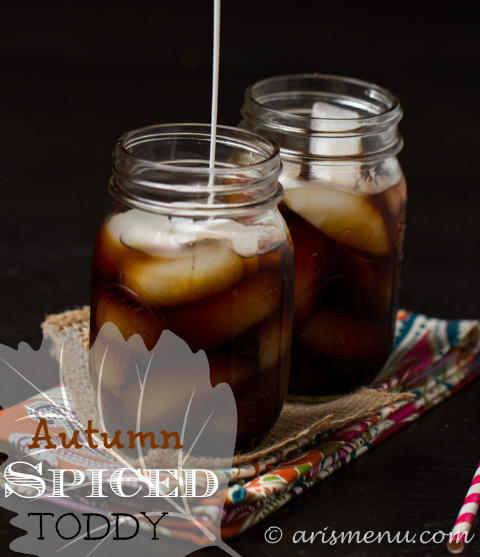
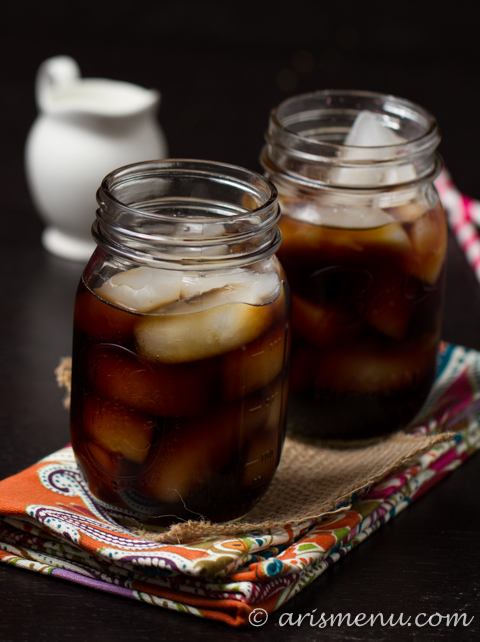
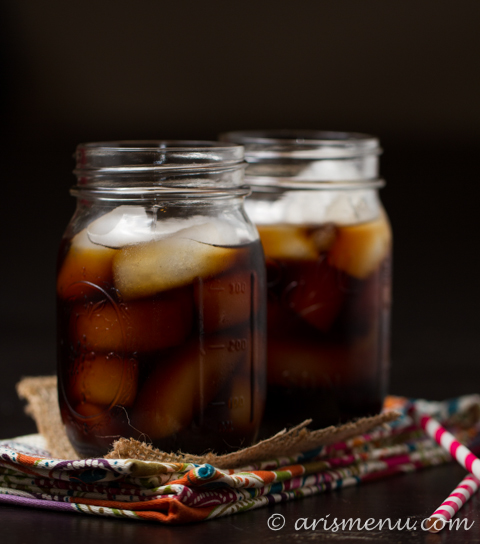
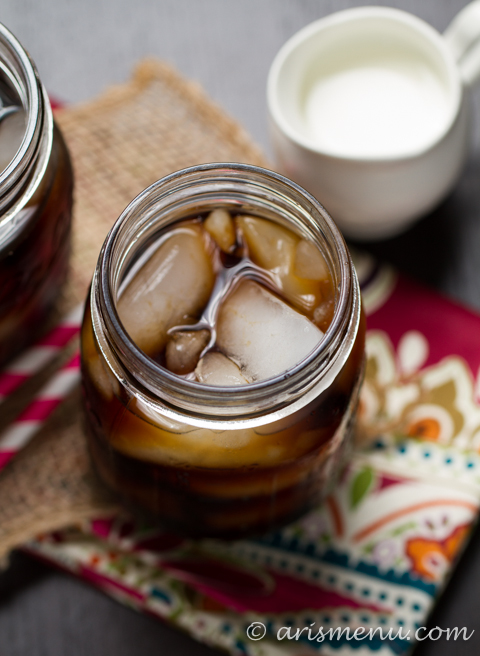
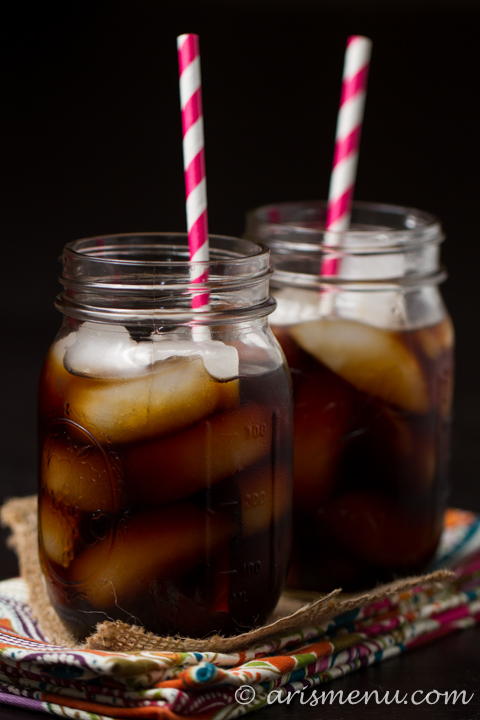
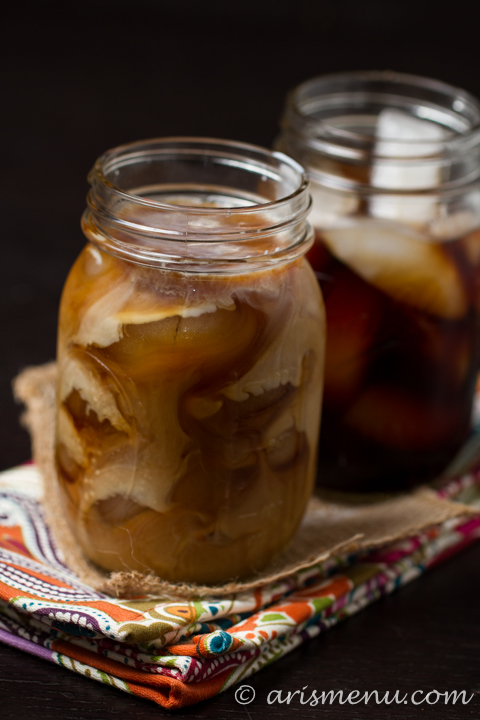
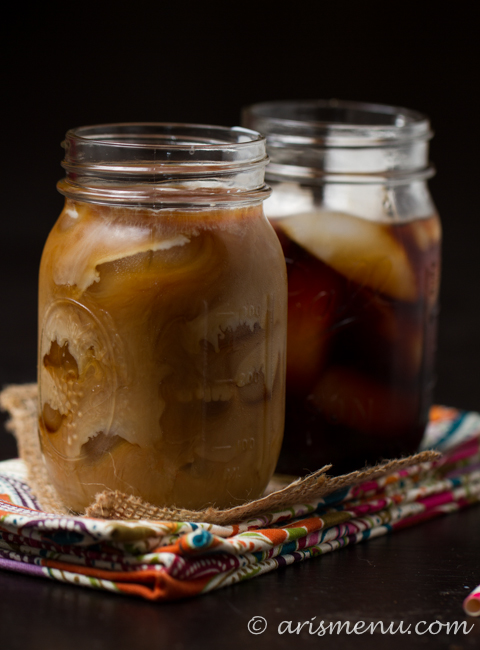
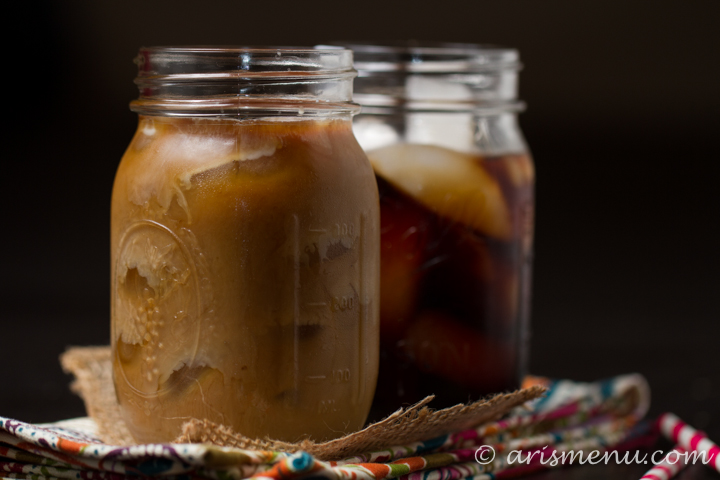
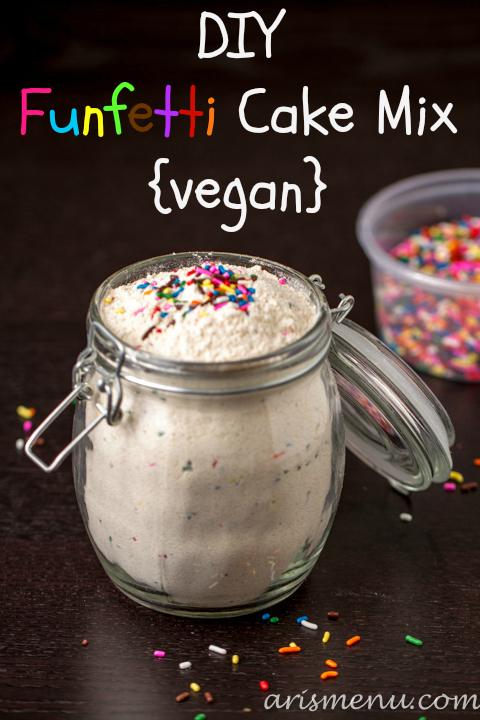
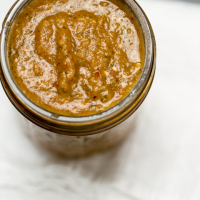
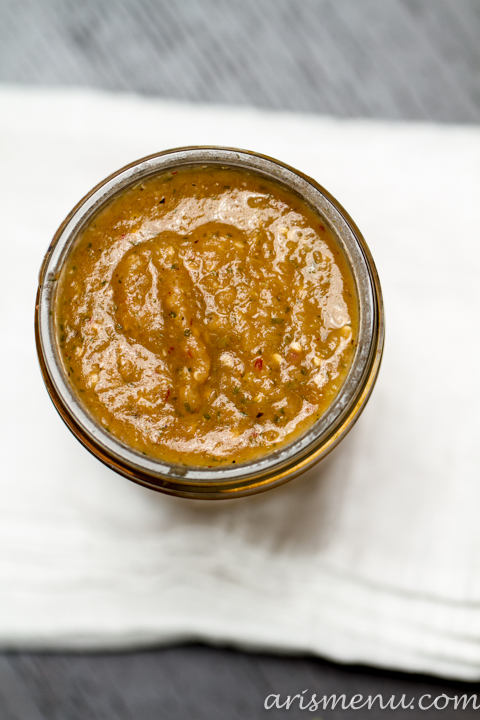
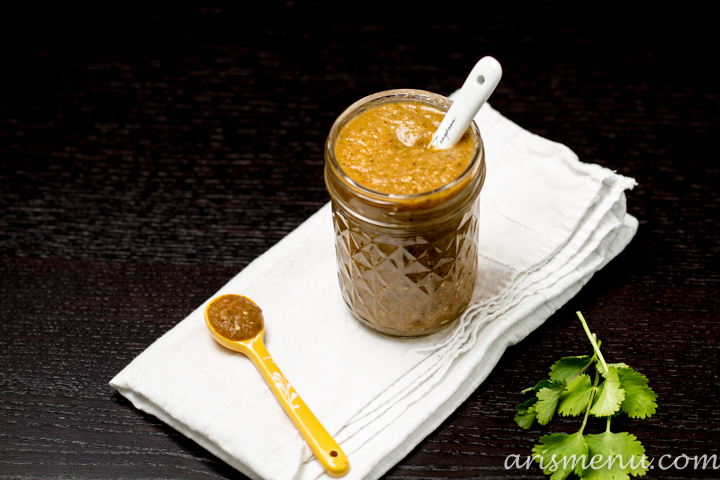
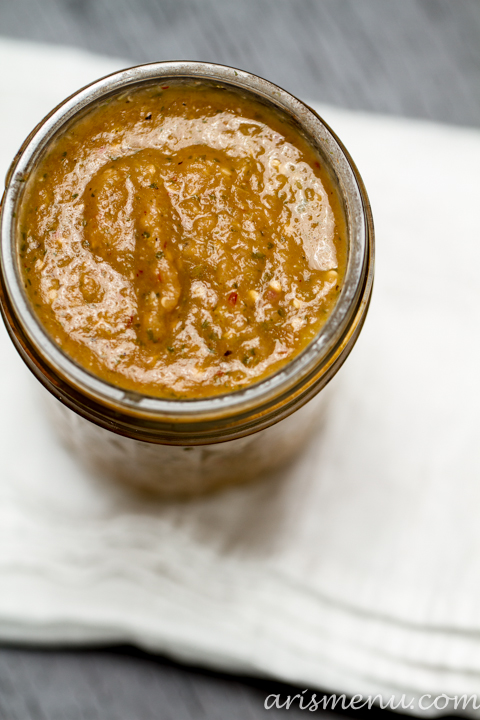
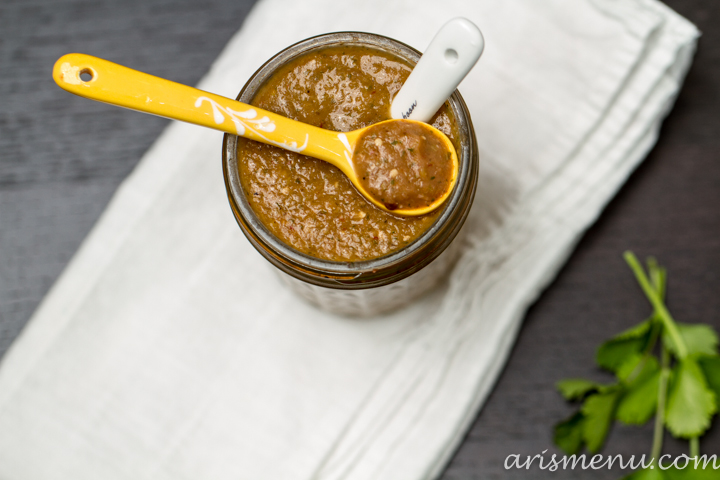
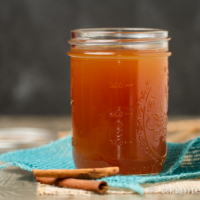
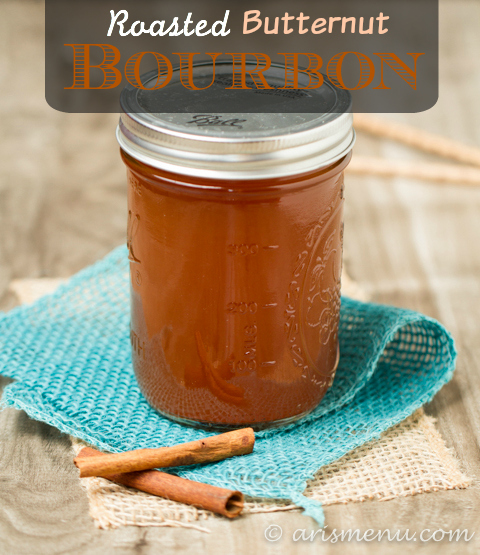
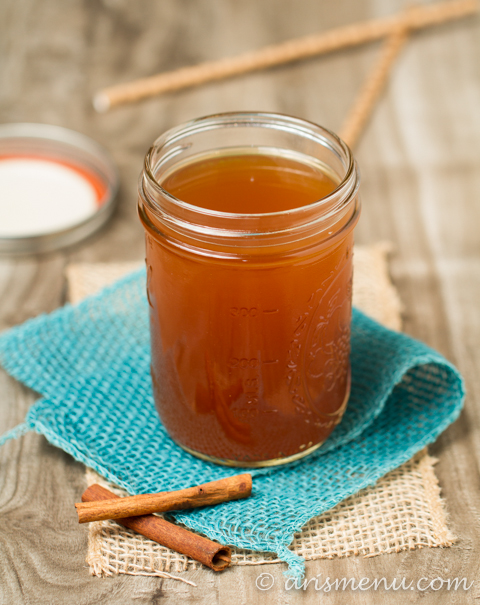
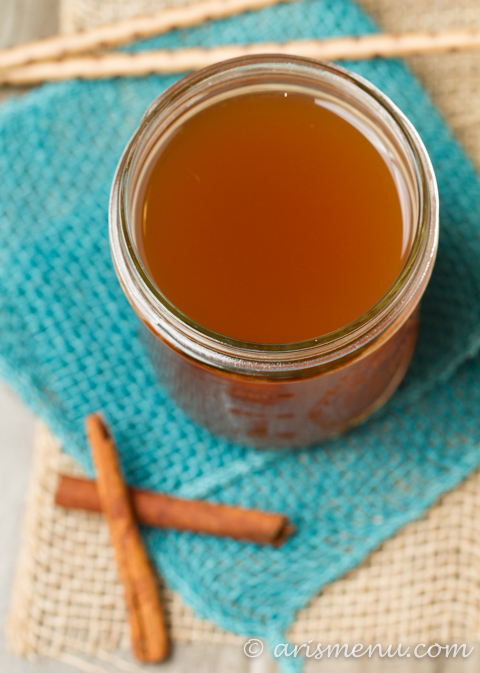
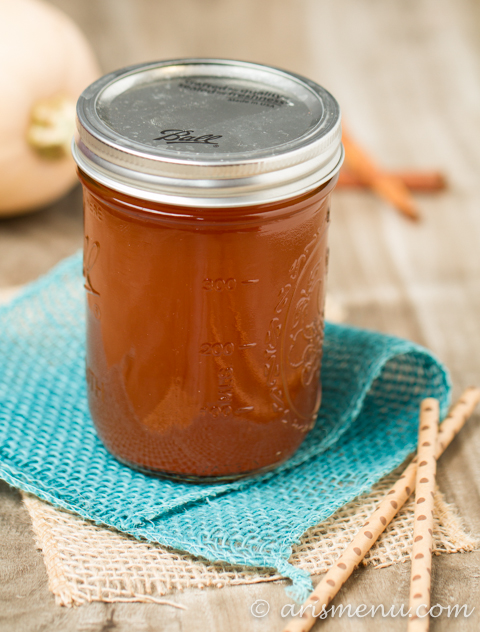
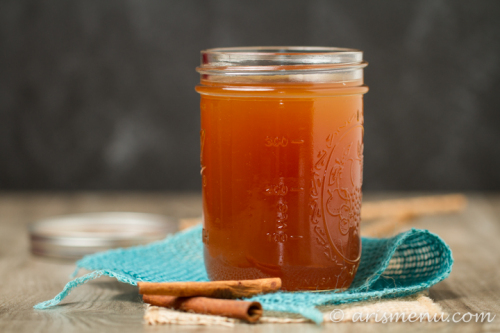
This Roasted Butternut Bourbon is the perfect fall beverage–infused with roasted butternut squash and spiced with cinnamon, cloves, allspice, nutmeg and vanilla. So much flavor, it will take any drink you make to the next level!

Roasted Butternut Bourbon: Infused with roasted butternut squash, cinnamon, cloves, allspice, nutmeg, and vanilla

So I don’t know exactly when I became grown up enough to drink things like bourbon. It’s like, at some point in your 20’s you all the sudden realize that whipped cream vodka may no longer be your drink of choice and you enter old man drinking status sipping on straight bourbon over ice. Just me?

Roasted Butternut Bourbon: Infused with roasted butternut squash, cinnamon, cloves, allspice, nutmeg, and vanilla

Infusing liquor is still pretty new to me, but after trying Nicole’s Pumpkin Pie Vodka last year (OMG it is AMAZING), I knew I wanted to experiment this year. Sometimes I feel like butternut squash is the redheaded step child of fall produce. Pumpkin and sweet potatoes are always stealing the show, but I love butternut squash too! It ends up being the perfect thing to kick this bourbon up to the next level!

Roasted Butternut Bourbon: Infused with roasted butternut squash, cinnamon, cloves, allspice, nutmeg, and vanilla

The spices are totally up to you. I used cinnamon, cloves, nutmeg, allspice and a vanilla bean, but use more/less/different spices depending on what you like. OMG and the vanilla bean? Well the seeds stayed inside and they are now soaked with bourbon. You better believe I saved that baby.

Roasted Butternut Bourbon: Infused with roasted butternut squash, cinnamon, cloves, allspice, nutmeg, and vanilla

Okay, so let’s talk about bourbon for a second. I did a lot of research about whether or not it is gluten-free. The answer is not technically. Although they say that the gluten goes away with distilling, most articles state that if you have Celiac or are very sensitive to cross contamination, it’s better to stay away. Steve is not super sensitive (and I only speculate that I actually feel better when I don’t eat it, but that is a subject for an other day), so it’s totally fine for us, but if you are more sensitive, you could definitely use Hudson Baby Bourbon which is made from corn instead of barley! Win!

butternutbourbon-5

Do keep in mind that you have to plan a little bit in advance with this baby. It needs 2-4 weeks to fully infuse, so just make sure you give yourself plenty of time. It’s really easy, and mostly hands off. In fact, you won’t believe just how easy it is to infuse your own liquors, and everyone you tell will be super impressed, and you can totally pretend it was lots of hard work, slaving over the stove, and all that. 😉

Print
Roasted Butternut Bourbon

Prep Time: 15 minutes

Cook Time: 15 minutes

Total Time: 45 minutes

Yield: approximately 16 ounces

Serving Size: 1.5 ounces

Roasted Butternut Bourbon

This Roasted Butternut Bourbon is the perfect fall beverage--infused with roasted butternut squash and spiced with cinnamon, cloves, allspice, nutmeg and vanilla. So much flavor, it will take any drink you make to the next level!

Ingredients

  • 1/2 large butternut squash, seeded and cut into 1-2" cubes
  • 750 ml bourbon
  • 6 whole cloves
  • 4 whole allspice berries
  • 3 cinnamon sticks
  • 1/2 nutmeg, smashed*
  • 1 vanilla bean, sliced length-wise

Instructions

  1. Preheat oven to 400. Roast butternut squash for 15 minutes. Cool completely.
  2. Place roasted butternut squash and all remaining ingredients in a large jar or tupperware. Store in a cool, dry place for 2-4 weeks (longer if you want a LOT of butternut squash flavor, less if you just want a hint), swirling ingredients around every few days.
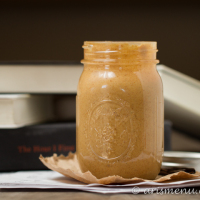
  3. Once your infusion in complete, line a fine mesh strainer with cheese cloth and strain liquid through into a large bowl (preferably one with a pouring spout). Pour ingredients into an airtight storing jar or bottle (a funnel helps if the bottle is small, or your bowl doesn't have a pour spout).

Notes

*To smash nutmeg, take half a piece of nutmeg, place parchment paper (or even a thin dish towel) on top and hit with a meat tenderizer. You should only need to do this once, just to break it up a bit. Recipe inspired by The Marvelous Misadventures of a Foodie

3.1
https://arismenu.com/roasted-butternut-bourbon/

Filed Under: DIY/How To, Drinks, Fall, Gluten-free, Holiday & Seasonal, Vegan, Vegetarian · Tagged: bourbon, butternut squash, diy, fall, infusion, liquor

Toasted Coconut Cold-brewed Iced Coffee

June 25, 2014 · by Ari ·

Ultra smooth, nutty cold-brewed iced coffee without a hint of bitterness. Literally THE BEST iced coffee I have ever tasted.

Toasted Coconut Cold-brewed Iced Coffee.: Smooth and nutty without a hint of bitterness

I think it’s safe to say I have a little coffee problem. I need it, have to have it, can’t live without it, want to swim in a big pool of it and never come out. And let me just tell you, making this cold brew has amplified that by about 1,000%.

Toasted Coconut Cold-brewed Iced Coffee.: Smooth and nutty without a hint of bitterness

So let’s chat a little bit about iced coffee. There are a few different ways to do it. When you order an iced coffee at Starbucks, they’ve taken their regular brewed hot coffee, poured it over ice and then stuck it in the refrigerator. Don’t get me wrong, I will drink the crap out of an iced coffee from Starbucks, but it doesn’t a candle to cold brew!

Toasted Coconut Cold-brewed Iced Coffee.: Smooth and nutty without a hint of bitterness

Cold brew is less acidic and bitter, and more caffeinated than drip coffee. It truly is the best of every world. Also, making a big batch means absolutely no work to get your morning coffee. Pour, add water (we’ll get to why in a moment), drink. Simple as that. And with the smooth taste and lack of bitterness, it really doesn’t need a thing. I add a little half and half–yes, the real deal–but that’s it.

Toasted Coconut Cold-brewed Iced Coffee.: Smooth and nutty without a hint of bitterness

Okay, about that coconut. It doesn’t taste like coconut. At least, not in the way you’d expect coconut to taste. Maybe it’s just me, but I almost always eat coconut in dessert, and it is the sweetness that I associate with the flavor. Have you ever eaten plain old flaked coconut? It is completely different. This means that coconut lovers and non coconut lovers alike will love this stuff!

Toasted Coconut Cold-brewed Iced Coffee.: Smooth and nutty without a hint of bitterness

So why even add the coconut? The result is a slightly nutty and creamy flavor and literally the smoothest coffee I have ever tasted. Of course, if you want some extra coconut flavor, you can add coconut extract while brewing or use coconut cream as your creamer. I’m pretty sure coconut cream in this coffee would be insanely addicting. Oh, who am I kidding, this stuff already is on its own!

Toasted Coconut Cold-brewed Iced Coffee.: Smooth and nutty without a hint of bitterness

Alright, remember when I said you have to add water? I brewed this stuff wayyyyy stronger than my other cold brew recipes, and ya know what? I like it even better! I tasted it on without adding water, and it was way too intense even for me. This recipe makes a concentrate and you really do need to add water. I used 1/3 concentrate / 2/3 water and that’s perfect for me. Silky and smooth, but not watered down because that is the worst. I recommend using coffee with a hint of cocoa for optimal flavor, but really any coffee you like will work great! Let me just say, I’m already working on batch #2 and I made triple the amount this time. 😉

Print
Toasted Coconut Cold-brewed Iced Coffee

Prep Time: 30 minutes

Total Time: 24 hours, 30 minutes

Yield: approximately 12 cups (when combined with water)

Serving Size: 1 cup (combined with water)

Toasted Coconut Cold-brewed Iced Coffee

Ultra smooth, nutty cold-brewed iced coffee without a hint of bitterness. Literally THE BEST iced coffee I have ever tasted.

Ingredients

  • 12 ounces ground coffee (preferably dark roast)
  • 2 cups unsweetened toasted coconut*
  • 8 cups filtered water

Instructions

  1. Pour coffee and coconut into a large air tight container (at least 1.5 gallons or larger). Pour water on top and stir lightly to combine. Cover and store at room temperature for 24-36 hours.
  2. Scoop out as much of the grounds and coconut as possible with a fine mesh strainer. Rinse strainer, then cover with a double layer of cheesecloth. Place covered strainer over a 1 gallon jug (or desired container). Use a measuring cup to pour coffee over your covered strainer to filter any remaining grounds. If your coffee begins to have trouble filtering through, change your cheesecloth out for a fresh one.
  3. To serve, combine 1 part coffee with 2 parts water. Add any desired cream or sweetener.

Notes

*To make your own toasted coconut, just place shredded or flaked coconut on a large cookie sheet and bake at 350 for 3-5 minutes. Watch carefully because it can burn quickly.

3.1
https://arismenu.com/toasted-coconut-cold-brewed-iced-coffee/

And to see step by step photos of how this cold brew process works, check out my post on how to make cold brewed iced coffee!

Filed Under: DIY/How To, Drinks, Gluten-free, Holiday & Seasonal, Low Carb, Paleo, Vegan · Tagged: coconut, coffee, cold brew.iced coffee, diy, how to, toasted coconut

Vanilla Bean Honey Roasted Peanut Butter

June 4, 2014 · by Ari ·

Simple, easy, sweet & delicious homemade peanut butter with just two ingredients! You’re just 5 minutes away from sweet, creamy and drippy peanut butter that is absolutely unforgettable.

Vanilla Bean Honey Roasted Peanut Butter--only 2 ingredients, healthy and made in 5 minutes!.jpg

Can I tell you something embarrassing? This morning I was leaving the pool after my swim, and I unlocked my car and I literally sat at this car wondering why it wouldn’t unlock for a good minute. Then I looked around and was like “Waiiiiiit, I didn’t park over here….”

Vanilla Bean Honey Roasted Peanut Butter--only 2 ingredients, healthy and made in 5 minutes!

This happens way more often than I’d like to admit. I usually am a “beat of my own drum” type, and I don’t like to have the same things as everyone else, so I’m not used to the fact that everyone and their mother has the same car as me. I love my cute little Elantra, but I’m not quite used seeing doubles everywhere I go.

Vanilla Bean Honey Roasted Peanut Butter--only 2 ingredients, healthy and made in 5 minutes!

So that was my morning. I swam, I tried to steal a car, I came home and took pictures of cookies, and now here I am. Avoiding packing. Talking to you. Speaking of packing, I still haven’t officially unpacked from Seattle, so I can probably just keep that suitcase, right???

Vanilla Bean Honey Roasted Peanut Butter--only 2 ingredients, healthy and made in 5 minutes!

Friday morning I’m heading to Blend!!! I’ve been dying to go after reading the recaps for the last two years, and I cannot wait to be reunited with this girl and also see/meet some of my favorites. Also, I’m pretty quick to jump into anything that gets me the heck out of Phoenix right now. Did I mention it’s already 110? Ew.

Vanilla Bean Honey Roasted Peanut Butter--only 2 ingredients, healthy and made in 5 minutes!

And clearly when it’s 110, I cannot be bothered to turn on the oven or my stove, so I make peanut butter. But not just any peanut butter. Like, the best peanut butter of my life kind of peanut butter. I was kind of obsessed with honey roasted peanut butter as it is, but add the seeds of an entire vanilla bean? Ummm, YES PLEASE. Smooth, creamy, drippy, sweet and totally dreamy; you will make this peanut butter again and again!

Print
Vanilla Bean Honey Roasted Peanut Butter

Prep Time: 5 minutes

Total Time: 5 minutes

Yield: approximately 1 1/2 cups

Serving Size: 1 tablespoon

Vanilla Bean Honey Roasted Peanut Butter

Simple, easy, sweet & delicious homemade peanut butter with just two ingredients! You're just 5 minutes away from sweet, creamy and drippy peanut butter that is absolutely unforgettable.

Ingredients

  • 16 oz honey roasted peanuts (or feel free to swap honey roasted almonds, macadamia nuts, etc.)
  • seeds from 1 vanilla bean
  • pinch sea salt, optional

Instructions

  1. Place peanuts and seeds from vanilla bean in your food processor. Blend until a smooth and creamy butter forms, about 5 minutes, stopping and scraping the sides of the food processor as necessary. Taste and add salt if necessary. Store in an airtight container in a cool, dry place for 2-3 weeks.
3.1
https://arismenu.com/vanilla-bean-honey-roasted-peanut-butter/

Filed Under: DIY/How To, Gluten-free, Sauces & Spreads · Tagged: diy, gluten free, homemade, peanut butter, peanuts, spread, vanilla, vanilla bean

Honey Roasted Macadamia Butter

December 18, 2013 · by Ari ·

Drippy, sweet and melty honey roasted macadamia butter. All it takes is one ingredient and 5 minutes to create your new favorite spread.

Honey Roasted Macadamia Butter

I’m really not the “DIY” type. As much as I love anything homemade, especially when it’s heartfelt, bringing myself to devote hours of time to a craft that I will inevitably be unhappy with when I finish is just not something I can usually do. I am, however, in total awe of people who can/do. Honestly, anyone that can make things look pretty, or at least not look like a kindergartner made it is totally impressive in my book.

Honey Roasted Macadamia Butter

Most of the time when I see a “Beautiful #DIY Gift Idea #Christmas” on Pinterest, I steer clear, and remind myself that the “5 Minute Up-Do” I found took me more like an hour, and I still wasn’t satisfied with the result.

Honey Roasted Macadamia Butter

But food? That I can do. Even DIY food. I love making people treats, especially things you can’t buy in the store, and I adore stuffing my family’s stockings with homemade nut butters, granola, and puppy chow rather than candy canes filled with m&ms.

Honey Roasted Macadamia Butter

So meet my newest obsession. The best, drippiest nut butter I have ever tastes. Now, if you like a more solid texture, not to worry! Stick this baby in the fridge, and you will get more of a traditional peanut butter texture, but I LOVE the way it drips right off the spoon, and has almost a melted texture. Macadamia nuts are the best nuts for spreads, in my opinion. They always come together super easy and quickly with no food processor starting and stopping. This DIY project will literally take you 5 minutes. 10 if you include dishes, but I wouldn’t know since I don’t actually do those.

Honey Roasted Macadamia Butter

I found my honey roasted macadamia nuts at Trader Joe’s, but I’m sure you could also find them online, or make your own!

Print
Honey Roasted Macadamia Butter

Prep Time: 5 minutes

Total Time: 5 minutes

Yield: approx 1 1/2 cups

Honey Roasted Macadamia Butter

Drippy, sweet and melty honey roasted macadamia butter. All it takes is one ingredient and 5 minutes to create your new favorite spread.

Ingredients

  • 16 oz honey roasted macadamia nuts
  • pinch sea salt, optional

Instructions

  1. Place macadamia nuts in your food processor. Blend until a smooth and creamy butter forms, about 3-5 minutes. Taste and add salt if necessary. Store in an airtight container refrigerated for up to one month, or in a cool, dry place for 2-3 weeks.
3.1
https://arismenu.com/honey-roasted-macadamia-butter/

Filed Under: Dessert, Gluten-free, Holiday & Seasonal, Sauces & Spreads, Snacks · Tagged: dairy free, diy, gluten free, macadamia nuts, nut butter, recipe, spreads

DIY Brownie Mix Jars {gluten-free}

November 21, 2013 · by Ari ·

A simple, easy, DIY gift idea for rich and fudgey gluten-free brownie mix. So easy to make, and a perfect gift for anyone in your life who loves chocolate! Includes dairy-free & vegan options.

DIY Brownie Mix Jars #glutenfree

Every year I do a huge holiday baking day. I usually invite hermano to “help”, and he’ll mix a few things, and then he just lays around…that is until I need a taste tester. 😉

DIY Brownie Mix Jars #glutenfree

I do enjoy it, but I usually end the day totally exhausted and swearing off ever stepping foot in my kitchen again. And don’t even think about getting me to cook dinner. It always ends up being a Chipotle night, even though all I really ever want at the end is greasy, cheesy pizza. But let’s be honest, all I ever want is greasy, cheesy pizza. And chocolate. And fro-yo.

DIY Brownie Mix Jars #glutenfree

The truth is, DIY mixes are so expensive at places like Starbucks or the Hallmark store, and they seem like a novelty item, but they are really easy to put together, far less time consuming than huge batch baking, and really inexpensive. The biggest expense ends up being the jars, but if you go to the dollar store, a thrift store, or hit the clearance section of your craft store, you can get them very reasonably.

DIY Brownie Mix Jars #glutenfree

Not to mention, the store-bought mixes are loaded with refined flours, and often times lots of weird preservatives. By making them yourself, you can control what goes in, and that includes changing things up, and adding your own mix-ins. If you know the person you’re giving it to loves chocolate and peanut butter, you could add some mini peanut butter cups, or Reese’s Pieces.

DIY Brownie Mix Jars #glutenfree

I just joined The Recipe ReDux which is a challenge hosted by dietitians to create unique and delicious recipes that are also healthy. While brownies are still somewhat indulgent, it is the holidays, and these are 100% whole grain, and the butter is replaced with nonfat yogurt. So you can have your cake brownie and eat it too. 😉

I just took my favorite brownie recipe, and layered the dry ingredients in a jar–it literally took less than 5 minutes, and you can easily do the same thing with any of your favorite recipes. I use my gluten-free baking blend, but you could use white whole wheat flour, or almond meal, or any blend of your own. All you need to add are eggs and some nonfat vanilla yogurt–everything else is included. You could also keep it dairy-free by using coconut oil instead of yogurt, or vegan by replacing the eggs with 2 tbsp cornstarch and 1/3 cup almond milk–so it can work for anyone in your life!

Print
DIY Brownie Mix Jars {gluten-free}

Prep Time: 5 minutes

Total Time: 5 minutes

Yield: 16

Serving Size: 1 brownie

DIY Brownie Mix Jars {gluten-free}

A simple, easy, DIY gift idea for rich and fudgey gluten-free brownie mix. So easy to make, and a perfect gift for anyone in your life who loves chocolate!

Ingredients

  • 1 cup + 2 tbsp gluten-free baking blend (or white whole wheat flour
  • dash salt
  • 2/3 cup granulated sugar
  • 2 tbsp brown sugar
  • 2 tbsp cocoa powder, preferably Dutch process
  • 1/2 tsp espresso powder
  • 5 1/2 oz dark chocolate, about 1 scant cup
  • To make brownies:
  • 1/2 cup nonfat vanilla yogurt
  • 2 eggs

Instructions

  1. In a medium bowl, whisk flour and salt together. In a 3.5-4 cup jar, layer ingredients in order listed. You may change the order as long as you leave the chocolate chips on top. Use a tablespoon to smooth down after each layer for the best visual effect.
  2. To make brownies, preheat oven to 350. Line a 9" square pan with aluminum foil and spray with nonstick spray. Set aside.
  3. In a large bowl, melt the chocolate and let cool. Stir in yogurt, whisk eggs in one at a time. Gently fold in remaining ingredients until just combined.
  4. Transfer to prepared baking tin and bake until a toothpick inserted in the center comes out mostly clean with a few crumbs, about 30 minutes. Cool completely in pan then serve. Store in an airtight container for up to 5 days.

Notes

Recipe easily doubled in a larger jar. Feel free to add mix ins of your choosing.

For dairy-free brownies, replace yogurt with melted coconut oil For vegan brownies, also replace egg with 2 tbsp cornstarch and 1/3 cup almond milk.

3.1
https://arismenu.com/diy-brownie-mix-jars-gluten-free/


Filed Under: Brownies & Bars, Dessert, DIY/How To, Gluten-free, Holiday & Seasonal, Vegan · Tagged: brownies, chocolate, christmas, dessert, diy, gifts, gluten free, recipe, vegan

Autumn Spiced Toddy (Cold-brewed Iced Coffee)

October 15, 2013 · by Ari ·

Easy & smooth cold-brewed iced coffee spiced with cinnamon, nutmeg, allspice & cloves. 

Autumn Spiced Toddy

Lately I’ve been wondering if it’s time to start acting like a grown up. I can’t even tell you what that means, because I just act like, well, me. The other day someone thought I was wayyy younger than I am (this isn’t even including the almost daily basis in which I’m mistaken for a student), and although this should be a compliment (YAY!! You didn’t notice those lines decorating my forehead!), I immediately got into my head thinking “OMG do I need to start acting like I’m in my *gulp* late 20’s?”

Autumn Spiced Toddy

Again, not that I could even tell you what that means. But sometimes I feel like maybe I need to stop talking like a teenager, getting upset when children beat me at games, and locking my husband out of our room so I can win at the who gets into bed first game. That’s a whole other story that I should probably be embarrassed of, but I’m not because I have the maturity of a 6 year old.

Autumn Spiced Toddy

I find this whole “growing up” and “maturing” business incredibly confusing. I guess I just assumed it would happen naturally, but I’m starting to wonder if it’s something people make a conscious effort to do? You know, like washing dishes (something I find equally appalling).

Autumn Spiced Toddy

But then on the other hand, I go to bed at 9 pm, I make my own coffee and I even pretend I’m fancy and call it toddy. That really is the name for cold brew, but I feel like it’s this secret coffee snob name that no one really knows about. I am totally a coffee snob, but in an all inclusive name. Feel free to join me in my snobbery and use words no one else knows. 😉

Autumn Spiced Toddy

There are few DIY projects I love more than making a huge batch of toddy. It is ridiculously simple, and not a single drop ever goes to waste. It’s one less thing I have to worry about in the morning. My coffee routine is simply fill my glass with ice, pour in toddy, add some almond milk and grab a straw. Nothing to prep the night before, and I never have to worry about running out of time to feed my caffeine addiction.

Autumn Spiced Toddy

Of course, sometimes I like to spice things up. One of my favorite local coffee shops offers spiced toddy this time of year (although I’ve never actually tried it there), and it always sounded so delicious. I am a huge fan of pumpkin spiced lattes, and pretty much any fall coffee drink you can imagine, so I wanted to incorporate my favorite flavors right into my cold brew.

Autumn Spiced Toddy

I was a little worried I wouldn’t be able to taste the spices over the bold flavor of the coffee, but they shine through without being over powering. You can always add more if you want a bolder spice flavor, but I like the nice hint that adds depth–it makes you wonder what’s different about this coffee, and why it tastes special.

Autumn Spiced Toddy

Adding the spices doesn’t really take any extra time–just add them right into your batch while it sits. I used a combination of cinnamon, nutmeg, allspice and cloves. You could also add ground ginger, cardamom (for a chai flavor), or any other spices you want. If you want to see detailed instructions with step-by-step photos on how to make your iced coffee, check out this post!

Print
Autumn Spiced Toddy (Cold-brewed Iced Coffee)

Prep Time: 30 minutes

Total Time: 24 hours, 30 minutes

Yield: 12-15 cups

Serving Size: 1 cup

Autumn Spiced Toddy (Cold-brewed Iced Coffee)

Simple & easy cold brewed iced coffee seasoned with warm, comforting fall spices.

Ingredients

  • 1 lb good quality bold coffee, coarsely ground
  • 1 1/2 tbsp ground cinnamon
  • 1 tsp ground nutmeg
  • 1 tsp allspice
  • 1 tsp cloves
  • 2 gallons water

Instructions

  1. Pour ground coffee into a 2.5 gallon airtight container. Add spices. Top with 2 gallons filtered water. Pat down the top to ensure all coffee is incorporated. Cover and store for 24-48 hours (the longer it brews, the stronger it will be).
  2. Scoop out as much of the grounds as possible with a fine mesh strainer. Rinse strainer, then cover with a double layer of cheesecloth. Place covered strainer over a 1 gallon jug Use a measuring cup to pour coffee over your covered strainer to filter any remaining grounds. Repeat until jug is mostly full, then repeat with a second 1 gallon jug. If your coffee begins to have trouble filtering through, change your cheesecloth out for a fresh one.
  3. To serve, fill glass with ice and add 1-2 inches of water. Add coffee, and any desired cream or sweetener.
3.1
https://arismenu.com/autumn-spiced-toddy-cold-brewed-iced-coffee/

Filed Under: DIY/How To, Drinks, Gluten-free, Holiday & Seasonal, Low Carb, Miscellaneous, Vegan · Tagged: cinnamon, cinnamon coffee, coffee, diy, drink, fall, gluten free, how to, recipe, vegan

My Gluten-free Baking Blend

October 13, 2013 · by Ari ·

A simple & easy gluten-free flour blend perfect for cookies, cupcakes, quickbreads, and more! Looking for more gluten-free recipes? Check these out!

#GlutenFree Baking Blend

Almost 6 months ago, my husband discovered he was gluten intolerant. He (obviously) cut out gluten completely, and as a result, I now eat about 90% gluten-free as well. I had toyed with gluten-free baking a little bit, but mostly using just almond meal or oats. I tried many gluten-free flours, and even when I enjoyed the end result, you could always tell they were gluten-free. The texture was never quite right. Sometimes they’d be gummy, or other times too crumbly–it is definitely a challenge, and it’s taken quite a bit of time, resources, and trial & error to get to a place where I feel like I’ve started to figure it out.

#GlutenFree Baking Blend

I’ve been making vegan desserts for quite some time–something that is so easy in my opinion. I already use butter alternatives, and cornstarch replaces an egg seamlessly in most cases (I’m not vegan, I just like to bake things that work for many different diets). Gluten-free on the other hand? I feel like it’s a constant learning process.

#GlutenFree Baking Blend

However, after trying a lot of different combinations, I truly feel like I’ve found my winner–my go-to flour blend that I will use 90% of the time. Of course, I will still try new things and learn lots of new tricks as I go, but after a series of successful baked goods (teenager approved and all!), I finally feel ready to share my blend with you guys. In fact, tonight I told Steve I may even like this better than wheat flour. The texture is ultra-soft, and perfect for baked goods.

#GlutenFree Baking Blend

A couple things to note: While I have used this blend to replace wheat flour in many different recipes, sometimes (especially in cookies) you may need to some extra flour. I often add an extra 1/4 to 1/2 cup compared to what a recipe calls for in cookies. My suggestion is to start off following the recipe, then add extra as needed. I usually start by adding 1/4 cup if the mixture is overly sticky and unworkable. Be careful though–too much flour leads to dry and cakey baked goods.

#GlutenFree Baking Blend

My favorite part of this blend? No weird ingredients. No xanthan gum, nothing too obscure, and no need to add any extra ingredients when baking. And it’s a whole grain mix! You better believe I’m not about to start baking with refined grains just because it’s gluten-free. 😉 The method is simple–it’s a 3:3:2 measurement of brown rice flour, gluten-free oat flour  (you can buy this at the store, or easily make your own with gluten-free oats in a food processor), and almond meal (you can also buy this, or make your own). You can simply mix these flours together for a recipe, or you can make a larger batch so that the measurements are already taken care of.

#GlutenFree Baking Blend

Making the blend ahead of time in a larger batch is a great time saver. You could also make a batch as a gift for a friend who maintains a gluten-free diet. If they haven’t found a lot of products they like yet, they will seriously love you for helping them enjoy the delicious treats they’ve been missing. This blend literally tastes no different than any regular flour, and is great for everyone no matter if you follow a gluten-free diet or not.

Print
My Gluten-free Baking Blend

Prep Time: 5 minutes

Total Time: 5 minutes

Yield: 8 cups

My Gluten-free Baking Blend

A perfectly soft whole grain gluten-free baking mix perfect for cookies, cakes, quick breads, and more.

Ingredients

  • 3 cups brown rice flour
  • 3 cups gluten-free oat flour*
  • 2 cups almond meal*

Instructions

  1. Stir all ingredients together in a large bowl until combined. Store in an airtight container.

Notes

*Oat flour and almond meal can each be made by pulsing oats or almond in food processor until a fine flour forms. Be careful with almonds not to over-pulse or you will end up with almond butter.

*This mix can replace all-purpose flour in most recipes. You may need to add a little bit extra (especially in cookies).

*Recipe inspired by Edible Perspective

3.1
https://arismenu.com/gluten-free-baking-blend/

Filed Under: DIY/How To, Gluten-free, Miscellaneous, Vegetarian · Tagged: almond meal, baking, cooking tips, diy, flour, gluten free, how to, oats, recipe

Fat Free Thousand Island Dressing

June 11, 2013 · by Ari ·

Fat Free Thousand Island Dressing

Does anyone actually eat thousand island on a salad? I mean, don’t get me wrong, I find it delicious, and I absolutely love it on sandwiches, burgers, and as a dipping sauce, but on a salad? I don’t think I’ve ever seen anyone eat it like that.

Fat Free Thousand Island Dressing

I told Hermano I made my own thousand island, and he told me I needed to recreate the big mac. I had totally forgotten that thing even exists, but I feel like now I have to tackle it. Especially since I’m apparently obsessed with burgers lately.

Fat Free Thousand Island Dressing

I used to get thousand island on my sandwiches all the time, but I kicked the habit to the curb when I started my weight loss journey. There aren’t a lot of options at the store if you want a healthier version, and most of them are filled with ingredients I don’t want to go anywhere near, so I figured I’d try my hand at my own version.

Fat Free Thousand Island Dressing

You guys…making your own salad dressing (or sandwich dressing, or dipping sauce) is SO EASY. Seriously. There is no reason to buy this stuff. It only requires a handful of ingredients, and about 5 minutes of your time.

Fat Free Thousand Island Dressing

Nonfat plain Greek yogurt is the secret to making it thick and creamy without any fat. From there, I just added a little bit of reduced sugar ketchup (available at most grocery stores), some sweet relish, honey for added sweetness, vinegar, and some seasonings. Aside from the relish, I had all of the ingredients in my house already! And with hardly any added time, I had a delicious sandwich with sweet and creamy thousand island in minutes *hint hint*.

Print
Fat Free Thousand Island Dressing

Prep Time: 5 minutes

Total Time: 5 minutes

Yield: 3/4 cup

Serving Size: 2 tbsp

Fat Free Thousand Island Dressing

Ingredients

  • 1/2 cup nonfat plain Greek yogurt
  • 2 tbsp reduced sugar ketchup
  • 1 tbsp white vinegar
  • 1-2 tsp honey (depending on desired sweetness)
  • 2 tsp sweet pickle relish1 teaspoon white onion, finely minced
  • pinch onion powder
  • dash each salt and pepper

Instructions

  1. Whisk all ingredients together in a medium bowl. Store refrigerated in an airtight container for 7-10 days. Serve completely chilled.
3.1
https://arismenu.com/fat-free-thousand-island-dressing/


Filed Under: DIY/How To, Gluten-free, Miscellaneous, Sauces & Spreads · Tagged: dip, diy, dressing, easy, fast, gluten free, recipe, sauce, thousand island

Drink & Dish: DIY Funfetti Cake Mix {with video!}

April 8, 2013 · by Ari ·

HAPPY BIRTHDAY TO MY BEST BLOG FRIEND NICOLE!!!!DIY Funfetti Cake Mix #vegan via www.arismenu.com

You guys know how insanely obsessed with birthdays I am, right? I jump on any chance to celebrate, and I consider birthdays the day you celebrate that people you love are in your life. My normal birthday message goes something like “Happy birthday! I’m glad you were born!”

funfetticakemix-660

So okay, it might sounds a little silly and cheesy, but how often to we actually tell people we love that we’re glad they’ve in our lives? It’s nice to have a day where we’re reminded. Or maybe I’m just sentimental…

funfetticakemix-664

The beginning of April is crazy birthday time! Within a week, Steve, Nicole and her husband Lance all have their birthdays. I’m the odd man out, but that’s probably a good thing, because I have a total sharing problem when it comes to my birthday. I reallllllly like attention (in case you haven’t figured that one out yet), and I don’t want to share my thunder with anyone.

DIY Funfetti Cake Mix #vegan via www.arismenu.com

Once my dad told me he was dating someone with the same birthday as me. He thought I would think this was “cool”. I told him he should probably break it off. Some people are bad at sharing books and m&ms (I love you Heath), I’m bad at sharing birthdays.

DIY Funfetti Cake Mix #vegan via www.arismenu.com

So I have some pretty serious character flaws. Sharing, over sharing, and obsessive sprinkle photographing. I’m sorry. I took, like, 100 pictures because…sprinkles, they’re sooooo pretty. It was one of those magic days where I loved shooting from every angle, and of course, I wanted to share every single one of them with you because God forbid I leave out the one that looks the same, but it slightly closer up. I don’t know what my problem is.

DIY Funfetti Cake Mix #vegan via www.arismenu.com

That’s why I made the little collage. I figured it would make this post, maybe not 500 years long. Some people just post, like 2 pictures, say a few words, and then post a recipe, but I have SO MANY things to say and OMG SO MANY things to show you!

DIY Funfetti Cake Mix #vegan via www.arismenu.com

Oh, and I guess I should talk about the cake mix, eh? To put it concisely (because lord knows I’ve talked enough in this post), I can’t believe I ever bought a boxed cake mix! This was so much easier than driving to the store! I know sometimes we like to have a little bit of cake mix on hand for when other recipes call for it–well friends, you just put some together, and have it ready in the pantry. It’s so easy. And when I baked it into cupcakes, all I did was mix everything together in one bowl (all you have to add is applesauce, almond milk and vanilla!), and my cupcakes were done in NO TIME! Not to mention, they domed up so beautifully!

DIY Funfetti Cake Mix #vegan via www.arismenu.com

It was a great excuse to throw some sprinkles around with the birthday girl, and film the latest episode of Drink & Dish! Make sure to check out Nicole’s Boozy Birthday Cake Shake. It is ridiculously, sinfully good.


Print
DIY Funfetti Cake Mix

Prep Time: 5 minutes

Total Time: 5 minutes

Serving Size: 1/24th mix

Easy, homemade, whole grain, vegan funfetti cake mix in less time than it takes to run to the store to buy a box.

Ingredients

  • 2 1/2 cups white whole wheat flour
  • 1 1/2 cup sugar
  • 1/4 cup corn starch
  • 2 tsp baking powder
  • small pinch salt
  • 1 1/3 cups Jimmies sprinkles

Instructions

  1. Whisk all ingredients in together in a large bowl. Store in an airtight container for up to 3 months.

Notes

To bake cupcakes, simply add 2/3 cup applesauce, 2 and 1/2 cups unsweetened almond milk, and 1 tbsp pure vanilla extract to mix. Stir until combined. Evenly divide the batter between 2 dozen cupcake tins and bake @ 350 until a toothpick in the center comes out clean, 20-25 minutes. You can also bake into 2 8-9" rounds, or one large sheet cake, just adjust baking times accordingly.

3.1
https://arismenu.com/drink-dish-diy-funfetti-cake-mix-with-video/

Filed Under: Cakes & Pies, Cupcakes, Dessert, DIY/How To, Miscellaneous, Vegan · Tagged: birthdays, cake, cake mix, cupcakes, diy, diy funfetti cake mix, drink and dish, fast, funfetti, simple.easy, sprinkles, vegan, vegan cake mix, whole grain

Green Chile Enchilada Sauce

April 3, 2013 · by Ari ·

Green Chile Enchilada Sauce via www.arismenu.com

For years, I have been buying enchilada sauce. Always green, although for years I was totally weirded out by green sauce. It was green, so obviously it was gross. Like vegetables, ew. Except now I am totally obsessed with almost all vegetables, and if offered the chance to be healthy, and never eat them, I would not accept.

Green Chile Enchilada Sauce via www.arismenu.com

I love veggies and cookies. But not together. Unless it’s carrot cake or zucchini bread flavored cookies, or sweet potato cookies, in which case SIGN ME UP!

Green Chile Enchilada Sauce via www.arismenu.com

Anyway, my college roomie/bestie Heather always made amazing enchiladas, and I stole her recipe and started making them all the time. Always with tons of bold and spicy green sauce.

Green Chile Enchilada Sauce via www.arismenu.com

I always kind of assumed that the sauce must be healthy because, well, it’s green–how bad could it be? I mean, the store bought kind isn’t terrible, but it totally includes all those things I can’t pronounce, which sucks, and it’s expensive! In fact, I made a quart and a half for probably about the amount I’d spend on one can at the grocery store!

Green Chile Enchilada Sauce via www.arismenu.com

It’s also incredibly easy. Like, ridiculous easy. I think it took me about 30 minutes start to finish, but that includes about 20 minutes of veggie roasting time in which I got important life things done, like emptying the dishwasher. Uggghhh, I HATE emptying the dishwasher. I have to do it while cookies are chilling, or food is in the oven so that I trick myself into believing it’s part of that task, not it’s own crappy task.

Green Chile Enchilada Sauce via www.arismenu.com

The sauce came out bold, slightly spicy (you can easily adjust the spice by adding extra chiles), and fantastically thick. I hate runny sauces. I feel like I can never soak them up and get the full flavor, but this is thick, almost like a well blended salsa. In fact, I could easily just eat it with a spoon.

Green Chile Enchilada Sauce via www.arismenu.com

I know it’s barely April, but Cinco de Mayo will be here before you know it, and trust me, you don’t want to buy the canned stuff at the last minute. This stuff will keep in the fridge for at least 2 weeks (that’s how long mine’s been going strong), or you can freeze it for much longer. I made a huge batch, so I will have my own on hand for a very long time.

Print
Green Chile Enchilada Sauce

Prep Time: 5 minutes

Cook Time: 20 minutes

Total Time: 25 minutes

Yield: 1 1/2 quarts

Green Chile Enchilada Sauce

Simple and easy homemade green chile enchilada sauce. Vegan, gluten-free, grain-free, paleo.

Ingredients

  • 1 tbsp olive oil
  • 3 lbs tomatillos, husks and stems removed, halved
  • 3 green chiles, ribs and seeds removed
  • 1 large onion, roughly chopped
  • 1/2 head garlic, peeled
  • 2 jalapenos, stems removed (seeds and ribs are optional depending on how spicy you like it)
  • 1 lime
  • 1/2 bunch cilantro
  • Heavy pinch sea salt
  • Pinch black pepper
  • 1 tbsp ground cumin

Instructions

  1. Place tomatillos, chiles, onion, garlic and jalapeno in a large baking dish. Drizzle lightly with olive oil and broil until tender and lightly charred, about 15-20 minutes. Keep an eye on it--if onion and garlic begin to cook faster, remove them first.
  2. Transfer your cooked ingredients to your food processor or blender. Zest the lime into the mixture, then add the juice. Add cilantro and remaining seasonings and blend until well combined, about 30 seconds. Store in an airtight container refrigerated for 2 weeks, or freeze for months.
3.1
https://arismenu.com/green-chile-enchilada-sauce/


Filed Under: DIY/How To, Gluten-free, Low Carb, Miscellaneous, Paleo, Sauces & Spreads, Vegan, Vegetarian · Tagged: diy, easy, enchilada sauce, enchiladas, mexican, recipe, sauce, simple, spicy

DIY Whole Wheat Cake Flour

December 31, 2012 · by Ari ·

DIY Whole Wheat Cake Flour


You know what is not easy? Taking pictures of flour.

DIY Whole Wheat Cake Flour


I know, I know….food blogger problems…

DIY Whole Wheat Cake Flour

There have always been a lot of recipes that I pass up on making because I reallllly don’t like to use white flour. It’s a weird thing. I don’t freak out if someone else makes something with it, but I just really prefer to use whole grains, especially when I’m creating things for Ari’s Menu.

DIY Whole Wheat Cake Flour


Of course there are exceptions to the rule, but it always seems silly to buy an entire container of something I know I’ll only use once. In fact, I only really buy two flours: whole wheat pastry, and white whole wheat, but you know what? I would package this up and buy it in a heart beat!

DIY Whole Wheat Cake Flour


I’ve never seen whole wheat cake flour in the grocery store, so I decided to get creative, and make my own. There are a lot of tutorials out there that teach you how to make your own cake flour, so I used to same concept, and just used whole wheat pastry in place of all purpose. You could probably do the same thing with white whole wheat flour as well, I’d imagine, and even plain old wheat, although it would probably bake a bit denser.

DIY Whole Wheat Cake Flour


As soon as I made this, I used it to whip up a batch of cookies. Very special cookies. They came out amazing, so I’d say the flour was a big success! They baked up fluffy, and cake-like (which is perfect for these cookies). Creating the cake flour took me all of an extra 2 minutes in the process, so I would highly recommend giving it a try next time you find a recipe that calls for cake flour–here’s an easy way to healthy it up in minutes.

DIY Whole Wheat Cake Flour


DIY Whole Wheat Cake Flour

yield 1 cup

  • 1 cup minus 2 tbsp whole wheat pastry flour
  • 2 tbsp cornstarch

Directions:

  1. Measure out 1 level cup of whole wheat cake flour and transfer to a medium mixing bowl. Remove 2 tbsp of flour and replace with 2 tbsp cornstarch. Lightly whisk together. Use immediately, or store in an airtight container just as you would any other flour.

Filed Under: DIY/How To, Miscellaneous, Vegan · Tagged: cake flour, diy, flour, whole grain

Brown Sugar Sweetened Condensed Coconut Milk

December 12, 2012 · by Ari ·

Would you like to know how many recipes I look at and think “OMG I WANT TO LICK THE SCREEN I NEED TO MAKE THAT!!!” then see that they call for sweetened condensed milk, decide they must be the most unhealthy thing in the world, and there is no way to modify it, so I click my little x and move on.

Too many. So, I made my own. Duh.

I have to say, I’m a little obsessed with the coconut in general right now. I love the sweet flakes for baking, the oil for practically anything, and the milk is proving to be everything I could ever want to use it for, and more!

It takes a little bit of time and attention on the stove top, but this thick, sweet, and almost syrupy (without being too sweet, if that makes sense?) sweetened condensed milk is nothing short of a cooking miracle! And ya know, it’s Chanukah (I will always and forever spell it the CH way, so that I can pronounce it as such), which is all about miracles, so I thought I’d share with you mine. It’s not quite as cool as a light that lasts for 8 days, but I mean, I really love food, so I found it pretty darn exciting.

Obviously, this is only the beginning for this coconut milk. You couldn’t possibly think I made just the coconut milk without special things to use it for, right??

Let’s just say, there’s lots of fun treats in store. 😉


Brown Sugar Sweetened Condensed Milk

adapted from Side of Sneakers

  • 2 cans full fat coconut milk
  • 1/3 cup brown sugar

Directions:

  1. Heat coconut milk and brown sugar together in a medium sized pot over medium heat whisking constantly until mixture thickens and reduces to about 1/2-2/3 of original. This takes about 30 minutes. When milk is finished, it will coat the back of a spoon as seen in the above pictures. Let cool, then store in an airtight container in the refrigerator.

Filed Under: Dessert, DIY/How To, Gluten-free, Miscellaneous, Vegan · Tagged: brown sugar, coconut milk, condensed milk, diy, milk, vegan

Image Map

Popular Posts

Tart Cherry Margaritas: The perfect, refreshing margarita--lightly sweet with a punch of tequila

Tart Cherry Margaritas

90+ Healthy Recipes for Breakfast, Lunch, Dinner & Dessert

90+ Healthy Recipes for Breakfast, Lunch, Dinner & Dessert

The Ultimate Peanut Butter Cup Brownie Cookies: Rich, fudgy, brownie-like chocolate cookies stuffed with melty peanut butter cups!

Ultimate Peanut Butter Cup Brownie Cookies

Drink & Dish: Cafe Au Lait Cupcakes

Crockpot Chicken Enchilada Soup

Subscribe via Email:

Enter your email address:

Save an additional $30 on Blendtec Factory Recertified Blenders + Free Shipping

Featured Here

recipe redux
Certified Yummly Recipes on Yummly.com

Member Of…

FitFluential Is Fitness Found
AZ Bloggers Network
az 150 photo az150_zpsfb093d32.gif

Archives


Image Map

Copyright © 2025 | Innovative Child Theme by The Pixelista | Built on the Genesis Framework


Loading Comments...