• Going Out
    • Phx Restaurants
    • How To Order At Starbucks
  • Running
    • My Running Story
    • Race Calendar
    • Race Recaps & Results
  • Blogroll
  • Bucket List
  • Video

Ari's Menu

Little changes making a big difference.

  • Home
  • Recipes
  • Weight Loss
    • My Story
    • Common Swaps
  • Who’s Who
  • Contact
    • Policies & Disclosure
  • Press

Search Results for: stuffing

Drink & Dish: Cornbread Sausage Stuffing {gluten-free}

November 13, 2013 · by Ari ·

Cornbread Sausage Stuffing: My family fights over the the leftovers from this stuffing every Thanksgiving! Big chunks of cornbread, sweet Italian turkey sausage, plenty of veggies and herbs and the secret ingredient -- TRUFFLE OIL -- make this a true, unforgettable classic!

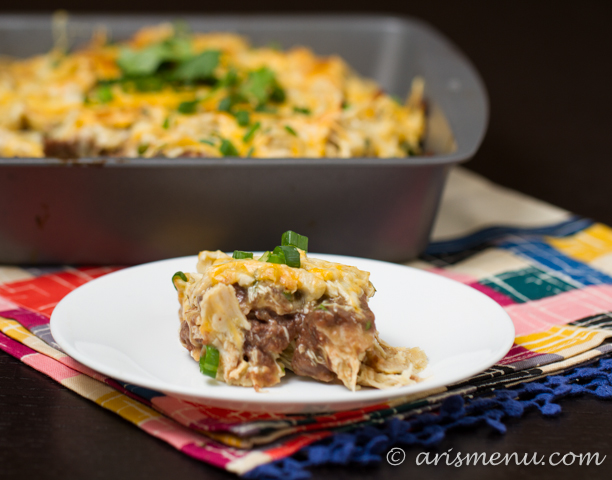
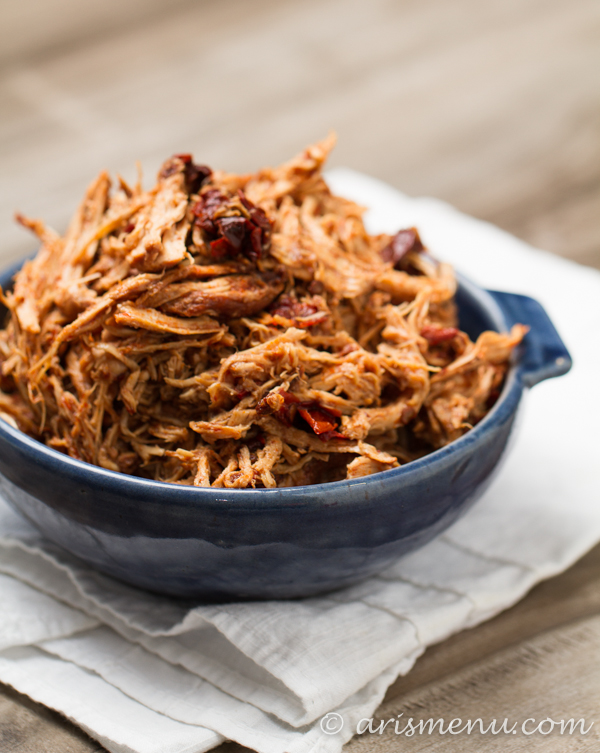
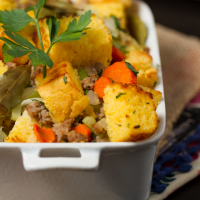
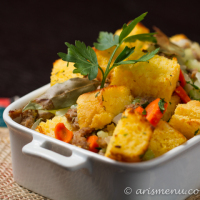
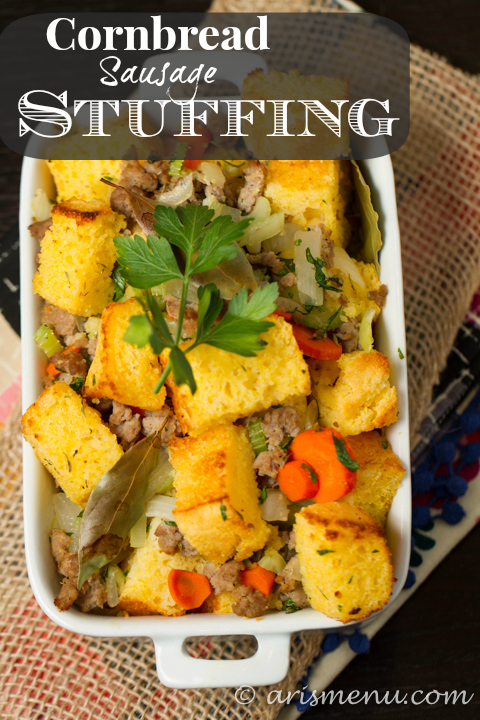
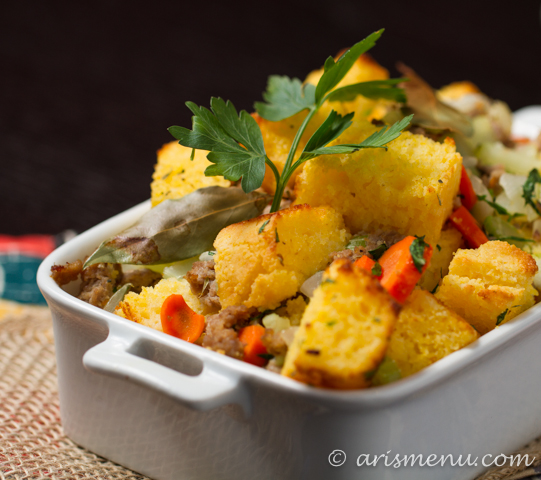
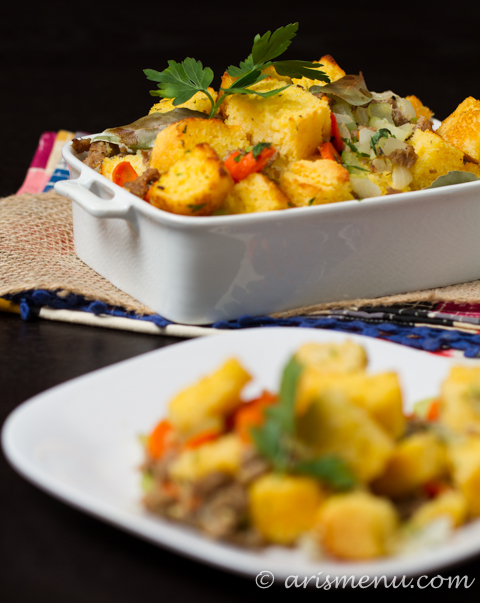
Warm and comforting Thanksgiving cornbread sausage stuffing packed with veggies and plenty of herbs, cooked in truffle oil for an extra-special flavor kick.

Cornbread Sausage Stuffing:  My family fights over the the leftovers from this stuffing every Thanksgiving! Big chunks of cornbread, sweet Italian turkey sausage, plenty of veggies and herbs and the secret ingredient -- TRUFFLE OIL -- make this a true, unforgettable classic!

One of my favorite questions to ask people is “What is your favorite Thanksgiving dish?” It says a lot about you, and what you like. I always thought that my favorites were pretty non traditional. It’s actually a tie, and neither of them are dessert! I know, I know, but trust me, I love the desserts too.

Cornbread Sausage Stuffing:  My family fights over the the leftovers from this stuffing every Thanksgiving! Big chunks of cornbread, sweet Italian turkey sausage, plenty of veggies and herbs and the secret ingredient -- TRUFFLE OIL -- make this a true, unforgettable classic!

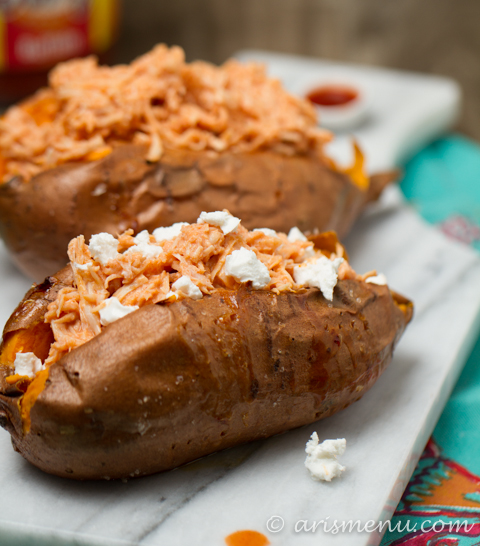
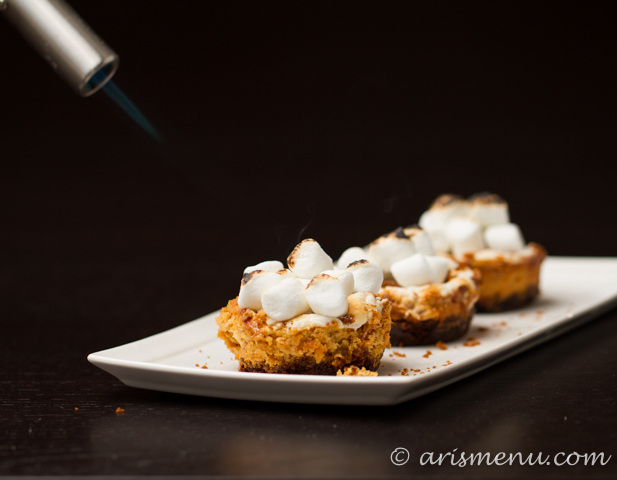
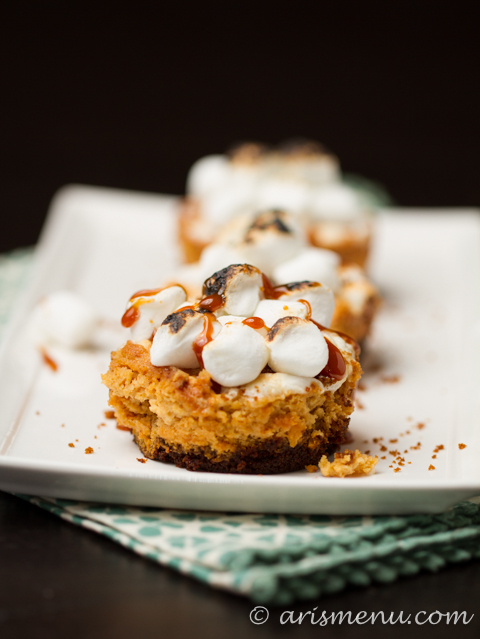
The first is my mom’s sweet potatoes. Mashed up with cinnamon and topped with melty, bubbling marshmallows. Uggghh, I die. I will only eat them that one day (and a few days after for whatever’s left over, obviously) a year. Food can bring up so many feelings and memories, and those sweet potatoes just feel like Thanksgiving.

Cornbread Sausage Stuffing:  My family fights over the the leftovers from this stuffing every Thanksgiving! Big chunks of cornbread, sweet Italian turkey sausage, plenty of veggies and herbs and the secret ingredient -- TRUFFLE OIL -- make this a true, unforgettable classic!

The other will come as no surprise. This stuffing. My stuffing. I was never the biggest fan of stuffing when I was younger, but once I tasted it, I realized exactly what I was missing. Last year was the first time I made my own. Before then? I was a sucker for the boxed stuff. Whatever, it totally tasted delicious at the time, but it is nothing compared to this gem. My family has been asking for this stuffing since last November. It’s become one of my traditions, and something I hope to pass down someday.

Cornbread Sausage Stuffing:  My family fights over the the leftovers from this stuffing every Thanksgiving! Big chunks of cornbread, sweet Italian turkey sausage, plenty of veggies and herbs and the secret ingredient -- TRUFFLE OIL -- make this a true, unforgettable classic!

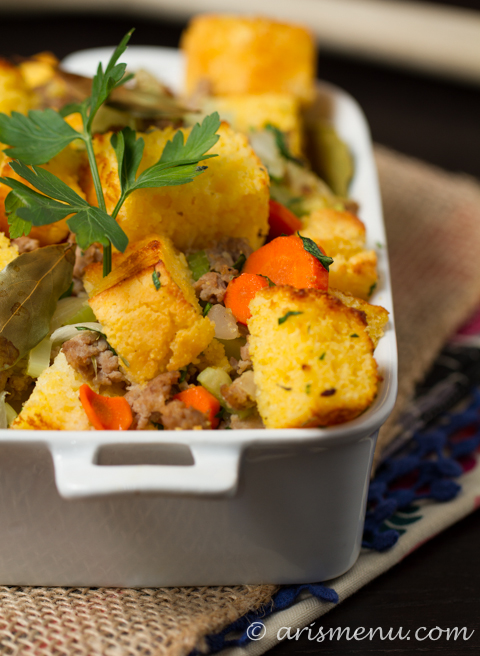
I often get caught up in trying new things and experimenting in the kitchen, but there is something so special about creating lasting family traditions. This stuffing is special enough to me that it has become just that. Soft and tender cornbread with perfectly sauteed veggies cooked up in bold, flavorful truffle oil (<–my secret ingredient, and totally worth the splurge!), along with sweet turkey sausage. It could be a meal on it’s own, or a standout Thanksgiving side dish.

Cornbread Sausage Stuffing:  My family fights over the the leftovers from this stuffing every Thanksgiving! Big chunks of cornbread, sweet Italian turkey sausage, plenty of veggies and herbs and the secret ingredient -- TRUFFLE OIL -- make this a true, unforgettable classic!

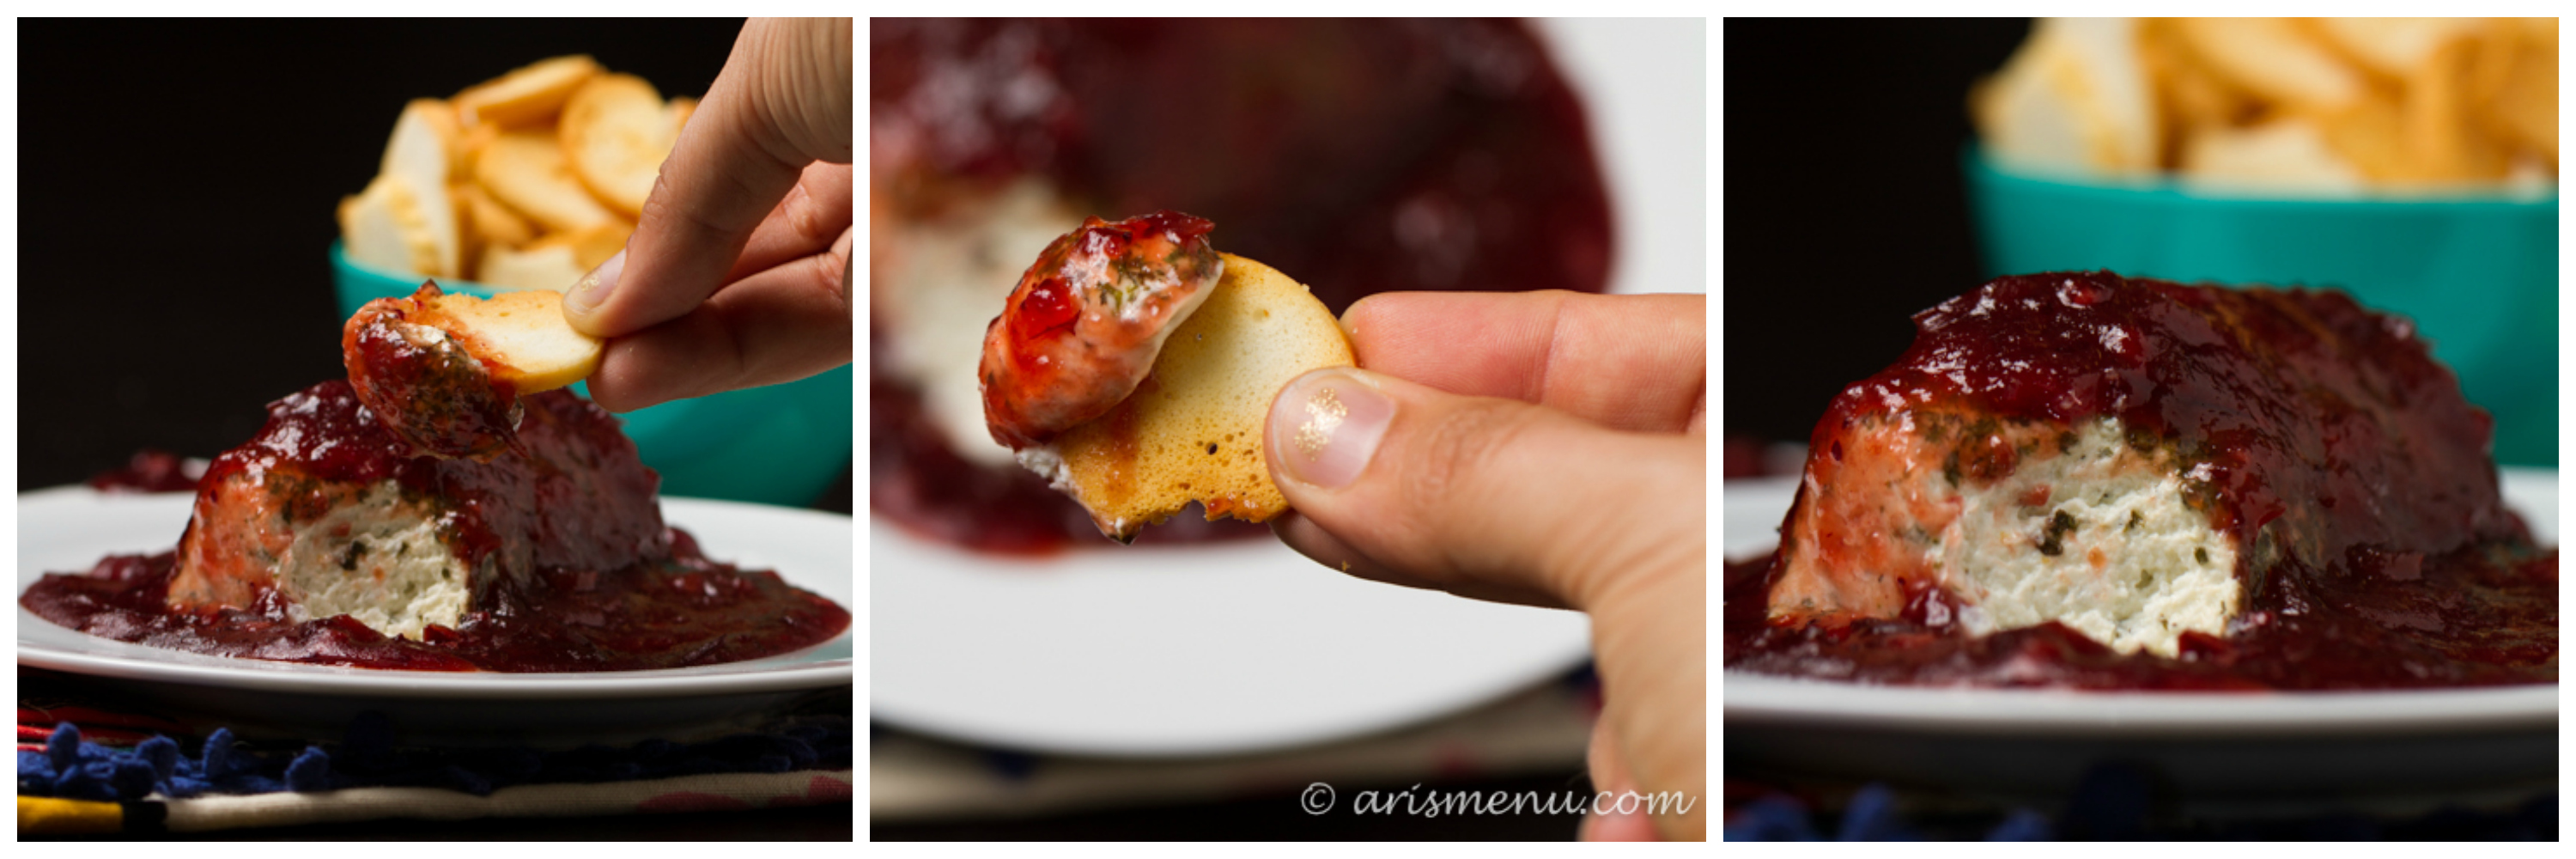
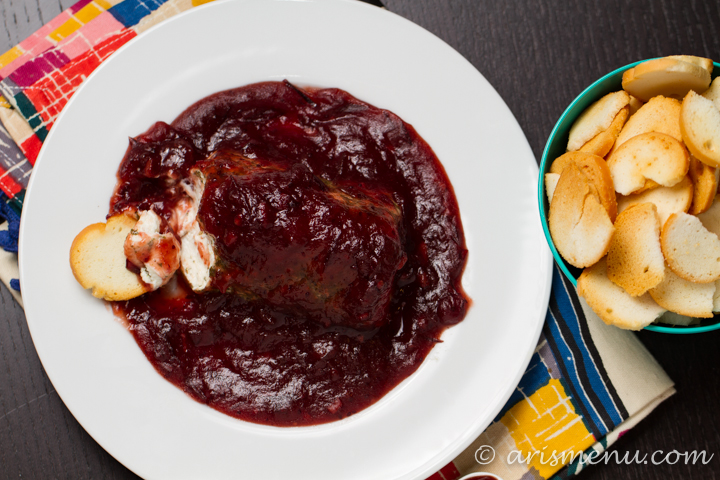
Obviously, Nicole and I couldn’t let November go by without sharing a Thanksgiving Drink & Dish. Nicole makes probably favorite drink I’ve tasted, like ever–a pumpkin pie martini made with homemade pumpkin pie infused vodka (I mean, come on…). And we both share some time saving tips for the big day.


If you’re still deciding on your menu (or what to bring along to friends and family), this dish is simple, easy, and sure to impress!

Cornbread Sausage Stuffing:  My family fights over the the leftovers from this stuffing every Thanksgiving! Big chunks of cornbread, sweet Italian turkey sausage, plenty of veggies and herbs and the secret ingredient -- TRUFFLE OIL -- make this a true, unforgettable classic!

So tell me… What’s your favorite Thanksgiving dish??

Print
Drink & Dish: Cornbread Sausage Stuffing {gluten-free}

Prep Time: 20 minutes

Cook Time: 30 minutes

Total Time: 50 minutes

Yield: 12 as a side dish, 8 as a main course

Drink & Dish: Cornbread Sausage Stuffing {gluten-free}

Warm and comforting Thanksgiving cornbread sausage stuffing packed with veggies and cooked in truffle oil for an extra-special flavor kick.

Ingredients

  • 1 tbsp truffle oil (can sub olive or coconut oil, but it will not taste quite as incredible)
  • 1 lb sweet Italian turkey sausage
  • 1 large onion, chopped
  • 3 carrots, peeled and chopped
  • 6 ribs celery, chopped
  • 4 cloves garlic, finely minced
  • Generous pinch each salt and pepper
  • 6 cups cornbread cut into 1" cubes (I used gluten-free), about 1 8x8 pan prepared
  • Generous pinch fresh thyme, finely chopped
  • 2-3 sage leaves, finely chopped
  • Handful fresh parsley, finely chopped
  • 1-2 cups chicken broth
  • 4-5 bay leaves

Instructions

  1. Preheat oven to 400. Heat truffle oil in a large skillet over medium heat. Cook sausage until browned. Add veggies and garlic. Season with a generous pinch each of salt and pepper. Cook until fragrant and slightly tender, about 10 minutes.
  2. Transfer to a large mixing bowl. Add cornbread and fresh herbs. Gently toss to combine. Transfer to baking dish. Add 1-2 cups chicken broth. 1 cup will yield a crispier stuffing, while more liquid will create a stickier texture closer resembling box mix. Place bay leaves on evenly around the top.
  3. Bake until cornbread begins to brown and edges become crispy, about 10-15 minutes. Again, less time will yield a softer stuffing.
  4. Remove bay leaves and serve. Leftover can be stored in an airtight container in the refrigerator for up to one week.
3.1
https://arismenu.com/drink-dish-cornbread-sausage-stuffing/

Filed Under: Drink & Dish, Entree, Fall, Gluten-free, Holiday & Seasonal, Side Dish, Thanksgiving · Tagged: dairy free, stuffing, truffle oil

Chicken Enchilada Casserole

April 16, 2015 · by Ari ·

Chicken Enchilada Casserole: Easy, cheesy and delicious!

Fast, easy and cheesy chicken enchilada casserole has all your favorite flavors, but no rolling and stuffing–just stack and bake. It doesn’t get much simpler or much more delicious!

Chicken Enchilada Casserole: Easy, cheesy and delicious!

I never realized my Mexican food obsession was even a thing for most of my life. I live in Arizona. Mexican food is basically just food. Not to mention that most Mexican dishes include my favorite food group: CHEESE!

Chicken Enchilada Casserole: Easy, cheesy and delicious!

Did I ever tell you about in my “before” days I would go out to eat and then when I’d get full, I would pick all of the cheese off of my dish and leave the rest? I’m pretty sure it was something like #20 in this article. PS: I laughed out loud for so long. Maybe my favorite BuzzFeed article ever?

Chicken Enchilada Casserole: Easy, cheesy and delicious!

Anyway, I love enchiladas, but every time I make them, the rolling takes me forevvveeerrrrr, and then they never stay, and I just end up eating a mess of enchilada filling rather than actual enchiladas. So this time I took a different approach and stacked it all up. It stayed together perfectly. I don’t know if I will ever make regular enchiladas again.

Chicken Enchilada Casserole: Easy, cheesy and delicious!

This is like you ordered enchiladas, then mixed your whole plate of enchiladas and beans together making it even more awesome, and with practically no work!

Chicken Enchilada Casserole
Recipe Type: Entree
Author: Ari Ziskin
Prep time: 10 mins
Cook time: 20 mins
Total time: 30 mins
Serves: 9-12
Ingredients
  • 1 1/2 pounds chicken breast, cooked and shredded
  • 2 1/2 cups enchilada sauce (I used [url href=”http://arismenu.com/green-chile-enchilada-sauce/” target=”_blank”]this one[/url], but green or red will work)
  • 6 small corn tortillas
  • 1 (14.5 ounce) can fat free re-fried beans, heated
  • 1/2 cup shredded cheese (sharp cheddar, Mexican blend, whatever you like)
  • fresh cilantro, optional
  • thinly sliced green onions, optional
Instructions
  1. Preheat oven to 350. Spray a 9″ square pan with nonstick spray. Set aside.
  2. In a medium bowl combine shredded chicken with 2 cups enchilada sauce. Line the bottom of prepared 9″ pan with 3 tortillas, then add half the beans and half the chicken and enchilada sauce mixture. Repeat with remaining tortillas, beans and chicken. Add remaining 1/2 cup enchilada sauce on top, then top with shredded cheese.
  3. Bake until cheese is bubbly, about 20 minutes. Top with fresh cilantro and green onions if desired. Serve immediately. Leftovers may be refrigerated in an airtight container for 5-7 days.
3.2.2885


Filed Under: Dinner, Entree, Gluten-free, savory · Tagged: casserole, chicken, enchilada casserole recipe, enchiladas, gluten free, gluten free chicken enchiladas, mexican

Crockpot Raspberry Chipotle Chicken

March 2, 2015 · by Ari ·

Crockpot Raspberry Chipotle Chicken: Perfectly tender and juicy shredded chicken with a sweet and spicy kick!

Crockpot raspberry chipotle chicken is the perfect juicy, tender shredded chicken that’s lightly sweet with a spicy kick! Just 3 ingredients and no prep time make it so fast and easy! Great for salads, sandwiches, or a fork.

Crockpot Raspberry Chipotle Chicken: Perfectly tender and juicy shredded chicken with a sweet and spicy kick!

One of my favorite meal prep options is crockpot shredded chicken. Almost every week I make some variety of chicken in the crockpot to bring for lunches, and somehow I’m still not sick of it. Probably because I’m always changing it up and trying new things, but I have to tell you this was one of my favorites.

Crockpot Raspberry Chipotle Chicken: Perfectly tender and juicy shredded chicken with a sweet and spicy kick!

One of my favorite lunch spots is Costa Vita because they have this amaaaaazing raspberry chipotle chicken salad. I love the sweet and spicy combination and raspberry and chipotle just go together like pb&j.

Crockpot Raspberry Chipotle Chicken: Perfectly tender and juicy shredded chicken with a sweet and spicy kick!

This is a great meal prep option because you can use it so many different ways–you don’t just eat the same thing day after day. I suggest making sandwiches, a taco-type salad, and maybe even stuffing a spaghetti squash! Although, I have to admit, I ate the majority with just a fork. 😉

Crockpot Raspberry Chipotle Chicken
Recipe Type: Entree
Author: Ari Ziskin
Prep time: 5 mins
Cook time: 5 hours
Total time: 5 hours 5 mins
Serves: 10-12
Crockpot raspberry chipotle chicken is the perfect juicy, tender shredded chicken that’s lightly sweet with a spicy kick! Great for salads, sandwiches, or a fork!
Ingredients
  • 4 large chicken breasts
  • 1 x 7 ounce can chipotle peppers in adobo sauce
  • 1 cup raspberry jam
Instructions
  1. Layer chicken in the bottom of your slow cooker. Cover with chipotle peppers (and sauce) and raspberry jam. Cook on low for 5 hours. Shred chicken and stir into sauce. Serve immediately or refrigerate in an airtight container for 5-7 days.
3.2.2885


Filed Under: Chicken, Dairy Free, Dinner, Entree, Gluten-free, Lunch, savory, Slow Cooker · Tagged: chicken, chipotle, chipotle in adobo, crockpot, crockpot chicken, dairy free, easy crockpot recipe, easy dinner, gluten free, grain free, raspberry, raspberry chipotle, slow cooker, slow cooker chicken, sweet and spicy chicken

Lasagna Baked Chicken

January 4, 2015 · by Ari ·

Lasagna Baked Chicken: Healthy, easy, delicious and low-carb baked chicken with all the flavor and comfort of classic lasagna!

Easy, healthy, cheesy and delicious lasagna baked chicken breast is the perfect dinner to get your new year started off right! All the taste and comfort of lasagna in a healthy chicken entree that comes together before you know it.

Lasagna Baked Chicken: Healthy, easy, delicious and low-carb baked chicken with all the flavor and comfort of classic lasagna!

If there’s one thing that drives me crazy (okay, there’s probably, like, a zillion…), it’s the idea that healthy eating means you can’t eat your favorite things. Before I was finally successful with my weight loss, I had so many failed attempts because each time I felt like I couldn’t eat anything, and it’s just not true. It’s just about finding ways to make your favorite things fit into your healthy lifestyle, and this chicken does just that!

Lasagna Baked Chicken: Healthy, easy, delicious and low-carb baked chicken with all the flavor and comfort of classic lasagna!

Lasagna has to be the ultimate comfort food. With melty, gooey cheese and pasta you really can’t go wrong, but I honestly have never felt like pasta even adds much to a dish. It is the vehicle for cheese and sauce. I’m happy just eating cheese and sauce. By themselves. With a spoon. But I guess I should eat protein or something too.

Lasagna Baked Chicken: Healthy, easy, delicious and low-carb baked chicken with all the flavor and comfort of classic lasagna!

I love stuffing chicken. It’s one of my favorite, easy ways to make my dinner more fun without having to do much. Chicken on its own can quickly become boring and monotonous, but there are so many fun varieties and flavor combinations you can use to dress it up a little. I just made my favorite lasagna filling, butterflied the chicken, stuffed that cheesy goodness inside, then baked it. Finish it off with a little mozzarella, stick it under the broiler to get brown and bubbly, and top it off with your favorite marinara sauce. Mine came from a bottle because, like I said, I am a totally lazy cook.

Lasagna Baked Chicken: Healthy, easy, delicious and low-carb baked chicken with all the flavor and comfort of classic lasagna!

The result was total cheesy dreaminess, and I literally haven’t stopped thinking about it since.

Lasagna Baked Chicken
Recipe Type: Entree
Author: Ari Ziskin
Prep time: 15 mins
Cook time: 25 mins
Total time: 40 mins
Serves: 40
Easy, healthy, cheesy and delicious lasagna baked chicken breast is the perfect dinner to get your new year started off right! All the taste and comfort of lasagna in a healthy chicken entree that comes together before you know it.
Ingredients
  • 4 large chicken breasts
  • salt and pepper
  • 1 tablespoon olive oil
  • 1/2 cup part skim ricotta cheese
  • 1/2 cup nonfat cottage cheese
  • 1 teaspoon dried or finely chopped fresh oregano
  • 1 teaspoon dried or finely chopped fresh basil
  • 1 cup shredded part skim mozzarella
  • 1 cup marinara sauce (or more if desired)
Instructions
  1. Preheat oven to 350. Season both sides of each chicken breast with salt and pepper. Butterfly each chicken breast then set aside.
  2. To make the filling, combine ricotta cheese, cottage cheese, oregano and basil in a medium bowl. Fill the center of each chicken breast with cheese mixture and fold the top half of the chicken back over on top. Make sure chicken can fold back over completely, and that cheese isn’t spilling out. Depending on the size of your chicken breasts, you may have some cheese mixture left over.
  3. Carefully place filled chicken breasts in a large, rimmed baking dish and lightly drizzle with olive oil. Bake until chicken is completely cooked and juices run clear. This will vary depending on thickness, but I usually start to check around 20 minutes. You do not want to over cook them.
  4. Top with mozzarella cheese and broil until cheese is bubbly, about 2 minutes. Watch closely–it can burn quickly. Plate and top with marinara sauce. Serve immediately. Leftovers may be refrigerated in an airtight container for up to 5 days.
3.2.2885


Filed Under: Chicken, Dinner, Entree, Gluten-free, Low Carb · Tagged: cheese, chicken, cottage cheese, italian, lasagna, ricotta

Pumpkin Cheesecake Bars

November 22, 2014 · by Ari ·

Pumpkin Cheesecake Bars: Ultra silky pumpkin cheesecake with a gingersnap crust. My family's favorite Thanksgiving dessert!

Creamy, silky pumpkin cheesecake bars are my family’s Thanksgiving tradition. All the flavor you love from pumpkin pie in a rich, creamy cheesecake!

Pumpkin Cheesecake Bars: Ultra silky pumpkin cheesecake with a gingersnap crust. My family's favorite Thanksgiving dessert!

Heyyyy! Notice anything different around here? Ari’s Menu got a big makeover, and I couldn’t be more in love with the new look! My old design had been what I wanted at the time, but after a few years, I really felt like I had outgrown it, and there were a lot of new things I wanted. The amazing Julie from White Lights On Wednesday did an absolutely incredible job, and has been so kind and responsive to all of my questions. Even the dumb ones. If you’re in the market for a redesign, I seriously cannot recommend her enough! And if you’re on your phone or on a reader, please come over and look around. It’s so pretty and BRIGHT here now. Like my bright, sparkling personality. 😉

Okay, now let’s talk about food. Five years ago, I had just moved back from college and I had barely begun my cooking adventures. I was inspired by my college roommate/best friend who always created amazing things in the kitchen, and I knew I wanted to contribute a special Thanksgiving dessert.

Pumpkin Cheesecake Bars: Ultra silky pumpkin cheesecake with a gingersnap crust. My family's favorite Thanksgiving dessert!

I made these pumpkin cheesecake bars. Except they were a whole cheesecake. Anyway, the cheesecake was the hit of Thanksgiving, and no one had any idea it was secretly healthier. These days we have up to 20+ people over for Thanksgiving, so I make a big batch of cheesecake bars to make serving easier, but it’s the one tried and true recipe and tradition I’ve had in my family since I began hosting Thanksgiving, and it holds a special place in my heart.

Pumpkin Cheesecake Bars: Ultra silky pumpkin cheesecake with a gingersnap crust. My family's favorite Thanksgiving dessert!

As a food blogger, I am always looking to create new and interesting dishes, so I rarely make the same thing twice, but when The Recipe ReDux asked us to share a food memory, I knew I had to share with you one of my two Thanksgiving traditions. The other is this cornbread sausage stuffing which is also hugely popular in my family. So please join our family tradition, and make these cheesecake bars! Your guests will thank you!

Print
Pumpkin Cheesecake Bars

Prep Time: 20 minutes

Cook Time: 1 hour, 30 minutes

Total Time: 10 hours

Yield: 16-20 servings

Serving Size: 1 bar

Pumpkin Cheesecake Bars

Creamy, silky pumpkin cheesecake bars are my family's Thanksgiving tradition. All the flavor you love from pumpkin pie in a rich, creamy cheesecake!

Ingredients

    For the crust:
  • 12 ounces gingersnap or graham cracker crumbs (I used gluten-free)*
  • 4-5 tablespoons pumpkin butter
  • For the cheesecake:
  • 1 pound fat free cream cheese (2 x 8 ounce packages), at room temperature
  • 1 pound reduced fat cream cheese (2 x 8 ounce packages), at room temperature
  • 1 cup brown sugar
  • 2/3 cup granulated sugar
  • 5 large eggs
  • 1 x 15 ounce can pumpkin puree (or about two cups homemade pumpkin puree)
  • 2 tablespoons bourbon, optional
  • 2 teaspoons vanilla extract
  • 1/4 cup gluten-free baking blend (or white whole wheat flour)
  • 3 teaspoons pumpkin pie spice

Instructions

  1. Preheat oven to 350. Spray a 9x13" pan with nonstick spray. Set aside. In a small bowl, combine gingersnap/graham cracker crumbs and pumpkin butter. Start with 4 tablespoons pumpkin butter and add a fifth if mixture seems too dry. Press crust into prepared baking pan and bake until browned and set, about 7-10 minutes.
  2. In a large bowl or stand mixer, beat cream cheese until fluffy and smooth. Add sugars and beat until combined. Beat in eggs one at a time until just combined, then beat in pumpkin, bourbon (if desired), and vanilla. Beat in baking blend and pumpkin pie spice. Pour over prepared crust and bake until set and center no longer jiggles, about 70-90 minutes.
  3. Cool completely to room temperature then cover and refrigerate for at least 8 hours. Cut into bars to serve. Cheesecake bars will last about 1 week in the refrigerator.

Notes

*I've made these bars with a gingersnap crust and a graham cracker crust, and both ways work great! Choose whichever taste you prefer.

3.1
https://arismenu.com/pumpkin-cheesecake-bars-2/

Filed Under: Brownies & Bars, Cheesecake, Dessert, Fall, Gluten-free, Holiday & Seasonal, Thanksgiving · Tagged: cheesecake, gluten free, gluten free thanksgiving dessert, pumpkin, pumpkin cheesecake, pumpkin gluten free, thanksgiving, thanksgiving dessert

Buffalo Chicken Stuffed Sweet Potatoes

May 26, 2014 · by Ari ·

These buffalo chicken stuffed sweet potatoes are an easy, healthy dinner that pack a powerful punch of flavor! With practically no prep work, they will change your mind on the ease of healthy eating.

Buffalo Chicken Stuffed Sweet Potatoes: Bold, healthy & insanely easy!

Can I just tell you about the moment in my life when I realized I could get the taste of buffalo wings without eating deep friend chicken? I seriously didn’t know for the better portion of my life that you could just buy the sauce at the store and put it on whatever the heck you want. I would venture to call this information life changing.

Buffalo Chicken Stuffed Sweet Potatoes: Bold, healthy & insanely easy!

You see, while I often (read: most of the time) crave buffalo sauce, I practically never crave fried chicken. I know, I know, a lot of people do, but it’s just not my thing. Kinda like I don’t get what the big deal is about mashed potatoes. I mean, I love butter and cream as much as the next girl, but white potatoes are pretty flavorless, and I’d rather just eat the butter on a piece of toast.

Buffalo Chicken Stuffed Sweet Potatoes: Bold, healthy & insanely easy!

I think it’s been pretty clear on this blog that I am all about bold, hit you in the face, stand out in a crowd kind of flavors. I don’t have one of those “sensitive pallets” that enjoys just a hint of spice. I have a heavy hand, and I almost never say things like “The flavors were over powering. I wish it had less spice.”

Buffalo Chicken Stuffed Sweet Potatoes: Bold, healthy & insanely easy!

My other love and probably favorite ingredient ever? SWEET POTATOES. I must have something like 20 sweet potato recipes on here, and I eat them multiple times per week on a regular basis. I love stuffing them with lean protein and bold flavors for a healthy, delicious and FUN dinner option that’s easy to put together any night of the week, and this is definitely one of my favorites!

Print
Buffalo Chicken Stuffed Sweet Potatoes

Prep Time: 5 minutes

Cook Time: 1 hour

Total Time: 1 hour, 5 minutes

Yield: 4 servings

Serving Size: 1 potato

Buffalo Chicken Stuffed Sweet Potatoes

These buffalo chicken stuffed sweet potatoes are an easy, healthy dinner that pack a powerful punch of flavor! With practically no prep work, they will change your mind on the ease of healthy eating.

Ingredients

  • 4 small sweet potatoes
  • 2 tablespoons olive oil
  • coarse sea salt
  • 6 tablespoons buffalo sauce (I recommend Frank's Red Hot)
  • 2 tablespoons nonfat plain Greek yogurt
  • 12 ounces chicken breast, cooked shredded
  • 2 ounces freshly crumbled goat cheese

Instructions

  1. Preheat oven to 400. Use a fork to poke several holes into sweet potatoes. Brush each sweet potato with approx 1/2 tablespoon of olive oil and sprinkle to coat lightly with sea salt. Roast until fork tender (meaning a fork easily slides right into the sweet potato), about 45-60 minutes depending on size of your potatoes.
  2. In a medium bowl, combine chicken, buffalo sauce and yogurt. Slice cooked sweet potatoes down the middle leaving about an inch uncut. Stuff each potato with 1/4 of the buffalo chicken, then top with goat cheese. Serve immediately.

Notes

To reduce cooking time, heat sweet potatoes in the microwave for 2-3 minutes before cooking. This usually reduces my cooking time to about 40 minutes.

3.1
https://arismenu.com/buffalo-chicken-stuffed-sweet-potatoes/


Filed Under: Dinner, Entree, Fall, Gluten-free, Holiday & Seasonal, Lunch, savory ·

2013: My Favorites

December 29, 2013 · by Ari ·

Cornbread Sausage Stuffing: My family fights over the the leftovers from this stuffing every Thanksgiving! Big chunks of cornbread, sweet Italian turkey sausage, plenty of veggies and herbs and the secret ingredient -- TRUFFLE OIL -- make this a true, unforgettable classic!

My turn, my turn!! As it turns out we have some very similar tastes, you and I, but there was a serious lack of dessert in your favorites. Don’t worry, I’ve more than made up for that here. So in no particular order, here are my very favorites (and yes, it was SO hard to choose!) of 2013. Also, unintentionally more than half of them happen to be from Drink & Dish. Must be because working with this girl is always exciting, inspiring, and FUN!

Peanut Butter & Jelly Cheesecake Cups {easily gluten-free-able}

I always get my best ideas for Steve’s birthday dessert. You know what they say about love coming through your food and all that hippy dippy stuff? I totally believe it. These tasted like pure love, and are without a doubt one of my favorite desserts of all time.

Caramel Stuffed Ginger Molasses Cookies {gluten-free + vegan}

I still can’t get over these, and I made them twice this holiday season. Everyone at work kept asking me to make more. I love soft and chewy ginger molasses cookies, and with that gooey piece of caramel on they inside, they are just irresistible (<—an other word I ALWAYS spell wrong).

Inside Out Buckeye Cookies {gluten-free + vegan}

So I have a thing about stuffing cookies. Obviously. This was one of those recipes where I truly loved everything about it–from concept to taste, and I even though they looked beautiful which is a rare occurrence for me.

Cookie Butter Cookie Dough Bars {vegan}

Nicole and I talked for hours about what dessert we would make for after we completed our marathon. She made brownies (duh), and in my cookie butter obsession, I came up with these. They were SO good. I literally couldn’t stay away. Graham cracker crust, cookie butter cookie dough, and salted dark chocolate. It’s the stuff dreams are made of.

Brussels Sprouts with Apple, Bacon & Dates {gluten-free, dairy-free, paleo}

My mom always talks about how these are the best veggies she’s ever eaten. They turned my brussels sprouts hating husband into a believer, and they disappear faster than you can say the title (granted the title is super long). I crave them all the time, and there is nothing like a veggie dish that tastes like comfort food.

Cornbread Sausage Stuffing {gluten-free, dairy-free, easily vegan-able}

This is an other family favorite. I’ve also had friends and readers make this to rave reviews. My brother was so skeptical, but he tried it on Thanksgiving and came up to me specifically to tell me that this made him like stuffing. It’s great as a meal any time of year, or the perfect impressive Thanksgiving side dish.

Jalapeno Popper Hot Dogs {gluten-free}

This is what happens when this girl comes to visit. Our brains work like magic, and the best recipe ideas come out of it. I knew I wanted to create a fancy hot dog, but the rest of the magic I can’t even take credit for. The result was definitely the best hot dog I have ever eaten, and something I made multiple times this summer.

Red, White & Blue Grilled Cheese {gluten-free, vegetarian}

In case you didn’t know, melty cheese actually goes perfectly with blueberries and raspberry jam. I don’t just make this for the 4th of July. It’s one of my favorite easy dinners year round. It might sound kinda strange at first, but just trust me, okay? 😉

Loaded Baked Potato Salad {gluten-free}

I don’t know if this one even needs words. Literally a loaded baked potato meets potato salad, and the result is a side dish that will disappear first at your barbecue or get together. My husband is always requesting this as well as the sweet potato salad that came after it. Totally addicting, and a lot healthier than you would expect!

Cookie Butter Streusel Banana Bread {vegan + easily gluten-free-able}

I resisted the banana bread thing for a long time. I really have no idea why because ever since I made this one, I’ve been literally obsessed. I don’t usually like baked goods with cookie butter or nutella baked inside because I feel like the flavor gets muted, but swirled and in a crunchy streusel topping you get the best of both worlds in this ridiculously soft and tender treat.

Gingerbread Granola {gluten-free + vegan}

I have a granola problem. In fact, this is my second favorite granola from 2013, but I haven’t shared my first favorite with you, so that will have to wait until next year. But this granola is right up there. Gingerbread cookie in granola form…let’s just say it didn’t last long. 😉


So, that’s that. I guess I already asked you what your favorite was, so this time tell me your favorite dish that YOU made this year. Or just tell me more things that I made that you like because that’s fun. We all know how I like to be the center of attention. No shame.

Filed Under: Roundup ·

Honey Roasted Macadamia Butter

December 18, 2013 · by Ari ·

Drippy, sweet and melty honey roasted macadamia butter. All it takes is one ingredient and 5 minutes to create your new favorite spread.

Honey Roasted Macadamia Butter

I’m really not the “DIY” type. As much as I love anything homemade, especially when it’s heartfelt, bringing myself to devote hours of time to a craft that I will inevitably be unhappy with when I finish is just not something I can usually do. I am, however, in total awe of people who can/do. Honestly, anyone that can make things look pretty, or at least not look like a kindergartner made it is totally impressive in my book.

Honey Roasted Macadamia Butter

Most of the time when I see a “Beautiful #DIY Gift Idea #Christmas” on Pinterest, I steer clear, and remind myself that the “5 Minute Up-Do” I found took me more like an hour, and I still wasn’t satisfied with the result.

Honey Roasted Macadamia Butter

But food? That I can do. Even DIY food. I love making people treats, especially things you can’t buy in the store, and I adore stuffing my family’s stockings with homemade nut butters, granola, and puppy chow rather than candy canes filled with m&ms.

Honey Roasted Macadamia Butter

So meet my newest obsession. The best, drippiest nut butter I have ever tastes. Now, if you like a more solid texture, not to worry! Stick this baby in the fridge, and you will get more of a traditional peanut butter texture, but I LOVE the way it drips right off the spoon, and has almost a melted texture. Macadamia nuts are the best nuts for spreads, in my opinion. They always come together super easy and quickly with no food processor starting and stopping. This DIY project will literally take you 5 minutes. 10 if you include dishes, but I wouldn’t know since I don’t actually do those.

Honey Roasted Macadamia Butter

I found my honey roasted macadamia nuts at Trader Joe’s, but I’m sure you could also find them online, or make your own!

Print
Honey Roasted Macadamia Butter

Prep Time: 5 minutes

Total Time: 5 minutes

Yield: approx 1 1/2 cups

Honey Roasted Macadamia Butter

Drippy, sweet and melty honey roasted macadamia butter. All it takes is one ingredient and 5 minutes to create your new favorite spread.

Ingredients

  • 16 oz honey roasted macadamia nuts
  • pinch sea salt, optional

Instructions

  1. Place macadamia nuts in your food processor. Blend until a smooth and creamy butter forms, about 3-5 minutes. Taste and add salt if necessary. Store in an airtight container refrigerated for up to one month, or in a cool, dry place for 2-3 weeks.
3.1
https://arismenu.com/honey-roasted-macadamia-butter/

Filed Under: Dessert, Gluten-free, Holiday & Seasonal, Sauces & Spreads, Snacks · Tagged: dairy free, diy, gluten free, macadamia nuts, nut butter, recipe, spreads

Drink & Dish: Cranberry Goat Cheese Bake

November 24, 2013 · by Ari ·

Warm melty goat cheese topped with sweet and tart cranberry sauce. The perfect easy, flavorful and impressive way to use up those Thanksgiving leftovers.

Cranberry Goat Cheese Bake #glutenfree #vegetarian

It’s officially my favorite week of the year. I’ve made no secret that Thanksgiving is my very favorite holiday, but I am equally in love with the entire weekend that follows. A four day weekend, getting out my menorah, putting up the Christmas tree (I am an equal opportunity celebrator), decorating the house, plenty of shopping for presents, and of course, eating delicious Thanksgiving leftovers all weekend long.

Cranberry Goat Cheese Bake #glutenfree #vegetarian

I love making the usual turkey sandwich, or doing crazy things with leftover stuffing and mashed potatoes, but especially when we have people in from out of town who are going to be hanging around, I like to do something unique, and something that seems a bit more thought out than the usual leftovers fare. Basically, I want to impress people (story of my life–such a people pleaser!), but I’m exhausted from cooking for 3 days straight to prepare for the big day, so I want to do it without actually having to do any work. Good thing I’m creative. 😉

xxCranberry Goat Cheese Bake #glutenfree #vegetarian

For our latest episode of Drink & Dish, Nicole and I show you what to do with some of those Thanksgiving leftovers. We both ended up using cranberry sauce, so make a little extra this year so that you can make Nicole’s awesome Poinsettia Blossom to go with this goat cheese!

This dish could also be served as a Thanksgiving appetizer–in fact, Steve loved it so much that he requested I make it on Thanksgiving day.

Cranberry Goat Cheese Bake #glutenfree #vegetarian

It may seem like a strange combination, but the tangy goat cheese really is the perfect pairing for the sweet cranberry sauce–it’s like a match made in heaven! Together, they are baked just enough for the goat cheese to get soft, but not completely melted–just the right consistency to easily dip your cracker into, but solid enough to hold its form.

Print
Drink & Dish: Cranberry Goat Cheese Bake

Prep Time: 3 minutes

Cook Time: 7 minutes

Total Time: 10 minutes

Yield: 6-8 servings

Drink & Dish: Cranberry Goat Cheese Bake

Warm melty goat cheese topped with sweet and tart cranberry sauce. The perfect easy, flavorful and impressive way to use up those Thanksgiving leftovers.

Ingredients

  • 1 x 4oz log herb goat cheese
  • Approx 1/2 cup cranberry sauce
  • Crackers, chips, or bread for serving (I used gluten-free bagel chips)

Instructions

  1. Preheat oven to 325. Place goat cheese on a heat-safe dish. A rimmed plate (as seen in the photos) works best so that cranberry sauce can spill over goat cheese while staying contained on the plate. Spoon cranberry sauce over goat cheese. You may use more or less--whatever ratio you like, and depending on how much you have leftover.
  2. Bake until softened, but not melted, about 7-10 minutes. Serve immediately with crackers, chips or bread of your choosing. Best eaten the same day, but leftovers may be refrigerated in an airtight container and reheated for up to 5 days.

Notes

If using a jellied cranberry sauce, whisk it up first to make it easier to pour onto the goat cheese.

3.1
https://arismenu.com/drink-dish-cranberry-goat-cheese-bake/

Psssst…still figuring out your Thanksgiving menu? This infographic is amaaaazing–a must see for anyone who loves cooking, entertaining or Thanksgiving!

Filed Under: Appetizers, Drink & Dish, Fall, Gluten-free, Holiday & Seasonal, Sauces & Spreads, savory, Side Dish, Vegetarian, Winter · Tagged: cranberry sauce, goat cheese, recipe, thanksgiving

Loaded Sweet Potato Cheesecake Cups

October 27, 2013 · by Ari ·

Individual sweet potato cheesecake cups with a gluten-free gingersnap crust, topped with bruleed marshmallows and drizzled with salted caramel sauce.

Loaded Sweet Potato Cheesecake Cups #glutenfree

Can you believe it’s already time to start thinking about Thanksgiving? I think I might even like Thanksgiving more than Christmas. Maybe it’s because I get to host, maybe because it’s the one day of the year where my entire family gets together, or maybe it’s because of the tradition I enforce every year (despite the whining from the less emotional types) of going around the table before dinner and everyone saying what they’re thankful for. I usually cry. I know that’s shocking.

Loaded Sweet Potato Cheesecake Cups #glutenfree

I feel like it’s also the sense of tradition. It takes a long time to set family traditions, and especially with my ADD cooking personality, it’s difficult to find things that I love enough to make them my traditions. There are a few things we never budge on–Steve’s mom makes the deviled eggs, and my mom makes the sweet potatoes.

Loaded Sweet Potato Cheesecake Cups #glutenfree

Ever since I was a little girl, my mom has made my grandma’s recipe for sweet potato casserole–you know, with the marshmallows on top all browned and crispy? It’s heaven. I have two favorite Thanksgiving dishes. The first is stuffing, and the second–those sweet potatoes. I refuse to make them myself. There is no way I could ever make them taste as delicious as my mom.

Loaded Sweet Potato Cheesecake Cups #glutenfree

So instead, I made cheesecakes. Delicious little individual cheesecakes that take all the best parts of sweet potato casserole + all the best parts of cheesecake and tie them together in a perfect little bow. It all starts with a gingersnap crust (as all fall flavored cheesecakes should) that sits below the sweet potato cheesecake, then topped with brulee’d (or broiled–even better, but a little tricky) marshmallows, then finished off with fluer de sel caramel sauce. Perfection.

Loaded Sweet Potato Cheesecake Cups #glutenfree

I mean, that may not be how you’re supposed to use a brulee torch…

Now let me give you some advice. A little something I learned during this process. DO NOT top the cheesecakes with marshmallows in the muffin tins. They will be almost impossible to get out, and cleaning your muffin tin will be a literal nightmare. I mean, I still got mine out, and I most definitely still ate them (they were just too good to turn down), but it was a huge ordeal. What you want to do is, just before serving, either place the cooked and cooled cheesecakes on a cookie sheet, top with marshmallows and broil for a few moments until they brown, or use a brulee torch. They will get puffier, meltier, and a little messier if you broil them, but that is my preference. The brulee torch is a little cleaner, but it’s not something everyone has, so the choice is yours. Or you can always do both–broil, then (add more marshmallows and ) brulee for the ultimate marshmallow experience. 😉

Print
Loaded Sweet Potato Cheesecake Cups

Prep Time: 10 minutes

Cook Time: 30 minutes

Total Time: 5 hours, 40 minutes

Yield: 12 cups

Serving Size: 1 cup

Loaded Sweet Potato Cheesecake Cups

Individual sweet potato cheesecake cups with a gluten-free gingersnap crust, topped with bruleed marshmallows and drizzled with salted caramel sauce.

Ingredients

    For the gingersnap crust:
  • 1 cup crushed gingersnap crumbs (I used gluten-free)
  • 1 1/2-2 tbsp coconut oil, melted (start with 1 1/2, and add a little extra if it needs it--it depends on the brand of gingersnap and how much oil is already in the cookie)
  • For the cheesecake:
  • 1 lb reduced fat cream cheese, at room temperature
  • 1/2 cup sweet potato puree*
  • 1 tbsp bourbon, optional
  • 2/3 cup brown sugar
  • 2 eggs
  • 1 tsp ground cinnamon
  • 1 tsp vanilla extract
  • For topping:
  • Approx 1 cup mini marshmallows
  • Salted caramel sauce (I used TJ's fluer de sel caramel)

Instructions

  1. Preheat oven to 350. Spray a standard muffin tin with nonstick spray. Set aside.
  2. To make the crust, combine gingersnap crumbs and coconut oil in a medium bowl. Place approx 1 tablespoon of crust into each muffin tin. Press down with your fingers, the back of your spoon, or a shot glass. Bake until set, about 7-10 minutes. Cool on a wire rack while you prepare the filling.
  3. To make the cheesecake, beat cream cheese, sweet puree, bourbon and brown sugar together in a large bowl or stand mixer. Add eggs one at a time, mixing until combined. Beat in vanilla and cinnamon.
  4. Evenly divide the cheesecake batter between your 12 muffin tins.
  5. Bake until lightly browned and just set, about 15 minutes. Turn the oven off and crack the door. Allow cheesecakes to sit in opened oven for an additional 15 minutes.
  6. Cool completely on a wire rack, then refrigerate until fully chilled, about 3-4 hours.
  7. To serve, remove cheesecakes from muffin tin and place on a large cookie sheet. Top each cheesecake cup with a few marshmallows. Either broil until browned, about 3-5 minutes, or brulee using a brulee torch until marshmallows brown. Drizzle with warm salted caramel sauce.
  8. Store remaining cups (without marshmallows or sauce) refrigerated in an airtight container for up to one week.

Notes

*To make sweet potato puree, simple roast sweet potato(es) at 400 until tender, about 40-60 minutes depending on size of the sweet potato. I often do this ahead of time in a large batch.

3.1
https://arismenu.com/loaded-sweet-potato-cheesecake-cups/

Filed Under: Cheesecake, Cupcakes, Dessert, Gluten-free, Holiday & Seasonal · Tagged: cheesecake, dessert, gluten free, recipe, sweet potato, thanksgiving

Drink & Dish: Orange Creamsicle Cookies

July 14, 2013 · by Ari ·

Orange Creamsicle Cookies

When I was a little girl, my brother’s mom (yeah, my family is hard to explain…she’s not my mom, or my step mom…) always kept the creamsicle ice cream in the house. You know, the swirl between the orange sorbet, and vanilla ice cream? The one that is 100x superior to just the bar with the ice cream on the inside? She always had it, and I always finished it. She probably never got more than a bowl full, and I didn’t even live there.

Orange Creamsicle Cookies

There is something so refreshing about the bright, citrusy, orange flavor against the smooth and creamy vanilla that is just about perfect in every way. Great on their own, better together.

Orange Creamsicle Cookies

I’m a little obsessed with stuffing cookies. I mean, I love a good chocolate chip cookie, but it is almost always better if all of the chocolate (or white chocolate as the case may be) is contained to the center, so that when you bite into the cookies you have the same experience as, say, a jelly-filled donut. And if you don’ know it’s in there, you get an AWESOME SURPRISE!!

creamsiclecookies-13

These creamsicle cookies are dangerously addictive. The cookie is soft and chewy, and the white chocolate filling stays perfectly creamy, even after the cookies have cooled. In fact, these are a rare cookie case when they taste BETTER after cooling completely. They come out slightly underdone, and need about a full hour after that to set, and cool completely. I mean, I was impatient, and I still loved them right out of the oven, but it wasn’t until I had one the next day that I fell deeply, deeply in love. In fact, the second batch didn’t even make it past the filming day. They were that good.

Orange Creamsicle Cookies

Cookie stuffing can be one of those things that no matter how well you try to describe it, it’s better just to see it in action, so Nicole and I are bringing you an awesome summer episode of drink and dish! Be sure to check out her recipe for her delicious rum punch!

Print
Orange Creamsicle Cookies

Prep Time: 40 minutes

Cook Time: 10 minutes

Total Time: 50 minutes

Yield: 12-16 cookies

Serving Size: 2 cookies

Orange Creamsicle Cookies

Ingredients

  • 1 1/4 cups white whole wheat flour
  • 1/2 tsp baking powder
  • dash salt
  • 1/2 cup sugar
  • Zest of one orange
  • 1/2 cup reduced fat cream cheese, softened
  • 1 tbsp fresh orange juice
  • 1 large egg white
  • 4 oz good quality white chocolate squares or chopped into large chunks

Instructions

  1. In a medium bowl, whisk together flour, baking powder and salt. Set aside.
  2. In a large bowl mix together sugar and orange zest. Then beat in cream cheese, egg white, and orange juice until combined. Slowly, beat in dry ingredients until combined, scraping down sides of the bowl as necessary. Refrigerate dough for 30-60 minutes.
  3. Preheat oven to 350. Roll cookies into 1? balls, then stuff with a white chocolate square. Re-roll into 1? ball, making sure all the white chocolate is covered. Repeat with remaining dough.
  4. Bake for 9-11 minutes until golden. Cool completely on baking sheet. Store in a loosely covered container for 5-7 days.
3.1
https://arismenu.com/drink-dish-orange-creamsicle-cookies/

Filed Under: Cookies, Dessert, Drink & Dish, Holiday & Seasonal · Tagged: baking, cookies, creamsicle, drink and dish, orange, recipe, summer, video, white chocolate

Cheuvront

September 24, 2012 · by Ari ·

Friday night I went out with some of my favorite AZ Blogger ladies to Cheuvront for restaurant week.

Arizona restaurant week is one of my very favorite things! When I was growing up, we didn’t have a huge restaurant scene, but ever since I moved back after college, it seems like new, indie restaurants are popping up like crazy! Or maybe I’m just finally starting to get into the scene? Either way, there are lots of amazing options for people who love food in this city, and I (obviously) really, really love food. Each restaurant has a special restaurant week menu with a set price and a few options for each course–you can choose to order off this menu, or stick to the regular menu.

This was my first time at Cheuvront, but I was super excited as soon as I looked at the menu. I had a really tough time making up my mind because everything looked amazing, but the one thing that was easy to decide was the first course. Goat cheese is one of those items I always immediately scan a menu for, and then I usually choose what I order by which options come with it. Obviously, I started with the goat cheese salad.

It was delicious! Fresh greens, the perfect amount of slightly sweet champagne vinaigrette, and of course the star of the plate–the fried goat cheese! For the second course, everything looked good and I had a hard time deciding, but ultimately went with the half roasted chicken because it came with cranberry apple stuffing.

That stuffing!!! I just kept digging underneath the chicken to try to get more of it out. It was probably my favorite thing I ate all night. The chicken was great too–perfectly cooked and tender. I asked the waiter what his favorite dessert option was and he pointed me towards the chocolate bouchon which is a small, lava-like chocolate cake that was served with dulce de leche ice cream.

Okay, maybe this was my favorite thing I ate all night. The chocolate bouchon had a slightly crisp outside, but the entire inside was gooey, like a half baked brownie, and it paired perfectly with the ice cream which was aaaaaamazing.

I absolutely loved Cheuvront, and will definitely be returning! It was also so great to spend time with some of my favorite ladies, and meet a couple of new ones!

Remy, Emily, me, Megan, Robin, Nicole & Jenn

Thanks for an awesome evening ladies!! Can’t wait to do it again soon!

Filed Under: Uncategorized · Tagged: az bloggers, cheuvront, food, phoenix, restaurant

Next Page »
Image Map

Popular Posts

Tart Cherry Margaritas: The perfect, refreshing margarita--lightly sweet with a punch of tequila

Tart Cherry Margaritas

90+ Healthy Recipes for Breakfast, Lunch, Dinner & Dessert

90+ Healthy Recipes for Breakfast, Lunch, Dinner & Dessert

The Ultimate Peanut Butter Cup Brownie Cookies: Rich, fudgy, brownie-like chocolate cookies stuffed with melty peanut butter cups!

Ultimate Peanut Butter Cup Brownie Cookies

Drink & Dish: Cafe Au Lait Cupcakes

Crockpot Chicken Enchilada Soup

Subscribe via Email:

Enter your email address:

Save an additional $30 on Blendtec Factory Recertified Blenders + Free Shipping

Featured Here

recipe redux
Certified Yummly Recipes on Yummly.com

Member Of…

FitFluential Is Fitness Found
AZ Bloggers Network
az 150 photo az150_zpsfb093d32.gif

Archives


Image Map

Copyright © 2025 | Innovative Child Theme by The Pixelista | Built on the Genesis Framework


Loading Comments...