• Going Out
    • Phx Restaurants
    • How To Order At Starbucks
  • Running
    • My Running Story
    • Race Calendar
    • Race Recaps & Results
  • Blogroll
  • Bucket List
  • Video

Ari's Menu

Little changes making a big difference.

  • Home
  • Recipes
  • Weight Loss
    • My Story
    • Common Swaps
  • Who’s Who
  • Contact
    • Policies & Disclosure
  • Press

Spicy BBQ Chicken Marinade

August 22, 2013 · by Ari ·

Spicy BBQ Chicken Marinade

Hello from Oregon! I know, I know, I just got back from Oregon like 3 weeks ago, but I can’t stay away. I actually contemplated staying the 3 weeks in between for a hot minute, but I came right back to starting a new job and there was no way I could just take the first 3 weeks off, so I sucked it up, spent the last 3 weeks hating everything about Phoenix in the summer, and bought a plane ticket back to my favorite place.

Spicy BBQ Chicken Marinade

I’ve actually been pretty quiet about the fact that I am running Hood to Coast. Mostly because I had no idea how my training would go. I started running again in May beginning with literally 1 mile at a time. Actually, that’s a lie. I was allowed to run (shuffle) for 10 minutes, and I was so out of running shape that I believe my first time I only got to .87. It’s been a very slow build up in mileage from there with plenty of obstacles along the way, but it is happening. This weekend I will run/walk/crawl my total of *gulp* 20 miles over 3 legs from the top of Mount Hood to the gorgeous Oregon coast. I can’t think of a more beautiful location to run. Not to mention I get to be with an amazing group of people.

Spicy BBQ Chicken Marinade

Okay, so let’s talk about chicken. We eat a lot of chicken in my house. My husband is definitely a “meat guy”. When I try to tell him a portobello mushroom can be a burger, he raises an eyebrow in judgement. He likes his dinners to be meat with a side of meat, and since chicken is an easy, healthy option, we eat a lot of it.

Spicy BBQ Chicken Marinade

I actually, can’t even really take credit for this recipe. While I was gone in Oregon the last time, I’m pretty sure Steve lived off grilled chicken, pork chops and Chipotle. When he came up to visit at the end of my time in Portland, we were grilling with friends, and he couldn’t wait to share his latest marinade secret.

Spicy BBQ Chicken Marinade

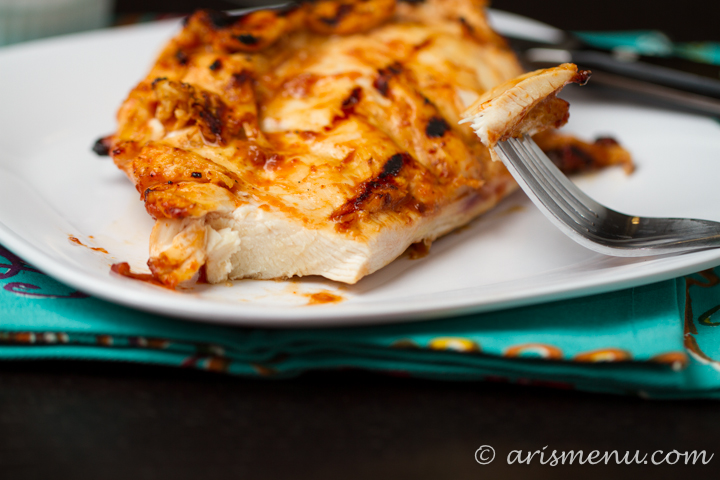
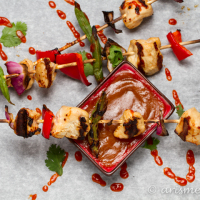
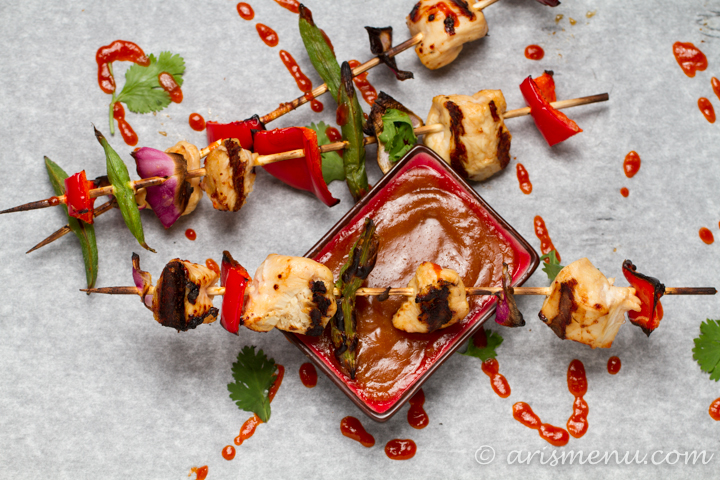
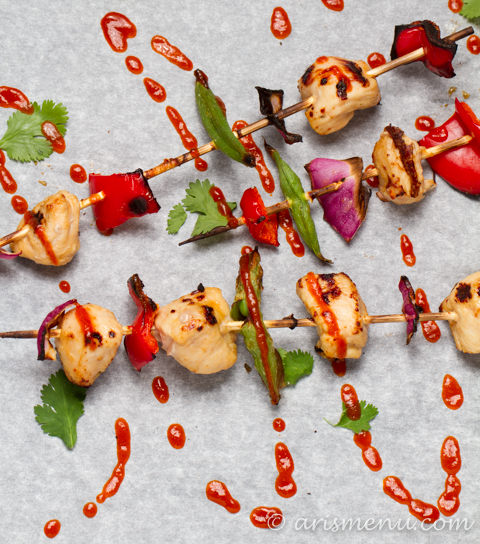
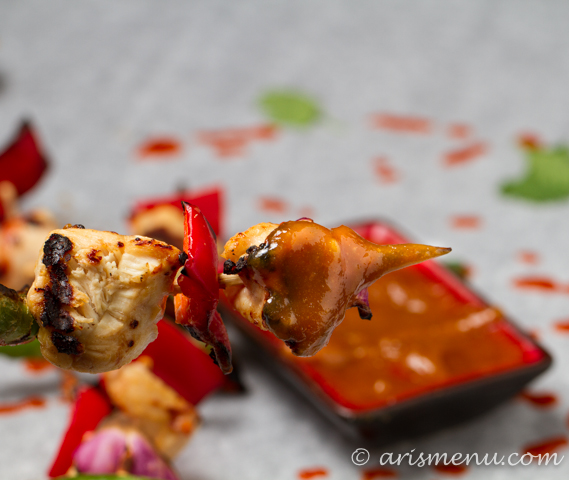
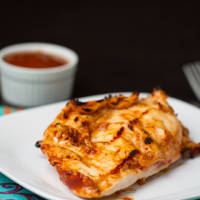
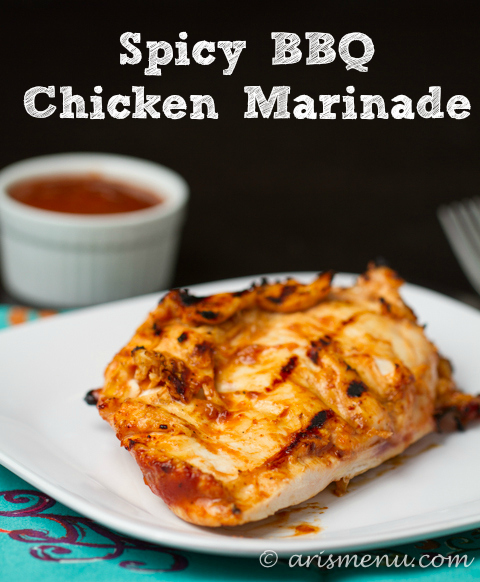
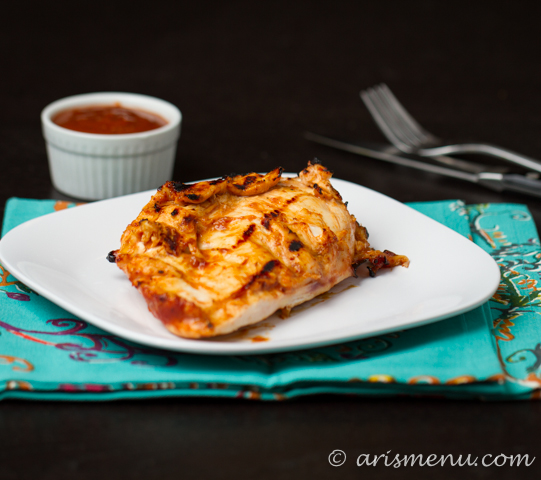
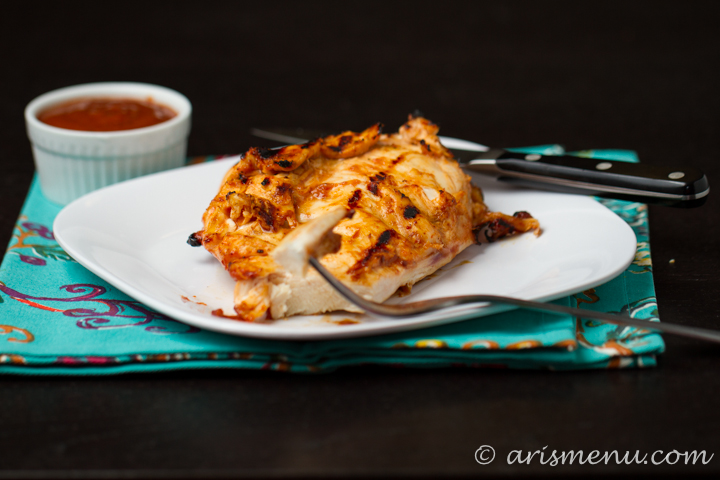
Ummm, it was AWESOME. Way to show up my cooking skills. Thanks, Steve. But really, it was. It’s so simple with only 3 ingredients, but it just works, and it creates the most flavorful, juicy chicken you will ever taste. We didn’t do a thing with the chicken in these photos other than grill and marinate, and they were absolute perfection. Dinner doesn’t get much easier than tossing some chicken on the grill and cooking up some veggies to go along side. You will love how this simple marinade transforms chicken from a boring dinner to something you will want to make again and again!

Print
Spicy BBQ Chicken Marinade

Prep Time: 5 minutes

Cook Time: 8 minutes

Total Time: 1 hour, 15 minutes

Yield: 2 servings

Serving Size: 1 6-8oz chicken breast

Spicy BBQ Chicken Marinade

Ingredients

  • 2 6-8 oz chicken breasts
  • 1 1/2 cups low sugar barbecue sauce
  • 1 tbsp dijon mustard
  • 1 tsp Sriracha (use less if you don't like a lot of spice)

Instructions

  1. Place all ingredients in a gallon freezer bag. Seal and lightly shake to coat.Refrigerate for 1 hour or up to 1 day.
  2. Grill chicken over medium heat until cooked throughout, about 3-4 minutes per side.
3.1
https://arismenu.com/spicy-bbq-chicken-marinade/

Filed Under: Entree, Gluten-free · Tagged: barbecue, bbq, chicken, chicken marinade, dairy free, dinner, gluten free, grain free, grilling, marinade, recipe, sriracha

Pesto Pizza {with roasted red pepper, tomato and roasted corn}

August 21, 2013 · by Ari ·

Pesto Pizza with roasted red pepper, tomato and roasted corn

If I had to choose one food to eat for the rest of my life and cilantro didn’t count, I would probably choose pizza. Goat cheese is right up there too, but I would just put the goat cheese ON the pizza. In fact, I kind of can’t believe I didn’t put it onĀ this pizza. You could though. It would be delicious.

Pesto Pizza with roasted red pepper, tomato and roasted corn

I mean, you really can’t go wrong with carbs and cheese. My two favorite food groups. Add in some homemade ricotta pesto, and you’ve got yourself a ridiculously easy and impressive homemade pizza for any day of the week!

Pesto Pizza with roasted red pepper, tomato and roasted corn

The pesto and the corn are without a doubt my favorite part. I loved the pesto on it’s own, and on a pizza it got EVEN BETTER. Plus, I looooove roasted corn, especially in the summer. I seek it out on menus when I go out to eat, and put it in almost everything I make at home. Sweet and crisp–it takes almost any dish to the next level!

Pesto Pizza with roasted red pepper, tomato and roasted corn

Print
Pesto Pizza {with roasted red pepper, tomato and roasted corn}

Prep Time: 10 minutes

Cook Time: 30 minutes

Total Time: 40 minutes

Yield: 3-4 servings

Pesto Pizza {with roasted red pepper, tomato and roasted corn}

Ingredients

  • 1 lb whole wheat pizza dough (I used Trader Joe's brand), at room temperature
  • 1-2 tbsp cornmeal
  • 1 batch ricotta pesto
  • 6-8oz freshly shredded part skim mozzarella
  • 1 red bell pepper, roasted and chopped
  • kernels from 1 ear roasted corn
  • 2 roma tomatoes, sliced
  • heavy pinch oregano
  • pinch pepper

Instructions

  1. Preheat oven to 450. If using a pizza stone, leave it in the oven for 30 minutes. Sprinkle cornmeal over a sheet of parchment paper. Place dough on parchment paper and roll into desired shape. Alternately, use your hands to stretch it out into desired shape, then place on parchment paper.Transfer to pizza stone or baking sheet and bake for 10 minutes.
  2. Remove from oven and evenly spread pesto over the pizza. Top with cheese, corn and sliced tomatoes. Sprinkle oregano and pepper on top.
  3. Bake until crust is cooked throughout and cheese is bubbling, about an other 15-20 minutes. Let stand for 5 minutes, then slice and serve.
3.1
https://arismenu.com/pesto-pizza/

Filed Under: Entree, Holiday & Seasonal, pizza, Vegetarian · Tagged: corn, dinner, lunch, pesto, pesto pizza, pizza, recipe, ricotta pesto, vegetarian, whole grain pizza

Drink & Dish: Restaurant-style Watermelon Margaritas

August 19, 2013 · by Ari ·


Restaurant Style Watermelon Margarita

I always try to spell watermelon with two Ls. Doesn’t the word mellon have two Ls? Shouldn’t watermel(l)on?? Maybe I just want to find an excuse for my terrible spelling. It’s true. You don’t even need to know how to spell these days. A red squiggly line will do it all for you, and my brain has gotten lazy. I can literally feel myself becoming less intelligent.

Restaurant-style Watermelon Margaritas

I’ve actually learned a lot about how many words I used to spell incorrectly since I started this blog. I always thought avocado was spelled avacado. That’s how it sounds in my head. I also get really confused because every time I type the word fudgy I still get a red squiggly line. So then I try fudgey which is also wrong and looks worse, so I’ll take it my computer has never eaten a delicious brownie, because if it had, it would totally know fudgy is a word.

Restaurant-style Watermelon Margaritas

Good lord, I need a margarita.Ā Specifically the best, thickest, most flavorful margarita I have ever tasted.Ā And trust me, I would never joke, or exaggerate about my margaritas. They are serious business, and these are the best of the best. The secret? Soaking the watermelon in the alcohol and freezing overnight. I had to get out that little push down stick for my vitamix to get everything to blend together. Restaurant-style Watermelon Margaritas

It’s easy for a frozen margarita to taste watered down and flavorless. In fact, I usually don’t order them frozen for this very reason. This margarita contains NO ICE. Simply watermelon, tequila, orange liquor, lime and agave. No overly sweet sour mix, no extra water–just real, bold ingredients. The watermelon flavor is out-of-this-world-good. It tastes fresh, natural, and like biting in to a cold, juicy watermelon. I simply cannot get these babies out of my head!

Restaurant-style Watermelon Margaritas

For our Labor Day episode of Drink & Dish, Nicole and I pulled a Freaky Friday and switched places–I made the drink, and she made the dish: a loaded potato chip dipĀ that is to die for! Crunchy potato chips in a cheesy, creamy dip with all sorts of flavors and textures working together–it is a must try! Check out this latest episode for all the details!

Print
Drink & Dish: Restaurant-style Watermelon Margarita

Prep Time: 12 hours, 5 minutes

Total Time: 12 hours, 5 minutes

Yield: 2 extra-large or 3 medium margaritas

Drink & Dish: Restaurant-style Watermelon Margarita

Ingredients

    For freezing:
  • 1/2 medium watermelon, chopped into 1" cubes
  • 1/2 cup tequila
  • 1/4 cup orange liqueur (triple sec, grand marnier, etc.)
  • For blending:
  • 2 shots tequila
  • 1 shot orange liqueur
  • juice of 1 lime
  • 1 tsp agave
  • For serving:
  • coarse salt
  • extra lime wedges

Instructions

  1. Place chopped watermelon in a large, freezer-safe container. Poor tequila and orange liqueur evenly over chopped watermelon. Cover and freeze for 12 hours or overnight.
  2. Transfer frozen watermelon and any liquid remains from your alcohol to a high-quality blender. Add remaining ingredients and blend until smooth. If mixture is still too thick, slowly add a little more alcohol until you've reached your desired consistency.
  3. Run a lime wedge around the rim of each glass. Place salt on a small, flat plat and press the top of each glass into the salt. Fill each glass with frozen margaritas and serve immediately.

Notes

You may freeze your watermelon up to 3 days if you wish to prepare ahead of time.

If all of the frozen watermelon does not fit into your blender, start with 1 shot of tequila and 1/2 short of orange liqueur and slowly add from there. All blenders and watermelons are different, so start slowly with the alcohol and add as you go.

3.1
https://arismenu.com/drink-dish-restaurant-style-watermelon-margaritas-2/

Filed Under: Drink & Dish, Drinks, Gluten-free, Holiday & Seasonal, Vegan · Tagged: drink, drink and dish, margarita, recipe, summer, tequila, watermelon

Ricotta Pesto

August 15, 2013 · by Ari ·

Ricotta Pesto

Ever since I was little and my dad used to take me out for Italian food a minimum of two nights per week, I have been obsessed with pesto sauce. Sure, during my teens and early 20’s I was always ordering whatever came with alfredo sauce, but my dad’s a real good sharer, and he would always give me a little plate of his pesto sauce. I considered this the “healthy” sauce because it was green and there was no cream.

Ricotta Pesto

Well, pesto sauce although loaded with healthy fats from the olive oil and pine nuts, is still incredibly calorie dense. Especially if you’re me and you like a side of pasta with your sauce. It’s funny that adding extra cheese actually makes this sauce lower in calories and fat. I can’t argue that it’s necessarily “healthier” than traditional pesto, but it makes me feel a little better about the whole thing. šŸ˜‰

Ricotta Pesto

Not to mention it is ridiculously good. In fact, I think I even like it more than a traditional pesto. The ricotta cheese makes it thick and creamy–perfect for lasagna, calzones or pizza (coming soon…). It’s great with pasta too, or just as a dipping sauce for veggies. Or, you know, a spoon. It’s ridiculously easy to make and comes together in about 3 minutes flat. Yes,Ā 3 minutes. Of course depending on how quick and nimble your food processor is, but it makes creating a dish with it a total breeze!

Print
Ricotta Pesto

Prep Time: 5 minutes

Total Time: 5 minutes

Yield: approx 1 cup

Ricotta Pesto

Ingredients

  • 2 cups packed fresh basil
  • 2 cloves garlic
  • 1/2 cup pine nuts
  • 1/2 cup freshly grated parmesan cheese
  • 1/3 cup low fat (or part skim) ricotta cheese
  • 1/3 cup olive oil

Instructions

  1. Place basil, garlic, pine nuts, and cheeses in food processor and blend. Slowly, stream in olive oil until everything comes together to form a thick sauce. If sauce is too thick for your taste, stream in a little more olive oil. Store in an airtight container for 3-5 days.

Notes

Lightly adapted from Rachael Ray

3.1
https://arismenu.com/ricotta-pesto/

Filed Under: Gluten-free, Sauces & Spreads · Tagged: basil, cheese, gluten free, italian, pesto, recipe, ricotta

Lemon Rosemary Grilled Artichokes

August 14, 2013 · by Ari ·

Lemon Rosemary Grilled Artichokes #vegan #glutenfree

I took 5 pictures of artichokes and they all look the same. Forgive me?

Lemon Rosemary Grilled Artichokes #vegan #glutenfree

Actually, I took more like 20 pictures of artichokes which is surprisingly low for me. Usually I take close to 40 photos per shoot until I’m either 100% positive I got the shot I wanted, or I give in to frustration and call it quits, decide I hate photography and I am going to delete my blog. Sometimes I’m a little dramatic.

Lemon Rosemary Grilled Artichokes #vegan #glutenfree

And actually, they don’t all lookĀ exactlyĀ the same. I moved, like, an inch to the right which obviously makes it a completely different photo. Then I just really liked them all, and I couldn’t choose. Usually I show them all to Steve over and over and over until he tells me which one(s) to delete, but he was boycotting. So that’s what you get. Five pictures of artichokes that all look extremely similar.

Lemon Rosemary Grilled Artichokes #vegan #glutenfree

Grilled artichokes. Uuugghh…you guys. They are THE BEST. I could eat a whole grilled artichoke for dinner and be totally content. They are huge, filling, healthy, and they force you to eat slow and enjoy the experience. They are not an impatient food, which makes it a little strange that I enjoy them so much, because we all know I am an impatient person. They are a process. The cooking part is a piece of cake. Boil, remove the weird hairs (I know…I wish they made hairless artichokes, like pitted dates or hairless cats…), grill, voila! Then you get to take your time. One leaf at a time, until you get to where all the action is–the heart!

Lemon Rosemary Grilled Artichokes #vegan #glutenfree

Once your artichoke has been cooked, you scrape the inside of each leaf with your teeth, then discard the leaf into a side dish. Repeat with all of the leaves until you get to the heart, then pick that baby up and chow down! If you’ve never tried a whole artichoke, seriously, you must! And the lemon and rosemary?? To die for. A totally impressive meal that is more time consuming to eat than it is to cook!

Print
Lemon Rosemary Grilled Artichokes

Prep Time: 10 minutes

Cook Time: 25 minutes

Total Time: 35 minutes

Yield: 4 servings

Serving Size: 1/2 artichoke

Lemon Rosemary Grilled Artichokes

Ingredients

  • 2 large lemons
  • 2 large artichokes
  • 1 sprig rosemary, finely chopped
  • 2 tbsp olive oil
  • salt and pepper

Instructions

  1. Cut off the stems of each artichoke leaving about 1" of stem remaining. Slice off the top quarter of each artichoke to create a flat top. Fill a very large pan or dutch oven with water and juice from one lemon. Add a pinch of salt if desired. Bring water to a boil, and add artichokes. Boil for about 15 minutes, until softened. Remove, and let stand for 5-10 minutes until they have slightly cooled.
  2. Slice each artichoke in half, and use a spoon to remove the choke (the part in the center just about the heart that looks like little hairs--they will scoop right out). Drizzle each half with 1/2 tbsp olive oil, then zest remaining lemon over the artichokes (I used about a tablespoon of zest). Season with rosemary, and a pinch each of salt and pepper.
  3. Grill artichokes over medium heat until browned and softened, about 5 minutes per side. Serve immediately.

Notes

Some people wish to trim the spiky leaves on the outside of the artichoke before cooking. You may do this, but I find it to be a waste of time. I find that they soften when cooked, and if they don't I simply discard them after cooking.

Often the first layer or two of the artichoke won't have any of the good stuff. You may with to discard the first several leaves. When you get to the good ones, the "meat" will scrape off easily.

3.1
https://arismenu.com/lemon-rosemary-grilled-artichokes/

Filed Under: Appetizers, Dinner, DIY/How To, Gluten-free, Holiday & Seasonal, Low Carb, Miscellaneous, Paleo, savory, Side Dish, Summer, Vegan, Vegetarian · Tagged: artichokes, gluten free, grilling, lemon, paleo, recipe, rosemary, summer, vegan, vegetables, whole 30

Vanilla Bean Coconut Pistachio Granola

August 11, 2013 · by Ari ·

Vanilla Bean Coconut Pistachio Granola #vegan #glutenfree

You know those people who rarely speak, and when they do everyone listens? Those quiet people who only speak out when they have something really important to say, and so you know you want to take note, soak it up, and really hear their words?

Vanilla Bean Coconut Pistachio Granola #vegan #glutenfree

Yeah, that’s not me. I’m more on the end of talks-too-much-so-most-of-it-must-be-pretty-inconsequential. In fact, the other day, Stacey told me she knew a recipe was mine by the long, overly descriptive title. It’s the truth. And not just in recipe writing. I am a human with a lot to say, and no matter how hard I try to be one of those people that only speaks when I need to like a character on stage, I just keep talking until someone finally stops me and puts the rest of the room out of their misery. šŸ˜‰

Vanilla Bean Coconut Pistachio Granola #vegan #glutenfree

Here’s what you actually need to know about this granola:

  • Crunchy
  • Sweet
  • Vanilla bean flavor
  • Rich pistachios
  • Nutty coconut
  • Big snack-worthy clusters
  • Vegan
  • Gluten-free
  • Ridiculously good

Vanilla Bean Coconut Pistachio Granola #vegan #glutenfree

Got it?

Print
Vanilla Bean Coconut Pistachio Granola

Prep Time: 10 minutes

Cook Time: 1 hour

Total Time: 1 hour, 10 minutes

Yield: approx 12 cups

Serving Size: 1/2 cup

Vanilla Bean Coconut Pistachio Granola

Ingredients

  • 5 cups rolled oats (use gluten-free if applicable)
  • 3 cups shelled pistachios, coarsely chopped
  • 2/3 cups almonds, coarsely chopped
  • 1 cup shredded unsweetened reduced fat coconut
  • 1/4 cup packed brown sugar
  • 3 tsp cinnamon
  • heavy pinch sea salt
  • 3/4 cup unsweetened applesauce
  • 1/4 cup pure maple syrup
  • 1/3 cup honey or agave
  • 2 tbsp coconut butter or coconut oil
  • Seeds from 1 vanilla bean
  • 1 tsp coconut extract

Instructions

  1. Preheat the oven to 300. Line two large baking sheets with silpat or parchment paper. Set aside.
  2. In a very large bowl, mix together the oats, nuts, coconut, brown sugar, cinnamon and salt.
  3. In a small saucepan, warm the applesauce, maple syrup, honey/agave, coconut butter, vanilla bean seeds, and coconut extract until well combined, whisking constantly.
  4. Add the applesauce mixture into the dry ingredients and toss to combine. Divide mixture evenly between your 2 prepared baking sheets.
  5. Bake until browned and crispy, about 1 hour. Lightly toss granola every 10-20 minutes while cooking. DO NOT skip the tossing--the pistachios can burn easily if you skip this step.
  6. Cool completely. Store in an airtight container at room temperature. The granola will stay fresh for at least one month. I’ve never made a batch last any longer than that, but it’s still great a month in!
3.1
https://arismenu.com/vanilla-bean-coconut-pistachio-granola/

Filed Under: Breakfast, Gluten-free, Granola, Vegan · Tagged: breakfast, coconut, gluten free, granola, nuts, oats, pistachio, recipe, vanilla, vegan

Lemon Crinkle Cookies

August 7, 2013 · by Ari ·

Lemon Crinkle Cookies

Hi friends! I can’t believe this week is almost over. It has been a whirlwind over here. I’ve been back in town for just a little over a week, and I’ve started a new job, adjusted to a new 4am alarm, and tried to start setting up a new routine. It has been great, and challenging, but mostly great! Also, yesterday I had the honored of being featured by one of my favorite bloggers. I answered several questions about my weight loss and running journey. Head over and check it out if you want to learn a little more about me. šŸ™‚

Lemon Crinkle Cookies

Anyway, let’s talk about food! Cookies, specifically. Perfectly tart and sweet, melt-in-your-mouth-soft lemon crinkle cookies. Uggghhhh, you guys…I can’t even explain to you how good these cookies are. They rival those Paradise Bakery gems that I’ve been obsessed with for years. They make you want to convert to lemon desserts forever.

Lemon Crinkle Cookies

The combination of the lemon Greek yogurt + coconut oil = cookie texture perfection. Thick, soft and lightly chewy–you will never miss the butter!

Print
Lemon Crinkle Cookies

Prep Time: 10 minutes

Cook Time: 10 minutes

Total Time: 50 minutes

Yield: 1 1/2 dozen

Serving Size: 1 cookie

Lemon Crinkle Cookies

Ingredients

  • 1 1/2 cups white whole wheat flour
  • 1/4 tsp baking soda
  • dash salt
  • Zest of 1 lemon
  • 3/4 cup sugar
  • 3 tbsp coconut oil, melted
  • 5 tbsp nonfat lemon Greek yogurt
  • 1 tsp vanilla
  • 1 egg
  • 1 tbsp lemon juice
  • 1/4 cup powdered sugar

Instructions

  1. In a medium bowl, whisk together flour, baking soda and salt. Set aside.
  2. In a large bowl, beat together sugar and lemon zest until fragrant. Add coconut oil, yogurt, vanilla, egg and lemon juice. Beat until combined. Add flour mixture and beat until just combined. Cover and refrigerate for 30 minutes.
  3. Preheat oven to 350. Line baking sheet with silpat or parchment paper.
  4. Place powdered sugar in a large shallow bowl. Roll dough into approx 1" dough balls. Roll in powdered sugar to coat completely, then transfer to prepared baking sheet. Repeat with remaining dough.
  5. Bake for 10-12 minutes until edges gave just set. Allow to cool completely on baking sheet. Store in a loosely covered container for 5 days.

Notes

Plain yogurt may be substituted if lemon is unavailable.

3.1
https://arismenu.com/lemon-crinkle-cookies/

Filed Under: Cookies, Dessert, Holiday & Seasonal · Tagged: cookies, dessert, greek yogurt, lemon, recipe, summer

Creamy Greek Yogurt Slaw

August 4, 2013 · by Ari ·

Creamy Greek Yogurt Slaw

You know, for the longest time I never ate coleslaw. I always thought it was really gross. Cabbage and mayo?? I’m really not sure where the appeal comes from, but Steve and my mom are both huge fans (weirdos), so one night when I was grilling up some hot dogs, I decided to try to make some coleslaw that was actually appealing.

Creamy Greek Yogurt Slaw

I’m pretty much convinced that Greek yogurt is the cure for all things. I have never made a dish and then thought “Man, it would have been so much better if I had left off the Greek yogurt.” Perhaps I am weirdly obsessed, but it really is a magical food.

Creamy Greek Yogurt Slaw

So I made coleslaw, which I thought I hated. But then I loved it. Steve was a little confused by the texture. He said coleslaw is usually more runny. That sounds gross. Thick, creamy, delicious, and packed with protein and veggies–now it really is the perfect side for your summer grilling!

Print
Creamy Greek Yogurt Slaw

Prep Time: 5 minutes

Total Time: 5 minutes

Yield: approx 10 servings

Serving Size: 1/2 cup

Creamy Greek Yogurt Slaw

Ingredients

  • 2/3 cup nonfat plain Greek yogurt
  • 1 tbsp honey
  • Juice from 1/2 medium lemon
  • 2 tsp apple cider vinegar
  • pinch each salt and pepper
  • 5 cups coleslaw veggie mix*

Instructions

  1. In a large bowl, whisk together yogurt, honey, lemon juice, vinegar, salt and pepper until combined. Stir in coleslaw mix. Serve immediately or keep refrigerated in an airtight container for 3-5 days.

Notes

*Feel free to use fresh cabbage and carrots (or whatever shaved veggies you'd like) to create your own mix. I bought a bag at the store because it was easy, but I'm sure it would be even better with fresh produce!

3.1
https://arismenu.com/creamy-greek-yogurt-slaw/

Filed Under: Gluten-free, Holiday & Seasonal, Low Carb, Side Dish, Vegetarian · Tagged: cabbage, coleslaw, fat free, greek yogurt, recipe, side, summer, veggies

Drink & Dish: Mediterranean Quinoa Salad

August 1, 2013 · by Ari ·

Mediterranean Quinoa Salad

There are few things I love more than a fresh summer salad. It’s hot outside. I don’t want to spend hours cooking inside and then put hot food into my hot body. Haha, hot body. Who says things like that??? I mean temperature wise…obviously…

Mediterranean Quinoa Salad

I love bringing healthy sides to barbecues and get togethers. There are so many “salads” filled with gross mayo that don’t even taste very good that seem to be the tradition, and I just don’t get that. I wanted to create a salad that can wear many faces. Healthy side dish? Check. Vegetarian meal option? Check. Vegan meal option? Just leave out the cheese (which makes me cry, but if you’re vegan, you’re probably used to that by now). Serving of veggies? Yeah, got that too. My salad is aĀ chameleon.

Mediterranean Quinoa Salad

This is also one of the simplest, easiest, and fastest dishes I’ve ever made. Seriously, as I wrote up the instructions, I thought to myself “That’s it? What did I forget?” because honestly, I feel like I always forget something. But for real, that’s it. If you cook the quinoa ahead of time and already have roasted red peppers on hand, it literally takes 5 minutes.

Mediterranean Quinoa Salad

Nicole and I always brainstorm together on what we will create for our Drink & Dish episodes that will complement each others’ recipes, but this time it truly was a match made in heaven. Her cucumber gin fizz is the perfect pairing to this salad. I’m not usually a gin person, but it was so light and refreshing, you’ve got to check it out! Also, check out our latest D&D episode!

..

Print
Drink & Dish: Mediterranean Quinoa Salad

Prep Time: 5 minutes

Cook Time: 20 minutes

Total Time: 25 minutes

Yield: 12-16 servings

Serving Size: approx 1/2 cup

Drink & Dish: Mediterranean Quinoa Salad

Ingredients

  • 1/2 cup dry quinoa
  • 1 large persian cucumber, chopped
  • 1 small 2-2.5 oz can sliced black olives
  • 1/2 cup crumbled feta cheese
  • 2 large red bell peppers, roasted and chopped (or 1 cup chopped roasted red peppers from a jar)
  • 1 cup cherry tomatoes, halved
  • 1 tbsp olive oil
  • 2 tbsp balsamic vinegar
  • generous pinch each salt and pepper

Instructions

  1. Cook quinoa according to package instructions. Drain and cool.
  2. Place cooked and cooled quinoa along with all remaining ingredients in a large bowl. Toss to combine. Serve immediately or store refrigerated in an airtight container for 5-7 days.
3.1
https://arismenu.com/mediterranean-quinoa-salad/

Filed Under: Appetizers, Dinner, Drink & Dish, Entree, Gluten-free, Holiday & Seasonal, savory, Side Dish, Summer, Vegan, Vegetarian · Tagged: drink and dish, gluten free, mediterranean, quinoa, recipe, salad, vegetarian

Thai Chicken Kabobs

July 31, 2013 · by Ari ·

Thai Chicken Kabobs

Is there anything more fun than food on a stick? I mean, sure, eating it can be tricky and you run the risk of stabbing your husband while playing swords with your food (because that’s a totally normal and acceptable thing to do, yes?), but really, how many foods can you make into a sword anyway?

Thai Chicken Kabobs

I’ve actually never made kabobs before this one, and let me tell you, I am in love. I loved having my chicken on my veggies all on one stick. I loved how fun they were to eat and dip in the peanut sauce, and I also loved how food on a stick meant there were next to no dishes to clean up. Seriously, I hate cleaning almost as much as I love cooking.

Thai Chicken Kabobs

The chicken marinates in the peanut sauce to soak up all that delicious Thai peanut flavor, then gets grilled up with your veggies and dunked in lots more peanut-y deliciousness as you eat. You end up eating a lot less of the calorie-dense peanut sauce than if you were to eat traditional Pad Thai. Not to mention getting rid of the noodles and adding a bunch of veggies gives you all the flavors of classic Pad Thai with a fraction of the calories, and sticking it all on kabob skewers to grill up gives them an awesome summery touch!

Thai Chicken Kabobs

They are topped off with fresh cilantro (my favorite food–I don’t care if you say it’s an “herb”, it’s still my favorite) and drizzles with sriracha for an extra spicy kick. Of course, those are option if you’re one of those weirdos who doesn’t like spicy food, or worse, you have that genetic “mutation” where you don’t like cilantro. Have you heard about that? Apparently it’s a genetic thing where to some people it tastes like soap. So glad I pulled the long straw on that one. šŸ˜‰

Print
Thai Chicken Kabobs

Prep Time: 1 hour, 15 minutes

Cook Time: 5 minutes

Total Time: 1 hour, 20 minutes

Yield: 9 kabobs

Serving Size: 3 kabobs

Thai Chicken Kabobs

Ingredients

  • 1/2 cup peanut butter
  • 1 1/2 tbsp fresh lime juice
  • 1 tbsp coconut aminos or soy sauce
  • 1 tsp sriracha + extra for drizzling
  • approx 1/2 cup water, divided
  • 1 1/2 lbs boneless skinless chicken breast, cut into 1" chunks
  • 1 large red bell pepper, cut into 1" chunks
  • approx 1 cup sugar snap peas
  • 1/2 red onion, cut into 1" chunks
  • fresh cilantro, optional

Instructions

  1. In a medium bowl, whisk together peanut butter, lime juice, coconut aminos, sriracha and 1/4 cup water. Remove half the mixture (eyeball it), cover and set aside.
  2. Add 1/4 cup water to remaining mixture. Whisk to combine. Continue to slowly add water until it has reached the consistency of a marinade. I used about 1/4-1/3 cup. Place chicken and marinade in a large freezer bag or medium tupperware and marinate in the refrigerator for 1 hour (alternately, feel free to do this step up to 24 hours ahead of time).
  3. If using wooden skewers, soak skewers for 30 minutes before cooking (if you use metal, this is not necessary). Alternately place chicken, bell pepper, onion, and snap peas onto your skewers (you will most likely have room for about 2 of each) close together, but not crowding.
  4. Grill on medium-high heat until chicken is cooked throughout, about 5-7 minutes. Sprinkle with fresh cilantro and drizzle with srirach. Serve immediately with remaining peanut dipping sauce.

Notes

You may wish to heat the peanut sauce before serving. It can get quite thick while it sits, so microwaving for about 15 seconds and adding a tablespoon of water should get it back to your ideal consistency.

3.1
https://arismenu.com/thai-chicken-kabobs/

Filed Under: Entree, Gluten-free, Holiday & Seasonal, Low Carb, Paleo · Tagged: chicken, dinner, gluten free, grilling, peanut butter, recipe, summer, thai

Bourbon Cherry Dark Chocolate Brownies

July 25, 2013 · by Ari ·

Bourbon Cherry Dark Chocolate Brownies

Do you know how many years of my life I wasted believing I didn’t like bourbon? It’s a damn shame.

Bourbon Cherry Dark Chocolate Brownies

I promise, I didn’t mean to put alcohol in my brownies. They started out as just regular chocolate brownies with cherries and dark chocolate for my dad’s birthday. He loves a black forrest cake, but he loves brownies more than cake, and so I wanted a similar flavor profile in brownie form.

Bourbon Cherry Dark Chocolate Brownies

But then I remembered these cookies, and made a game time decision to soak the cherries in bourbon. Of course, if you don’t like bourbon (who are you????), you can totally skip this step and still have some rich and gooey cherry and dark chocolate brownies, but I really feel like the bourbon takes them to the next level.

Bourbon Cherry Dark Chocolate Brownies

One of the secrets to perfect brownies is to just ever so slightly under-bake them. They will continue to bake when you let them cool in your pan. My problem is that I am impatient and I never wait long enough to cut into them. Oh and also that I often over estimate the amount of unbaked that is ideal and end up eating brownie batter because I pulled them from the oven a good 10 minutes too early. These were totally still hot and gooey when I photographed them, but I just couldn’t wait. They firm up a bit as they cool making them easier to serve, but still soft and fudgy.

Bourbon Cherry Dark Chocolate Brownies

I love the crisp brownie top (my favorite thing about brownies and sometimes hard to achieve with no butter!) and the extra melty chunks of dark chocolate with the bold flavor of the bourbon soaked cherries. These were a huge hit, and the entire pan was gone in one evening!

Print
Bourbon Cherry Dark Chocolate Brownies

Prep Time: 10 minutes

Cook Time: 30 minutes

Total Time: 40 minutes

Yield: 9 large or 16 small brownies

Serving Size: 1 brownie

Bourbon Cherry Dark Chocolate Brownies

Ingredients

  • 3/4 cup cherries, pitted
  • Approx 1/2 cup bourbon
  • 5.5 ounces dark chocolate, melted
  • 1/2 cup nonfat coffee yogurt*
  • 3/4 cup sugar
  • 2 eggs
  • 1 tsp vanilla extract
  • 2/3 cup white whole wheat flour
  • 1/2 cup dark chocolate covered cherries**

Instructions

  1. Place cherries in a wide shallow bowl. Cover with bourbon and soak for 1 hour.
  2. Preheat oven to 350. Line a 9" square pan with aluminum foil and spray with nonstick spray. Set aside.
  3. In a large bowl, slowly stir yogurt into melted chocolate. Whisk in sugar, then whisk in eggs one at a time. Add vanilla. Gently fold in flour until just combined. Strain soaked cherries (save the extra liquid and make yourself a drink!) and fold in soaked cherries and dark chocolate covered cherries.
  4. Transfer to prepared baking tin and bake until a toothpick inserted in the center comes out mostly clean with a few crumbs, about 30 minutes. Cool completely in pan then serve. Store in an airtight container for up to 5 days.

Notes

*Vanilla yogurt may be substituted. The coffee enhances the chocolate flavor. I suggest adding 1 tsp espresso powder if you use vanilla yogurt. **I found dark chocolate covered cherries at Trader Joe's. You can always use dark chocolate chunks instead, or add more fresh cherries.

3.1
https://arismenu.com/bourbon-cherry-dark-chocolate-brownies/

Filed Under: Brownies & Bars, Dessert, Holiday & Seasonal · Tagged: bourbon.bars, brownies, cherry, chocolate, dessert, recipe

Vanilla Bean Coconut Butter

July 23, 2013 · by Ari ·

Vanilla Bean Coconut Butter

So, if it weren’t for other blogs, I wouldn’t even know coconut butter was a thing. Coconut is, like, the next big thing in the food world it seems. Coconut milk, coconut oil, coconut butter, COCONUT EVERYTHING!

Vanilla Bean Coconut Butter

I didn’t even have an idea what it would actually taste like, but one day I just threw some coconut in my food processor, and decided to give it a try. I do love anything with the word ‘butter’ in the name, so I figured there was no way it could be bad…

Vanilla Bean Coconut Butter

In fact, you could tell me that broccoli butter is a thing, and I’d probably be convinced I needed to get in the kitchen and make it rightthatsecond.

Vanilla Bean Coconut Butter

Turns out, coconut butter is good. Like, really good. It’s like a combination of creamy, drippy homemade peanut butter with chewy coconut flavor and texture. It’s great on toast, bananas, and especially smoothies. It’s actually kind of magical in smoothies.

Vanilla Bean Coconut Butter

The coconut is already slightly sweet, so you don’t need a lot of sugar. I used 1/2 tbsp, and I probably would have REALLY loved it with 1-2 tbsp, but I wouldn’t use more than 2. Also, if you don’t like to add sugar, you can totally leave it out. Either way, you are in for a creamy, drippy jar of deliciousness.

Print
Vanilla Bean Coconut Butter

Prep Time: 10 minutes

Total Time: 10 minutes

Yield: Scant 1/2 pint

Serving Size: 2 tbsp

Vanilla Bean Coconut Butter

Creamy, simple and delicious coconut butter with bold vanilla bean and lightly sweetened with brown sugar.

Ingredients

  • 2 cups unsweetened shredded coconut
  • 1 vanilla bean (or 1 tbsp vanilla bean paste)
  • 1/2 tbsp brown sugar*

Instructions

  1. Blend coconut in your food processor until a creamy, peanut-butter-like texture forms, about 5-7 minutes. Split vanilla bean length wise and scrape seeds into coconut mixture. Add brown sugar and continue to pulse until well combined, about an other 1-2 minutes. Store in an airtight container at room temperature, or in the refrigerator. Stir before serving.

Notes

*You can omit the brown sugar if you wish, or if you like things sweeter, add up to 2 tbsp. I would add it 1/2 tbsp at a time, and taste as you go.

I've had my jar for over 2 weeks and it is still going strong. If it will last you longer than that, you may wish to keep refrigerated.

3.1
https://arismenu.com/vanilla-bean-coconut-butter/

Filed Under: DIY/How To, Gluten-free, Miscellaneous, Paleo, Sauces & Spreads, Snacks, Vegan · Tagged: coconut, coconut butter, easy, gluten free, recipe, simple, spreads, vanilla, vanilla bean, vegan

« Previous Page
Next Page »
Image Map

Popular Posts

Tart Cherry Margaritas: The perfect, refreshing margarita--lightly sweet with a punch of tequila

Tart Cherry Margaritas

90+ Healthy Recipes for Breakfast, Lunch, Dinner & Dessert

90+ Healthy Recipes for Breakfast, Lunch, Dinner & Dessert

The Ultimate Peanut Butter Cup Brownie Cookies: Rich, fudgy, brownie-like chocolate cookies stuffed with melty peanut butter cups!

Ultimate Peanut Butter Cup Brownie Cookies

Drink & Dish: Cafe Au Lait Cupcakes

Crockpot Chicken Enchilada Soup

Subscribe via Email:

Enter your email address:

Save an additional $30 on Blendtec Factory Recertified Blenders + Free Shipping

Featured Here

recipe redux
Certified Yummly Recipes on Yummly.com

Member Of…

FitFluential Is Fitness Found
AZ Bloggers Network
az 150 photo az150_zpsfb093d32.gif

Archives


Image Map

Copyright © 2025 | Innovative Child Theme by The Pixelista | Built on the Genesis Framework


Loading Comments...