• Going Out
    • Phx Restaurants
    • How To Order At Starbucks
  • Running
    • My Running Story
    • Race Calendar
    • Race Recaps & Results
  • Blogroll
  • Bucket List
  • Video

Ari's Menu

Little changes making a big difference.

  • Home
  • Recipes
  • Weight Loss
    • My Story
    • Common Swaps
  • Who’s Who
  • Contact
    • Policies & Disclosure
  • Press

Jalapeno Popper Chicken

May 27, 2013 · by Ari ·

Jalapeno Popper Chicken

I don’t know about you guys, but I am living in a haze of my post-long-weekend-fun. Did you guys do anything exciting for memorial day? I helped my brother move into his first apartment, celebrated my mom’s birthday, and had an awesome day at Lake Pleasant with Nicole. Oh, and then I spent actual Memorial Day creating recipes, meal planning, grocery shopping, and attempting productivity. Now? I just want to lay around and be lazy.

Jalapeno Popper Chicken

It’s always those lazy nights that I feel like throwing in the towel and hitting up Chipotle (honestly, does Chipotle EVER not sound good?) that I end up coming up with some of my favorite recipes. A quick survey of the fridge and pantry, throw a few things together in about 5 minutes, stick it in the oven and hope for the best.

Jalapeno Popper Chicken

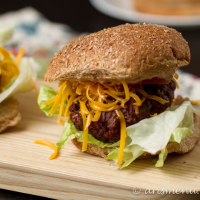
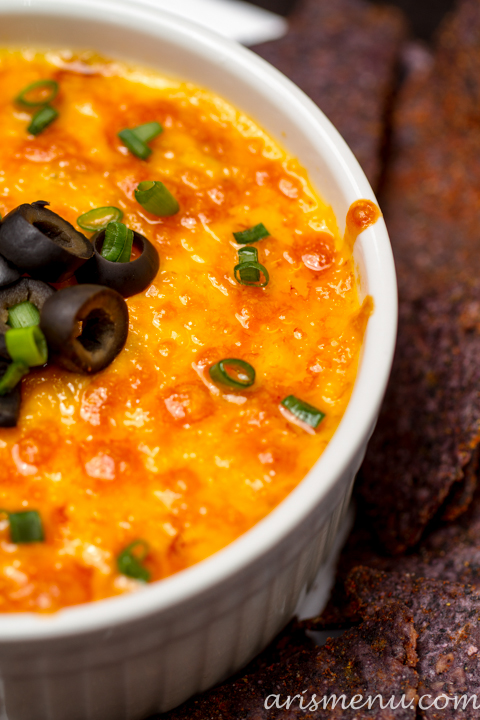
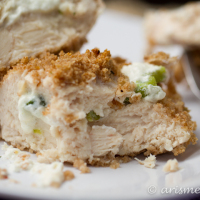
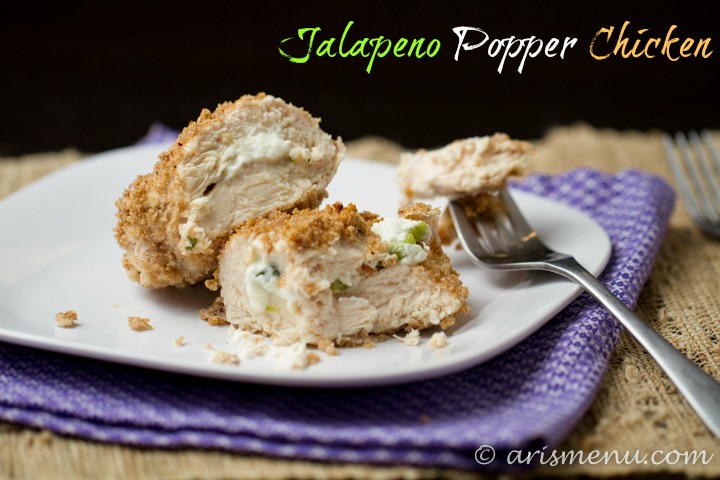
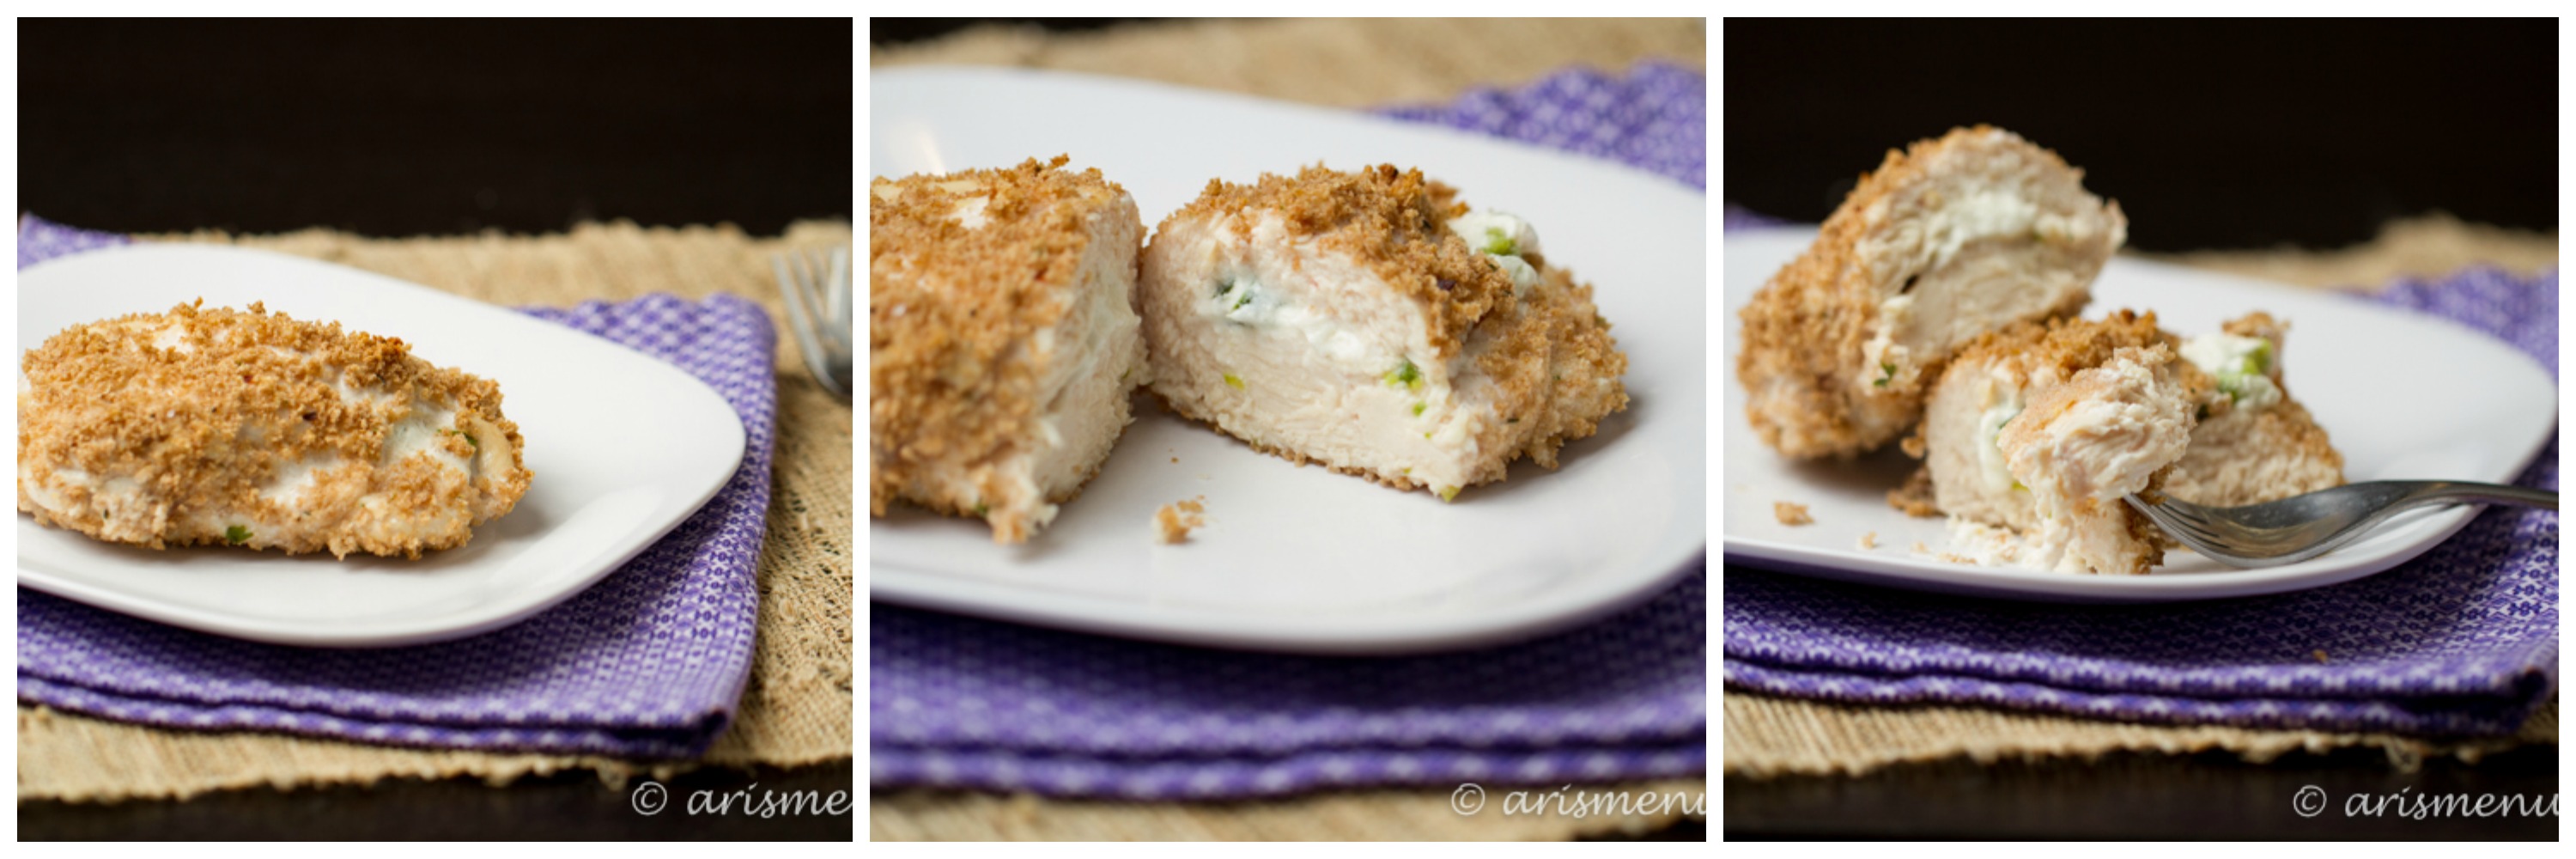
I know you guys love recipes like that too. Who wants to cook healthy food if it means spending your entire life in the kitchen? Umm, I love cooking, and that sounds awful even to me! This chicken is breaded and crispy and filled with cheese and jalapeno creating the unmistakable flavor of a jalapeno popper (one of my favorite bar food appetizers) in a healthy, simple dinner. I fell in love with it at first bite, and you better believe it will become one of my I-don’t-feel-like-cooking staples.

Print
Jalapeno Popper Chicken

Prep Time: 10 minutes

Cook Time: 30 minutes

Total Time: 40 minutes

Yield: 2 servings

Serving Size: 1 x 6oz chicken breast

Jalapeno Popper Chicken

Crispy, breaded chicken breast stuffed with roasted jalapeno and cheese. It tastes like a jalapeno popper for dinner!

Ingredients

  • 1 cup whole grain bread crumbs (brown rice, whole wheat, etc.)
  • dash cayenne pepper
  • generous pinch each salt and pepper
  • 1 jalapeno, ribs and seeds removed
  • 2 cloves garlic
  • 1 tsp olive oil
  • 2 x 6 oz chicken breasts, butterflied
  • 1 oz goat cheese (or cream cheese)
  • 2 egg whites, beaten

Instructions

  1. Preheat oven to 375. Place a cooling rack inside of a cookie sheet and spray lightly with nonstick spray. Set aside.
  2. Combine bread crumbs, cayenne, salt and pepper in a large shallow bowl. Set aside.
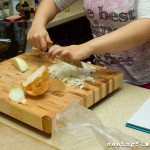
  3. Place jalapeno and garlic on a small piece of tin foil. Lightly drizzle with olive oil. Broil until softened, about 10 minutes. Keep an eye on it to make sure the garlic doesn't burn. Roughly chop jalapeno, and finely chop garlic.
  4. Divide cheese, jalapeno and garlic between the center of the two chicken breasts. Fold chicken back over on top of the fillings. Secure with a toothpick.
  5. Place beaten egg whites in a large shallow bowl. Drench chicken in egg whites, then coat completely in bread crumb mixture and place on prepared baking sheet. Repeat with remaining chicken.
  6. Bake until cooked throughout and juices run clear, about 30 minutes.
3.1
https://arismenu.com/jalapeno-popper-chicken/

Filed Under: Entree, Gluten-free · Tagged: cheese, chicken, dinner, easy, jalapeno, jalapeno popper, recipe, simple

Drink & Dish: Loaded Baked Potato Salad

May 21, 2013 · by Ari ·

Loaded Baked Potato Salad

I realllllly hope you like this recipe. I almost lost a leg creating it for you. I mean, “lost a leg” might be sliiiiightly dramatic, but I did end up with a pretty massive and nasty burn on my leg. I’ve had quite a few kitchen casualties recently, and I’m just considering it an opportunity to toughen up.

Loaded Baked Potato Salad

I’m pretty much a wimp about hurting myself. I will push through tons of pain when I run, but the second I SEE the physical pain happen, I kind of cry like a baby. It’s not my best character trait, but I mean it could be worse, right?

Loaded Baked Potato Salad

Ya know, for all my whining, this dish totallllly made up for it. I’ve made it before, but not for a long time, and with one bite I remembered just how dangerously delicious it was. In fact, after several days of nonstop picking at it and eating bites here and there, I finally had to throw in the towel and send the rest of the leftovers off with my family.

Loaded Baked Potato Salad

It literally tastes like a loaded baked potato. It has all the good stuff, and gets rid of a large amount of the bad. No butter (the original recipe calls for TWO STICKS–gross), no sour cream, and lighter cheese and bacon options. If you’re not a meat or bacon eater, I guess you cooouuulllld leave it out, but I feel like it’s totally worth the little extra splurge here. Plus, center cut bacon is like 35 caloies a slice, so unless you just don’t like it, I’d keep it. 😉

Loaded Baked Potato Salad

The only time consuming part of this salad is waiting for the potatoes to bake. Literally, the rest is 5 minutes of throwing things together in a bowl. The flavors and textures come together perfectly with the starchy potatoes, creamy greek yogurt and crunchy, salty bacon.

Loaded Baked Potato Salad

Make sure you check out the latest episode of Drink & Dish, and if you want a fun summer treat for Memorial Day or lounging by the pool, check out Nicole’s delicious vodka lemonade slush.


Print
Drink & Dish: Loaded Baked Potato Salad

Prep Time: 10 minutes

Cook Time: 45 minutes

Total Time: 1 hour

Yield: 6-8 servings

Drink & Dish: Loaded Baked Potato Salad

Simple, easy, and lightened up loaded baked potato salad perfect for summer BBQs.

Ingredients

  • 2 lbs red skinned potatoes
  • 1/2 tbsp olive oil
  • 1/2 lb center cut bacon, cooked and crumbled
  • 1 heaping cup nonfat plain Greek yogurt
  • 1/4 cup scallions, thinly sliced
  • 1/3 cup reduced fat shredded cheddar cheese
  • Generous pinch salt and pepper

Instructions

  1. Preheat oven to 400. Pierce potatoes several times with a fork. Transfer to a large baking dish and lightly drizzle with olive oil. Cook until softened, about 45 minutes. Let cool for 15-20 minutes.
  2. Cut baked potatoes into 1" cubes. Place all ingredients in a large bowl, and lightly toss until combined. Serve immediately or store in an airtight container for up to 5 days.

Notes

Adapted from Rachel Ray

3.1
https://arismenu.com/drink-dish-loaded-baked-potato-salad/

Filed Under: Appetizers, Drink & Dish, Gluten-free, Holiday & Seasonal, Salads, savory, Side Dish, Snacks, Summer · Tagged: bacon, baked potato, cheese, gluten free, greek yogurt, grilling, potato, potato salad, recipe, salad, side, summer

Spicy Chipotle Cheeseburgers

May 19, 2013 · by Ari ·

Spicy Chipotle Cheeseburgers

My mind has officially checked out into summer vacation land. Technically, I have 2 more days of classes before it becomes official, but mentally I am….so….there. And let’s face it,  I’ve been there for a couple of weeks now.

Spicy Chipotle Cheeseburgers

There is something about summer when you work on the school calendar. I still work hard over the summer, but it all seems like so much FUN. Maybe it’s knowing it’s all only temporary, and eventually you will all go back to “real life”, but I just love it. Despite the hear here in Phoenix, it’s probably my favorite time of year.

Spicy Chipotle Cheeseburgers

It seems like no matter what I have on my meal plan these days, nothing sounds better than grilling up some burgers and eating dinner by the pool. It just makes my heart happy. Not to mention the flavor combinations for burgers are pretty much endless, leaving you with burger after burger recipe. Sorry I’m not sorry.

Spicy Chipotle Cheeseburgers

I do have a pretty sweet side dish coming your way later this week that you can eat along side these burgers during your Memorial Day festivities.

Print
Spicy Chipotle Cheeseburgers

Prep Time: 5 minutes

Cook Time: 10 minutes

Total Time: 15 minutes

Yield: 4 burgers

Serving Size: 1 burger

Spicy Chipotle Cheeseburgers

Simple and easy spicy chipotle cheeseburgers are a perfect way to kick up your summer grilling!

Ingredients

    For the burgers:
  • 1 lb 96% lean ground beef (or lean ground turkey)
  • 1 chipotle pepper in adobo sauce, finely chopped
  • pinch salt
  • For the creamy chipotle spread:
  • 1 cup nonfat plain Greek yogurt
  • 1 chipotle pepper in adobo sauce
  • Toppings/to put together the burger:
  • Whole grain buns (whole wheat, brown rice, etc.)
  • Sliced roma tomato
  • Lettuce
  • Extra sharp cheddar cheese

Instructions

  1. To make the burgers, combine beef, chopped chipotle pepper and salt in a large bowl. Create 4 evenly sized patties. Gently press each patty down in the center with your thumb to create an indent--this promotes even cooking. Grill to desired doneness, about 4-5 minutes per side.
  2. To make the sauce, blend Greek yogurt and chipotle pepper in a food processor or blender until well combined.
  3. To assemble burgers, spread sauce onto the top side of the bun. Top bottom half with lettuce, burger, cheese and tomato slices (or whatever you'd like--it's your burger!) and finish off with the top half of the bun. Serve immediately. Leftover meat patties can be stored in an airtight container in the refrigerator for up to 5 days.
3.1
https://arismenu.com/spicy-chipotle-cheeseburgers/

Filed Under: Dinner, Entree, Gluten-free, Holiday & Seasonal, Lunch, Sandwiches, savory, Summer · Tagged: beef, burger, cheese, chipotle, dinner, gluten free, grilling, lunch, recipe, spicy, summer

Drink & Dish: Chicken Enchilada Dip {with video!}

April 22, 2013 · by Ari ·

Chicken Enchilada Dip #glutenfree via arismenu.com

I think the happiest day of my life was the day Chipotle started serving brown rice. Maybe you think that makes me a total freak? But if that’s true, you clearly don’t understand my love for Mexican food. I mean, I live in Phoenix. Mexican food is more common than hamburgers.

Chicken Enchilada Dip #glutenfree via arismenu.com

I’ve always been all about the cheese enchiladas. And quesedillas. Pretty much anything with cheese is sure to be a winner in my book. Did I ever tell you about how when I was younger I would “snack” on blocks of cheddar cheese? In fact, just this morning, I told Steve that cheese was my favorite food group.

Chicken Enchilada Dip #glutenfree via arismenu.com

I’m pretty sure the abundance of cheese is what fuels my love for Mexican food, which is why it’s often difficult for me to find healthy options. No matter what I say, I cannot convince myself that 11 servings of cheese is “healthy”. It’s really sad. If you can help convince me, I would greatly appreciate it. 😉

Chicken Enchilada Dip #glutenfree via arismenu.com

Luckily, this dip has the perfect amount of cheesy goodness, but with a lighter touch. Most of the creaminess comes from nonfat plain Greek yogurt and the avocado–the avocado is like my secret weapon. I put it in on a whim, and it ended up totally making the dish! It’s like if you took an enchilada and stuffed it with guacamole–I mean, HOW COULD THAT BE BAD???

Chicken Enchilada Dip #glutenfree via arismenu.com

This dip is super simple with only a handful of ingredients, and it comes together in minutes. It’s perfect for any party or get together, and the bold flavors and creamy texture are sure to be a hit with whoever you’re serving!

Chicken Enchilada Dip #glutenfree via www.arismenu.com

Do you guys do anything to celebrate Cinco De Mayo? My plan usually includes eating Mexican food, drinking margaritas, and apparently, wearing a mustache. You’ll have to check out the video to understand that one. Nicole and I were in a rare form of ridiculousness this episode.

Make sure to check out Nicole’s perfect margarita recipe too!

Print
Chicken Enchilada Dip

Cook Time: 10 minutes

Total Time: 10 minutes

Chicken Enchilada Dip

Green chile enchilada dip with creamy avocado, goat cheese and Greek yogurt. Perfectly creamy and cheesy, with a lighter twist.

Ingredients

  • 10-12 oz cooked chicken, shredded (I used the meat from 1 rotisserie chicken)
  • 4 oz goat cheese
  • 1 cup nonfat plain Greek yogurt
  • 1/2 pint enchilada sauce
  • 1 avocado, pitted and skin removed
  • Shredded cheddar cheese for topping*
  • Black olives and green onion for garnish, optional
  • Baked corn chips for serving

Instructions

  1. Combine chicken, goat cheese, yogurt, enchilada sauce and avocado in a medium pan over medium heat. Stir constantly until all ingredients are melted and combined.
  2. Transfer to your serving dish (make sure it's oven safe) and top with cheddar cheese (I used about 1/3 cup). Broil until cheese is browned and bubbly.
  3. Top with olives and onion if desired. Serve with chips or veggies.

Notes

*I usually use a reduced fat cheddar cheese, but it doesn't melt quite the same. For photos, I used full fat. If you're concerned about appearance, I would encourage a full fat cheese, but if you're purely concerned with taste, reduced fat will still taste great!

3.1
https://arismenu.com/drink-dish-chicken-enchilada-dip/

Filed Under: Appetizers, Drink & Dish, Holiday & Seasonal, Low Carb, savory, Snacks · Tagged: cheese, chicken, cinco de mayo, dip.party food, drink and dish, easy, enchiladas, quick, recipe

Caprese Pasta

February 25, 2013 · by Ari ·

Caprese Pasta: A simple, healthy and delicious weeknight dinner that will impress the whole family. With only a handful of ingredients, this comes together in a flash with so much flavor and the perfect amount of melty mozzarella.

Caprese Pasta .jpg


I find that people have strong opinions on tomatoes. Either you’re ordering them on all your salads and sandwiches, or you absolutely hate them.

Caprese Pasta


I used to be a total hater. I always loved salsa, and I liked tomato sauce as long as it wasn’t chunky, and I liked ketchup, although I’ve never been one of those people who goes crazy over ketchup. There are so many awesome condiments out there with so much more flavor! I’ve never understood the people that put ketchup on everything.

Caprese Pasta


Like my husband. He puts ketchup on macaroni and cheese. WHAT IS THAT??? I will season the crap out of some meat, and we will sit down to dinner, and he grabs the ketchup bottle. What a jerk.

Caprese Pasta


Anyway, I never used to be a tomato fan. My dad would order a caprese salad, and I would just eat the cheese. Not that this was abnormal behavior for me with any dish. All my friends still make fun of me about the way I used to eat. I would order food, eat until I started to get full, then proceed to pick all the cheese out. What can I say? I’ve always loved my cheese. 😉


Caprese Pasta


Somewhere along my healthy living journey, I turned the page on tomatoes. Now, I eat the whole caprese salad (or pasta), but the best part is still the mozzarella cheese. 😉

Caprese Pasta


In this pasta, the cheese gets just warm enough to get a little soft, melty, and gooey. I could have picked it out all night long, and lived on the cheese alone, but it was even better paired with the fresh basil, and juicy tomatoes.


Caprese Pasta


This pasta takes everything I love about a caprese salad, and translates it to a full, protein packed, delicious dinner. It was so easy–ready in about 20 minutes, and my whole family loved it!


Caprese Pasta

yield 8 servings

  • 13 oz box whole grain penne (brown rice, whole wheat, quinoa, whatever you like)
  • 3 cloves garlic, finely chopped
  • 2 tbsp olive oil, divided
  • 1-2 tbsp balsamic vinegar
  • 5 fresh basil leaves, chopped
  • salt and pepper
  • 3 chicken breasts, grilled and sliced
  • 8 oz part skim mozzarella, cubes
  • 2 big handfuls baby spinach, stems removed
  • 10 oz cherry tomatoes, halved

Directions:

  1. Cook pasta according to package instructions.
  2. In a large skillet over medium heat, cook garlic in 1 tbsp olive oil until fragrant. Add cooked and drained pasta, and toss with remaining oil, vinegar and basil. Season with salt and pepper.
  3. Add chicken, cheese and spinach, and gently toss until spinach slightly wilts, and cheese softens. Remove from heat and stir in tomatoes. Serve immediately. Store leftovers in an airtight container in the refrigerator for up to 1 week.

Filed Under: Entree, Gluten-free, Pasta · Tagged: caprese, cheese, dinner, gluten free, pasta, recipe, spinach, tomatoes

Drink & Dish: Buffalo Chicken Dip {with video!}

January 29, 2013 · by Ari ·


Let’s talk for a second about making a video.

Healthy Buffalo Chicken Dip

It’s, um…hard. I naively assumed that I would be great at this, You see, I’m an actor. I have a degree in musical theatre. This is what I teach people to do all day long, right??? Well, as it turns out, it’s not quite that simple. Shocking, right? But it is a whole lot of fun!

Healthy Buffalo Chicken Dip

I believe it was the day that Nicole and I ran 21 miles that we decided to create our own internet cooking show. When we talk about food, we run faster. We spend a lot of time talking about food.

Healthy Buffalo Chicken Dip

I think the hardest part of this process for me was that my big, ridiculous, often over-the-top personality doesn’t always translate to a tiny little camera box. Nicole kept telling me I was shouting because I’m so used to having to project on stage, haha. It’s definitely a learning process, and there are quite a few things I want to work on for the next time (like, oh…actually plugging in our microphone and shooting in the hd format…whoops…), but I am pretty proud of what we put together.

Healthy Buffalo Chicken Dip

Make sure you go over to Nicole’s page to check out her recipe too!

Buffalo Chicken Dip

yield your entire party

  • 9-11 oz chicken breast, cooked and shredded 
  • 4 oz reduced fat cream cheese
  • 1 cup nonfat plain Greek yogurt
  • 4 oz reduced fat sharp cheddar cheese
  • 2-3 tsp ranch seasoning
  • 1/3 cup buffalo sauce (or more if you want it spicier)
  • bleu cheese for topping (optional)
  • carrots and celery for dipping

Directions:

  1. Combine chicken, cream cheese, Greek yogurt, cheddar cheese, ranch seasoning, and buffalo sauce in a medium sauce pan over medium heat. Stir constantly until all items are incorporated and dip is heated throughout, about 10-15 minutes.
  2. Serve topped with crumbled bleu cheese, with carrots and celery. Dip can be stored in an airtight container in the refrigerator for one week, and reheated or eaten cold (if you’re weird like me 😉 ).

Filed Under: Appetizers, Drink & Dish, Gluten-free, Holiday & Seasonal, savory, Snacks · Tagged: buffalo, cheese, chicken, dip, drink & dish, greek yogurt, low fat, recipe, super bowl, video

Cheesy Broccoli Soup with Roasted Corn

January 28, 2013 · by Ari ·

The weather has been unusually cold and rainy here in Phoenix. Not that I’m complaining. We only get about 5 days a year of this, and so it’s kind of like a treat. I generally like to keep my schedule jam packed, constantly going from one thing to the next, but when the weather gets like this, it’s like one of life’s little reminders to slow down, cuddle up under a blanket with the puppies, and listen to the rainfall.

brocollicheddarsoup-16

Oh, and eat my body weight in rich. creamy, hot soup. I could probably eat soup year round. I love it sososo much, but when it’s 115* outside, it sort of loses it’s luster, if you know what I mean.

brocollicheddarsoup-12

Therefore, after December 25th, when I stop eating cookies for dinner every single night, I usually declare the month of January soup month, and cook pretty much only soup for the entire month. I’m sure my husband loves it, and never gets bored.

brocollicheddarsoup-11

I’m such a creature of habbit. Have I ever told you I eat the same thing for breakfast every.single.day.? Pumpkin, Greek yogurt, chopped apple, chia seeds, spices, and cereal on top. It’s really….weird. But I love it. Steve makes fun of it. I find him rude. Also, when I find a lunch I’m into, I eat that every day as well. Lately, it’s a grilled sandwich with hummus, cheese, mustard, and lots of veggies. It’s delicious.

brocollicheddarsoup-9

So, I’ve been enjoying my month of soup. I had a serious craving for broccoli cheddar soup, and then I went grocery shopping and saw that the ears of corn actually looked good. In January. I decided that was a sign that corn needed to make it’s way into my soup.

brocollicheddarsoup-1


This isn’t your typical broccoli cheese soup. The corn makes it thick, and chunky, and it’s more creamy than cheesey, because I didn’t want to add an entire block of cheese. Right about the time it was ready, I got reallll nervous, and told Jason we might just be eating bread for dinner (I made some really delicious biscuits to go with it that I never doubted for a second), but I decided I would take pictures juuuust in case. Then I took a bite, and I couldn’t believe how much I loved it! It was different than what I was expecting with the initial broccoli cheddar feel, but I absolutely loved the rich creaminess with the texture of the broccoli and corn.


Cheesey Broccoli Soup with Roasted Corn

yield 6 servings

  • 1 1/2 tbsp olive oil, divided
  • 3 ears sweet corn
  • 1 medium onion, chopped
  • 2 cloves garlic, finely chopped
  • 3 cups unsweetened almond milk
  • 3 cups vegetable stock
  • 1 lb fresh broccoli florets, chopped
  • 1 tsp salt
  • 1 tsp black pepper
  • dash hot sauce
  • 4 oz freshly grated reduced fat cheddar cheese
  • 1/2 cup nonfat plain Greek yogurt

Directions:

  1. Preheat oven to 400. Place corn in a large baking dish. Drizzle with 1 tbsp olive oil, and add salt and pepper if desired. Roast for 1 hour until lightly browned.
  2. Meanwhile, in a large pot over medium heat, saute onion and garlic in olive oil until fragrant. Add almond milk and veggie stalk whisking together for 3-5 minutes. 
  3. Add broccoli, salt, pepper, and hot sauce. Reduce heat to medium low, and continue to cook until broccoli is tender, about 40-50 minutes.
  4. Remove pot from heat, and pulse with an immersion blender, until desired consistency (I like mine chunky, so I only pulse it through a few times. For a smoother soup, blend for longer, or transfer soup to a blender to blend completely).
  5. Return pot to heat, turn down to low, and add cheddar cheese. Allow to simmer for 10 minutes.
  6. When corn is finished cooking, scrape kernels off with a knife. Stir in corn and Greek yogurt, and serve. Leftovers can be stored in the refrigerator in an airtight container for up to 1 week.

Filed Under: Entree, Gluten-free, Side Dish, Soup, Vegetarian · Tagged: broccoli, cheese, corn, dinner, gluten free, recipe, soup, vegetarian

French Onion Meatloaf

January 9, 2013 · by Ari ·

Warm, comforting, and healthy meatloaf stuffed with 2 sweet, caramelized onions and topped with bubbly gruyere cheese. This is the ultimate in comfort food, yet still low in calories and fat, and packed with protein!

French Onion Meatloaf #glutenfree

Can we just talk about beef for a second? I mean, not too much, because honestly it’s not nearly as interesting as something like FRO YO, but I do want to talk about how it can, in my opinion, be a lot healthier than people think. When I started my weight loss journey, one of the first things I did (after cutting out fast food) was cut out red meat. I don’t want to go into toooo much detail here, but I don’t “cut out” foods anymore; however, it was incredibly beneficial in the beginning when I was literally learning how to eat healthily.

French Onion Meatloaf #glutenfree

For years, I was very strict and I would only consume ground turkey, but one day I read the nutrition label of my lean ground turkey and compared it to lean ground beef. They were practically identical. If you choose 99% lean ground turkey breast, it is the leanest and the healthiest, but 96% lean ground beef is pretty great too. If you buy ground turkey, it usually comes in several varieties with the leanest being 93% and 99%.

  • 93% lean ground turkey has 170 calories, 8 grams of fat, 2.5 grams of saturated fat, and 21 grams of protein per serving.
  • 99% lean ground turkey breast has 120 calories, 1.5 grams of fat, .5 grams of saturated fat and 26 grams of protein per serving.
  • 96% lean ground beef has 140 calories, 4 grams of fat, 2.5 grams of saturated fat and 24 grams of protein per serving.

So, yes, ground turkey breast is clearly the healthiest, (especially if you compare it to the 80% lean ground beef I see most often at the store that contains 290 calories, 23 grams of fat, 9 grams of saturated fat and 19 grams of protein per serving) but they’re all great options, and ground turkey breast can be expensive, and many people consider it dry. I love it, and I think it works great for tacos and meat sauce, but for things like burgers and meatloaf, I think extra lean ground beef is the way to go.

French Onion Meatloaf #glutenfree

So my point is, not all red meat is “bad” and not all turkey is “good”. I won’t bore you with more numbers, but check that nutrition label of the less expensive 85% lean ground turkey. Okay, enough nutrition talk, let’s talk about this meatloaf because it is bordering on life changing. First of all, please tell me you love French onion soup as much as I do??? Sweet caramelized onions in a savory beef broth with tons of bread and cheese overflowing the top of the bowl–what’s not to love?

French Onion Meatloaf #glutenfree

This dish takes all of the best aspects of French onion soup and puts them together in a healthy, hearty meatloaf. It is FILLED with 2 whole onions worth of caramelized onions, bound by oats instead of crusty bread (I promise you can’t even taste them!), and topped off with melty, bubbling gruyere cheese. It’s also incredibly easy (and fun!) to assemble, making it perfect for any time!

Print
French Onion Meatloaf

Prep Time: 20 minutes

Cook Time: 1 hour, 40 minutes

Total Time: 2 hours

Yield: 6 servings

French Onion Meatloaf

Warm, comforting, and healthy meatloaf stuffed with 2 sweet, caramelized onions and topped with bubbly gruyere cheese. This is the ultimate in comfort food, yet still low in calories and fat, and packed with protein!

Ingredients

  • 1 tbsp olive oil
  • 1 tsp balsamic vinegar
  • 3 cloves garlic, minced
  • 2 large sweet onions, sliced
  • salt and pepper
  • 2 egg whites, lightly beaten
  • 1/3 cup unsweetened almond milk
  • 1/3 cup low sodium beef broth
  • 1/2 cup raw oats (if you care about that sort of thing, use gluten-free oats)
  • 1 lb 96% lean ground beef (if I haven't sold you on the beef thing, ground turkey works too 😉 )
  • 2-3 oz gruyere cheese, sliced or freshly shredded

Instructions

  1. Preheat oven to 400. Line a 9 x 5 inch loaf pan with tin foil and spray with nonstick spray. Set aside.
  2. In a large pan, cook garlic and onions in olive oil and balsamic vinegar over medium-low heat. Season with salt and pepper. Cook until soft and caramelized, about 40 minutes.
  3. Meanwhile, whisk together egg whites, almond milk and beed broth in a large bowl. When onions have finished cooking, remove from heat and let cool for 5-10 minutes, then add onions, oats and beef to the egg white mixtures. Add salt and pepper if desired (I didn't). Use your hands to incorporate all ingredients until combined. You don't need to overmix. The mixture may appear liquidy at first, but just keep lightly tossing with your hands, and it will come together.
  4. Transfer to prepared loaf pan, and cook for 50-60 minutes until cooked throughout. Remove tinfoil from pan and transfer to a baking sheet. Gently remove tin foil from the sides of your meatloaf, and flatten onto baking sheet (this allows the cheese to ooze down). Top with cheese. Turn your oven to broil and cook for and additional 3-5 minutes until the cheese is melted, browned and bubbly to your liking. Let rest for 5 minutes, then enjoy.
3.1
https://arismenu.com/french-onion-meatloaf/

Filed Under: Entree, Gluten-free, Low Carb, Popular Posts · Tagged: beef, cheese, dinner, french onion, gluten free, meatloaf, onion, recipe

Pumpkin Mac & Cheese

October 9, 2012 · by Ari ·

Okay, maybe you think I’ve gone off the deep end. Maybe you haven’t been lucky enough to experience how awesome pumpkin can be in a savory dish? Or maybe you’re like my husband, and you hate pumpkin.

But guess what??? Steve loves this dish! I try to get him to sip my pumpkin coffee and he acts like I handed him wheat grass, but pumpkin mac and cheese, even he can get behind.

LOOK AT THE STEAM!!! *happy dance*

The texture of the pumpkin puree works so perfectly to make a creamy sauce with no butter. This mac and cheese is actually good for you, and super filling so, even if you’re like me and want to eat delicious things until you can’t even lift the fork anymore, you won’t need to eat too much. Promise 😉

I made this for the first time last year with Jason.

I take my stirring very seriously.

Jason is good at following directions. I just yell commands at him “JASON STIR!”

This is what the mac and cheese looked like then vs now


I’ve actually made this many times since then because I love it sosoSO much. I figured it was time to update the photos 🙂

This is perfect for a Thanksgiving side, a fall dinner, or any time really (like, um, carb-o loading)!

Pumpkin Mac & Cheese

yield 4 servings

  • 8 oz uncooked whole grain penne, macaroni or other pasta (whole wheat, brown rice, etc.)
  • 2 cloves garlic, minced
  • 1 cup pumpkin puree
  • 1 cup unsweetened almond milk
  • 4 oz reduced fat cream cheese
  • 1/2 cup freshly grated goat cheddar cheese (or reduced fat cheddar)
  • 1/2 cup goat brie cheese, rind removed, cut into cubes
  • pinch freshly ground nutmeg
  • pinch ground cloves
  • sea salt and freshly ground black pepper, to taste

Directions:

  1. Cook pasta according to package directions, drain.
  2. Meanwhile, whisk together and heat pumpkin puree, garlic and milk in a medium saucepan over medium heat until just starting to simmer.
  3. Reduce stove heat to low. Whisk in cheeses until fully melted.
  4. Stir in nutmeg and ground cloves. Season with salt and pepper.
  5. Stir drained pasta into the pumpkin-cheese sauce and mix until thoroughly combined.

Filed Under: Entree, Gluten-free, Holiday & Seasonal, Pasta, Vegetarian · Tagged: cheese, comfort food, cooking, dinner, fall, mac and cheese, pasta, pumpkin, recipe, whole grain

Barbecue Ranch Bacon Cheeseburger Meatloaf

January 9, 2012 · by Ari ·

You know those barbecue bacon cheeseburgers that you can order at all those greasy hamburger restaurants, and then you smother ranch all over it and it’s even more delicious? This is like that. Only healthy 😉

When I was in NYC, we ate at a restaurant called Chelsea Grill per Mac’s suggestion. On the menu they had “Bacon Wrapped Meatloaf”. Now, I am not the type of person that orders that at a restaurant. Lots of healthy eating folks could, but knowing I could make it so much healthier at home would stress me out. So instead, I did just that and oh my gosh, it was so amazing. I would make it again and again and again. The cheese on top got the perfect amount of melty and the bacon on top got perfectly crispy. It was just like the type of cowboy burger you’d order at a restaurant. In fact, if you made it as a burger, it would also be healthy and delicious!

I made 2 meatloaves for 5 peoples plus roasted sweet potatoes and there wasn’t a single bite left at the end of the night. I was totally looking forward to leftovers this week, but I’ll take the lack thereof as a compliment about my awesome cooking!

Barbecue Ranch Bacon Cheeseburger Meatloaf

yield 4-6 servings

  • 1 1/2 lbs extra lean ground beef/turkey (at least 93% lean)
  • 1/2 cup egg substitute
  • 3/4 cup unsweetened almond milk
  • 2/3 cup raw oats
  • 1/2 cup finely chopped onion
  • generous pinch each of salt, garlic pepper, and your favorite burger seasoning
  • dash ranch reasoning
  • 1/4-1/3 cup reduced fat sharp cheddar cheese
  • 3 slices center cut or turkey bacon

For the sauce:

  • 3/4 cup nonfat plain Greek yogurt
  • 3-4 tbs barbecue sauce
  • 1 1/2 tsp ranch seasoning

Directions:

  1. Preheat oven to 400. Line a cookie sheet with tin foil and spray with nonstick spray.
  2. In a large bowl, whisk together egg substitute, almond milk, and seasonings. Mix in onion and oats.
  3. Add meat **this is the fun part!!** and use your hands to thoroughly combine. (Note: you may add the cheese at this time if you wish. I didn’t, but I imagine it would be especially delicious if you mixed it in and put it on top 🙂 )
  4. Using your hands, remove meat mixture from bowl and make a loaf shape on your prepared cookie sheet.
  5. Top with cheese, then bacon slices.
  6. Bake for 1 hour, or until cooked throughout.
  7. Meanwhile, in a small bowl, whisk together all sauce ingredients. Heat in microwave for 45-60 seconds when meat if ready.
  8. Serve meatloaf and top with barbecue ranch sauce.

To be fair, I made 2 different kinds of meatloaf. Obviously, this is the one on the right 😉

I discovered through the picture process that meatloaf is, in fact, kind of an ugly food. Sorry about that. But I promise you it tastes delicious!

Filed Under: Entree, Gluten-free · Tagged: bacon, barbecue, cheese, meatloaf, ranch, recipe

« Previous Page
Image Map

Popular Posts

Tart Cherry Margaritas: The perfect, refreshing margarita--lightly sweet with a punch of tequila

Tart Cherry Margaritas

90+ Healthy Recipes for Breakfast, Lunch, Dinner & Dessert

90+ Healthy Recipes for Breakfast, Lunch, Dinner & Dessert

The Ultimate Peanut Butter Cup Brownie Cookies: Rich, fudgy, brownie-like chocolate cookies stuffed with melty peanut butter cups!

Ultimate Peanut Butter Cup Brownie Cookies

Drink & Dish: Cafe Au Lait Cupcakes

Crockpot Chicken Enchilada Soup

Subscribe via Email:

Enter your email address:

Save an additional $30 on Blendtec Factory Recertified Blenders + Free Shipping

Featured Here

recipe redux
Certified Yummly Recipes on Yummly.com

Member Of…

FitFluential Is Fitness Found
AZ Bloggers Network
az 150 photo az150_zpsfb093d32.gif

Archives


Image Map

Copyright © 2025 | Innovative Child Theme by The Pixelista | Built on the Genesis Framework


Loading Comments...