• Going Out
    • Phx Restaurants
    • How To Order At Starbucks
  • Running
    • My Running Story
    • Race Calendar
    • Race Recaps & Results
  • Blogroll
  • Bucket List
  • Video

Ari's Menu

Little changes making a big difference.

  • Home
  • Recipes
  • Weight Loss
    • My Story
    • Common Swaps
  • Who’s Who
  • Contact
    • Policies & Disclosure
  • Press

Autumn Spiced Toddy (Cold-brewed Iced Coffee)

October 15, 2013 · by Ari ·

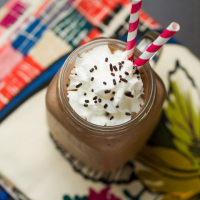
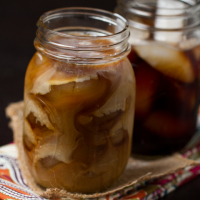
Easy & smooth cold-brewed iced coffee spiced with cinnamon, nutmeg, allspice & cloves. 

Autumn Spiced Toddy

Lately I’ve been wondering if it’s time to start acting like a grown up. I can’t even tell you what that means, because I just act like, well, me. The other day someone thought I was wayyy younger than I am (this isn’t even including the almost daily basis in which I’m mistaken for a student), and although this should be a compliment (YAY!! You didn’t notice those lines decorating my forehead!), I immediately got into my head thinking “OMG do I need to start acting like I’m in my *gulp* late 20’s?”

Autumn Spiced Toddy

Again, not that I could even tell you what that means. But sometimes I feel like maybe I need to stop talking like a teenager, getting upset when children beat me at games, and locking my husband out of our room so I can win at the who gets into bed first game. That’s a whole other story that I should probably be embarrassed of, but I’m not because I have the maturity of a 6 year old.

Autumn Spiced Toddy

I find this whole “growing up” and “maturing” business incredibly confusing. I guess I just assumed it would happen naturally, but I’m starting to wonder if it’s something people make a conscious effort to do? You know, like washing dishes (something I find equally appalling).

Autumn Spiced Toddy

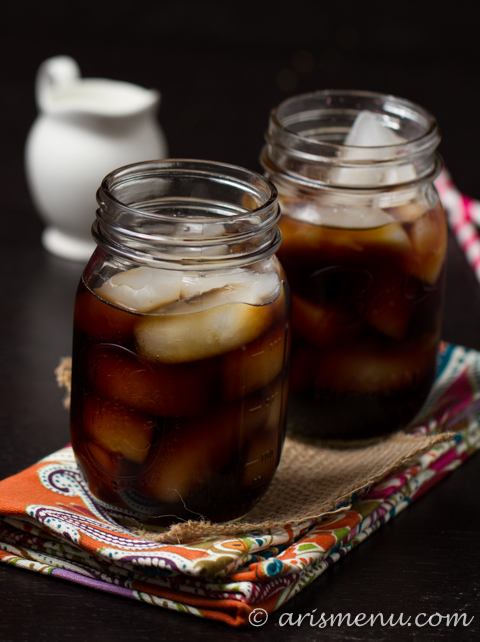
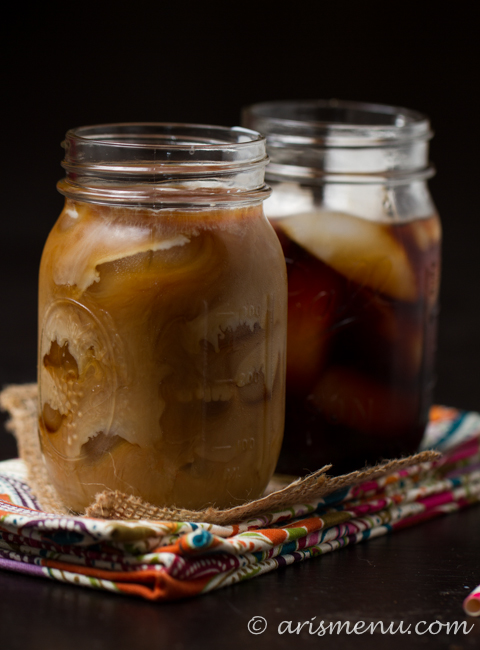
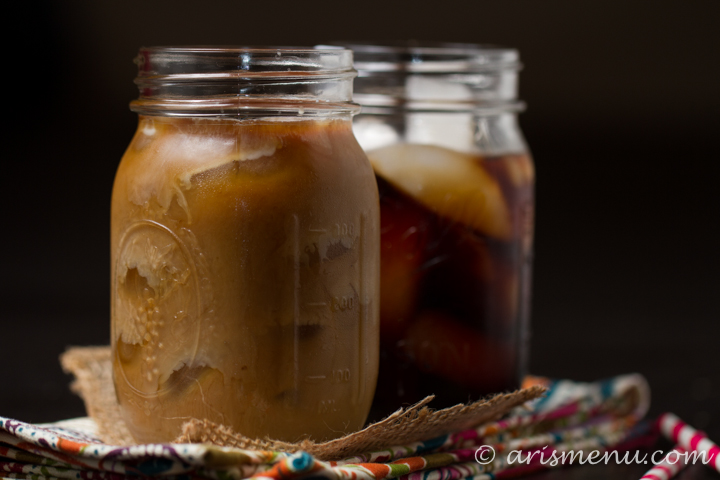
But then on the other hand, I go to bed at 9 pm, I make my own coffee and I even pretend I’m fancy and call it toddy. That really is the name for cold brew, but I feel like it’s this secret coffee snob name that no one really knows about. I am totally a coffee snob, but in an all inclusive name. Feel free to join me in my snobbery and use words no one else knows. 😉

Autumn Spiced Toddy

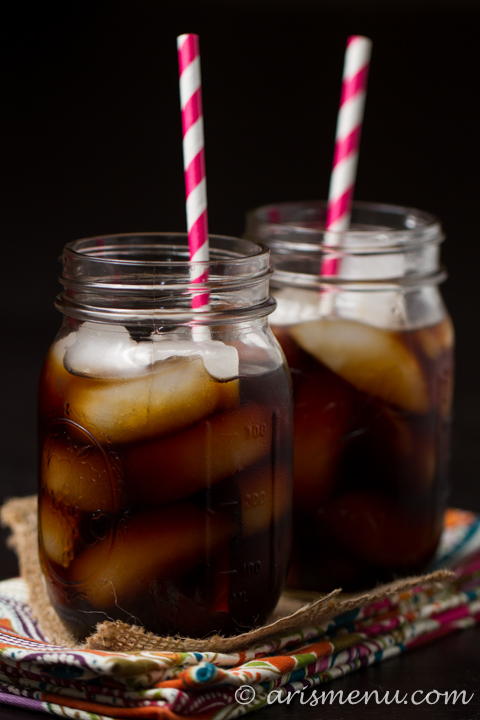
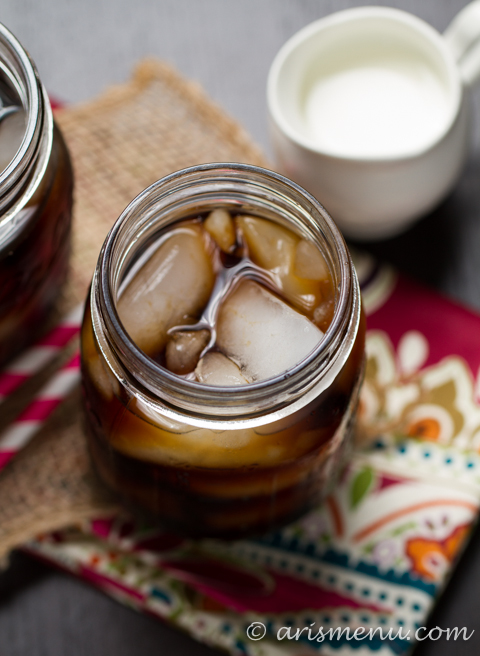
There are few DIY projects I love more than making a huge batch of toddy. It is ridiculously simple, and not a single drop ever goes to waste. It’s one less thing I have to worry about in the morning. My coffee routine is simply fill my glass with ice, pour in toddy, add some almond milk and grab a straw. Nothing to prep the night before, and I never have to worry about running out of time to feed my caffeine addiction.

Autumn Spiced Toddy

Of course, sometimes I like to spice things up. One of my favorite local coffee shops offers spiced toddy this time of year (although I’ve never actually tried it there), and it always sounded so delicious. I am a huge fan of pumpkin spiced lattes, and pretty much any fall coffee drink you can imagine, so I wanted to incorporate my favorite flavors right into my cold brew.

Autumn Spiced Toddy

I was a little worried I wouldn’t be able to taste the spices over the bold flavor of the coffee, but they shine through without being over powering. You can always add more if you want a bolder spice flavor, but I like the nice hint that adds depth–it makes you wonder what’s different about this coffee, and why it tastes special.

Autumn Spiced Toddy

Adding the spices doesn’t really take any extra time–just add them right into your batch while it sits. I used a combination of cinnamon, nutmeg, allspice and cloves. You could also add ground ginger, cardamom (for a chai flavor), or any other spices you want. If you want to see detailed instructions with step-by-step photos on how to make your iced coffee, check out this post!

Print
Autumn Spiced Toddy (Cold-brewed Iced Coffee)

Prep Time: 30 minutes

Total Time: 24 hours, 30 minutes

Yield: 12-15 cups

Serving Size: 1 cup

Autumn Spiced Toddy (Cold-brewed Iced Coffee)

Simple & easy cold brewed iced coffee seasoned with warm, comforting fall spices.

Ingredients

  • 1 lb good quality bold coffee, coarsely ground
  • 1 1/2 tbsp ground cinnamon
  • 1 tsp ground nutmeg
  • 1 tsp allspice
  • 1 tsp cloves
  • 2 gallons water

Instructions

  1. Pour ground coffee into a 2.5 gallon airtight container. Add spices. Top with 2 gallons filtered water. Pat down the top to ensure all coffee is incorporated. Cover and store for 24-48 hours (the longer it brews, the stronger it will be).
  2. Scoop out as much of the grounds as possible with a fine mesh strainer. Rinse strainer, then cover with a double layer of cheesecloth. Place covered strainer over a 1 gallon jug Use a measuring cup to pour coffee over your covered strainer to filter any remaining grounds. Repeat until jug is mostly full, then repeat with a second 1 gallon jug. If your coffee begins to have trouble filtering through, change your cheesecloth out for a fresh one.
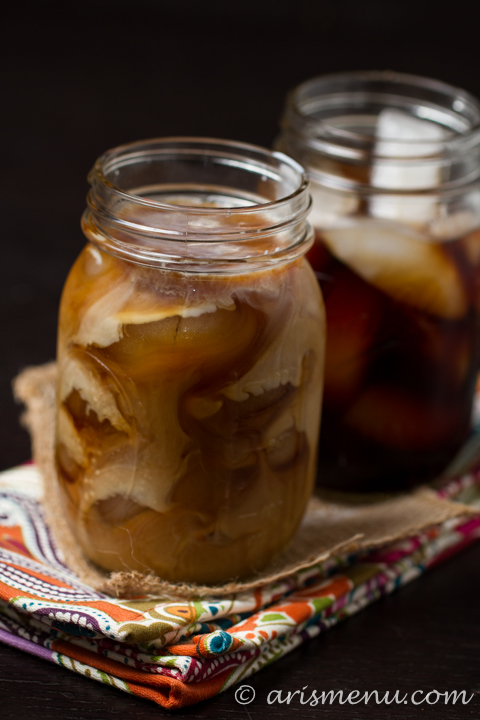
  3. To serve, fill glass with ice and add 1-2 inches of water. Add coffee, and any desired cream or sweetener.
3.1
https://arismenu.com/autumn-spiced-toddy-cold-brewed-iced-coffee/

Filed Under: DIY/How To, Drinks, Gluten-free, Holiday & Seasonal, Low Carb, Miscellaneous, Vegan · Tagged: cinnamon, cinnamon coffee, coffee, diy, drink, fall, gluten free, how to, recipe, vegan

Pumpkin Pecan Granola

September 24, 2013 · by Ari ·

Pumpkin Pecan Granola #vegan #glutenfree

This morning I went out for a run, and my first thought when I stepped outside was “It feels chilly out”!!!! I practically jumped for joy. There is a warmth in my heart that can only be described as fall, and I don’t intend to stop sharing my love about it any time soon. Forgive me?

Pumpkin Pecan Granola #vegan #glutenfree

Of course I needed a special fall granola. Okay, that’s a lie. I made this in, like, April and thought I should probably wait until fall to post it. I do promise not to post exclusively pumpkin recipes for the next 3 months, but I can’t promise that there won’t be a whole lot of ’em. 😉

Pumpkin Pecan Granola #vegan #glutenfree

This granola just has a *hint* of pumpkin, so if you’re not as obsessed with the flavor as I am (ummm, WHY NOT), I think there’s a good chance you’ll still enjoy it! Lots of crunchy pecans, a hint of spice, big granola clusters, and soft, sweet dried cranberries. This granola just screams fall, and the flavors complement each other perfectly.

Print
Pumpkin Pecan Granola

Prep Time: 10 minutes

Cook Time: 1 hour

Total Time: 1 hour, 10 minutes

Yield: approx 12 cups

Serving Size: 1/2 cup

Pumpkin Pecan Granola

Warm and cozy pumpkin spice granola with pecans and dried cranberries is the perfect way to add some fall flavor to your breakfast every morning!

Ingredients

  • 5 cups rolled oats (use gluten-free if applicable)
  • 3 cups pecans, coarsely chopped
  • 2/3 cups almonds, coarsely chopped
  • 1/3 cup milled flax seed
  • 1 tbsp pumpkin pie spice
  • heavy pinch sea salt
  • 3/4 cup pumpkin puree
  • 2/3 cup pure maple syrup
  • 2 tbsp coconut oil
  • 2 tsp vanilla extract
  • 2 cups dried cranberries

Instructions

  1. Preheat the oven to 300. Line two large baking sheets with silpat or parchment paper. Set aside.
  2. In a very large bowl, mix together the oats, nuts, flax seed, pumpkin pie spice and salt.
  3. In a small saucepan, warm the pumpkin puree, maple syrup, coconut oil, and vanilla extract until well combined, whisking constantly.
  4. Add the pumpkin mixture into the dry ingredients and toss to combine. Divide mixture evenly between your 2 prepared baking sheets.
  5. Bake until browned and crispy, about 1 hour. Lightly toss granola half way through.
  6. Cool completely. Add cranberries and gently toss to combine. Store in an airtight container at room temperature. The granola will stay fresh for at least one month. I’ve never made a batch last any longer than that, but it’s still great a month in!
3.1
https://arismenu.com/pumpkin-pecan-granola/

Filed Under: Breakfast, Fall, Gluten-free, Granola, Holiday & Seasonal, Vegan · Tagged: breakfast, cranberries, fall, gluten free, granola, pecan, pumpkin, recipe, snack, vegan

Mexican Slaw

September 19, 2013 · by Ari ·

Mexican Slaw #vegan #glutenfree

You guys, life has been so busy lately. I don’t know how some people take all of these trips and still manage to get things done in life. I’ve been coming and going since June, and I’m just kind of ready to stay put for a little while. I mean, I wouldn’t trade any of my recent trips for the world, but I am tiiiiired. And I haven’t cooked real food in, like, 2 weeks.

Mexican Slaw #vegan #glutenfree

I mean, I have 5 zillion recipes that literally only take a matter of minutes to prepare, but I just cannot get on the ball. I know that once I just force myself to make it happen, I will remember that I actually like cooking. Not to mention, I have soooo many fall recipes floating around in my head.

Mexican Slaw #vegan #glutenfree

Until then, coleslaw counts as dinner, right? Okay, maybe not, but it certainly does count for an insanely easy side dish packed full of veggies and nutrients. I don’t think I really like the word nutrients. It sounds ugly to me. Is that weird? Have I ever told you about my friend who doesn’t like the word cube (miss you, John!)?

Mexican Slaw #vegan #glutenfree

Anyway, this slaw…it is the easiest thing you will ever make, and it is insanely delicious. Bold and spicy Mexican flavors with some honey (or agave) for a touch of sweetness, and I am a firm believer that cumin and cilantro make everything better. You could top some delicious homemade tacos with this, add some grilled chicken or black beans to make it a full meal, or even just simply eat it as a snack or side dish.

Print
Mexican Slaw

Prep Time: 5 minutes

Total Time: 5 minutes

Yield: approx 10 servings

Serving Size: 1/2 cup

Mexican Slaw

Simple., easy, spicy and bold Mexican coleslaw--the perfect side dish for some fajitas or great for topping your homemade tacos!

Ingredients

  • 12 oz slaw mix
  • 1/2 red onion, finely chopped
  • 1 jalapeno, seeded and finely chopped (remove ribs for less spice)
  • Handful fresh cilantro, finely chopped
  • 1 1/2 tbsp olive oil
  • 3 tbsp fresh lime juice
  • 1 tbsp honey (or agave)
  • pinch cumin
  • generous pinch each salt and pepper

Instructions

  1. Add slaw mix, onion, jalapeno and cilantro to a large bowl.
  2. In a small bowl, whisk together olive oil, lime juice and honey. Add to your slaw mix and season with cumin, salt and pepper. Toss until fully coated. Serve immediately or refrigerate in an air tight container for 3-5 days.

Notes

Feel free to add in chopped red pepper, or any extra veggies you'd like.

3.1
https://arismenu.com/mexican-slaw/


Filed Under: Appetizers, Gluten-free, Holiday & Seasonal, Low Carb, Paleo, savory, Side Dish, Summer, Vegan, Vegetarian · Tagged: coleslaw, gluten free, mexican, paleo, recipe, side, spicy, vegan

Sweet Potato Avocado Salad

September 11, 2013 · by Ari ·

Sweet Potato Avocado Salad #vegan #glutenfree

You know that feeling when you’re super excited for a long weekend, but getting ready for it is so stressful that by the time you’re done getting ready for said long weekend, you feel like you need a second long weekend just to recover from it? Yeah…I’m there.

Sweet Potato Avocado Salad #vegan #glutenfree

Tomorrow morning (at some hour that shouldn’t even be legal), Nicole and I fly to Minneapolis for the Healthy Living Summit. It seems like we’ve been anticipating this day foreeevvvverrrr, and I can’t believe it’s finally here! This week has been spent getting things taken care of at work, and putting the final touches on our presentation. I’m totally nervous, but mostly excited for the next 4 days!

Sweet Potato Avocado Salad #vegan #glutenfree

So in my absence, I leave you  this salad. I wasn’t sure if it was a salad or a salsa. I mean, it’s actually nothing like salsa, except it kind of reminds me of a salsa? Kinda like this one. Anyway, I first made this salad when I was staying with my friend Karisa this summer, and one bite in I knew I needed to make it again so I could share it with you guys. It is hands down one of my favorite things I’ve ever eaten. The sweetness from the sweet potatoes against the spicy jalapenos and creamy avocado…ugggghhh, it just all…fits. Like a glove.

Sweet Potato Avocado Salad #vegan #glutenfree

This recipe is so simple, and aside from the time spent roasting the potatoes, it all comes together really quickly. Just a few fresh ingredients, and totally fool proof–the perfect side for some grilled chicken or steak for a nice, easy, and healthy weeknight dinner!

Print
Sweet Potato Avocado Salad

Prep Time: 10 minutes

Cook Time: 40 minutes

Total Time: 1 hour

Yield: Approx 6 servings

Sweet Potato Avocado Salad

Ingredients

  • 2 medium sweet potatoes, cut into 1" pieces
  • 3 tbsp olive oil, divided
  • Salt and pepper
  • 2 large avocados, cut into 1" pieces
  • 1/2 red onion, finely chopped
  • 1 jalapeno, seeded and finely chopped
  • Handful fresh cilantro, chopped
  • Juice of 1 lime
  • 1 tsp honey or agave

Instructions

  1. Preheat oven to 400. Line sweet potatoes out on a large rimmed baking sheet. Drizzle with 2 tbsp olive oil and season with a generous pinch each of salt and pepper. Roast until tender, but not mushy, about 40 minutes. Let cool slightly.
  2. In a large bowl, add cooked sweet potato, remaining tablespoon olive oil, avocado, onion, jalapeno, cilantro, lime juice and honey/agave. Toss together lightly to coat. Serve immediately. May be served warm or cold. Keep leftovers refrigerated in an airtight container for 3-5 days.
3.1
https://arismenu.com/sweet-potato-avocado-salad/


Filed Under: Appetizers, Fall, Gluten-free, Holiday & Seasonal, Lunch, Salads, savory, Side Dish, Summer, Vegan, Vegetarian · Tagged: avocado, cilantro, gluten free, recipe, salad, side, sweet potato, vegan

Chocolate Peanut Butter Banana Shake

September 8, 2013 · by Ari ·

Chocolate Peanut Butter Banana Shake #vegan #glutenfree

I know, I know….It’s September and we’re supposed to be talking about crockpots, pumpkin, and cinnamon. And this weekend, I can’t even complain about the temperatures here. We’ve had highs in the 90s, and yesterday we even got rain! I mean,  being rained on for a good 3 hours of my bike ride was not ideal, but I will never complain about rain in this city!

Chocolate Peanut Butter Banana Shake #vegan #glutenfree

And honestly, I don’t care if it’s 100 degrees or 50, I still always want ice cream. My friends think I’m crazy when I crave fro-yo in the winter, but it just is, and always will be, my favorite dessert. Cookies are a close second.

Chocolate Peanut Butter Banana Shake #vegan #glutenfree

The other day, my little sister (in-law–ps I hate the term “in-law”) was over after just having her braces tightened and was having trouble chewing on any solid food. I am of strong belief that any mouth or throat pain means ice cream is a necessity. If you’re going to be miserable, there should at least be ice cream.

Chocolate Peanut Butter Banana Shake #vegan #glutenfree

I decided to use up the last of my chocolate fro-yo, throw in a banana, and of course I had to add in peanut butter. I tasted a sip, and it was dangerously good. I knew I wanted to remake it at least a tiny bit healthier for myself, so I put some extra ripe bananas in the freezer for a day when I would need a little pick-me-up.

Chocolate Peanut Butter Banana Shake #vegan #glutenfree

I love milkshakes because they literally require 3 minutes of your time (and then an other 30 as you stress out trying to photograph them before they turn into a melty puddle of mess), and they are a total comfort dessert for me! I ended up using a combination of chocolate peanut butter and chocolate chips to get the chocolate flavor in there, and the blended up chips added just the right amount of texture.

Print
Chocolate Peanut Butter Banana Shake

Prep Time: 3 minutes

Total Time: 3 minutes

Yield: 2 servings

Chocolate Peanut Butter Banana Shake

This chocolate peanut butter banana milkshake is ridiculously simple and comes together in minutes.

Ingredients

  • 3 bananas, sliced and frozen
  • 2 tbsp chocolate peanut butter
  • 1/2 cup dark chocolate chips
  • 1 tsp vanilla extract
  • 3/4 cup unsweetened almond milk
  • whipped cream or whipped coconut cream and sprinkles for serving, optional

Instructions

  1. Combine bananas, peanut butter, chocolate chips, vanilla and 1/2 cup of your almond milk in a high-quality blender. Blend until smooth (you will likely need to stop and stir--it will be very thick). Slowly, add more milk until milkshake has reached your desired consistency. Serve immediately. Top with whipped cream/whipped coconut cream and sprinkles if desired.
3.1
https://arismenu.com/chocolate-peanut-butter-banana-shake/

Filed Under: Breakfast, Dessert, Drinks, Gluten-free, Smoothies & Shakes, Summer, Vegan · Tagged: banana, chocolate, chocolate peanut butter banana milkshake, dessert, gluten free, milkshake, peanut butter, recipe, vegan

Pumpkin Pecan Scones {vegan + gluten-free}

September 3, 2013 · by Ari ·

Pumpkin Pecan Scones #vegan #glutenfree

I promised myself I was going to wait until the first day of fall to post my first pumpkin recipe of the year, but I just can’t do it anymore. Heck, it was hard enough to wait until after the first day of September!

Pumpkin Pecan Scones #vegan #glutenfree

Like many of you, I make pumpkin recipes year round. Pecans though? I feel like they are the forgotten stepchild of fall amazingness. Pumpkin, apples and cranberries take the spotlight while sweet and crunchy pecans are often forgotten, left on the sidelines.

Pumpkin Pecan Scones #vegan #glutenfree

Well not here, my friends. These scones may be loaded with pumpkin spice, but the real star is the ultra-soft pecan flour. The texture of these scones is like no other. The outside is just like a regular scone, but the inside is melt-in-your-mouth smooth. Not at all dry and crumbly like some scones can be.

Pumpkin Pecan Scones #vegan #glutenfree

Pecan flour isn’t exactly a common ingredient. At least, I’ve never seen it in the store, and until after making my own was a slightly annoying (but still totally worth it) task, I didn’t even know you could buy it. King Arthur sells it, and you can also look on Amazon. I made my own by grinding the pecans in my food processor, then lofts of sift, grind, repeat. I can’t say it was a quick process, but the result was so incredible that I would do it again in a heart beat!

Pumpkin Pecan Scones #vegan #glutenfree

Other than if you make your own pecan flour, they are ridiculously quick and easy to make. 1 bowl–no mixer–quick bake time–practically fool proof!

Pumpkin Pecan Scones #vegan #glutenfree

I dusted mine with a pumpkin spiced powdered sugar topping, but they are equally great without, or with some fresh whipped cream or whipped coconut cream for an extra treat. They also stay super soft for a few days, so you can make them ahead of time for company, or throw them together at the last minute. Either way, once you make them, they won’t last long!

Print
Pumpkin Pecan Scones

Prep Time: 5 minutes

Cook Time: 10 minutes

Total Time: 15 minutes

Yield: 8 scones

Serving Size: 1 scone

Pumpkin Pecan Scones

Ultra-soft pumpkin spiced pecan flour scones are sure to be your new go-to fall treat! Vegan & gluten-free.

Ingredients

    For the scones:
  • 2 1/2 cups pecan flour
  • dash salt
  • 1 tsp baking soda
  • 1 tbsp corn starch
  • 1 tsp pumpkin pie spice
  • 2 tbsp pure maple syrup
  • 1/2 cup pumpkin puree
  • For the powdered sugar topping:
  • 2 tbsp powdered sugar
  • 1 tsp pumpkin pie spice

Instructions

  1. To make the scones, preheat oven to 350. Line a medium baking sheet with Silpat or parchment paper. Set aside.
  2. In a medium bowl, whisk together pecan flour, salt, baking soda, corn starch, and pumpkin pie spice. Add maple syrup and pumpkin puree. Mix until combined. Mixture will be slightly wet and sticky. If it is unmanageable, add more pecan flour 1 tablespoon at a time.
  3. Roll dough into a large ball and press down into a 1-1 1/2? thick disk. Cut into 8 equal pieces. Do not separate. Bake as if for 9-11 minutes until golden and set. Transfer to wire racks to cool completely.
  4. In a small bowl, whisk together powdered sugar topping. Lightly dust onto scones just before serving. Scones can be stored at room temperature in an airtight container for up to 5 days.
3.1
https://arismenu.com/pumpkin-pecan-scones-vegan-gluten-free/

Filed Under: Breads & Muffins, Breakfast, Dessert, Fall, Gluten-free, Holiday & Seasonal, Paleo, Vegan · Tagged: fall, gluten free, pecan flour, pecan flour scones, pecans, pumpkin, pumpkin scones, recipe, scones, vegan, vegan and gluten free scones

Lemon Rosemary Grilled Artichokes

August 14, 2013 · by Ari ·

Lemon Rosemary Grilled Artichokes #vegan #glutenfree

I took 5 pictures of artichokes and they all look the same. Forgive me?

Lemon Rosemary Grilled Artichokes #vegan #glutenfree

Actually, I took more like 20 pictures of artichokes which is surprisingly low for me. Usually I take close to 40 photos per shoot until I’m either 100% positive I got the shot I wanted, or I give in to frustration and call it quits, decide I hate photography and I am going to delete my blog. Sometimes I’m a little dramatic.

Lemon Rosemary Grilled Artichokes #vegan #glutenfree

And actually, they don’t all look exactly the same. I moved, like, an inch to the right which obviously makes it a completely different photo. Then I just really liked them all, and I couldn’t choose. Usually I show them all to Steve over and over and over until he tells me which one(s) to delete, but he was boycotting. So that’s what you get. Five pictures of artichokes that all look extremely similar.

Lemon Rosemary Grilled Artichokes #vegan #glutenfree

Grilled artichokes. Uuugghh…you guys. They are THE BEST. I could eat a whole grilled artichoke for dinner and be totally content. They are huge, filling, healthy, and they force you to eat slow and enjoy the experience. They are not an impatient food, which makes it a little strange that I enjoy them so much, because we all know I am an impatient person. They are a process. The cooking part is a piece of cake. Boil, remove the weird hairs (I know…I wish they made hairless artichokes, like pitted dates or hairless cats…), grill, voila! Then you get to take your time. One leaf at a time, until you get to where all the action is–the heart!

Lemon Rosemary Grilled Artichokes #vegan #glutenfree

Once your artichoke has been cooked, you scrape the inside of each leaf with your teeth, then discard the leaf into a side dish. Repeat with all of the leaves until you get to the heart, then pick that baby up and chow down! If you’ve never tried a whole artichoke, seriously, you must! And the lemon and rosemary?? To die for. A totally impressive meal that is more time consuming to eat than it is to cook!

Print
Lemon Rosemary Grilled Artichokes

Prep Time: 10 minutes

Cook Time: 25 minutes

Total Time: 35 minutes

Yield: 4 servings

Serving Size: 1/2 artichoke

Lemon Rosemary Grilled Artichokes

Ingredients

  • 2 large lemons
  • 2 large artichokes
  • 1 sprig rosemary, finely chopped
  • 2 tbsp olive oil
  • salt and pepper

Instructions

  1. Cut off the stems of each artichoke leaving about 1" of stem remaining. Slice off the top quarter of each artichoke to create a flat top. Fill a very large pan or dutch oven with water and juice from one lemon. Add a pinch of salt if desired. Bring water to a boil, and add artichokes. Boil for about 15 minutes, until softened. Remove, and let stand for 5-10 minutes until they have slightly cooled.
  2. Slice each artichoke in half, and use a spoon to remove the choke (the part in the center just about the heart that looks like little hairs--they will scoop right out). Drizzle each half with 1/2 tbsp olive oil, then zest remaining lemon over the artichokes (I used about a tablespoon of zest). Season with rosemary, and a pinch each of salt and pepper.
  3. Grill artichokes over medium heat until browned and softened, about 5 minutes per side. Serve immediately.

Notes

Some people wish to trim the spiky leaves on the outside of the artichoke before cooking. You may do this, but I find it to be a waste of time. I find that they soften when cooked, and if they don't I simply discard them after cooking.

Often the first layer or two of the artichoke won't have any of the good stuff. You may with to discard the first several leaves. When you get to the good ones, the "meat" will scrape off easily.

3.1
https://arismenu.com/lemon-rosemary-grilled-artichokes/

Filed Under: Appetizers, Dinner, DIY/How To, Gluten-free, Holiday & Seasonal, Low Carb, Miscellaneous, Paleo, savory, Side Dish, Summer, Vegan, Vegetarian · Tagged: artichokes, gluten free, grilling, lemon, paleo, recipe, rosemary, summer, vegan, vegetables, whole 30

Vanilla Bean Coconut Pistachio Granola

August 11, 2013 · by Ari ·

Vanilla Bean Coconut Pistachio Granola #vegan #glutenfree

You know those people who rarely speak, and when they do everyone listens? Those quiet people who only speak out when they have something really important to say, and so you know you want to take note, soak it up, and really hear their words?

Vanilla Bean Coconut Pistachio Granola #vegan #glutenfree

Yeah, that’s not me. I’m more on the end of talks-too-much-so-most-of-it-must-be-pretty-inconsequential. In fact, the other day, Stacey told me she knew a recipe was mine by the long, overly descriptive title. It’s the truth. And not just in recipe writing. I am a human with a lot to say, and no matter how hard I try to be one of those people that only speaks when I need to like a character on stage, I just keep talking until someone finally stops me and puts the rest of the room out of their misery. 😉

Vanilla Bean Coconut Pistachio Granola #vegan #glutenfree

Here’s what you actually need to know about this granola:

  • Crunchy
  • Sweet
  • Vanilla bean flavor
  • Rich pistachios
  • Nutty coconut
  • Big snack-worthy clusters
  • Vegan
  • Gluten-free
  • Ridiculously good

Vanilla Bean Coconut Pistachio Granola #vegan #glutenfree

Got it?

Print
Vanilla Bean Coconut Pistachio Granola

Prep Time: 10 minutes

Cook Time: 1 hour

Total Time: 1 hour, 10 minutes

Yield: approx 12 cups

Serving Size: 1/2 cup

Vanilla Bean Coconut Pistachio Granola

Ingredients

  • 5 cups rolled oats (use gluten-free if applicable)
  • 3 cups shelled pistachios, coarsely chopped
  • 2/3 cups almonds, coarsely chopped
  • 1 cup shredded unsweetened reduced fat coconut
  • 1/4 cup packed brown sugar
  • 3 tsp cinnamon
  • heavy pinch sea salt
  • 3/4 cup unsweetened applesauce
  • 1/4 cup pure maple syrup
  • 1/3 cup honey or agave
  • 2 tbsp coconut butter or coconut oil
  • Seeds from 1 vanilla bean
  • 1 tsp coconut extract

Instructions

  1. Preheat the oven to 300. Line two large baking sheets with silpat or parchment paper. Set aside.
  2. In a very large bowl, mix together the oats, nuts, coconut, brown sugar, cinnamon and salt.
  3. In a small saucepan, warm the applesauce, maple syrup, honey/agave, coconut butter, vanilla bean seeds, and coconut extract until well combined, whisking constantly.
  4. Add the applesauce mixture into the dry ingredients and toss to combine. Divide mixture evenly between your 2 prepared baking sheets.
  5. Bake until browned and crispy, about 1 hour. Lightly toss granola every 10-20 minutes while cooking. DO NOT skip the tossing--the pistachios can burn easily if you skip this step.
  6. Cool completely. Store in an airtight container at room temperature. The granola will stay fresh for at least one month. I’ve never made a batch last any longer than that, but it’s still great a month in!
3.1
https://arismenu.com/vanilla-bean-coconut-pistachio-granola/

Filed Under: Breakfast, Gluten-free, Granola, Vegan · Tagged: breakfast, coconut, gluten free, granola, nuts, oats, pistachio, recipe, vanilla, vegan

Vanilla Bean Coconut Butter

July 23, 2013 · by Ari ·

Vanilla Bean Coconut Butter

So, if it weren’t for other blogs, I wouldn’t even know coconut butter was a thing. Coconut is, like, the next big thing in the food world it seems. Coconut milk, coconut oil, coconut butter, COCONUT EVERYTHING!

Vanilla Bean Coconut Butter

I didn’t even have an idea what it would actually taste like, but one day I just threw some coconut in my food processor, and decided to give it a try. I do love anything with the word ‘butter’ in the name, so I figured there was no way it could be bad…

Vanilla Bean Coconut Butter

In fact, you could tell me that broccoli butter is a thing, and I’d probably be convinced I needed to get in the kitchen and make it rightthatsecond.

Vanilla Bean Coconut Butter

Turns out, coconut butter is good. Like, really good. It’s like a combination of creamy, drippy homemade peanut butter with chewy coconut flavor and texture. It’s great on toast, bananas, and especially smoothies. It’s actually kind of magical in smoothies.

Vanilla Bean Coconut Butter

The coconut is already slightly sweet, so you don’t need a lot of sugar. I used 1/2 tbsp, and I probably would have REALLY loved it with 1-2 tbsp, but I wouldn’t use more than 2. Also, if you don’t like to add sugar, you can totally leave it out. Either way, you are in for a creamy, drippy jar of deliciousness.

Print
Vanilla Bean Coconut Butter

Prep Time: 10 minutes

Total Time: 10 minutes

Yield: Scant 1/2 pint

Serving Size: 2 tbsp

Vanilla Bean Coconut Butter

Creamy, simple and delicious coconut butter with bold vanilla bean and lightly sweetened with brown sugar.

Ingredients

  • 2 cups unsweetened shredded coconut
  • 1 vanilla bean (or 1 tbsp vanilla bean paste)
  • 1/2 tbsp brown sugar*

Instructions

  1. Blend coconut in your food processor until a creamy, peanut-butter-like texture forms, about 5-7 minutes. Split vanilla bean length wise and scrape seeds into coconut mixture. Add brown sugar and continue to pulse until well combined, about an other 1-2 minutes. Store in an airtight container at room temperature, or in the refrigerator. Stir before serving.

Notes

*You can omit the brown sugar if you wish, or if you like things sweeter, add up to 2 tbsp. I would add it 1/2 tbsp at a time, and taste as you go.

I've had my jar for over 2 weeks and it is still going strong. If it will last you longer than that, you may wish to keep refrigerated.

3.1
https://arismenu.com/vanilla-bean-coconut-butter/

Filed Under: DIY/How To, Gluten-free, Miscellaneous, Paleo, Sauces & Spreads, Snacks, Vegan · Tagged: coconut, coconut butter, easy, gluten free, recipe, simple, spreads, vanilla, vanilla bean, vegan

Sugar-free Rosemary Lemonade

July 11, 2013 · by Ari ·

Rosemary Lemonade #sugarfree

Is there anything more refreshing in the summer than an ice cold lemonade? Okay, maybe those frozen ones at Disneyland (ahhh Disneyland–WANT TO BE THERE NOW!), but even those can be so syrupy sweet that I end up thirstier than when I started.

Rosemary Lemonade #sugarfree

I’m not usually into the artificial sweeteners. I used to use a lot of Splenda, then as I began to care about actually health, and not just caloric values, I began to steer myself away from fake sweeteners. Minus my coffee and sometimes a diet coke. Let’s just say it’s a work in progress. 😉

Rosemary Lemonade #sugarfree

Anyway, they say that stevia won’t kill you, so I decided to give it a shot. I know, I’m totally late to the party. If you’ve decided that “they” are liars and have it all wrong, you could totally sub in some agave nectar for a nice natural sweetness.

Rosemary Lemonade #sugarfree

When I first started thinking about creating a rosemary lemonade, I thought it was this new, unique idea that most people would find crazy, until they tried it and discovered my visionary genius qualities. Then they started popping up all over the internet. Womp womp. Still, it’s delicious, fresh, summery, and totally not as weird as it sounds. I make mine on the tart end because I want that more natural taste, but feel free to add a little extra sweetness if you prefer. Either way, you will love this lemonade!

Print
Sugar-free Rosemary Lemonade

Yield: 7 cups

Serving Size: 1 cup

Sugar-free Rosemary Lemonade

Ingredients

  • 6 cups filtered water
  • 3-4 sprigs rosemary
  • Juice from 6 large lemons (or about 1 cup fresh lemon juice)
  • 20 drops stevia (or 2/3 cup agave nectar)

Instructions

  1. Bring one cup water to a boil Add rosemary, remove from heat and allow to cool completely. Add 5 cups cold water, lemon juice and stevia. You may discard rosemary sprigs or allow to stay in for some extra rosemary flavor.
  2. Store refrigerated in an airtight container for up to one week. Serve over ice with extra rosemary and lemon slices if desired.
3.1
https://arismenu.com/sugar-free-rosemary-lemonade/

Filed Under: Drinks, Gluten-free, Holiday & Seasonal, Low Carb, Paleo, Vegan · Tagged: drink, gluten free, lemonade, recipe, rosemary, sugar free, summer, vegan

Magic Shell Cups

July 7, 2013 · by Ari ·

Magic Shell Cups #vegan #glutenfree

Remember Dibs? They were so popular when they first came out. Dangerously good, and finally brought ice cream as a “snack” to movie theaters. I was pretty obsessed, but as I’ve mentioned, I’m pretty obsessed with anything that includes ice cream. 😉

Magic Shell Cups #vegan #glutenfree

I tried to make you Dibs. I tried to many ways. I made a mess of my kitchen. Chocolate and fro-yo everywhere. And I’m not one of those roll with the punches people who keeps it cool when things don’t work out. No. I work in an embarrassingly fragile state in the kitchen where I am known to have legit freak out when things don’t turn out the way I want them to. It’s really fun being married to me. 😉

Magic Shell Cups #vegan #glutenfree

Anyway, after several failed attempts, I decided to change things up a little. Last year I was obsessed with making these cups. Then after selling hundreds of them for fundraising and spending pretty much every weekend making them, I decided I never wanted to make a single candy cup again for the rest of my life. Good thing these are ice cream cups instead. They did bring back some painful memories, but man were they worth it in the end!

Magic Shell Cups #vegan #glutenfree

These cups are everything you love about a magic shell ice cream cone in tiny, bite-sized cups that are perfect for when you just want a little bit of sweetness. They are also extremely versatile. You could put rice krispies in the chocolate for some added crunch, you can use any type of ice cream/fro-yo you like (I like it best with nonfat vanilla fro-yo or coconut milk ice cream), you can add sprinkles (no brainer for me!) for color and crunch, and you could even put in some peanut butter, granola or pretzels to add some variety!

Print
Magic Shell Cups

Prep Time: 20 minutes

Total Time: 20 minutes

Yield: 26-30 cups

Serving Size: 2 cups

Magic Shell Cups

Ingredients

  • 20 oz dark chocolate, roughly chopped (or dark chocolate chips)
  • 1 tbsp coconut oil
  • Approx 1 cup ice cream/frozen yogurt of choice (I used coconut milk ice cream and nonfat vanilla fro-yo. If vegan, use coconut milk or other nondairy ice cream.)
  • Sprinkles for topping, optional

Instructions

  1. Line mini muffin tins with paper liners.
  2. In a medium bowl, heat chocolate and coconut oil in the microwave in 20 second intervals, stirring after each, until melted.
  3. Spoon enough chocolate to cover the bottom of each baking cup. Add scant tablespoon fro-yo or ice cream. Cover with more chocolate. Add sprinkles if desired.
  4. Freeze for at least one hour or until set. Cups will stay kept in the refrigerator for up to one month.
3.1
https://arismenu.com/magic-shell-cups/

Filed Under: Dessert, Gluten-free, Holiday & Seasonal, Ice Cream & Fro-yo, Snacks · Tagged: candy, chocolate, cups, dessert, fro yo, gluten free, ice cream, magic shell, recipe, sprinkles, vegan

Chocolate Chip Zucchini Almond Meal Muffins

June 18, 2013 · by Ari ·

Soft & fluffy zucchini muffins stuffed with dark chocolate chips. Grain-free, refined sugar-free, vegan & paleo!

Chocolate Chip Zucchini Almond Meal Muffins #vegan #glutenfree

Did I ever tell you about the time I ate 3 zucchinis in one sitting because I wanted a snack and was trying to be healthy? I called up one of my best friends and said “I think I just over ate zucchinis. Is that even a thing?” I love them. Sauteed, roasted, grilled, BAKED!

zucchinimuffins-19Chocolate Chip Zucchini Almond Meal Muffins #vegan #glutenfree

Okay, these muffins taste nothing like zucchinis. Just like carrot cake doesn’t actually taste like carrots. But the zucchinis add some extra veggie goodness, and also produce some of the softest, (insert gross word) and tender muffins I have ever tasted.

Chocolate Chip Zucchini Almond Meal Muffins #vegan #glutenfree

As soon as I decided I wanted to make zucchini almond meal muffins, I hit up my girl Gina’s blog for some inspiration. She has the best paleo recipes, and although I don’t eat paleo, I love baking with nut flours, and her blog is always a great place to start. She made some ridiculously good looking zucchini bread that I used as a guideline, but ended up with muffins with chocolate chips inside. Shocking, right?

Chocolate Chip Zucchini Almond Meal Muffins #vegan #glutenfree

The muffins tasted EXACTLY like I wanted–lightly sweet, hearty and filling without being heavy. They didn’t last long, and whether you normally use grain-free flours or not, you will absolutely love them!

Print
Chocolate Chip Zucchini Almond Meal Muffins

Prep Time: 10 minutes

Cook Time: 25 minutes

Total Time: 35 minutes

Yield: 1 dozen

Serving Size: 1 muffin

Chocolate Chip Zucchini Almond Meal Muffins

Soft & fluffy zucchini muffins stuffed with dark chocolate chips. Grain-free, refined sugar-free, vegan & paleo!

Ingredients

  • 3/4 cup unsweetened vanilla almond milk
  • 1/2 tsp apple cider vinegar
  • 1 1/2 cups almond meal
  • 1 1/2 tsp baking soda
  • dash salt
  • 1 tsp cinnamon
  • 1 ripe banana, mashed
  • 3 tbsp natural liquid sweetener of choice (honey, agave, maple syrup, etc.)
  • 1 tbsp coconut oil, melted
  • 1 tsp vanilla extract
  • 1 cup finely grated zucchini, squeezed dry
  • heaping 1/2 cup mini dark chocolate chips

Instructions

  1. Preheat oven to 350. Line muffin tins with paper liners. Set aside.
  2. Measure milk in your measuring cup. Add apple cider vinegar and whisk lightly. Set aside.
  3. In a large bowl, whisk together almond meal, baking soda, salt and cinnamon. Add almond milk mixture, banana, sweetener, coconut oil, and vanilla. Mix until just combined. Fold in zucchini and chocolate chips.
  4. Evenly divide batter between between 12 prepared muffin molds.
  5. Bake until golden and a toothpick inserted in the center comes out clean, about 20-25 minutes.

Notes

Adapted from Running to the Kitchen

3.1
https://arismenu.com/chocolate-chip-zucchini-almond-meal-muffins/

Filed Under: Breads & Muffins, Breakfast, Dessert, Gluten-free, Holiday & Seasonal, Paleo, Summer, Vegan · Tagged: almond meal, breakfast, chocolate, dessert, gluten free, grain free, muffin, recipe, vegan, zucchini

« Previous Page
Next Page »
Image Map

Popular Posts

Tart Cherry Margaritas: The perfect, refreshing margarita--lightly sweet with a punch of tequila

Tart Cherry Margaritas

90+ Healthy Recipes for Breakfast, Lunch, Dinner & Dessert

90+ Healthy Recipes for Breakfast, Lunch, Dinner & Dessert

The Ultimate Peanut Butter Cup Brownie Cookies: Rich, fudgy, brownie-like chocolate cookies stuffed with melty peanut butter cups!

Ultimate Peanut Butter Cup Brownie Cookies

Drink & Dish: Cafe Au Lait Cupcakes

Crockpot Chicken Enchilada Soup

Subscribe via Email:

Enter your email address:

Save an additional $30 on Blendtec Factory Recertified Blenders + Free Shipping

Featured Here

recipe redux
Certified Yummly Recipes on Yummly.com

Member Of…

FitFluential Is Fitness Found
AZ Bloggers Network
az 150 photo az150_zpsfb093d32.gif

Archives


Image Map

Copyright © 2025 | Innovative Child Theme by The Pixelista | Built on the Genesis Framework


Loading Comments...