• Going Out
    • Phx Restaurants
    • How To Order At Starbucks
  • Running
    • My Running Story
    • Race Calendar
    • Race Recaps & Results
  • Blogroll
  • Bucket List
  • Video

Ari's Menu

Little changes making a big difference.

  • Home
  • Recipes
  • Weight Loss
    • My Story
    • Common Swaps
  • Who’s Who
  • Contact
    • Policies & Disclosure
  • Press

Banana Cream Pie Shake

July 21, 2013 · by Ari ·

Banana Cream Pie Shake #vegan #glutenfree

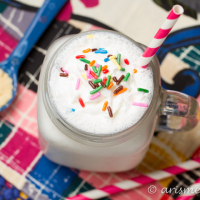
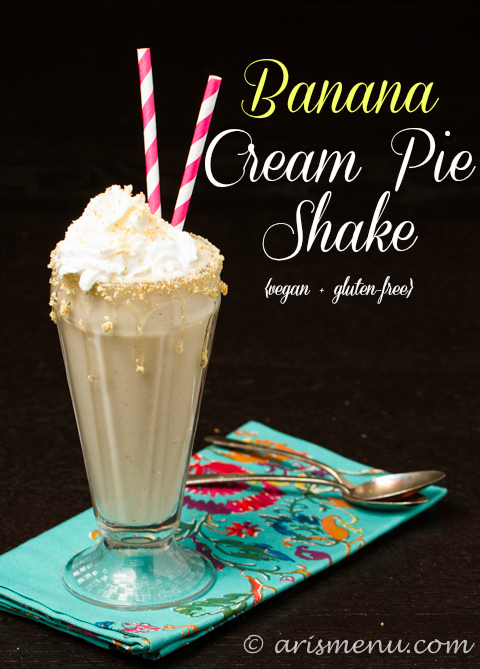
Do you guys remember the banana cream pie shake at Sonic?? OMG, I was obsessssssed with it. I would go through the Sonic drive through multiple times a week for that little gem. Creamy banana shake with crushed graham cracker? That is speaking my language. Although I always thought their whipped cream tasted a little weird. Anyone else? I am a whipped cream lover, but theirs always tasted slightly like plastic to me.

Banana Cream Pie Shake #vegan #glutenfree

Anyway, I was obsessed with the shake, and lately my girl Sally has been making a bunch of frozen banana shake recipes. I’d been dying to try the banana soft serve craze anyway, and I was inspired to try my own so I jumped on board to recreate one of my favorite treats.

Banana Cream Pie Shake #vegan #glutenfree

You see, I secretly thought it would never be as good as everyone says. Bananas as ice cream? The ice cream lover in me wanted to be stubborn, and I thought it was like when everyone said mashed cauliflower was like mashed potatoes. I still don’t get that one…

Banana Cream Pie Shake #vegan #glutenfree

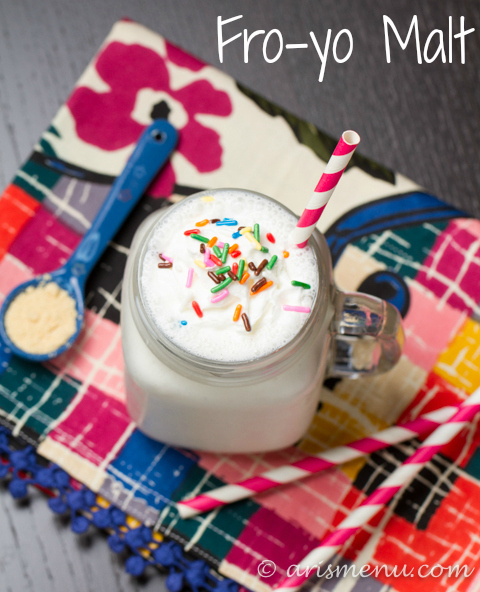
But the thing is, this EXCEEDED all of my expectations! In fact, it was so thick at first that I had to use that little stick for my Vitamix to press the banana pieces down and even get it to blend, and the results were so rich and creamy that I added way more milk than I originally planned. Also, I used 3 bananas because I thought I would need that many for one photo. Ummm, nope! It definitely made 3 servings that were nearly impossible to not eat all at once in one sitting (I know bananas are good for me, but somehow I believe 3 at once may be what they call “too much of a good thing”). Then if this dreamy shake wasn’t enough, the combo of the crushed graham cracker and the honey…uuugggghhhh… You guys, I just wanted to put honey and graham cracker crumbs on a huge spoon and eat it along side my shake. I loved it so much that after the first time I made it, I made it about 3 more times that week. It’s so quick, easy and will totally cure your sweet tooth!

Print
Banana Cream Pie Shake

Prep Time: 5 minutes

Total Time: 5 minutes

Yield: 2

Serving Size: About 1 cup

Banana Cream Pie Shake

Ingredients

  • 2 large ripe bananas, chopped and frozen
  • 2/3-1 cup unsweetened vanilla almond milk
  • 1 tsp vanilla bean paste or pure vanilla extract
  • Optional for topping:
  • Honey or agave for lining the glass
  • 3-4 tbsp crushed graham cracker crumbs (use vegan and/or gluten-free graham crackers if desired)
  • Light whipped cream or whipped coconut cream

Instructions

  1. In a high quality blender, blend bananas, 2/3 cup almond milk, and vanilla. If desired, add more milk until milkshake has reached your desired creaminess. This will depend on the size of your bananas and how thick you want your shake.
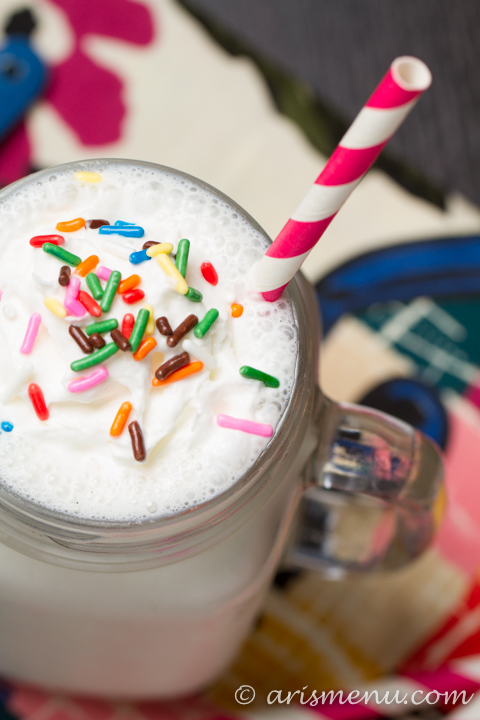
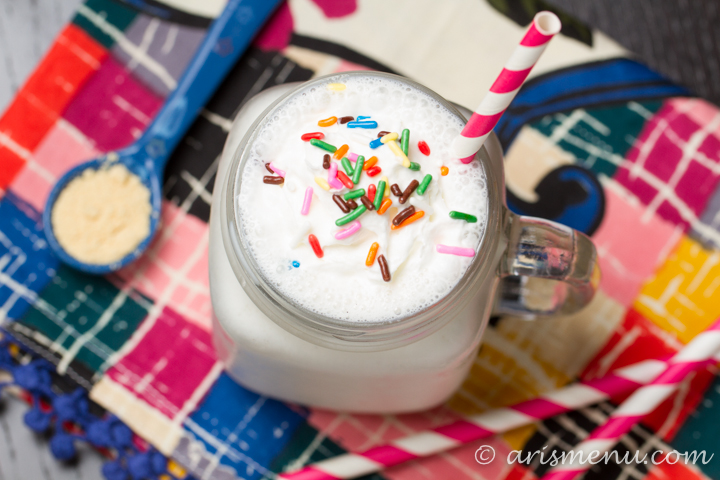
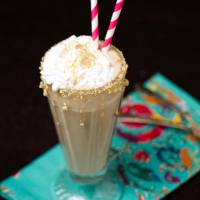
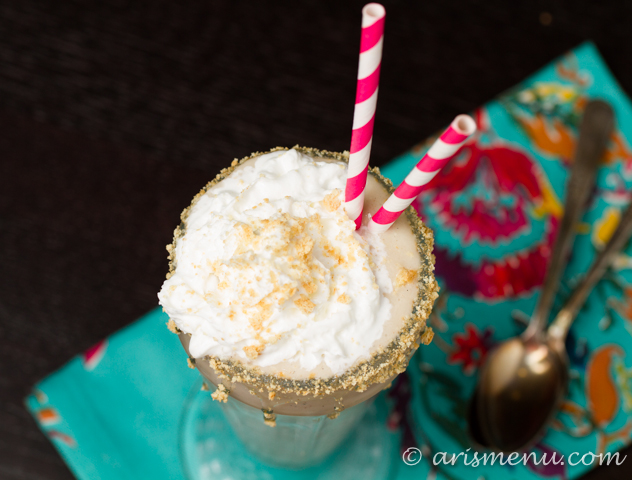
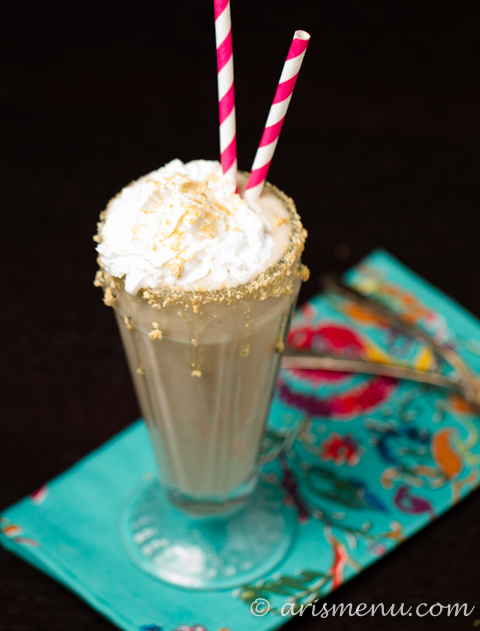
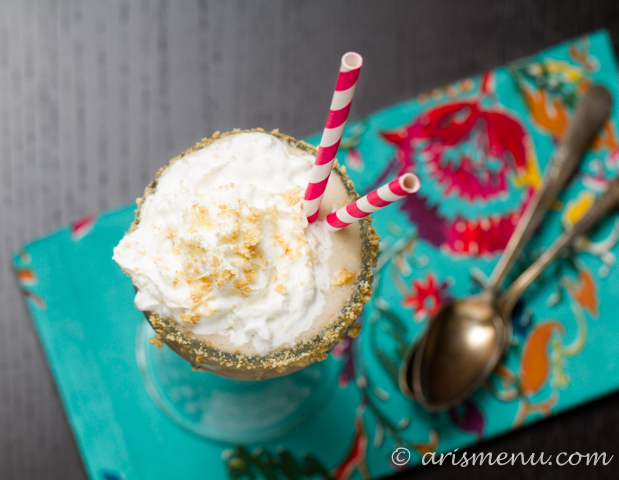
  2. To prepare the glass, drizzle honey or agave on a small plate. Place graham cracker crumbs on a separate small plate. Roll the top of your glass to just coat it in honey/agave then graham cracker crumbs. Add prepared milkshake, then top with whipped cream or whipped coconut cream if desired. Serve immediately.
3.1
https://arismenu.com/banana-cream-pie-shake/

Filed Under: Breakfast, Dessert, Drinks, Gluten-free, Smoothies & Shakes, Special Diet, Summer · Tagged: banana, banana cream pie, dessert, ice cream, milkshake, recipe, shake

White Chocolate Lemon Blondies

July 18, 2013 · by Ari ·

White Chocolate Lemon Blondies

Before I left for Portland, I made a lot of food. Sometimes, I would spend all day in the kitchen creating recipes, and by the time I left I was pretty sick of the inside of my kitchen. The best day, though? The day I blasted my newly purchased Matilda original cast recording, sang Revolting Children at the top of my lungs and made all lemon desserts. It was literally the best day.

White Chocolate Lemon Blondies

Lemon pastries have always been one of my favorites. The tart lemon pairs perfectly with the sweetness of almost any dessert, but it needs to be a pastry for me. Cookie, cake, blondie, etc. Not lemon creamy things. They don’t do it for me. Lemon bars? Meh, take ’em of leave ’em. I shied away from creating my own because I am so in love with the way lemon and butter taste together. I didn’t think I could recreate a genuinely delicious lemon pastry without rich, flavorful butter. I was wrong. You may want to take note, because I don’t admit to being wrong too often. Just ask my husband.

White Chocolate Lemon Blondies

Maybe it’s the melted white chocolate? Maybe it’s the tiniest bit of butter flavored extract? It’s optional, but when you don’t use butter, I find it can be magical. And that is how I would describe these bars. Magical. I know that’s a bold statement, but when you create a blondie that is ultra soft, gooey, and not the least bit cakey without using even a hint of butter, I call that magic.

White Chocolate Lemon Blondies

These babies are a full on indulgent treat without any of the guilt. They do have quite a bit of sugar that you could absolutely cut down on if you have less of a sweet tooth than me, but other than that, they are 100% whole wheat and fairly low in fat due to the nonfat Greek yogurt. The Greek yogurt is a must. It adds the perfect flavor and texture, and I wouldn’t try to sub it out for applesauce or any other type of fat substitute. If you love lemon pastries even half as much as I do, you will not be able to get enough of these blondies!

Print
White Chocolate Lemon Blondies

Prep Time: 10 minutes

Cook Time: 25 minutes

Total Time: 35 minutes

Yield: 16 small, or 9 large blondies

Serving Size: 1 blondie

White Chocolate Lemon Blondies

Ingredients

  • Zest of one lemon
  • 2/3 cup sugar
  • 5.5 oz white chocolate, melted
  • 1 x 5oz container (or about 1/2 cup) nonfat lemon Greek yogurt
  • 1 tbsp fresh lemon juice
  • 2 eggs
  • 1 tsp vanilla extract
  • 1/8 tsp butter extract (optional)
  • 1/3 cup white whole wheat flour

Instructions

  1. Preheat oven to 350. Line a 9" square pan with parchment paper or tin foil and spray with nonstick spray. Set aside.
  2. In a large bowl, beat together lemon zest and sugar until fragrant, about 1 minute. Whisk in melted white chocolate, yogurt, and lemon juice. Add eggs 1 at a time, whisking until combined. Add vanilla and butter extracts. Gently fold in flour until just combined.
  3. Transfer to prepared pan and bake until golden and a toothpick inserted about 2" from the center comes out with just a few moist crumbs, about 25 minutes. Set pan on a wire rack and allow to cool completely. Store in a loosely covered container for 5-7 days.
3.1
https://arismenu.com/white-chocolate-lemon-blondies/

Filed Under: Brownies & Bars, Dessert, Holiday & Seasonal · Tagged: bars, blondies, dessert, lemon, recipe, white chocolate

Macadamia Crusted Halibut

July 16, 2013 · by Ari ·

Macadamia Crusted Halibut #paleo

For most of my life, I hated seafood. Anything other than canned tuna was totally out, and I wouldn’t even dream of giving it a try. I passed up cedar-grilled salmon, spicy shrimp, and never knew that swordfish tasted like steak and chilean sea bass tastes like butter (serious, it does). I missed out on a ridiculous amount of awesomeness, and now that I LOVE fish, I still rarely make it at home. I forget that I love it, and because it’s still fairly new to me, I don’t always know what to do with it.

Macadamia Crusted Halibut #paleo

People are always crusting fish with macadamia nuts and, well, macadamia nuts are AWESOME, so I figured this dish would be a sure thing. That’s the way I like it. No stress, don’t have to work too hard to make something awesome–just use awesome ingredients and your dish will be, well, awesome. How many times can I say awesome in one post? Awesome awesome awesome awesome awesomeawesomeawesome. It’s like when you repeat a word too many times and then it doesn’t even make sense anymore.

Macadamia Crusted Halibut #paleo

This dish is a perfect healthier grilling option. It’s grain and dairy free using only fresh, whole ingredients. It also fits into the paleo and whole 30 diets (if you buy organic) that everyone and their mom are doing right now. I’m not. I just like fish. And macadamia nuts. And coconut. Really, I just like food in general.

Macadamia Crusted Halibut #paleo

The macadamia nuts and coconut add a great buttery flavor and lightly brown at the bottom for some crispness. Halibut is a mildly flavored fish, so even if you’re like the Ari-of-10-years-ago and think you hate fish, you will probably love this, but you could always use chicken if you’re really against the sea, or any fish of your choosing. It’s a simple recipe with only 5 ingredients that’s easy to play around with and change up, and it comes together in minutes!

Print
Macadamia Crusted Halibut

Prep Time: 5 minutes

Cook Time: 6 minutes

Total Time: 10 minutes

Yield: 2 servings

Serving Size: 1 x 6-8 oz halibut fillet

Macadamia Crusted Halibut

Ingredients

  • 2 x 6-8 oz halibut fillets
  • 1 large egg white, beaten
  • 1/3 cup macadamia nuts, crushed or finely chopped
  • 2 tbsp unsweetened shredded coconut
  • 3 tbsp finely chopped parsley + extra for garnish
  • pinch each salt and pepper

Instructions

  1. Place beaten egg white in a wide, shallow bowl. In a separate large shallow bowl, toss together macadamia nuts, coconut, parsley, salt and pepper.
  2. Dip one halibut fillet in egg whites coating completely, then submerse in macadamia mixture. Press coating in lightly and ensure that the fish is fully covered. Repeat with remaining fillet.
  3. Wrap each fillet in aluminum foil and grill over medium heat for about 3 minutes per side. Do not overcook. Fish should be tender and flaky. Serve immediately.
3.1
https://arismenu.com/macadamia-crusted-halibut/

Filed Under: Entree, Gluten-free, Low Carb, Paleo · Tagged: coconut, dinner, fish, nuts, paleo, recipe, whole 30

Drink & Dish: Orange Creamsicle Cookies

July 14, 2013 · by Ari ·

Orange Creamsicle Cookies

When I was a little girl, my brother’s mom (yeah, my family is hard to explain…she’s not my mom, or my step mom…) always kept the creamsicle ice cream in the house. You know, the swirl between the orange sorbet, and vanilla ice cream? The one that is 100x superior to just the bar with the ice cream on the inside? She always had it, and I always finished it. She probably never got more than a bowl full, and I didn’t even live there.

Orange Creamsicle Cookies

There is something so refreshing about the bright, citrusy, orange flavor against the smooth and creamy vanilla that is just about perfect in every way. Great on their own, better together.

Orange Creamsicle Cookies

I’m a little obsessed with stuffing cookies. I mean, I love a good chocolate chip cookie, but it is almost always better if all of the chocolate (or white chocolate as the case may be) is contained to the center, so that when you bite into the cookies you have the same experience as, say, a jelly-filled donut. And if you don’ know it’s in there, you get an AWESOME SURPRISE!!

creamsiclecookies-13

These creamsicle cookies are dangerously addictive. The cookie is soft and chewy, and the white chocolate filling stays perfectly creamy, even after the cookies have cooled. In fact, these are a rare cookie case when they taste BETTER after cooling completely. They come out slightly underdone, and need about a full hour after that to set, and cool completely. I mean, I was impatient, and I still loved them right out of the oven, but it wasn’t until I had one the next day that I fell deeply, deeply in love. In fact, the second batch didn’t even make it past the filming day. They were that good.

Orange Creamsicle Cookies

Cookie stuffing can be one of those things that no matter how well you try to describe it, it’s better just to see it in action, so Nicole and I are bringing you an awesome summer episode of drink and dish! Be sure to check out her recipe for her delicious rum punch!

Print
Orange Creamsicle Cookies

Prep Time: 40 minutes

Cook Time: 10 minutes

Total Time: 50 minutes

Yield: 12-16 cookies

Serving Size: 2 cookies

Orange Creamsicle Cookies

Ingredients

  • 1 1/4 cups white whole wheat flour
  • 1/2 tsp baking powder
  • dash salt
  • 1/2 cup sugar
  • Zest of one orange
  • 1/2 cup reduced fat cream cheese, softened
  • 1 tbsp fresh orange juice
  • 1 large egg white
  • 4 oz good quality white chocolate squares or chopped into large chunks

Instructions

  1. In a medium bowl, whisk together flour, baking powder and salt. Set aside.
  2. In a large bowl mix together sugar and orange zest. Then beat in cream cheese, egg white, and orange juice until combined. Slowly, beat in dry ingredients until combined, scraping down sides of the bowl as necessary. Refrigerate dough for 30-60 minutes.
  3. Preheat oven to 350. Roll cookies into 1? balls, then stuff with a white chocolate square. Re-roll into 1? ball, making sure all the white chocolate is covered. Repeat with remaining dough.
  4. Bake for 9-11 minutes until golden. Cool completely on baking sheet. Store in a loosely covered container for 5-7 days.
3.1
https://arismenu.com/drink-dish-orange-creamsicle-cookies/

Filed Under: Cookies, Dessert, Drink & Dish, Holiday & Seasonal · Tagged: baking, cookies, creamsicle, drink and dish, orange, recipe, summer, video, white chocolate

Sugar-free Rosemary Lemonade

July 11, 2013 · by Ari ·

Rosemary Lemonade #sugarfree

Is there anything more refreshing in the summer than an ice cold lemonade? Okay, maybe those frozen ones at Disneyland (ahhh Disneyland–WANT TO BE THERE NOW!), but even those can be so syrupy sweet that I end up thirstier than when I started.

Rosemary Lemonade #sugarfree

I’m not usually into the artificial sweeteners. I used to use a lot of Splenda, then as I began to care about actually health, and not just caloric values, I began to steer myself away from fake sweeteners. Minus my coffee and sometimes a diet coke. Let’s just say it’s a work in progress. 😉

Rosemary Lemonade #sugarfree

Anyway, they say that stevia won’t kill you, so I decided to give it a shot. I know, I’m totally late to the party. If you’ve decided that “they” are liars and have it all wrong, you could totally sub in some agave nectar for a nice natural sweetness.

Rosemary Lemonade #sugarfree

When I first started thinking about creating a rosemary lemonade, I thought it was this new, unique idea that most people would find crazy, until they tried it and discovered my visionary genius qualities. Then they started popping up all over the internet. Womp womp. Still, it’s delicious, fresh, summery, and totally not as weird as it sounds. I make mine on the tart end because I want that more natural taste, but feel free to add a little extra sweetness if you prefer. Either way, you will love this lemonade!

Print
Sugar-free Rosemary Lemonade

Yield: 7 cups

Serving Size: 1 cup

Sugar-free Rosemary Lemonade

Ingredients

  • 6 cups filtered water
  • 3-4 sprigs rosemary
  • Juice from 6 large lemons (or about 1 cup fresh lemon juice)
  • 20 drops stevia (or 2/3 cup agave nectar)

Instructions

  1. Bring one cup water to a boil Add rosemary, remove from heat and allow to cool completely. Add 5 cups cold water, lemon juice and stevia. You may discard rosemary sprigs or allow to stay in for some extra rosemary flavor.
  2. Store refrigerated in an airtight container for up to one week. Serve over ice with extra rosemary and lemon slices if desired.
3.1
https://arismenu.com/sugar-free-rosemary-lemonade/

Filed Under: Drinks, Gluten-free, Holiday & Seasonal, Low Carb, Paleo, Vegan · Tagged: drink, gluten free, lemonade, recipe, rosemary, sugar free, summer, vegan

Magic Shell Cups

July 7, 2013 · by Ari ·

Magic Shell Cups #vegan #glutenfree

Remember Dibs? They were so popular when they first came out. Dangerously good, and finally brought ice cream as a “snack” to movie theaters. I was pretty obsessed, but as I’ve mentioned, I’m pretty obsessed with anything that includes ice cream. 😉

Magic Shell Cups #vegan #glutenfree

I tried to make you Dibs. I tried to many ways. I made a mess of my kitchen. Chocolate and fro-yo everywhere. And I’m not one of those roll with the punches people who keeps it cool when things don’t work out. No. I work in an embarrassingly fragile state in the kitchen where I am known to have legit freak out when things don’t turn out the way I want them to. It’s really fun being married to me. 😉

Magic Shell Cups #vegan #glutenfree

Anyway, after several failed attempts, I decided to change things up a little. Last year I was obsessed with making these cups. Then after selling hundreds of them for fundraising and spending pretty much every weekend making them, I decided I never wanted to make a single candy cup again for the rest of my life. Good thing these are ice cream cups instead. They did bring back some painful memories, but man were they worth it in the end!

Magic Shell Cups #vegan #glutenfree

These cups are everything you love about a magic shell ice cream cone in tiny, bite-sized cups that are perfect for when you just want a little bit of sweetness. They are also extremely versatile. You could put rice krispies in the chocolate for some added crunch, you can use any type of ice cream/fro-yo you like (I like it best with nonfat vanilla fro-yo or coconut milk ice cream), you can add sprinkles (no brainer for me!) for color and crunch, and you could even put in some peanut butter, granola or pretzels to add some variety!

Print
Magic Shell Cups

Prep Time: 20 minutes

Total Time: 20 minutes

Yield: 26-30 cups

Serving Size: 2 cups

Magic Shell Cups

Ingredients

  • 20 oz dark chocolate, roughly chopped (or dark chocolate chips)
  • 1 tbsp coconut oil
  • Approx 1 cup ice cream/frozen yogurt of choice (I used coconut milk ice cream and nonfat vanilla fro-yo. If vegan, use coconut milk or other nondairy ice cream.)
  • Sprinkles for topping, optional

Instructions

  1. Line mini muffin tins with paper liners.
  2. In a medium bowl, heat chocolate and coconut oil in the microwave in 20 second intervals, stirring after each, until melted.
  3. Spoon enough chocolate to cover the bottom of each baking cup. Add scant tablespoon fro-yo or ice cream. Cover with more chocolate. Add sprinkles if desired.
  4. Freeze for at least one hour or until set. Cups will stay kept in the refrigerator for up to one month.
3.1
https://arismenu.com/magic-shell-cups/

Filed Under: Dessert, Gluten-free, Holiday & Seasonal, Ice Cream & Fro-yo, Snacks · Tagged: candy, chocolate, cups, dessert, fro yo, gluten free, ice cream, magic shell, recipe, sprinkles, vegan

Turkey Sloppy Joes

July 4, 2013 · by Ari ·

Turkey Sloppy Joes

The first time I ever heard of sloppy joes was when I was watching that movie with the Olsen twins. I think it’s called It Takes Two? With Kirstie Alley and they go to summer camp and find out that they were twins separated at birth, then they switch places? There’s a scene in the cafeteria where they have sloppy joes and then they have a food fight. Food fights always look fun in the movies, but the idea of being literally covered in food in real life is surprisingly unappealing to me. As much as I love food, I do not love it on my body instead of in it.

Turkey Sloppy Joes

Sloppy joes were just never something my mom made, so when I did finally have one, it seemed like a special treat and I fell in love. I tried to make them once before with no ketchup (I used tomato sauce) and no sugar. It tasted like bad meat sauce. It was a total failure, and I’m pretty sure I threw a temper tantrum during the time Steve ate his entire serving and went back for seconds. Anyway, I knew I needed to try again.

Turkey Sloppy Joes

This time, I stuck to the simple and traditional, and ended up with a total treat that made me feel like a little kid again. It was totally messy, and got all over my face and clothes in the best way possible. It had that sweetness you imagine with a sloppy joe without any refined sugar, and the sriracha adds a little kick that I love. But then again, I put sriracha on just about everything.

Turkey Sloppy Joes

This is one of those perfect healthy meal for anyone who has kids (or lives with people that act like kids), or just likes simple, delicious foods. It’s healthy, nutritious, super filling and so easy to make that you will be making it over and over again!

Print
Turkey Sloppy Joes

Prep Time: 5 minutes

Cook Time: 40 minutes

Total Time: 45 minutes

Yield: 4 servings

Turkey Sloppy Joes

Ingredients

  • 1 tsp olive oil
  • 1 sweet onion, finely chopped
  • 1 red bell pepper, finely chopped
  • 3 cloves garlic, minced
  • 1 lb lean ground turkey (I used 93%)
  • 3/4 cup reduced sugar ketchup
  • 2-3 tsp molasses
  • pinch each salt and pepper
  • dash worcestershire sauce
  • dash sriracha or other hot sauce, optional
  • whole grain buns for serving (whole wheat, brown rice, etc.), optional

Instructions

  1. In a large pan over medium heat, saute onion, bell pepper and garlic in olive oil until tender and fragrant, about 7-10 minutes. Add ground turkey and brown until cooked throughout.
  2. Stir in ketchup, molasses, salt, pepper, worcestershire and sriracha. Bring to a light boil. Reduce heat and simmer until thickened, about 30 minutes.
  3. Serve immediately on buns, or over a salad, or any way you like.
3.1
https://arismenu.com/turkey-sloppy-joes/

Filed Under: Entree, Gluten-free, Sandwiches · Tagged: dairy free, dinner, easy, gluten free, lunch, recipe, sandwich, sloppy joe, turkey

Fro-yo Malt

July 2, 2013 · by Ari ·

Fro-yo Malt

I love to bake, but my #1 hands down favorite dessert will always be anything involving ice cream or fro-yo. In fact, sometimes if I get fro-yo as an afternoon snack, I find myself still eating some after dinner for dessert. I can’t even keep ice cream in the house, or it’s bad news.

Fro-yo Malt

One of my favorite ways to eat ice cream is a thick and creamy malted milk shake. What is it about malt powder that automatically makes things delicious?? I love sitting down at an old school diner and ordering a vanilla malt. I haven’t had one in years because shakes have more calories than almost any dessert out there. I never stopped craving them, so I made my own smaller ones using nonfat fro-yo and almond milk. Let me tell you, they taste exactly like the real deal!

Fro-yo MaltI made them for my mom and she told me they were her favorite thing I’ve ever made! They are definitely on my favorites list also. Thick, creamy and perfect for the summer (not that I don’t drink shakes in December…), these are sure to cool you off and take you back in time without giving you the gross ate-too-much-ice-cream feeling. You can make these whatever flavor you want–chocolate, caramel, the possibilities are endless! Also, this makes a fairly small shake (about 1 cup). You are free to double the portions if desired. I kept it closer to what I consider (and what do I even know? 😉 ) to be a healthy-ish dessert portion, but I’m not going to tell you how much fro-yo to eat. 😉

Print
Fro-yo Malt

Prep Time: 5 minutes

Total Time: 5 minutes

Yield: 3 servings

Serving Size: Approx 1 cup

Fro-yo Malt

Ingredients

  • 2 cups nonfat vanilla frozen yogurt (or chocolate, or any flavor you like), I used Stoneyfield
  • 1 cup unsweetened almond milk
  • 1/4 cup malted milk powder
  • Light whipped cream and sprinkles for topping, optional

Instructions

  1. Blend frozen yogurt, almond milk and malted milk powder in a blender until smooth, about 1 minute. Serve topped with whipped cream and sprinkles if desired.
3.1
https://arismenu.com/fro-yo-malt/


Filed Under: Dessert, Drinks, Gluten-free, Holiday & Seasonal, Ice Cream & Fro-yo, Smoothies & Shakes · Tagged: dessert, easy, fro yo, malt, milk shake, quick, recipe, vegetarian

Green Chile Guacamole Burgers

June 30, 2013 · by Ari ·


Disclaimer: This is a sponsored post. Recipe and all opinions are my own.
Green Chile Guacamole Burger

You guys, it is hot. I’m in Portland and it’s supposed to be perfect weather all summer long, but instead there is a heat wave, and it’s in the 90s which wouldn’t even be bad except for the fact that we live upstairs and there is no ac. It is gross. I want to be swimming in a pool with a margarita in hand eating burgers for dinner. Can we make that happen?

Green Chile Guacamole Burger

Before I left for Portland, I’m pretty sure we ate at least 2 hamburgers a week for about a month. I wish I was kidding. I never got sick of them because there are 5 billion combinations so it always feels like something new!

Green Chile Guacamole Burger

I’m pretty bad about waiting to decide what to make until the last minute, then I have to bat my eyelashes and beg Steve to go to the store and pick up whatever we need. Luckily, there is a Fresh & Easy right around the corner that we can get to in no time, and makes it incredibly easy to pick up last minute items. Their store brand fresh&easy is all natural ingredients, and super affordable, so it’s a win, win. With the last minute idea to make the burgers, I sent Steve to the store to get fresh&easy buns and guacamole.

untitled-1

The burgers came out AWESOME! Bold and spicy, and the fresh&easy guacamole was AWESOME!! The roasted green chiles and so much flavor and also help the burgers not to dry out (which can easily happen when using lower fat meat), and the grilled onions on top are like the icing on the cake!

Green Chile Guacamole Burger

Fresh & Easy has tons of options for summer grilling, and really is insanely easy to get in and out of quickly (think the oposite of going through Walmart, but still with great prices), and I even have a coupon for you! Click here to receive a $5 off coupon (expires 7/7/13).

Print
Green Chile Guacamole Burgers

Prep Time: 10 minutes

Cook Time: 10 minutes

Total Time: 20 minutes

Yield: 4 burgers

Serving Size: 1 burger

Green Chile Guacamole Burgers

Ingredients

  • 2 green chiles, roasted, seeds removed
  • 1 lb extra lean ground beef (or turkey)
  • 2 cloves roasted garlic, finely minced
  • generous pinch cumin
  • pinch each salt and pepper
  • 4 fresh&easy whole wheat buns (gluten-free may be substituted)
  • Approximately 1 cup fresh&easy guacamole
  • 1/2 onion, sliced
  • 2 roma tomatoes, sliced

Instructions

  1. Half roasted green chiles. Finely chop 1/2 of one of your chiles and slice the rest.
  2. In a medium bowl, combine finely chopped green chile, ground beef, garlic, cumin, salt and pepper until ingredients are just incorporated. Form into 4 equal-sized patties. Press your thumb down into the center of each patty to create a small indent.
  3. Grill over medium heat until burgers have reached desired doneness, about 5 minutes each side. Simultaneously grill the onion slices until browned. This will also take about 5 minutes on each side.
  4. Top buns with guacamole, cooked burgers and onions, reserved green chile slices and tomato. Serve immediately.
3.1
https://arismenu.com/green-chile-guacamole-burgers/

I was selected for this opportunity as a member of Clever Girls Collective and the content and opinions expressed here are all my own.

Filed Under: Dinner, Entree, Gluten-free, Holiday & Seasonal, Lunch, Sandwiches, savory, Summer · Tagged: burger, chile, dinner, grilling, guacamole, lunch, recipe, sandwich

Drink & Dish: Red, White & Blue Grilled Cheese

June 23, 2013 · by Ari ·

Red, White & Blue Grilled Cheese.jpg

It’s almost the 4th of July!!!

Red, White & Blue Grilled Cheese

One of my very favorite holidays because I am obsessed with fireworks. I’m sure this is totally surprising information given that I am never a sucker for bright, sparkly things, but I can ooohh and ahhh for the entire fireworks show, and always get a little sad when they start going all crazy for the grand finale because that means it’s over.

Red, White & Blue Grilled Cheese

Maybe it’s because for years I never got to watch the fireworks? I’ve spent almost every summer since I was 15 years old at theatre camp. First as a student, then as a counselor, and the last few years as a teacher/director/choreographer. For most of those years, the camp was located at the top of this hill in the middle of nowhere White Salmon, WA. We were always in rehearsals at night, so I never got to get into town (a good 40 minute drive) to watch the fireworks. Now camp is in Portland, and we light little sparklers and the kids get really into it which is fun in an entirely different way.

Red, White & Blue Grilled Cheese

You know what else I love about the 4th of July? RED WHITE AND BLUE FOOD!!! Last year, I made red, white and blue cookies, and they still stand as some of my all time favorite cookies. This year, I decided to go with something you could eat for lunch or dinner while celebrating America (you have to pronounce it Ah-murrr-kah).

Red, White & Blue Grilled Cheese

This sandwich….I just…I’m not sure I even have the words? I made it 3 times in 1 week. The brie cheese is so melty and dreamy, and then the goat cheese provides the perfect creaminess. Both of these cheeses pair perfectly with fruit, and the raspberry jam adds a bright sweetness the compliments the slightly tart bursting blueberries. It sounds crazy, but it just works. It works so well that you want to eat it every day for the rest of your life. You know I’m not usually a meal repeater, but I can’t get enough of this sandwich, and I can see it making a comeback all year long.

Check out the latest episode of Drink & Dish to learn the secret to making a perfectly melty grilled cheese, and make sure to also check out Nicole’s super fun 4th of July Citrus Splash. I mean, it has poprocks and it’s BLUE!

Print
Drink & Dish: Red, White & Blue Grilled Cheese

Prep Time: 5 minutes

Cook Time: 15 minutes

Total Time: 20 minutes

Yield: 2 sandwiches

Serving Size: 1 sandwich

Drink & Dish: Red, White & Blue Grilled Cheese

Ingredients

  • 4 slices whole grain bread (use gluten-free if applicable)
  • 2 tbsp reduced sugar raspberry jam (or jam or choice)
  • 1 1/2 oz goat cheese, at room temperature
  • 2 small handfuls fresh blueberries (preferably organic)
  • 2 oz light brie cheese, sliced, rinds removed

Instructions

  1. Heat a large grill pan, griddle or nonstick pan over medium-low heat.
  2. Spread 2 slices of bread with 1 tbsp each of jam. Spread remaining two pieces with softened goat cheese (evenly divide the 1 1/2 oz between the two slices). Place a handful of blueberries on each goat cheese slice and lightly press the berries into the cheese. Top each with 1 oz sliced brie. Place the jam side on top.
  3. Grill until the bottom is browned, about 5-7 minutes. Flip and continue cooking until both sides are browned and cheese is fully melted, about an other 5-7 minutes. Serve immediately.
3.1
https://arismenu.com/drink-dish-red-white-blue-grilled-cheese/

Filed Under: Drink & Dish, Gluten-free, Holiday & Seasonal, Lunch, Sandwiches, savory, Summer · Tagged: 4th of july, blueberries, brie, cheese, dinner, drink and dish, goat cheese, lunch, recipe, summer, vegetarian, video.sandwich

Chocolate Chip Zucchini Almond Meal Muffins

June 18, 2013 · by Ari ·

Soft & fluffy zucchini muffins stuffed with dark chocolate chips. Grain-free, refined sugar-free, vegan & paleo!

Chocolate Chip Zucchini Almond Meal Muffins #vegan #glutenfree

Did I ever tell you about the time I ate 3 zucchinis in one sitting because I wanted a snack and was trying to be healthy? I called up one of my best friends and said “I think I just over ate zucchinis. Is that even a thing?” I love them. Sauteed, roasted, grilled, BAKED!

zucchinimuffins-19Chocolate Chip Zucchini Almond Meal Muffins #vegan #glutenfree

Okay, these muffins taste nothing like zucchinis. Just like carrot cake doesn’t actually taste like carrots. But the zucchinis add some extra veggie goodness, and also produce some of the softest, (insert gross word) and tender muffins I have ever tasted.

Chocolate Chip Zucchini Almond Meal Muffins #vegan #glutenfree

As soon as I decided I wanted to make zucchini almond meal muffins, I hit up my girl Gina’s blog for some inspiration. She has the best paleo recipes, and although I don’t eat paleo, I love baking with nut flours, and her blog is always a great place to start. She made some ridiculously good looking zucchini bread that I used as a guideline, but ended up with muffins with chocolate chips inside. Shocking, right?

Chocolate Chip Zucchini Almond Meal Muffins #vegan #glutenfree

The muffins tasted EXACTLY like I wanted–lightly sweet, hearty and filling without being heavy. They didn’t last long, and whether you normally use grain-free flours or not, you will absolutely love them!

Print
Chocolate Chip Zucchini Almond Meal Muffins

Prep Time: 10 minutes

Cook Time: 25 minutes

Total Time: 35 minutes

Yield: 1 dozen

Serving Size: 1 muffin

Chocolate Chip Zucchini Almond Meal Muffins

Soft & fluffy zucchini muffins stuffed with dark chocolate chips. Grain-free, refined sugar-free, vegan & paleo!

Ingredients

  • 3/4 cup unsweetened vanilla almond milk
  • 1/2 tsp apple cider vinegar
  • 1 1/2 cups almond meal
  • 1 1/2 tsp baking soda
  • dash salt
  • 1 tsp cinnamon
  • 1 ripe banana, mashed
  • 3 tbsp natural liquid sweetener of choice (honey, agave, maple syrup, etc.)
  • 1 tbsp coconut oil, melted
  • 1 tsp vanilla extract
  • 1 cup finely grated zucchini, squeezed dry
  • heaping 1/2 cup mini dark chocolate chips

Instructions

  1. Preheat oven to 350. Line muffin tins with paper liners. Set aside.
  2. Measure milk in your measuring cup. Add apple cider vinegar and whisk lightly. Set aside.
  3. In a large bowl, whisk together almond meal, baking soda, salt and cinnamon. Add almond milk mixture, banana, sweetener, coconut oil, and vanilla. Mix until just combined. Fold in zucchini and chocolate chips.
  4. Evenly divide batter between between 12 prepared muffin molds.
  5. Bake until golden and a toothpick inserted in the center comes out clean, about 20-25 minutes.

Notes

Adapted from Running to the Kitchen

3.1
https://arismenu.com/chocolate-chip-zucchini-almond-meal-muffins/

Filed Under: Breads & Muffins, Breakfast, Dessert, Gluten-free, Holiday & Seasonal, Paleo, Summer, Vegan · Tagged: almond meal, breakfast, chocolate, dessert, gluten free, grain free, muffin, recipe, vegan, zucchini

Black Bean Burger Salad

June 16, 2013 · by Ari ·

Black Bean Burger Salad with Cilantro Lime Vinaigrette #glutenfree

In the summertime, the only things I crave other than burgers (and grilled food in general) are big, delicious, cool and refreshing salads. I’m not talking the kind of “salad” that is some lettuce thrown on a plate and then drowned with ranch dressing. My salads need to be loaded with flavor, and they have to have a little something special to keep me interested.

Black Bean Burger Salad with Cilantro Lime Vinaigrette #glutenfree

I also always love a new way to eat one of my favorite foods. I fell head over heels for these black bean burgers at first bite, and since I almost never make the same meal twice, I wanted a new way to enjoy them. I have to say, I like them even better this way!

Black Bean Burger Salad with Cilantro Lime Vinaigrette #glutenfree

The bold, spicy burgers balance perfectly with the fresh, crisp lettuce and cucumber, and the sweet tomatoes, peppers, roasted corn and dried cranberries. And that tangy, creamy goat cheese on top? Flavor heaven. Not to mention the sweet and spicy cilantro lime vinaigrette. It is legit the best salad dressing I have ever tasted.

Black Bean Burger Salad with Cilantro Lime Vinaigrette #glutenfree

If you don’t do dairy, you could leave the goat cheese off and replace it with avocado. I mean, you should probably just add avocado anyway to all things, but especially if you leave the cheese off. This salad is perfect for summer (or any time), and I even continued to make it with my left over black bean burgers for the entire rest of the week! You can also easily double or triple it if you’re serving a bigger group!

Print
Black Bean Burger Salad with Cilantro Lime Vinaigrette

Prep Time: 10 minutes

Cook Time: 1 hour

Total Time: 1 hour, 10 minutes

Yield: 2 servings

Black Bean Burger Salad with Cilantro Lime Vinaigrette

Ingredients

  • 2 ears corn
  • 1 tbsp olive oil
  • salt and pepper
  • 1 heart of romain, chopped
  • 1 cup cherry tomatoes, halved
  • 1 red bell pepper, chopped
  • 1 large cucumber, chopped
  • 1/3 cup dried cranberries
  • 2 black bean burgers*
  • 3 oz goat cheese
  • For the Cilantro Lime Vinaigrette:
  • 2 limes
  • 1/4 cup olive oil
  • 2/3 cup cilantro
  • 1/2 jalapeno, seeds removed
  • 1 clove garlic
  • 1 tbsp honey
  • 1 tbsp balsamic vinegar
  • 2 tbsp water
  • 1 tsp cumin
  • pinch salt

Instructions

  1. Drizzle corn with olive oil and season with salt and pepper. Roast at 400 until golden and tender, about an hour.
  2. Prepare the dressing by adding the zest of 1 lime, and the juice of two with all remaining ingredients in your food processor and pulsing until combined and smooth, about 1 minute.
  3. For the salad, gently toss together roasted corn, lettuce, tomato, bell pepper, cucumber, and cranberries. Transfer to serving dishes. Crumble 1 black bean burger and 1.5 oz goat cheese on top of each salad. Serve with prepared dressing.

Notes

*Store bought/frozen black bean burgers may be used. Cook per package instructions before adding to your salad.

**To keep vegan, avocado may be subbed for goat cheese and agave may be subbed for honey in the dressing.

3.1
https://arismenu.com/black-bean-burger-salad/

Filed Under: Appetizers, Dinner, Entree, Gluten-free, Holiday & Seasonal, Lunch, Salads, savory, Summer, Vegetarian · Tagged: beans, black bean burger, cheese, cilantro, corn, dinner, gluten free, lunch, recipe, salad, summer, vegetarian

« Previous Page
Next Page »
Image Map

Popular Posts

Tart Cherry Margaritas: The perfect, refreshing margarita--lightly sweet with a punch of tequila

Tart Cherry Margaritas

90+ Healthy Recipes for Breakfast, Lunch, Dinner & Dessert

90+ Healthy Recipes for Breakfast, Lunch, Dinner & Dessert

The Ultimate Peanut Butter Cup Brownie Cookies: Rich, fudgy, brownie-like chocolate cookies stuffed with melty peanut butter cups!

Ultimate Peanut Butter Cup Brownie Cookies

Drink & Dish: Cafe Au Lait Cupcakes

Crockpot Chicken Enchilada Soup

Subscribe via Email:

Enter your email address:

Save an additional $30 on Blendtec Factory Recertified Blenders + Free Shipping

Featured Here

recipe redux
Certified Yummly Recipes on Yummly.com

Member Of…

FitFluential Is Fitness Found
AZ Bloggers Network
az 150 photo az150_zpsfb093d32.gif

Archives


Image Map

Copyright © 2025 | Innovative Child Theme by The Pixelista | Built on the Genesis Framework


Loading Comments...