• Going Out
    • Phx Restaurants
    • How To Order At Starbucks
  • Running
    • My Running Story
    • Race Calendar
    • Race Recaps & Results
  • Blogroll
  • Bucket List
  • Video

Ari's Menu

Little changes making a big difference.

  • Home
  • Recipes
  • Weight Loss
    • My Story
    • Common Swaps
  • Who’s Who
  • Contact
    • Policies & Disclosure
  • Press

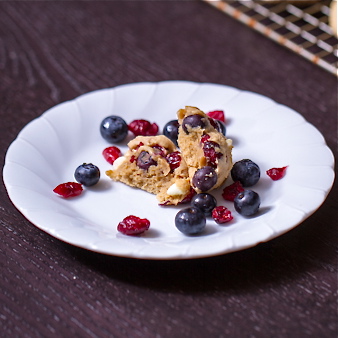
Red White & Blue Cookies

June 24, 2012 · by Ari ·

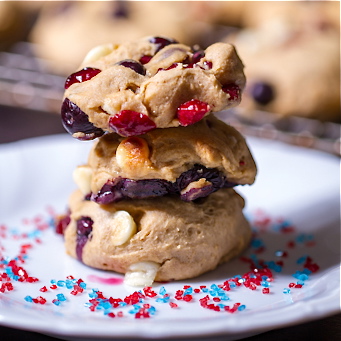
It’s almost the 4th of July!!!

One of my very favorite things in the world is fireworks. I missed them for years when I was working at camp, and I will never forget the summer I stayed in Idaho, going to see fireworks was a huge deal for me! You know me…I like bright, pretty colors. They make me happy. I’m 5 years old on the inside, so it doesn’t take a whole lot to impress me.

Last year, I stayed in Phoenix for the summer, and we had a big BBQ around the 4th, and that’s when I got the idea for these cookies. In fact, I posted them waaaayyy back when I first started blogging, but the pictures were pretty bad, and I loved them so sooooo much, that I had to make them again!

In fact, a year ago, they were Steve’s very favorite dessert I’d ever made. Now, I think there may be a new favorite, but these cookies are still pretty high up on the list. We took them to the bike shop, and I left with a fundraising order! Sweet!

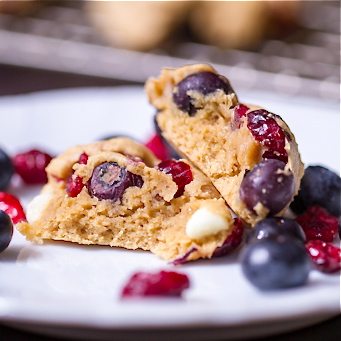
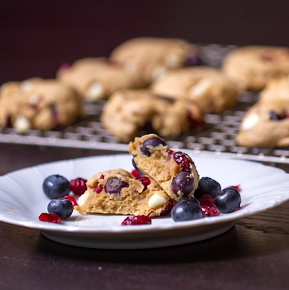
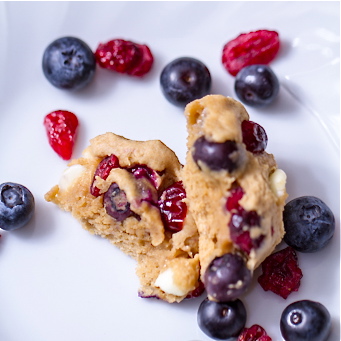
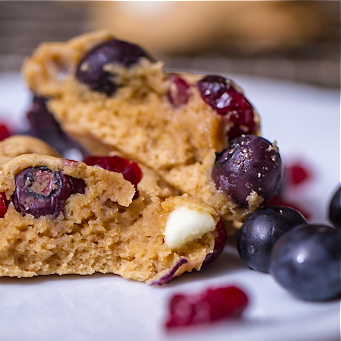
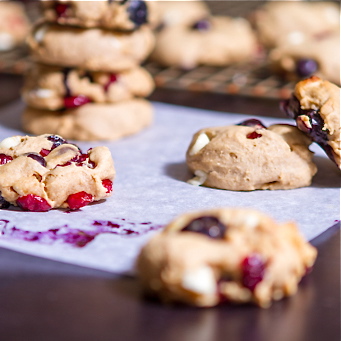
I realllllly love these cookies. I love the combination of flavors and the soft, gooey texture, but I especially love the way the blueberries burst when you take a bit. It’s like the most amazingly fresh blueberry muffin, but a cookie.

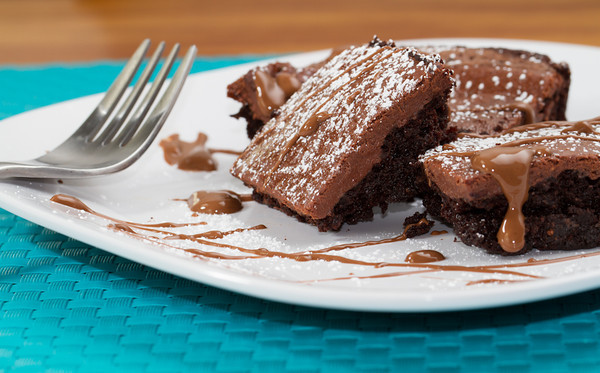
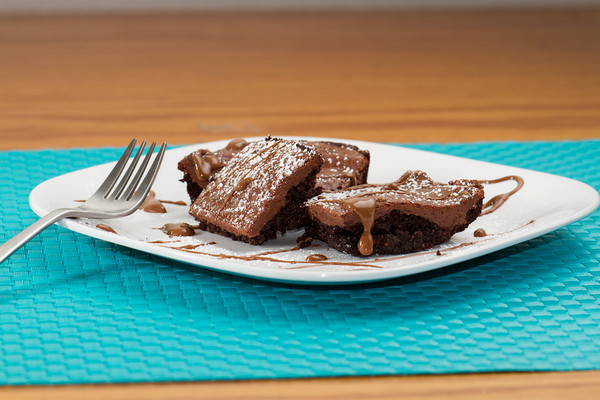
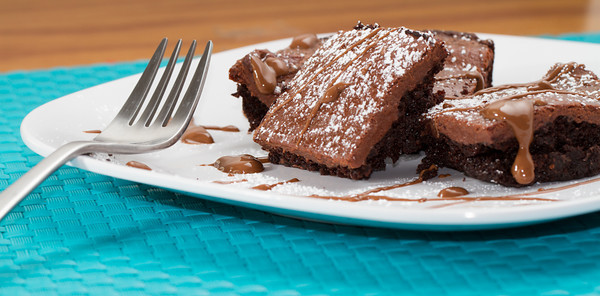
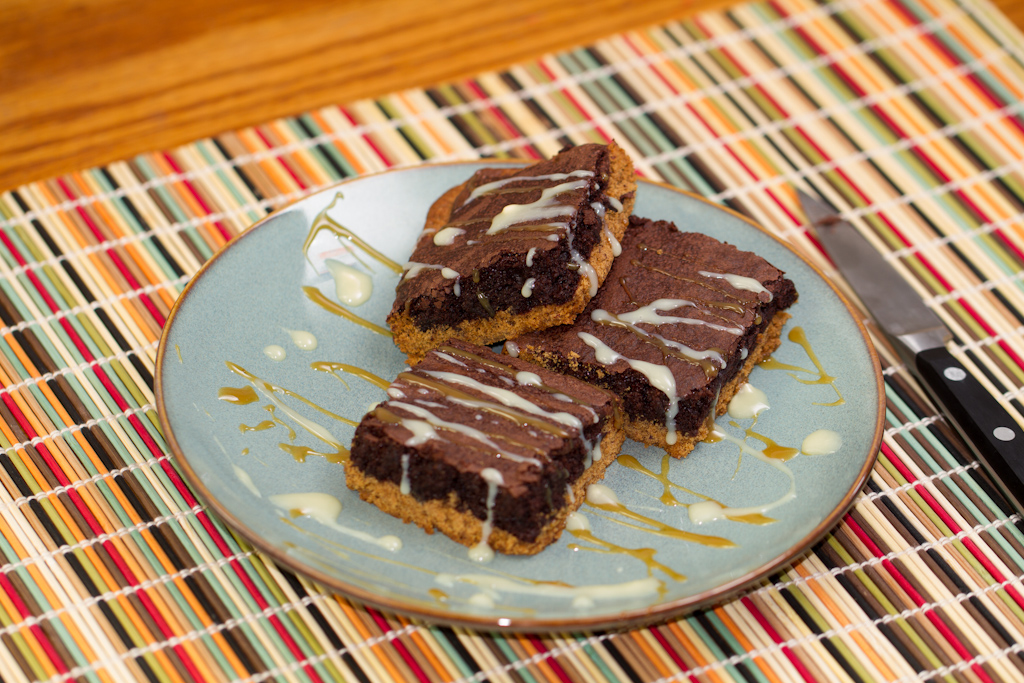
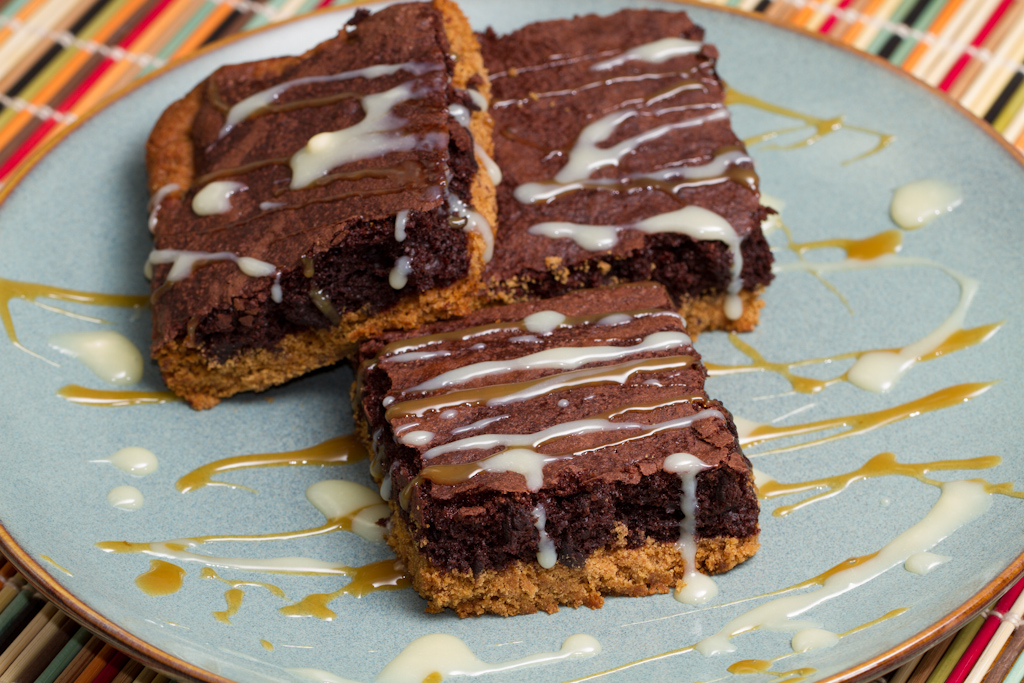
Also, they’re pretty. That pretty much never happens with my food. In fact, the other day Steve told me that my brownies were photogenic, and it was, like, the best compliment ever. Usually my food looks like a kindergartner put it together. Which is almost true. Maturity wise.

And now I want to eat a dozen. And not share. Good thing we don’t have a cookie sheet up here yet…


Red White & Blue Cookies

yield approx 3 dozen

  • 1 cup brandy (to soak the berries in, then saving 2 tsp for later)
  • 2/3 cup dried cranberries
  • 2/3 cup small blueberries
  • 1/2 cup honey apple butter
  • 1/2 cup non fat plain greek yogurt
  • 3/4 cup turbinado sugar
  • 2/3 cup brown sugar
  • 1/4 cup + 2 tbs liquid egg whites (or other egg substitute, or 3 egg whites)
  • 1 tsp baking soda
  • dash salt
  • 2 1/4 cups white whole wheat flour
  • 2/3 cup all natural white chocolate chips
  1. Put the blueberries in a wide and shallow bowl, pour in a bit of brandy. Enough so they’re surrounded by it, but not drowning. Cover and place in the fridge for at least one hour. Afterwards, place a colander over a bowl and pour the berries and brandy through, putting the cranberries and the brandy they soaked in aside.
  2. Preheat oven to 375°F. In a large bowl, beat apple butter, yogurt, and sugars until combined. Add liquid egg whites, and 2 tsp berry soaked brandy. Beat well, scraping sides of the bowl as necessary.
  3. In a separate bowl, whisk together the flour, baking soda, and salt, then slowly add to wet mixture, beating until just incorporated. Fold in the brandy soaked blueberries, dried cranberries, and white chocolate chips. Let chill for 15 minutes in the fridge.
  4. Spray baking sheet with non stick spray or parchment paper. Use a small-medium sized cookie scoop to transfer dough onto the baking sheet. Bake at 375°F for 8-10 minutes until just set, and the edged are slightly golden. Let cool for a minute, then transfer to a wire rack to cool completely.
 

Filed Under: Cookies, Dessert, Holiday & Seasonal · Tagged: 4th of july, baking, cookies, dessert, recipe, theme, whole grain

Vegan Banana Chocolate Chip Muffins

June 1, 2012 · by Ari ·

This never happens. We eat a lot of bananas in this house, so they never stick around long enough to make banana bread/muffins/etc.

But I guess one day I got overzealous on my banana buying. Or we got sick of them for a while, because all of the sudden I had more over ripe bananas than I knew what to do with.

Okay, that’s a lie. I knew exactly what to do with them!

Note to self: bananas don’t typically stick around too long. Banana muffins don’t make it through the night.

I always talk about how I love experimenting with cooking for different diets. I won’t ever, ever, ever do an other diet with rules again, unless I develop some medical condition in which it is necessary or I’m going to die, and even then I’d still consider my options. Kidding. Mostly. 😉 I do love trying different things, however, and cooking in different ways. I’ve been dying to find some amazing looking recipe to make Diana some candida baked goods! Soon, soon, soon. But for now, amazing people like Jen that can’t have dairy, can eat delicious muffins (and Jen, I promise I am sending your cookies before I leave for camp!).

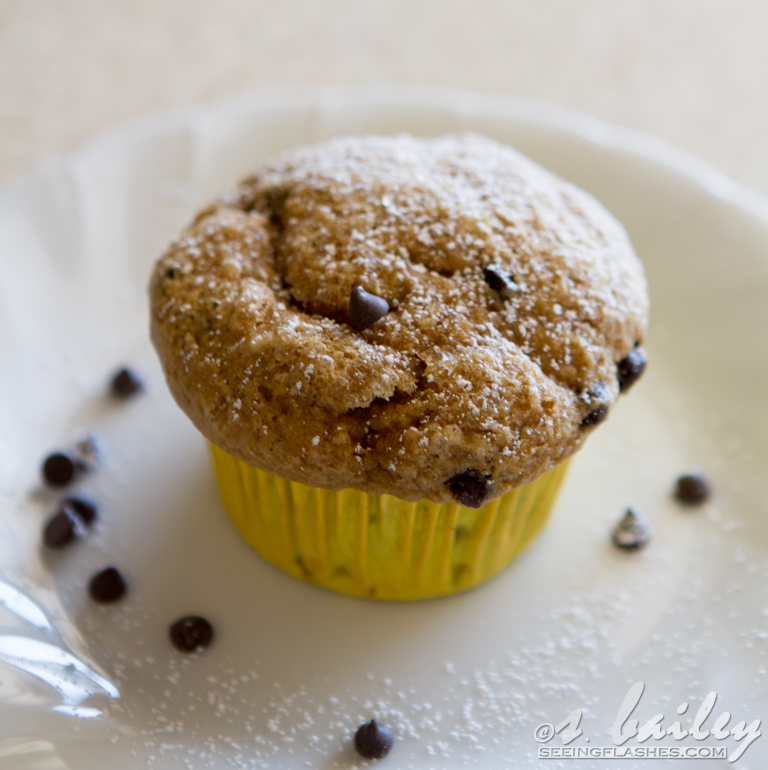
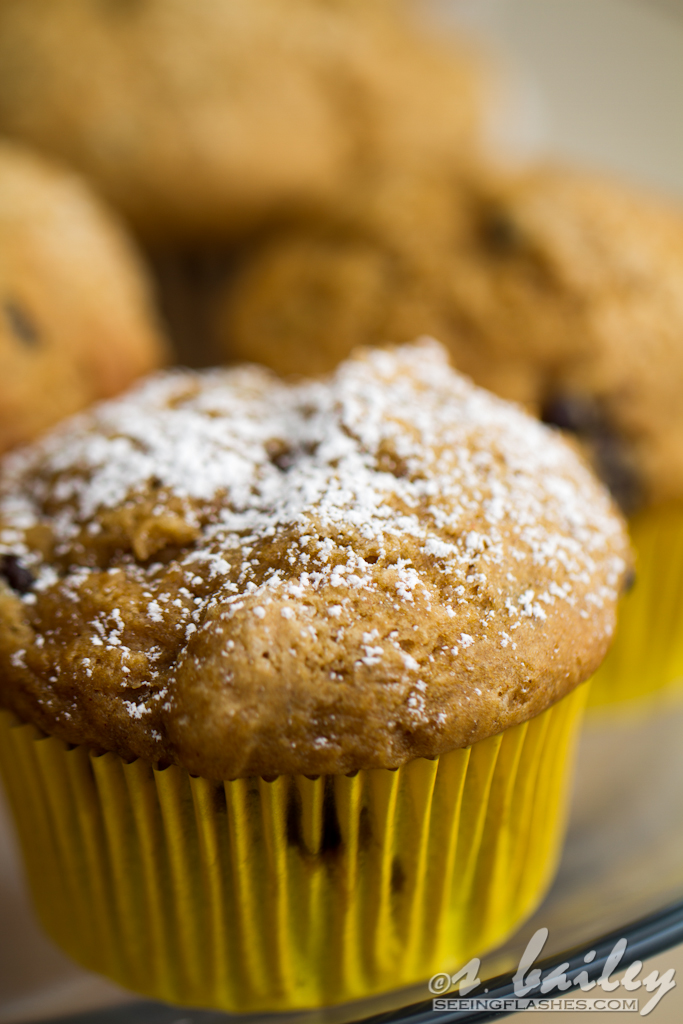
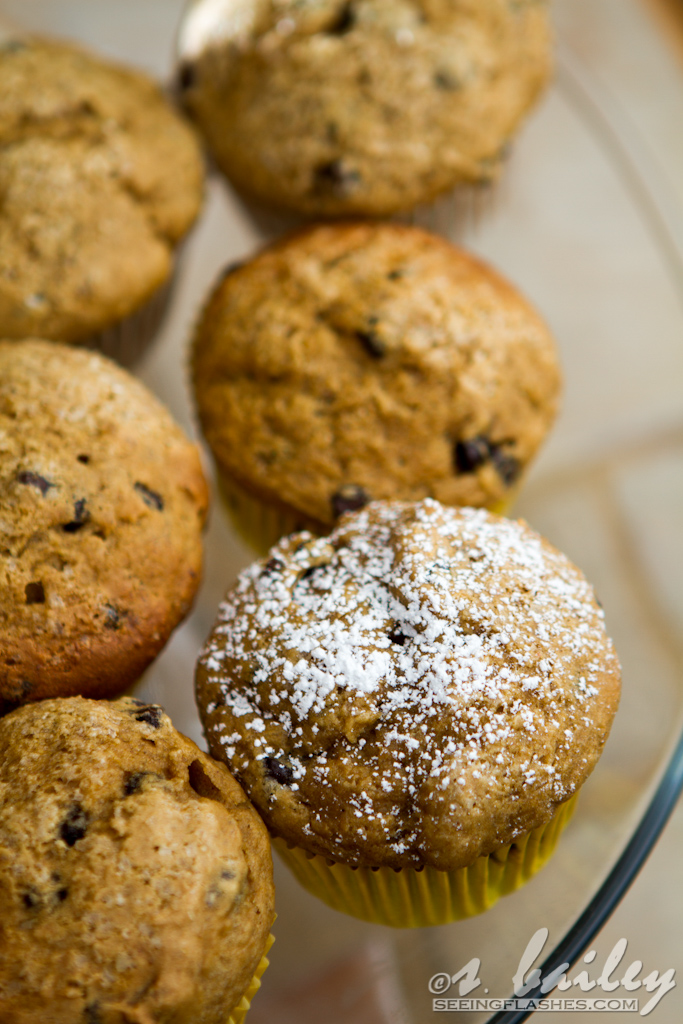
I could not get over how soft and moist these muffins were! Honestly, what is the point of butter in a muffin? Bananas and applesauce do the same thing and, in my opinion, like a million times better. I mean, don’t get me wrong…I love butter. It’s sick, really, how much I love butter, but well…now I feel slightly embarrassed because about my last statement, so let’s get back to these muffins which don’t fill my love of butter, but fill my bigger love of baked goods and chocolate. And now I am reminded of how sad I am that there are no longer any left in my house. First world problems people. This means you should make them, and enjoy them for me!

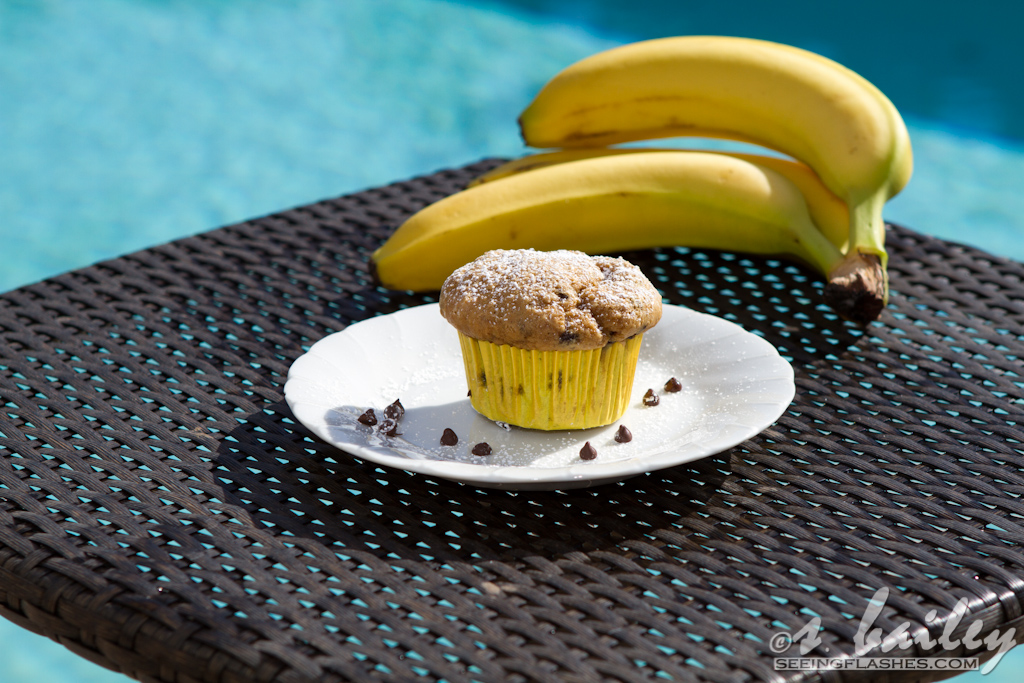
Like, perhaps, while lounging by the pool. 😉


Vegan Banana Chocolate Chip Muffins

yield 1 dozen

  • 2 1/3 cup white whole wheat flour
  • 3/4 tsp baking soda
  • 1/2 tsp baking powder
  • dash salt
  • 1 tsp pumpkin pie spice
  • 3 extra-ripe bananas, mashed
  • 1 1/2 tsp vanilla
  • 1/2 cup unsweetened applesauce
  • 3/4 cup turbinado sugar + more for sprinkling
  • 1/3 cup unsweetened vanilla almond milk
  • 1/2 cup non dairy dark chocolate chips (I recommend using the mini size)

Directions:

  1. Preheat oven to 350. Line muffin tin with paper liners, and spray lightly with nonstick spray.
  2. In a medium bowl, whisk together flour, baking soda, baking powder, salt, and pumpkin pie spice. Set aside.
  3. In a large bowl, beat together bananas, vanilla, applesauce, 3/4 cup sugar, and almond milk, until well combined. Slowly, beat in dry ingredients, then fold in chocolate chips.
  4. Evenly divide batter between the 12 muffin tins. Sprinkle an extra pinch of turbinado sugar on the top of each muffin (optional), and bake for 25-30 minutes until golden, and a toothpick inserted in the center comes out clean. Transfer immediately to wire racks to cool.

Filed Under: Breads & Muffins, Breakfast, Dessert, Vegan · Tagged: baking, bananas, breakfast, chocolate, dessert, muffins, recipe, vegan, whole grain

Caramelized Onion Rosemary Biscuits

May 17, 2012 · by Ari ·

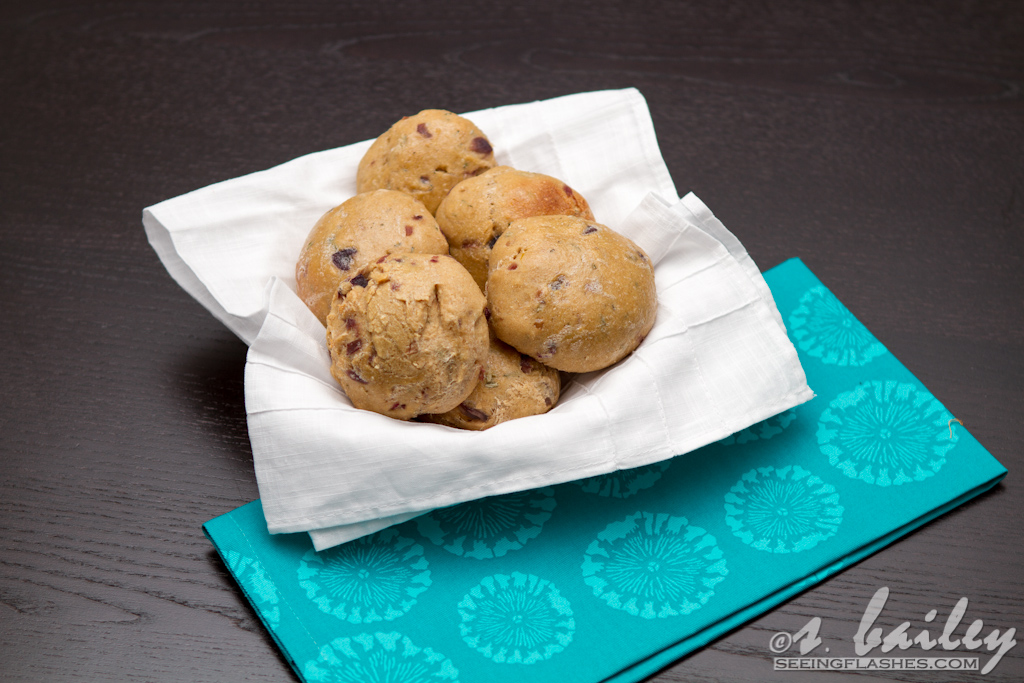
Soft and fluffy whole grain biscuits stuffed with caramelized onions and fresh rosemary.

I remember when I was living with Heather in Moscow, and she made roasted garlic and rosemary bread. It was pretty amazing. So amazing that when I was deciding what type of bread to make for Mother’s Day to go along side my Skinnified Fettucine Alfredo, it was the first thing that came to mind.

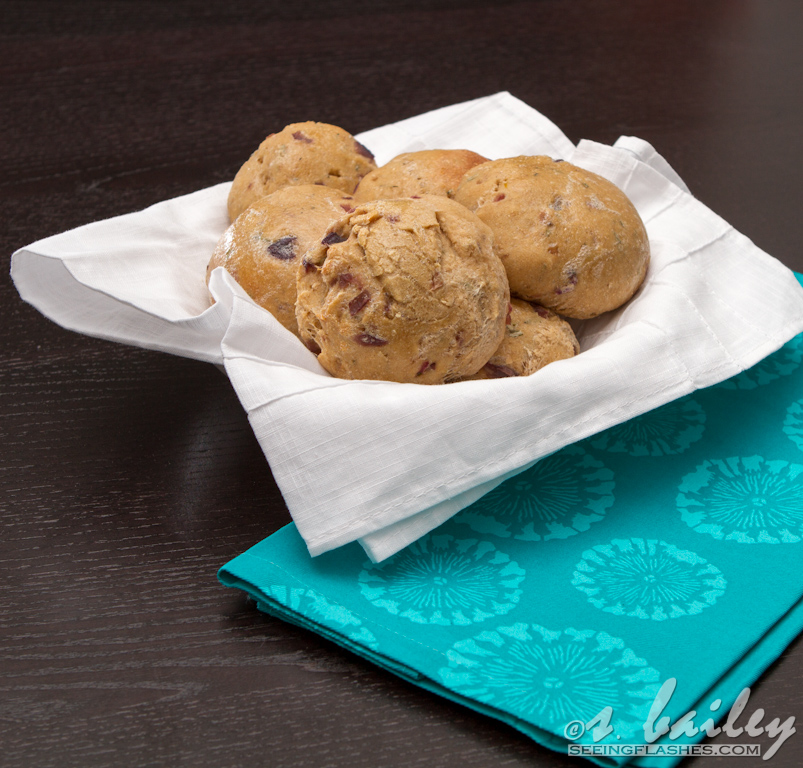
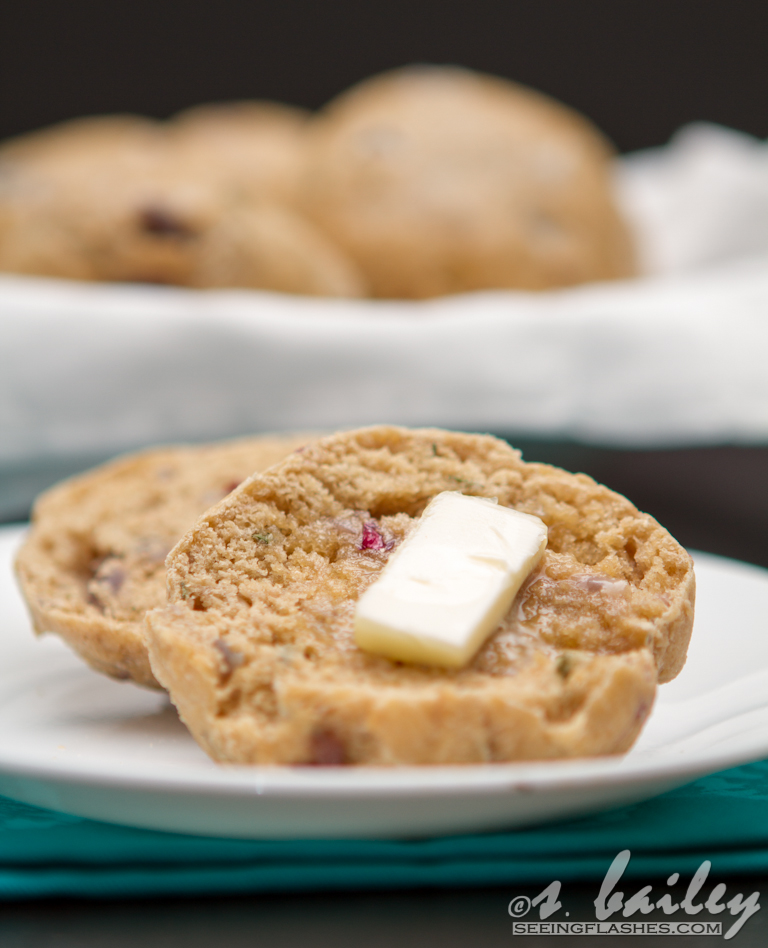
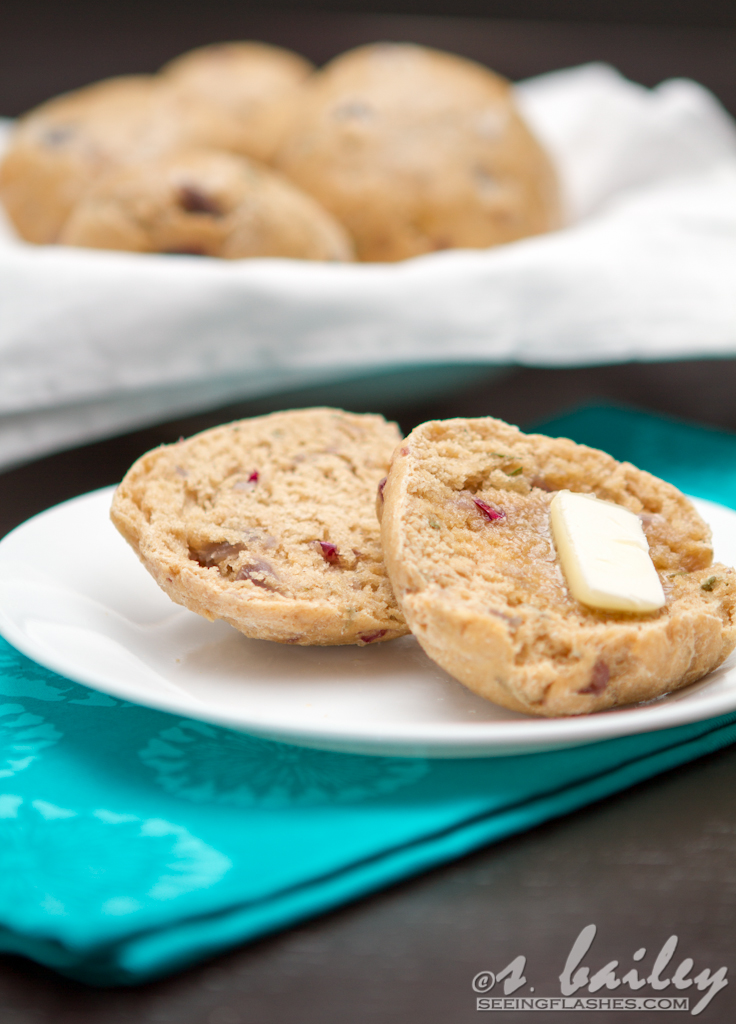
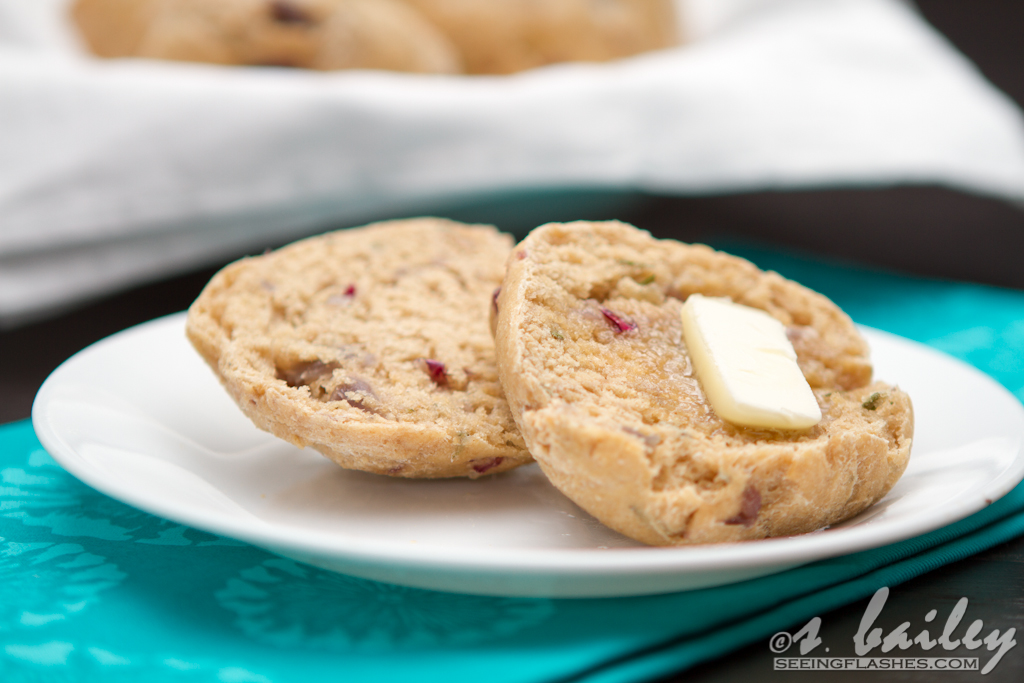
Let’s talk about these biscuits, because I really cannot get enough of them. You would expect a 100% whole wheat biscuit to be dense and heavy, right? Well these babies were fluffy while still full of hearty wheat flavor.

Aren’t they pretty with butter? Honestly though, they don’t need any.

I would eat them in a boat. I would eat them with a goat.

I will eat them here or there. I will eat them anywhere! Yes, I just quoted Dr. Seuss. Don’t judge. Okay, but seriously, carmelized onions, sauteed garlic, and fresh rosemary? You can’t go wrong. These biscuits are full of flavor, and taste like the bread basket from a fancy Italian restaurant. My mom was super impressed. She kept calling them professional. Thanks mom! 😉

Print
Caramelized Onion Rosemary Biscuits

Prep Time: 30 minutes

Cook Time: 40 minutes

Total Time: 4 hours

Yield: 1 dozen

Serving Size: 1 biscuit

Caramelized Onion Rosemary Biscuits

Soft and fluffy whole grain biscuits stuffed with caramelized onions and fresh rosemary.

Ingredients

  • 1 large sweet onion, chopped
  • 2 large cloves garlic, minced
  • 1 tbs light whipped butter
  • 1 1/2 cup warm water
  • 3 tsp active dry yeast
  • 1 tablespoon honey
  • 3 tablespoons olive oil, plus more for coating bowl
  • 2 cups whole wheat pastry flour
  • 2 cup white whole wheat flour
  • 2 teaspoons sea salt
  • leaves from 2 sprigs rosemary, finely chopped
  • 1 egg white, lightly beaten

Instructions

  1. Sauté onions and minced garlic in the butter over medium heat. Cook until brown and caramelized, about 15 to 20 minutes. Allow to cool for a few minutes.
  2. Pour warm water into a bowl. Sprinkle yeast on top. Add the honey and olive oil. Stir gently with a fork until combined. Set aside.
  3. In a medium bowl, combine flours and salt. Add cooked and cooled onions, rosemary, and water mixture, stirring gently until dough is combined.
  4. Knead in stand mixer using hook attachment (or by hand 15-20 times on a floured surface) until bread sticks together on the hook when lifted.
  5. Spray a separate bowl generously with nonstick spray, then add your ball of dough, turning to coat. Cover with a towel and place in a warm spot for 1 1/2 to 2 hours (I put it outside--it's 105 in Phoenix).
  6. Preheat oven to 400 degrees. Divide dough into twelve round biscuits. Place on a baking mat or parchment paper, then cover with a towel and allow to rise for 15 to 20 minutes. Bake for 18 to 20 minutes or until brown. Brush with beaten egg white halfway through.
3.1
https://arismenu.com/caramelized-onion-rosemary-biscuits/


Filed Under: Appetizers, Breads & Muffins, Fall, Holiday & Seasonal, savory, Side Dish · Tagged: baking, biscuit, bread, dinner, onions, recipe, rosemary, side dish, whole grain

Orange Chocolate Lava Cookies

May 11, 2012 · by Ari ·

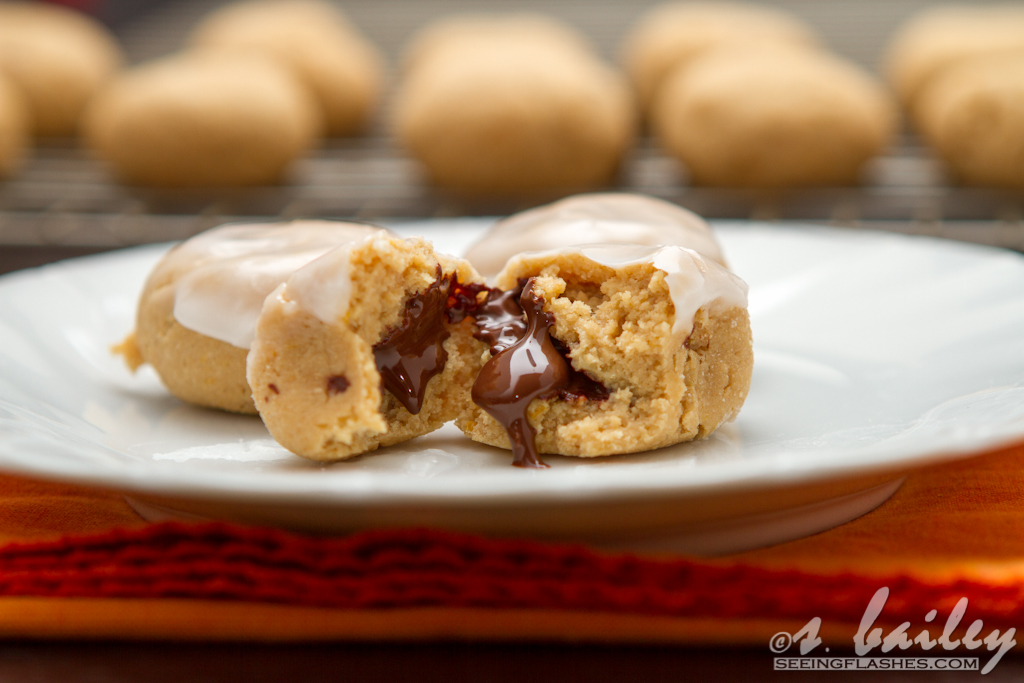
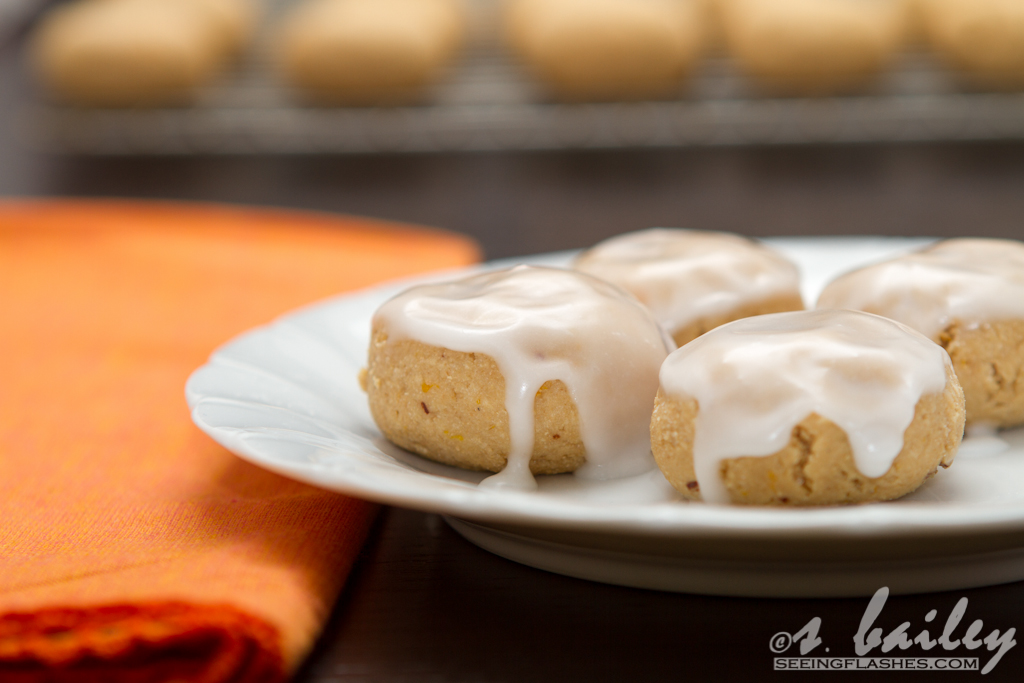
Have you ever had one of those big chocolate oranges? I always thought they were weird, but it turns out orange and chocolate together is brilliant and delicious. I guess those chocolate orange people were right all along 😉

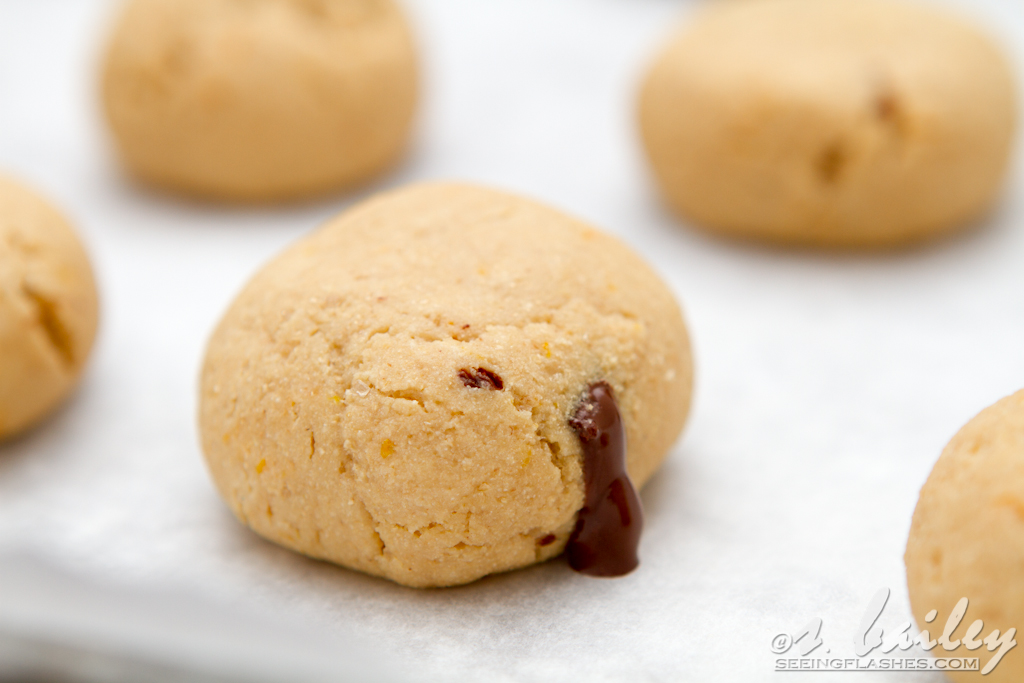
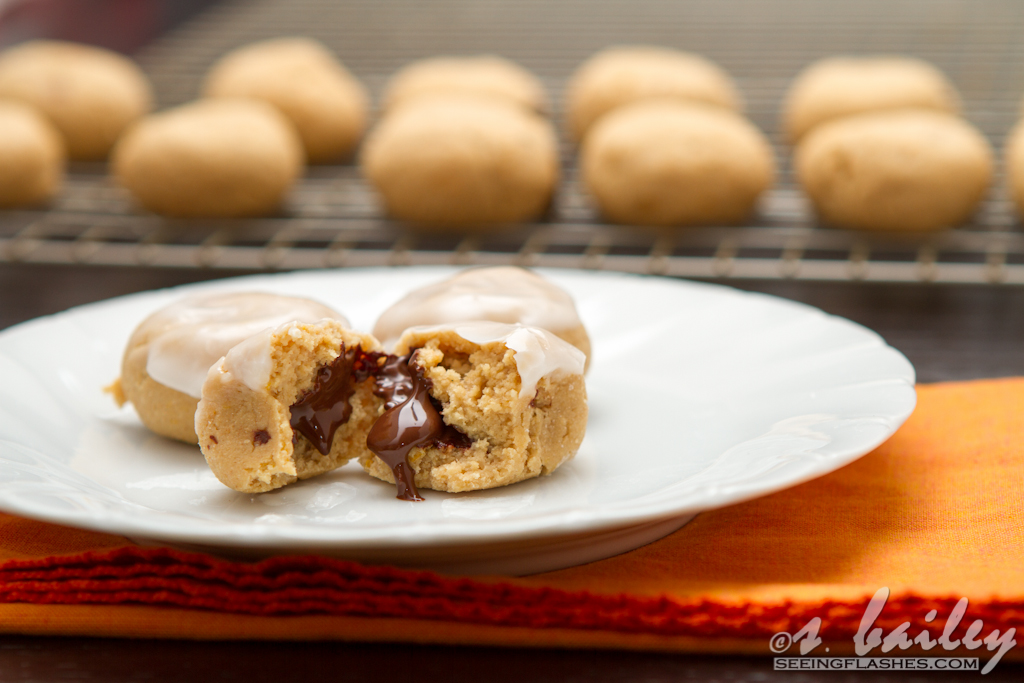
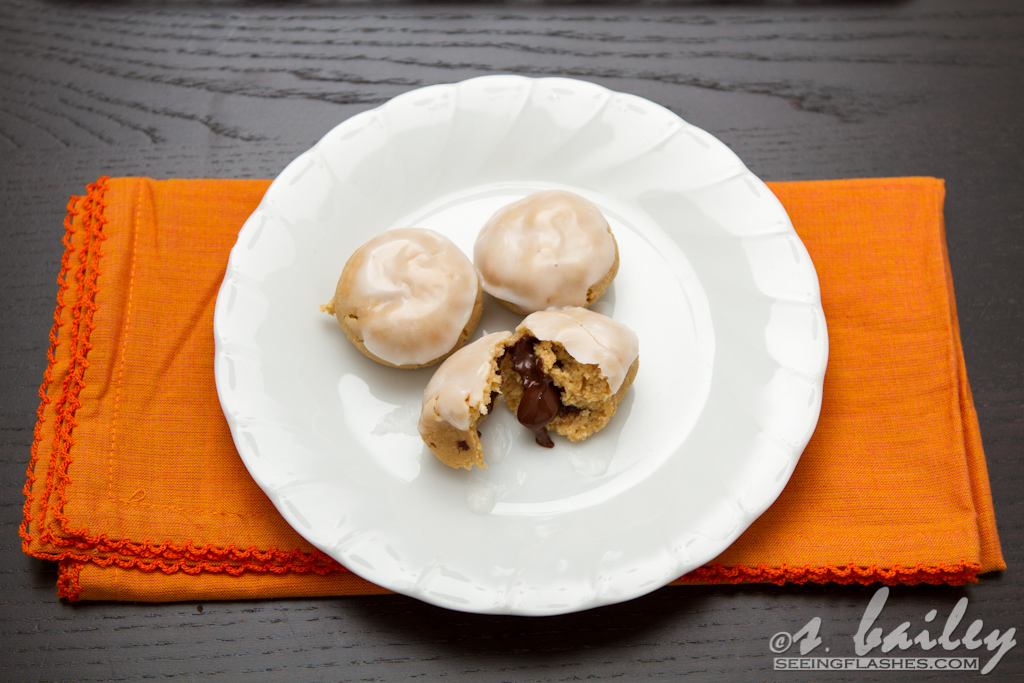
Is it just me, or do things seem fancier when they have a filling? It’s pretty deceptive, really. These are just as easy to make as chocolate chip cookies, but it’s so much more fun to take a bite and have melty, gooey, rich chocolate surprise you in the middle.

Apparently this chocolate was too impatient, and couldn’t wait to be a surprise. Silly chocolate.

I love surprises. Poor Steve…I always tell him “I require a lot of surprises.” Whether it’s coffee, fro yo (my #1 fav surprise), or a note, it just makes me happy. 🙂

But ya know what I do not prefer? When someone tells you they have a surprise for you, and then refuses to tell you what it is!! What is that about? If you have a surprise, then just surprise me! Don’t tell me you’re going to surprise me! I can’t deal with not knowing things, people!

Clearly, I am the easiest person on Earth to be married to. I bet you’re all sad that you didn’t scoop me up first. Sorry guys. I know it sucks.

But seriously, I like to think that my baking at least slightly makes up for the fact that I’m kind of an obnoxious human being. I mean, I still have friends, so it must be the cookies.

This is where you compliment me, and tell me I have a personality that shines like a star, or something cheesey like that. Ready, go!

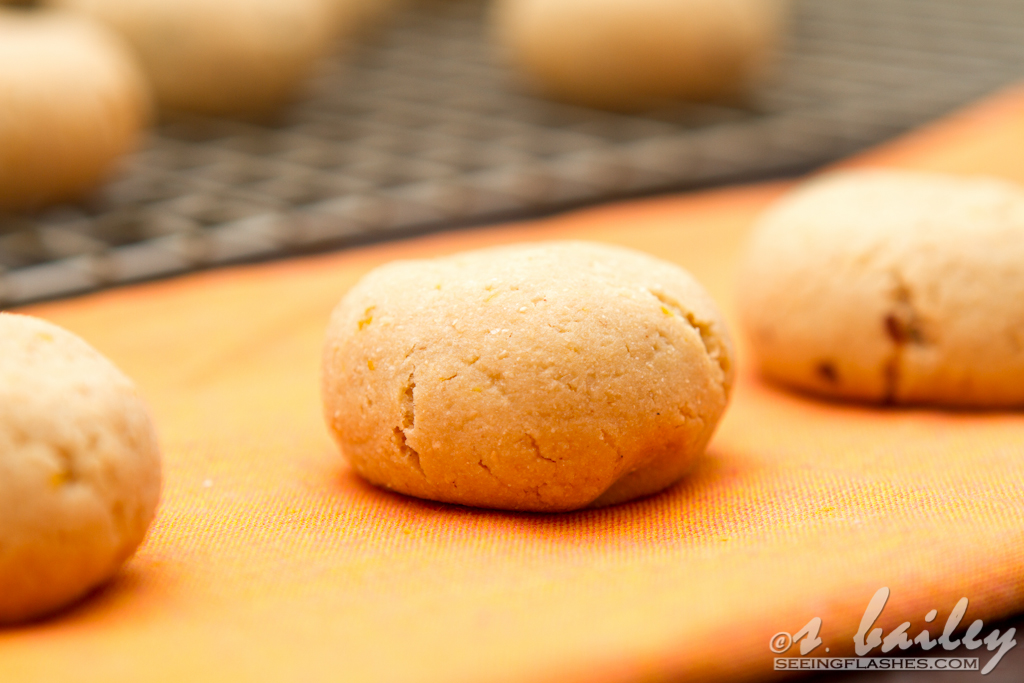
Okay, back to the cookies, because these cookies are ridiculous. Sweet, citrusy, chocolatey, tons of flavors and textures all fitting together to make up cookie heaven.

I’m on a bit of an orange dessert kick it seems. Which is funny, because I don’t even like actual oranges. Or orange juice. But I do like these…and also these.


Orange Chocolate Lava Cookies

  • 1 1/4 cups gluten-free baking blend (or white whole wheat flour)
  • 1/2 tsp baking powder
  • dash salt
  • 1/2 cup granulated sugar
  • 1 tbs orange zest
  • 1/4 cup fat free cream cheese, softened
  • 1/4 cup apple butter
  • 1 tbs fresh orange juice
  • 1 egg white
  • 4 oz dark chocolate (small squares or coarsely chopped)
For the glaze:
  • ½ cup powdered sugar
  • 1-2 tbs orange juice
Directions:
  1. Preheat oven to 350. Line a large cookie sheet with parchment paper. Set aside.
  2. In a medium bowl, whisk together baking blend, baking powder and salt. Set aside.
  3. In a large bowl mix together sugar and orange zest. Then beat in cream cheese, apple butter, egg white, and orange juice until combined.
  4. Beat dry ingredients into wet until combined, scraping down sides of the bowl as necessary,
  5. Roll cookies into 1″ balls, then stuff with a 1/4 tsp size chunk of dark chocolate (eye ball it–you want to make sure it is bigger than a chocolate chip, but that the dough can still cover it completely). Re-roll into 1″ ball, making sure all chocolate is covered. Repeat with remaining dough.
  6. Bake for 10-12 minutes until golden. Let stand for 3-5 minutes on baking sheet before transferring to a wire rack to cool completely.
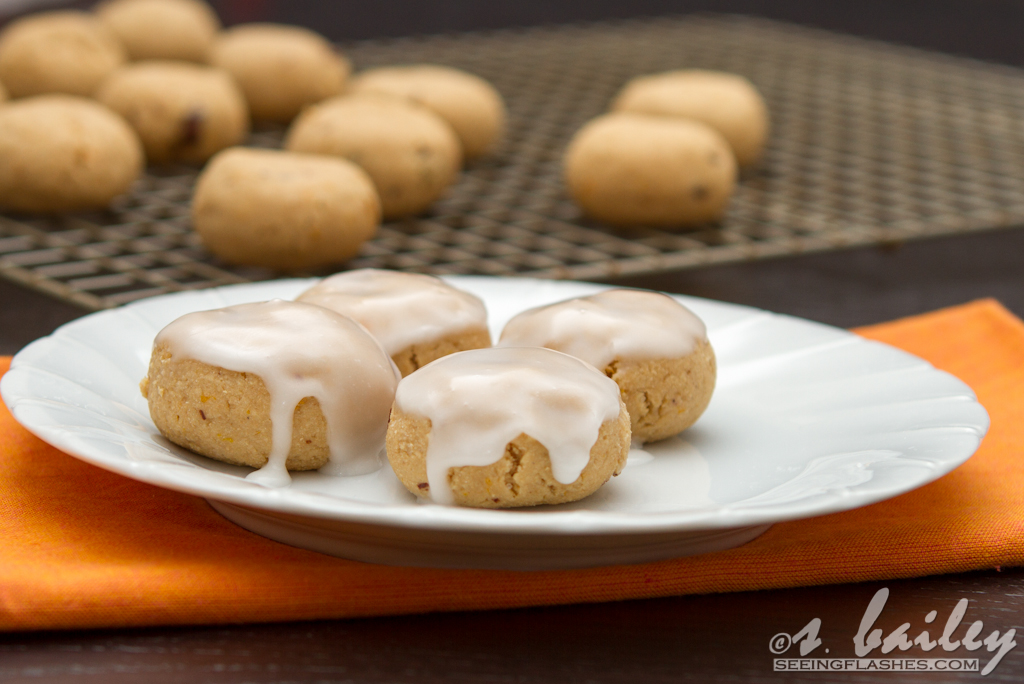
  7. Meanwhile, in a small-medium mixing bowl, whisk together powdered sugar and 1 tbs orange juice. Slowly continue to add more orange juice (and I mean very slowly. A little bit of liquid goes a long way with powdered sugar) until desired drippy consistency.
  8. Dip tops of completely cooled cookies into the glaze, then let stand to set on a flat surface.


Filed Under: Cookies, Dessert · Tagged: baking, chocolate, cookies, dessert, orange, recipe

Skinnified Sunday: Monster Cookies

April 15, 2012 · by Ari ·

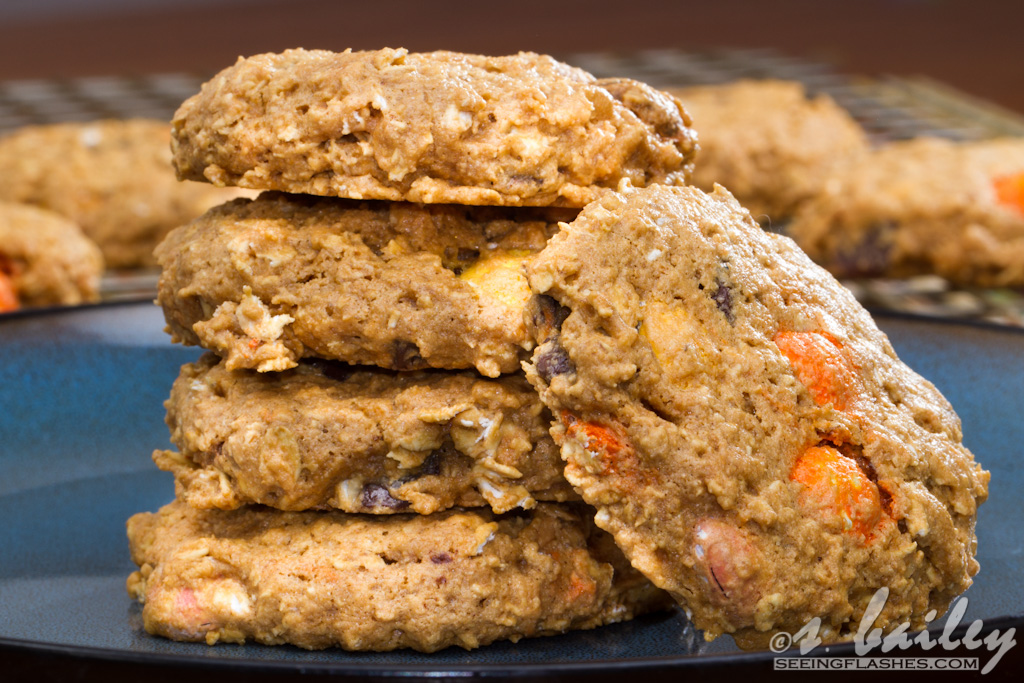
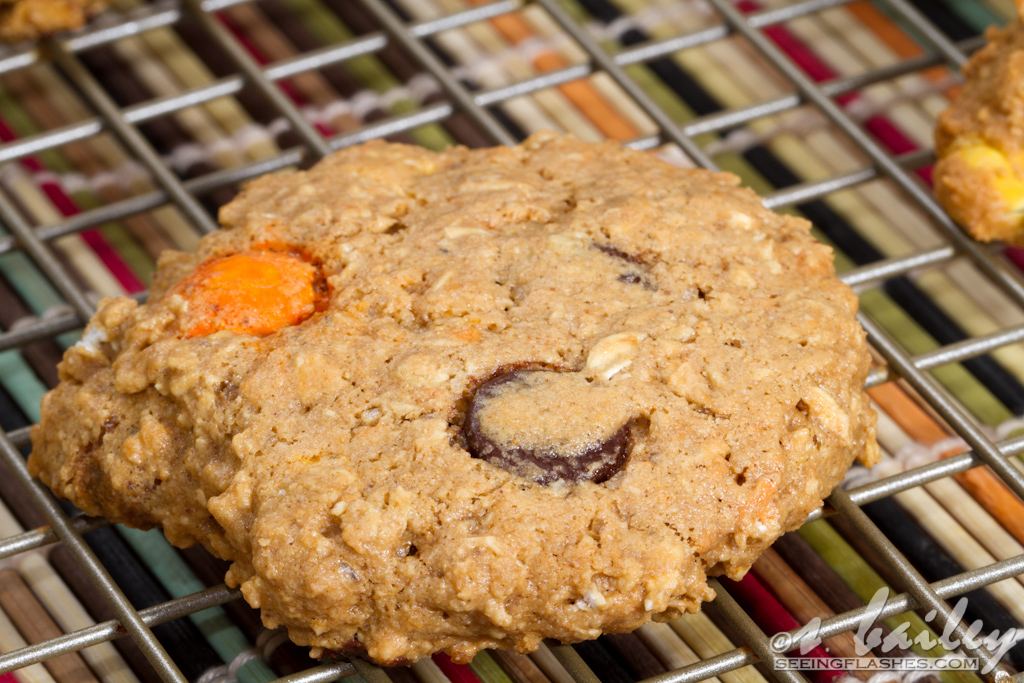
I have always been a sucker for monster cookies. There are so many ways to make them, but the basic concept includes peanut butter, chocolate chips, M&Ms, and oats. How could you go wrong with those ingredients?! Seriously. I had some at a friend’s birthday and have been dying to make my own ever since. When I noticed that Sunspire had their own version of M&M’s, I bought them immediately knowing monster cookies were on the horizon!

I found the original recipe from Taste of Home

My swaps:

  • ¼ cup Better’n Peanut Butter for half the peanut butter (-fat, -calories)
  • TJ’s Honey Apple Butter for butter (-fat, -calories, -saturated fat, -cholesterol)
  • Splenda* for some of the sugar (-sugar, -calories)
  • Egg substitute for whole eggs (-fat, -cholesterol, -calories)
  • Rolled oats for quick cooking (just what I buy)
  • Sunspire Sun Drops for M&M’s (-sugar, -calories)
  • Sunspire grain sweetened chocolate & peanut butter chips for butterscotch chips (-sugar, -calories)
  • No peanuts (-fat, -calories, and I don’t like nuts in cookies)
  • White whole wheat flour for all-purpose (+fiber, +protein)
  • Extra cinnamon & vanilla (+yum)

*Some people feel really strongly about Splenda. You can easily use all sugar real sugar, I just prefer to cut some of the calories.

I was a little nervous about swapping in the Better’n Peanut Butter, but I was amazed at how well it worked!! That stuff is okay on its own, but it doesn’t compare to the real stuff. In baking, however, I would have never even known there was anything different!

PS, what is the difference between Better’n Peanut Butter and PB2? Does anyone know? All the popular bloggers use PB2, but I couldn’t find it 🙁 And obviously, if all the cool kids are doing it, I don’t want to be the lame one using the wrong peanut butter substitute. Clearly, I have really grown up and no longer use junior high mentality 😉

Okay, but back to the cookies…ummmm…they were gone in one day. Actually like 6 hours.

Whoops.

I think Jason may have eaten 4 in one sitting. Don’t judge him. They were really that delicious. And they’re “healthy” so that means you can eat the whole batch, right?

Skinnified Monster Cookies

Yield 2 ½-3 dozen cookies

  • 1/4 cup PB & Co White Chocolate Wonderful (you can use regular PB, but this is just my favorite!)
  • ¼ cup Better N Peanut Butter
  • ¼ cup honey apple butter
  • ¼ cup packed brown sugar
  • ¼ cup turbinado sugar
  • ½ cup Splenda
  • ¼ cup + 2 tbs egg substitute
  • 1 tsp baking soda
  • 1 tsp vanilla extract
  • 2 cups rolled oats
  • ½ cup Sunspire Sun Drops
  • ¼ cup grain sweetened chocolate chips
  • ¼ cup Sunspire peanut butter chips
  • ½ tsp cinnamon
  • 1 cup white whole wheat flour

Directions:

1. Preheat oven to 325. Spray a large cookie sheet with nonstick spray.
2. In a large bowl, cream peanut butter, Better N Peanut Butter, apple butter, and sugars. Add egg substitute, then baking soda and vanilla.
3.  Add oats, M&M’s, butterscotch chips and peanuts; let stand for 10 minutes.
4.  Stir in flour.
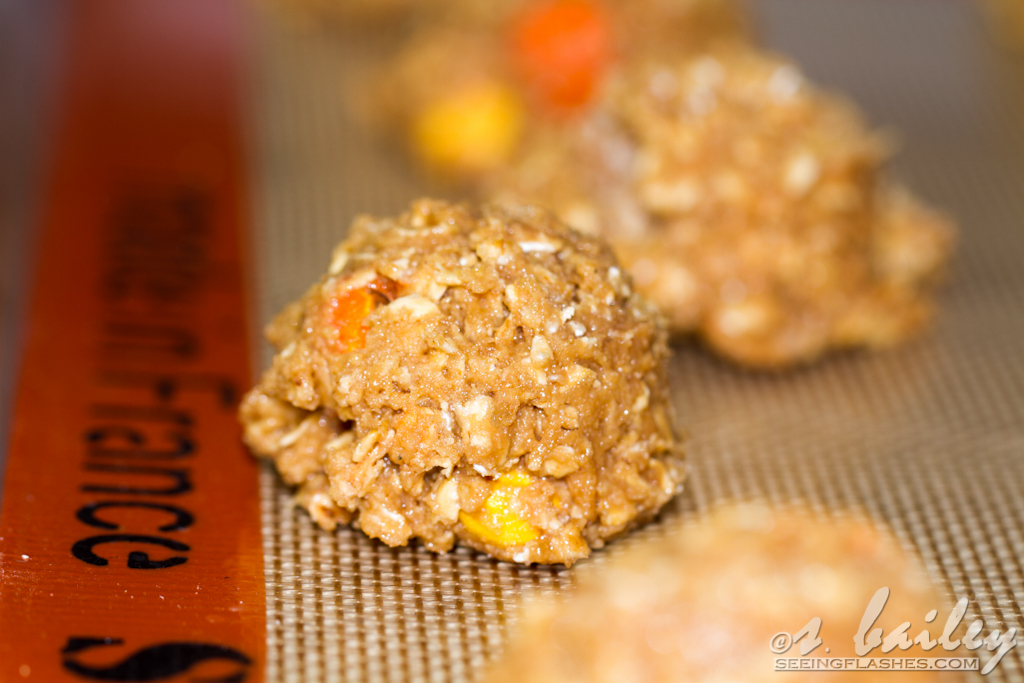
5. Use a medium cookie scoop  cookie dough onto the baking sheet, then use a sprayed piece of wax paper to flatten slightly.
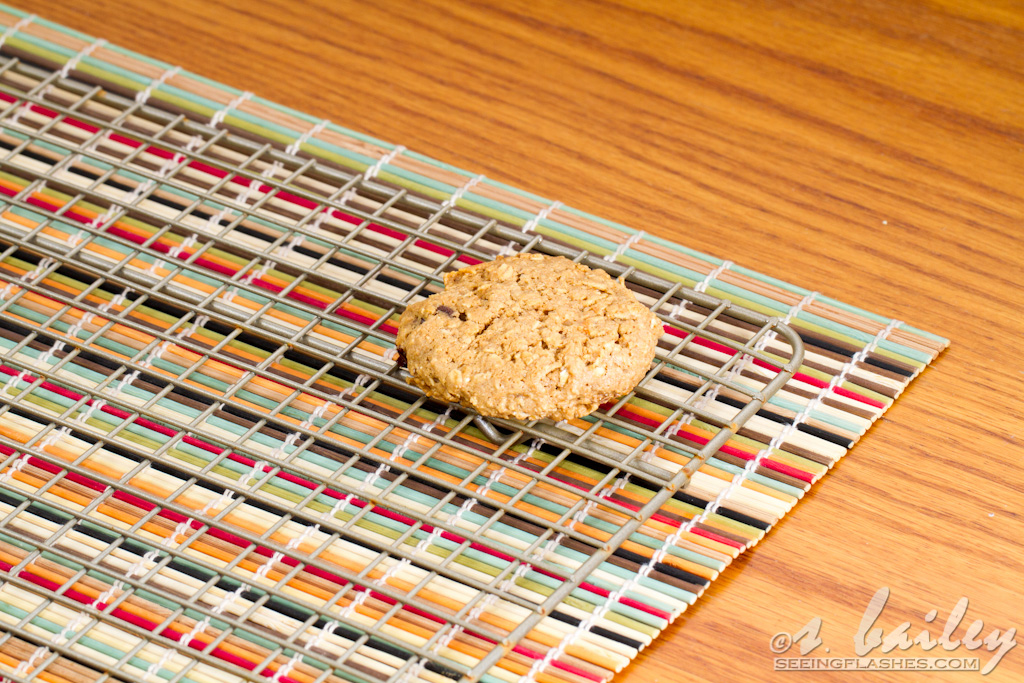
6. Bake for 15-18 minutes until edges are golden. Let stand for 5 minutes on baking sheet, then transfer to wire rack to cook completely.

I love my cookie scoop. Just saying.

Filed Under: Cookies, Dessert · Tagged: baking, better'n peanut butter, chocolate, cookies, peanut butter, skinnified, sunspire, whole grain

Vanilla Bean Cookie Butter Cup Cupcakes

April 9, 2012 · by Ari ·

I have a serious problem.

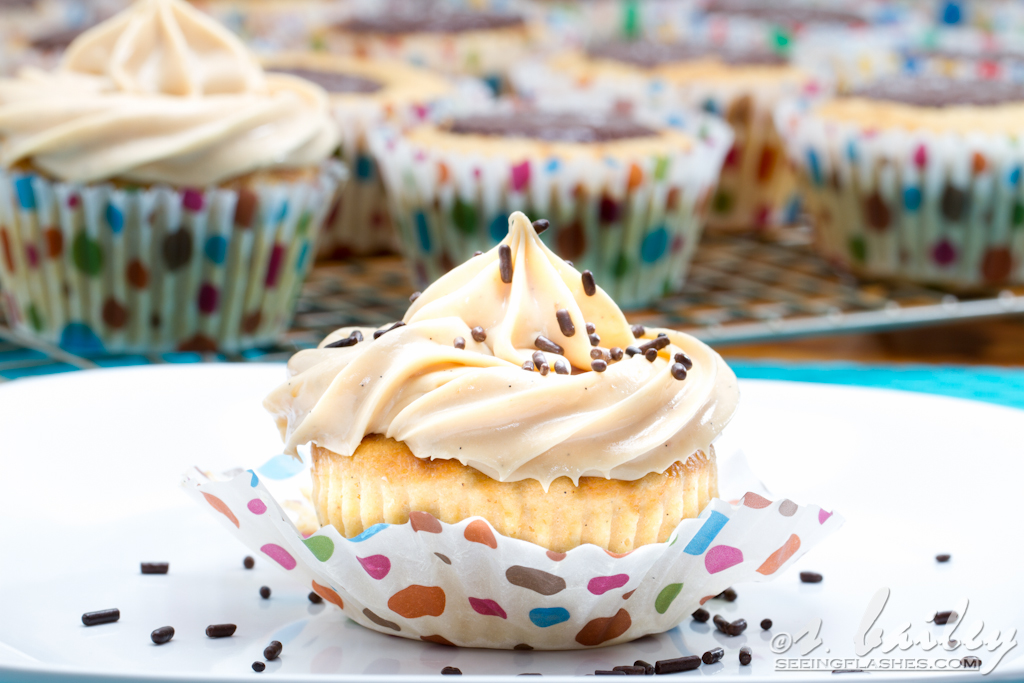
How do you live with a fridge full of this and not eat every last one?? Seriously.

Well, I guess the fact that they were made for someone else is pretty good for the whole self control thing. I canNOT make cupcakes like this that are just for me. I will eat a dozen in about 2 days hours minutes.

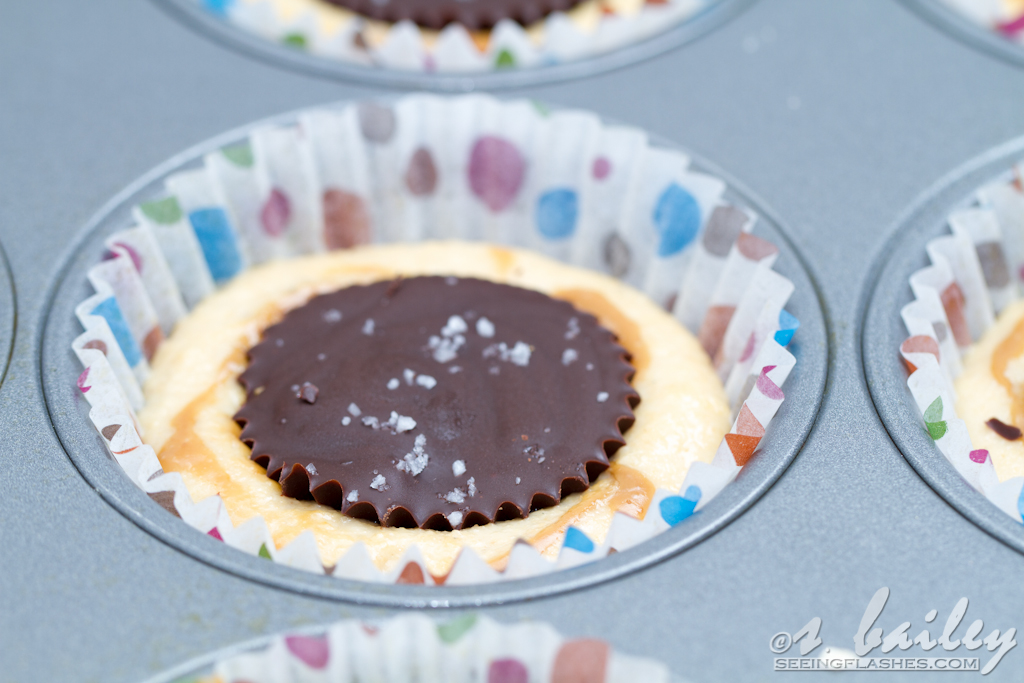
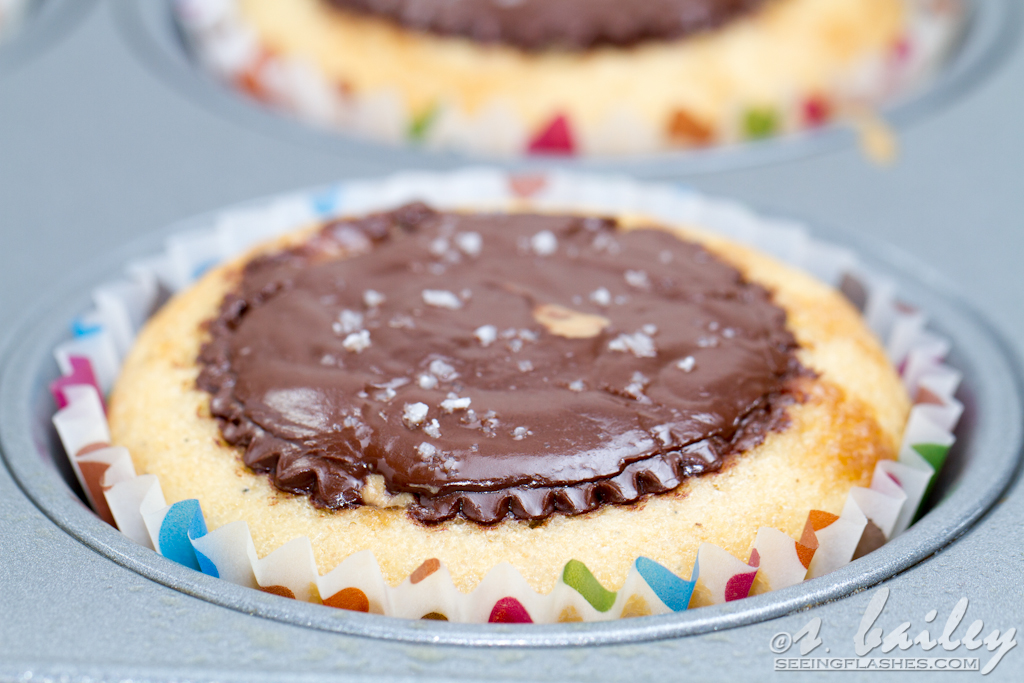
Remember when I made these and said they part one of a special baking project?? Well, I made vanilla bean cupcake batter, swirled in some cookie butter, then pressed one into the center before baking.

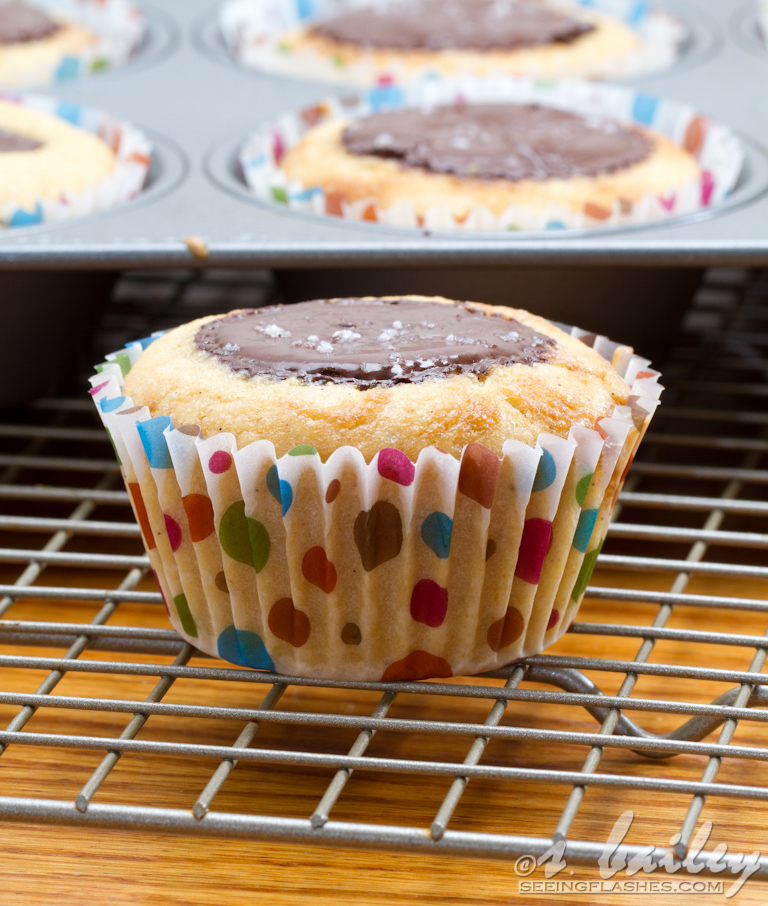
I thought they would bake much faster than normal cupcakes, or that the cookie butter cup would just melt right into the cupcake, but they baked for a normal amount of time (18 minutes) and came out looking perfect!

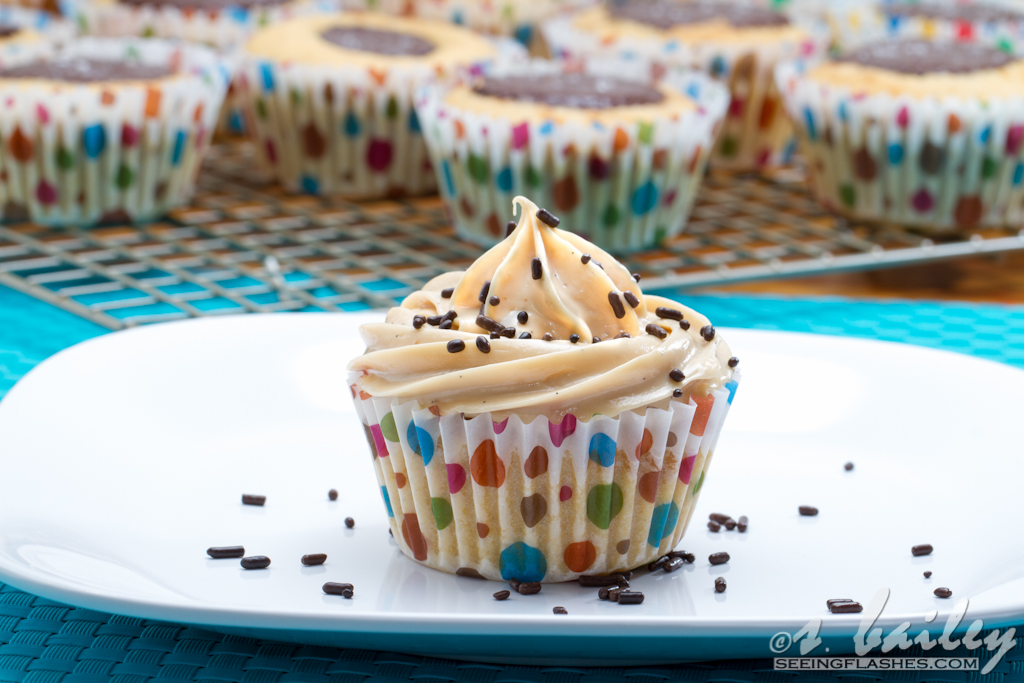
Then I made a Cookie Butter Cream Cheese Frosting and things got REAL over here.

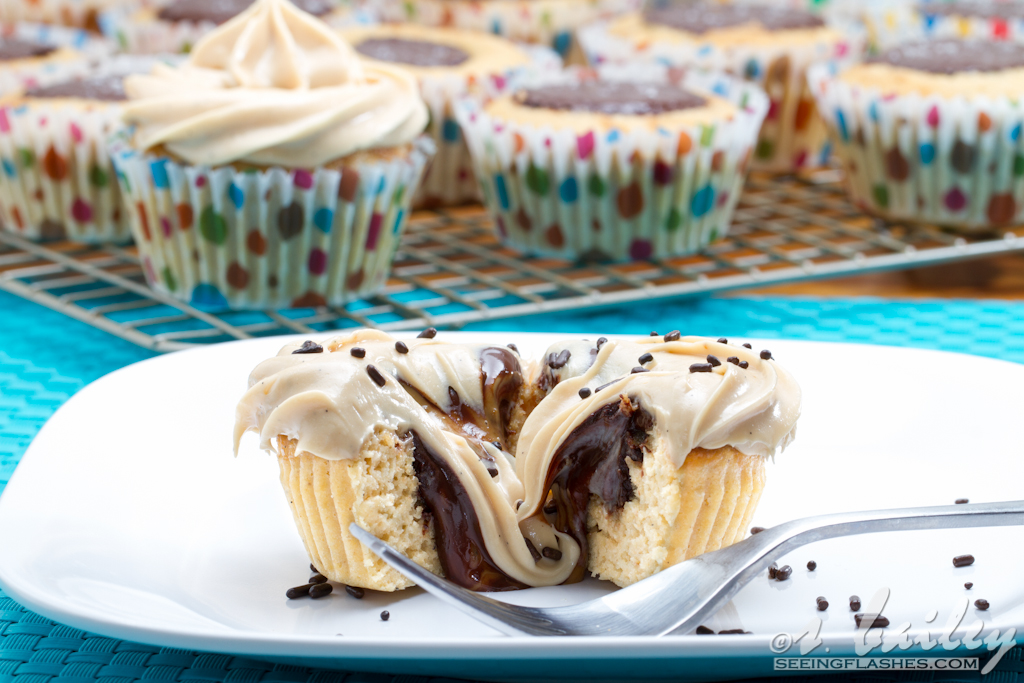
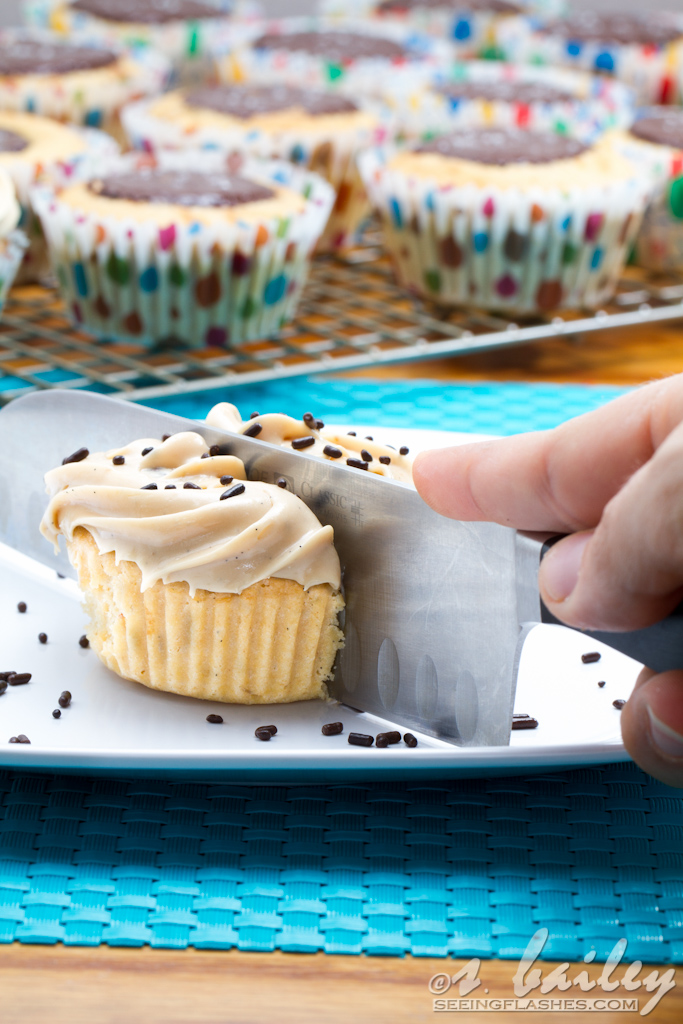
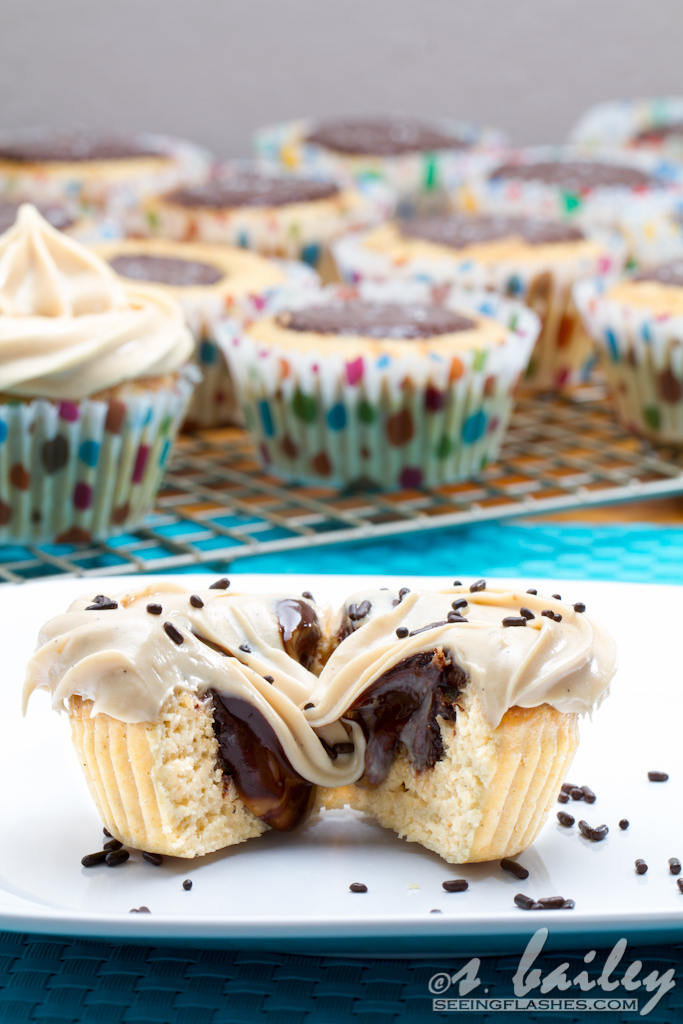
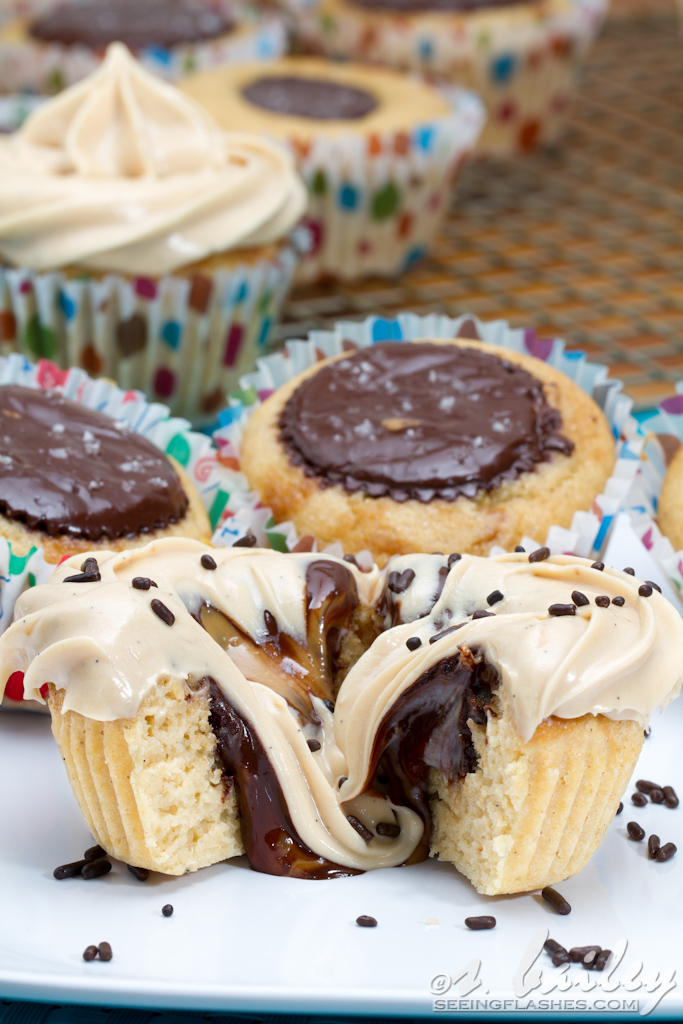
Because what good is a cupcake picture if you don’t cut it in half and show off all the gooey insides?!

Also can we check out all those vanilla bean specs?! In the cupcake and the frosting. Can’t. Get. Enough.

These weren’t completely cooled, so everything just came right out. I love that. If you don’t, just make sure you cool them in the fridge first. But seriously, if you don’t like warm, oozey chocolate, who are you and why are you even reading this blog?!

Just kidding, please keep reading. I can overlook your weird textural preferences. Maybe…

Drrrrooooool.

HAPPY BIRTHDAY STEVE!!!! I couldn’t have picked a better occasion to make probably the best cupcake I have ever created. Obviously, you inspire me 🙂

Vanilla Bean Cookie Butter Cup Cupcakes

yield 15

  • 1 1/2 cups white whole wheat flour (or all purpose)
  • 1/2 tbs baking powder
  • dash salt
  • 1/2 vanilla bean, split lengthwise
  • 1/2 cup unsweetened applesauce (or butter)
  • 3/4 cup sugar
  • 2 eggs
  • 3/4 cup reduced fat buttermilk
  • 1/2 tbs vanilla extract
  • 2-3 tbs TJ’s Cookie Butter (or Biscoff spread), melted
  • 15 Salted Chocolate Cookie Butter Cups, frozen

Directions:

  1. Preheat oven to 350. Line cupcake pans with paper liners. Spray lightly with nonstick spray, then set aside.
  2. In a medium bowl, whisk together flour, baking powder and salt. Set aside.
  3. In the bowl of a stand mixer (or you can use a hand mixer if you don’t have a stand one), add applesauce and sugar. Scrape in seeds from vanilla bean and beat on medium speed.
  4. Beat in eggs one at a time.
  5. In a glass measuring cup (or separate bowl) combine buttermilk and vanilla extract.
  6. With mixer on low speed, alternately add flour and buttermilk mixtures, starting and ending with dry ingredients.
  7. Beat until just incorporated, scraping down sides of the bowl when necessary.
  8. Fill 15 cupcake liners 2/3 of the way full. I used a medium sized cookie scoop and it took 1 1/2 scoops per cupcake.
  9. Drizzle in a small amount of cookie butter into each cupcake, and swirl lightly with a toothpick.
  10. Press one Salted Chocolate Cookie Butter Cup into each cupcake.
  11. Bake for 17-19 minutes. (I always turn mine around halfway through to keep even cooking)
  12. Let stand for 5 minutes, then transfer to a wire rack to cool completely.
  13. Top with Vanilla Bean Cookie Butter Cream Cheese Frosting.

Vanilla Bean Cookie Butter Cream Cheese Frosting

yield enough for 20 cupcakes

  • 16 oz reduced fat cream cheese, softened
  • 1 cup TJ’s Cookie Butter
  • 1 vanilla bean, split lengthwise
  • 3 cups powdered sugar

Directions:

  1. Place cream cheese and cookie butter in a large bowl. Scrape in vanilla bean seeds and beat together for 1 minute.
  2. Slowly beat in powdered sugar, scraping down sides of bowl when necessary.
  3. Frost immediately, or chill in refrigerator.


Filed Under: Cupcakes, Dessert, Popular Posts · Tagged: baking, birthdays, chocolate, cookie butter, cupcakes, recipe, trader joe's, vanilla bean, whole grain

Gluten-Free Blueberry Marshmallow Buttermilk Cupcakes

March 20, 2012 · by Ari ·

I have a confession. I really enjoy cooking for people on specific diets, especially baking. I love the challenge of having to create something differently, or giving someone something they can’t have all the time. My first experience with gluten free baking was a huge hit! My step dad even said they were the best cupcakes I’d ever made. Those were made with my lovely friend Carolyn in mind, but once I told my mom about them, she mentioned to me that she’s been trying to eat gluten-free as well. She hasn’t been diagnosed with any intolerance, but has found in overall improvement in how she feels since she made the switch, so when I went to create a recipe for Hank and Charlie’s birthdays, I wanted to make something she could eat too.

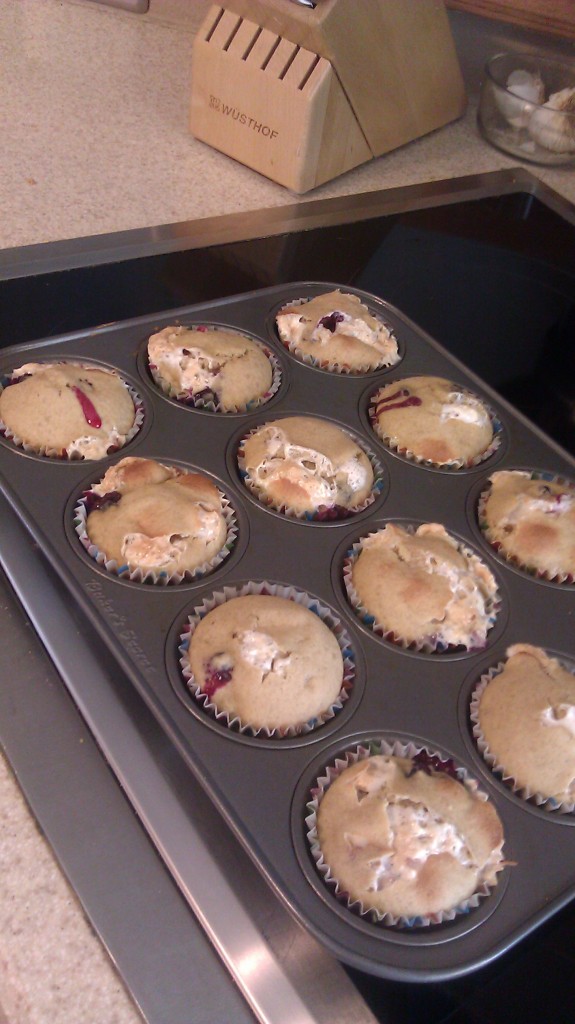
Marshmallows are pretty much Charlie’s favorite thing on Earth, so I created these babies, and oh my goodness. The fresh blueberries burst in your mouth, and the gooey marshmallows almost melt into the batter while baking. They were absolutely delicious. You know your special diet baking is good when everyone who doesn’t have to eat that way loves it too. All of the boys were super into them, and I think if I hadn’t told people they were gf and healthyish, no one really would have known.

Gluten-Free Blueberry Marshmallow Buttermilk Cupcakes

yield 24 cupcakes

  • 1 cup raw cane sugar
  • 1 cup Splenda (yes, some people are very opposed to Splenda–you can easily use Stevia, or more real sugar, but I just feel better cutting some of those sugar calories)
  • 1 cup egg substitute
  • 2 1/2 cups brown rice flour mix (see below)
  • dash salt
  • 1 tbs baking powder
  • 1 tsp xanthan gum
  • 1 cup unsweetened apple sauce
  • 1/2 cup reduced fat buttermilk
  • 1/2 cup unsweetened vanilla almond milk
  • 1 teaspoon pure vanilla extract
  • 6 oz organic fresh blueberries
  • 1/2 cup mini marshmallows (if you care about this sort of thing, you can find Kosher marshmallows @ Whole Foods!)

Brown rice flour mix:

  • 1 cup brown rice flour
  • 1 cup sweet white sorghum flour
  • 2/3 cup potato starch (not potato flour)
  • 1/3 cup tapioca flour

Directions:

  1. Preheat oven to 350. Line 2 muffin tins with cupcake liners and lightly spray with nonstick spray.
  2. Beat sugar, Splenda, and egg substitute at medium speed for approx 1 min. Add in all remaining ingredients, except blueberries and marshmallows, and beat at medium speed for 1 min.
  3. Gently, fold in blueberries and marshmallows
  4. Evenly divide the batter between your 24 lined cups. Each one should be about 2/3 full.
  5. Bake for 18-20 min, until top springs back when you press lightly on the middle, or toothpick inserted in center comes out mostly clean.
  6. Cool completely on wire rack, then frost with Marshmallow Cream Cheese Frosting.

Marshmallow Cream Cheese Frosting

yield enough for approx 4 dozen cupcakes

  • 8 oz fat free cream cheese, softened
  • 1 jar marshmallow cream
  • 1 cup powdered sugar
  • 1 tsp vanilla extract

Directions:

  1. Beat marshmallow cream and cream cheese together until well combined.
  2. Slowly beat in powdered sugar, then beat in vanilla.
  3. Chill for at least 1 hour, then frost and enjoy!

**Note: This frosting came out somewhere more between a glaze and a frosting. It’s not firm enough to make pretty shapes on your cupcakes, but a small spread on top definitely makes them more delicious, and it’s really all you need!**

Filed Under: Cupcakes, Dessert, Gluten-free · Tagged: baking, blueberries, buttermilk, cupcakes, gluten free, marshmallows

Nutella Cheesecake Brownie Bars

March 19, 2012 · by Ari ·

Did you know there are actually people out there who have not tried NUTELLA?!?! That is a shame people. A big, huge, fat shame. Let’s change that by mixing it with cream cheese, sugar, and brownies. Then proceeding to eat the remaining Nutella straight from the jar. Sound like a good plan?

These cheesecake brownie bars are based very closely off my Peanut Butter Cheesecake Brownie Bars, but super chocolatey, and the hazelnut flavor in the Nutella is especially delicious. I gave most of them away (Happy belated birthday KT!!), but the ones in my house didn’t last long 😉

Nutella Cheesecake Brownies Bars

yield approx 30

For the brownie layer:

  • 1 box No Pudge brownie mix or TJ’s Reduced Guilt brownie mix
  • 1 6oz container Yoplait Light fat free red velvet yogurt

For the cheesecake layer:

  • 8oz fat free cream cheese
  • 1/4 cup fat free plain Greek yogurt
  • 1 box fat free, sugar free chocolate pudding mix
  • 2/3 cup granulated
  • 1/2 cup Nutella
  • 1/2 cup unsweetened vanilla almond milk
  • 1 tsp vanilla extract
  • 1/2 tsp almond extract

Directions:

  1. Preheat oven to 350. Spray a 9×13 baking pan well with nonstick spray. Set aside.
  2. In a medium bowl, combine brownie mix and yogurt. Spread in a thin layer to coat the bottom of your baking pan.
  3. In a large bowl, beat cream cheese, Greek yogurt, pudding mix, sugar, Splenda, and Nutella. Add almond milk, and extracts. Beat until smooth and creamy.
  4. Spread cheesecake mixture evenly over brownie mixture.
  5. Bake for 80-90 minutes until cheesecake layer is set in the center. Yes, that is quite a long time. You may want to pour yourself a glass of wine and catch up on bad reality tv.
  6. Cool on wire rack for 30 minutes, then transfer to refrigerator to cool completely.
Filed Under: Brownies & Bars, Dessert · Tagged: baking, brownies, cheesecake, chocolate, dessert, nutella, recipe

Happy Tuesday

March 13, 2012 · by Ari ·

Today is the best day. You wanna know why? Well for one thing it’s my brother Charlie’s birthday–happy birthday Charlie!! For an other thing, I have the day completely off. WHOOOO!!!! Also, I started my day off in Linda’s spin class with Kara.

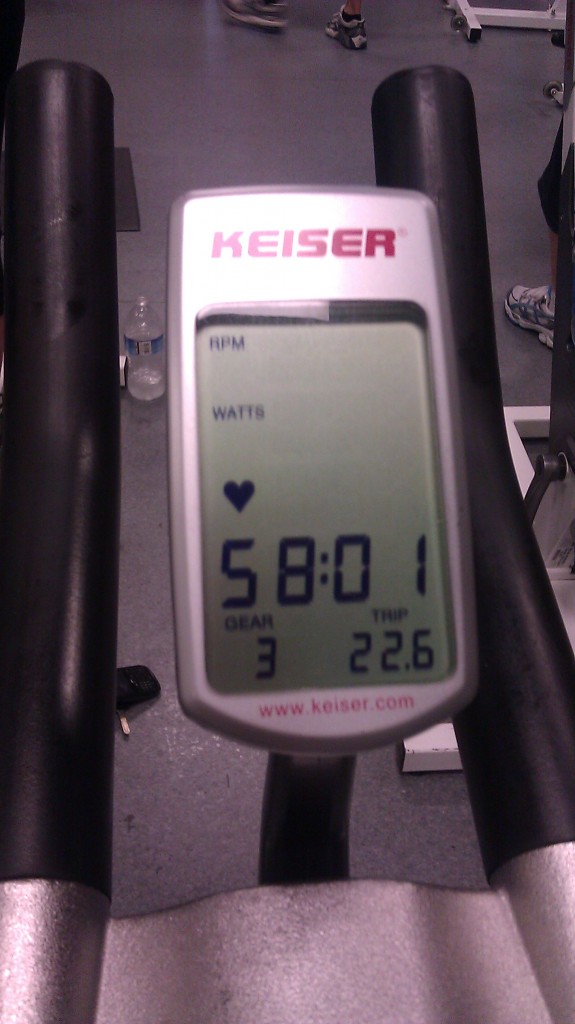
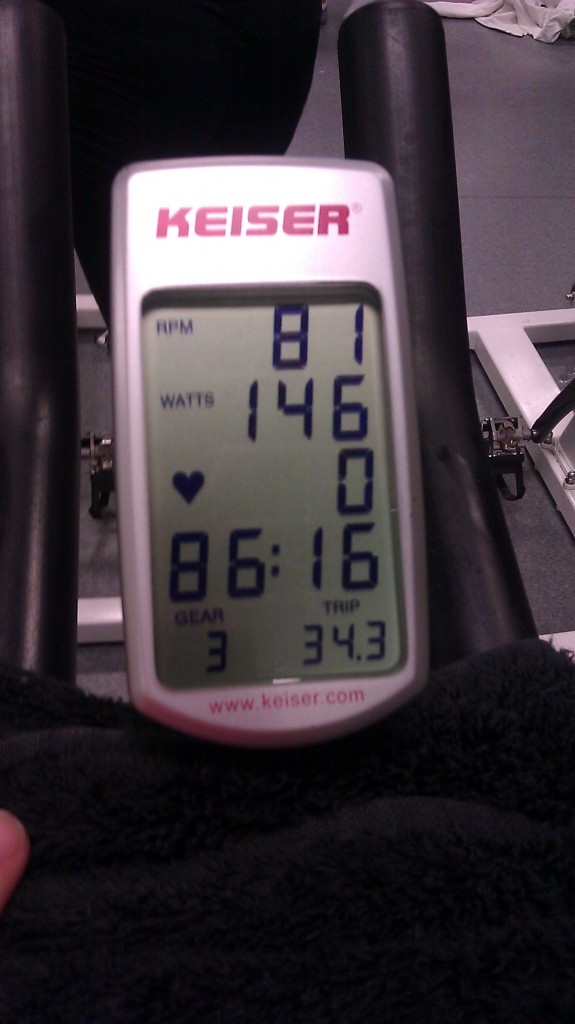
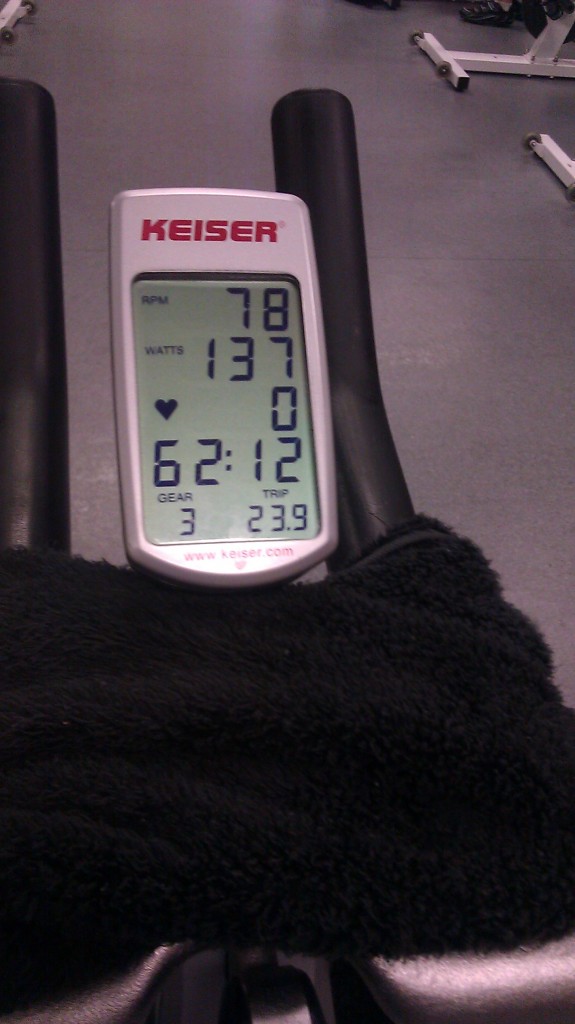
While we’re on the subject of spin, check out this awesome one from Sunday’s 90 min class!

After class, we got coffee from my newest love, Dutch Bros, and headed back to my house for a day of baking!

Definitely a much better start than I got yesterday. Sooooo, yesterday I went to meet Jason for a run, and he was running a few minutes late. I could have gone out and gotten an extra mile or so in, but instead, I sat in my car going through my google reader. Good job, Ari. Way to know what’s important. So Jason comes to my window and says “I guess you had a rough morning too.” Huh???? What??? I mean I’m not really awake yet, and I definitely did not brush my hair, but how is this any different from every other Monday we meet at 7am?

There’s a first time for everything. Luckily, I had only just gotten gas about a mile back, but holy crap–I can’t believe I did that!

Sometimes I suck at life, and that's sad. So is my sunburn.

Ohhhh, life is hard when you’re unobservant like me. Anyway, today has been fabulous, and totally chill, but still productive–exactly what I needed. I have a birthday dinner to head to tonight and then I get to pick up one of my very favorite people on Earth from the airport!!!!

Mac, you were planning on stuffing Sylvi in your Diana Ross suit case, so we could recreate this moment right? Okay, good.

Okay, lots of getting ready to do. Have a fabulous day everyone!

Filed Under: Uncategorized · Tagged: baking, birthdays, friends, spin

Weekend Recap

March 5, 2012 · by Ari ·

Happy Monday, friends! I’m flying high on about 4 hours of sleep. WHEEEEEEEE!!!!! To be honest, I haven’t gotten a decent night’s sleep since Steve left for LA and I am simultaneously slap happy, grouchy, bitchy, and delirious. I also have a week filled with long days, and my extra grouchy time may or may not be quickly approaching (you’re welcome), so Jason and I basically decided this morning, that I should do the world a favor and just hide out in a cave for a while to avoid offending the masses. Unfortunately, that is entirely impossible, so I’m going to try to focus on the moments of slap happy ridiculousness, because those are the best part of exhaustion!

To be honest, aside from feeling like I want to take a week long nap, the past few days have been pretty fantastic. Saturday I had a super full work day, then Deann came over and we worked on some stuff for her wedding. I am pretty much the least crafty person on earth, but when it’s not super complicated, and I know exactly what to do, I actually find simple craft activities strangely therapeutic. I made us a delicious dinner of cornbread crusted chicken tenders with a creamy maple mustard dipping sauce and kale chips. You better believe that when the fancy camera is back, I will be recreating this because it was AMAZING and I can’t wait to share the recipe! I also made some more donuts for dessert. Let’s just say it’s a good thing Deann took most of the rest home because I probably would have eaten them all that night! Yum!!

Here is a crappy picture from my android. And now I want to eat more donuts.

Yesterday, I met Christina and Diana for my fav spin class! Linda kicked my butt, like usual, but I was especially excited to drip pools of sweat yesterday for some reason. Must be the week off from running ( 🙁 )!

It was so awesome to finally meet Diana too! She is just as hilarious and awesome in person as on her blog, and it totally felt like working out with an old friend! I seriously can’t get over the awesome friendships I have made through blogging!

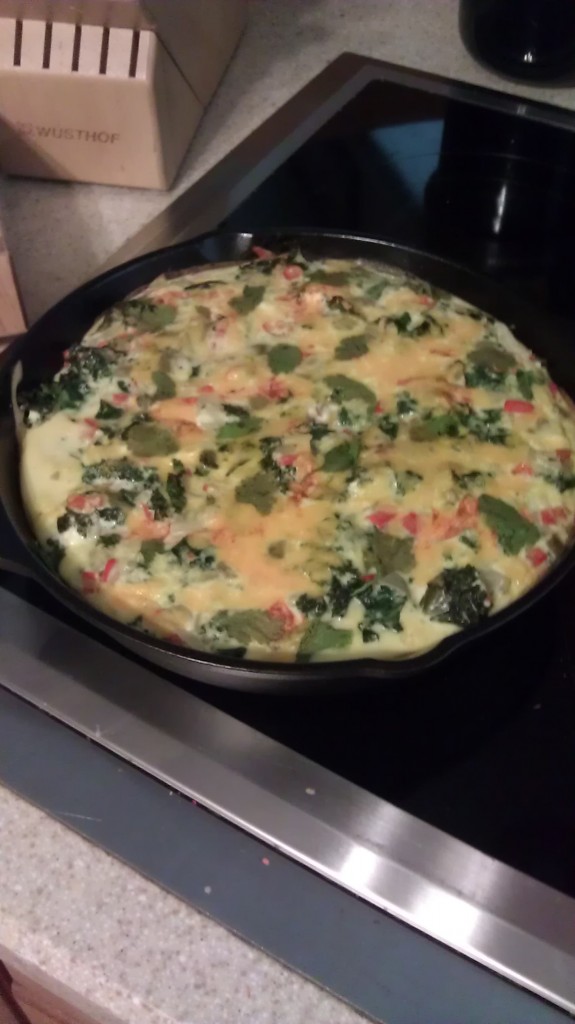
After spin, Christina came over for brunch. I made my own southwest version of Caitlin’s Spinach and Goat Cheese Cornbread Quiche.

I miss the fancy camera. Waaaahhhh.

It was probably the most delicious non dessert item I have made in a long time. Again, can’t wait to get some actually good pictures of it so I can post the recipe for my version!

This morning, even though I was super exhausted, when my alarm went off at 6 to go run, I was still pretty excited. I have been in quite a bit of pain lately–enough that I actually took KT’s advice to take a week off from running, so I was very anxious to get out there this morning! I got there early and did just under 2 miles on my own at a 9:20 average pace, then Jason arrived and mentioned that he was ready to move up to longer intervals! We had started using the Galloway method, running 3 min, walking 1 min. We were up to a 5:1 ratio, but today he wanted to move up to 1 mile intervals! You don’t have to ask me twice!!

Not only did Jason totally bump up his running time, but his overall pace improved and this was the first run where he had all negative splits!!! I am so proud!!! I never imagined I would be helping anyone with their running! I remember feeling shocked when people started to ask me for food and weight loss advice, but I just never in a million years expected to be pushing others to run and helping them train. I mean I’ve always been one to drag someone to a group fitness class, or suggest a gym date, but I just really can’t believe how much has changed in such a short amount of time!

There is honesty no better feeling than helping someone else achieve their goals. I mean, that’s the entire reason I blog in the first place, because I want to inspire others, and I hope that someday something I write makes a difference in even one person’s life, and that they are better because of me. That would honestly be the greatest gift. Sorry for being so cheesy! I’d like to say it’s temporary, but I was absolutely born this way and intend to stay cheesy and sentimental forever and ever. 😉


Filed Under: Uncategorized · Tagged: baking, cooking, donuts, food, friends, phoenix bloggers, quiche, running, spin

Gluten Free Almond Joy Cupcakes

February 20, 2012 · by Ari ·

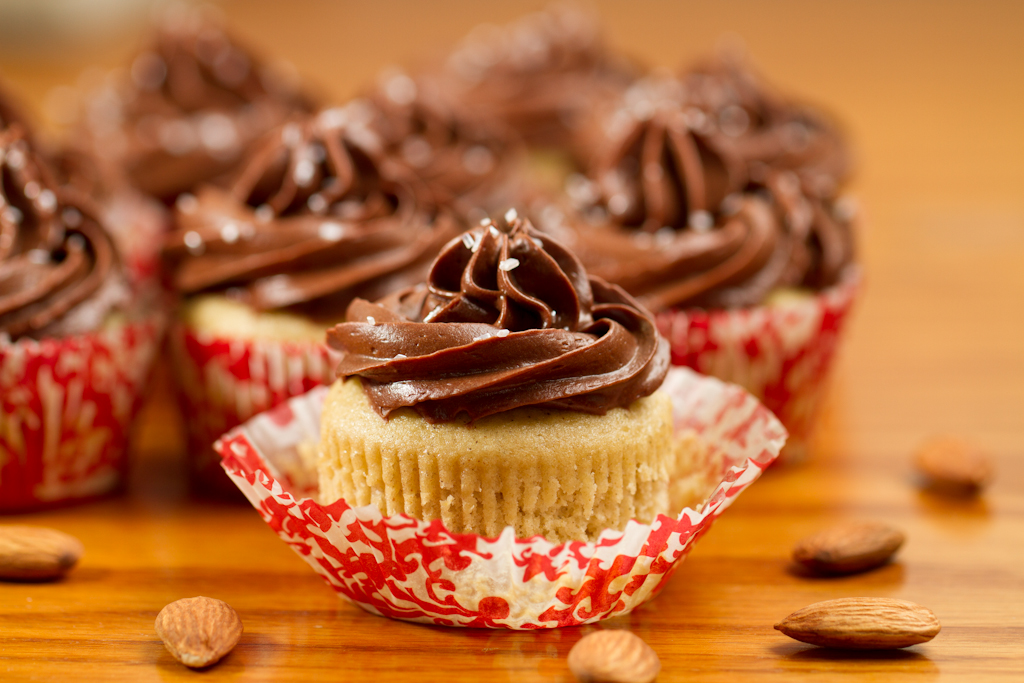
Happy belated birthday to my super, awesome, lovely, beautiful friend Carolyn! If you haven’t checked out this girl’s blog, you really should. Her work outs are amazing, and she has been a total inspiration to me ever since I met her! She is also super sweet and a truly amazing friend.  She eats gluten free, and I always feel bad that when I make desserts for things, she can never eat them. So Nicole and I put our heads together to plan out some awesome surprise birthday cupcakes for her. Well, then poor Nicole got sick, but still gave me all of the fantastic ingredients I needed to carry out our plan!

My friend Christina sent me a recipe for gluten free coconut cupcakes that I used as a base. I’m not sure who it’s originally from, so dear person who created it, if you read this lil ole blog, please tell me so I can be like “Hey readers! All 3 of you! Go look at ______’s awesome recipes”. Thanks in advance. I’m a big fan of your recipe!

I altered the recipe a bit to make it healthy(ish) and put some of my own touches in. Also, Nicole gave me all of these gf flour options, so I ended up getting a little accidentally creative on the flour mix, but I think it was pretty much the happiest accident ever.

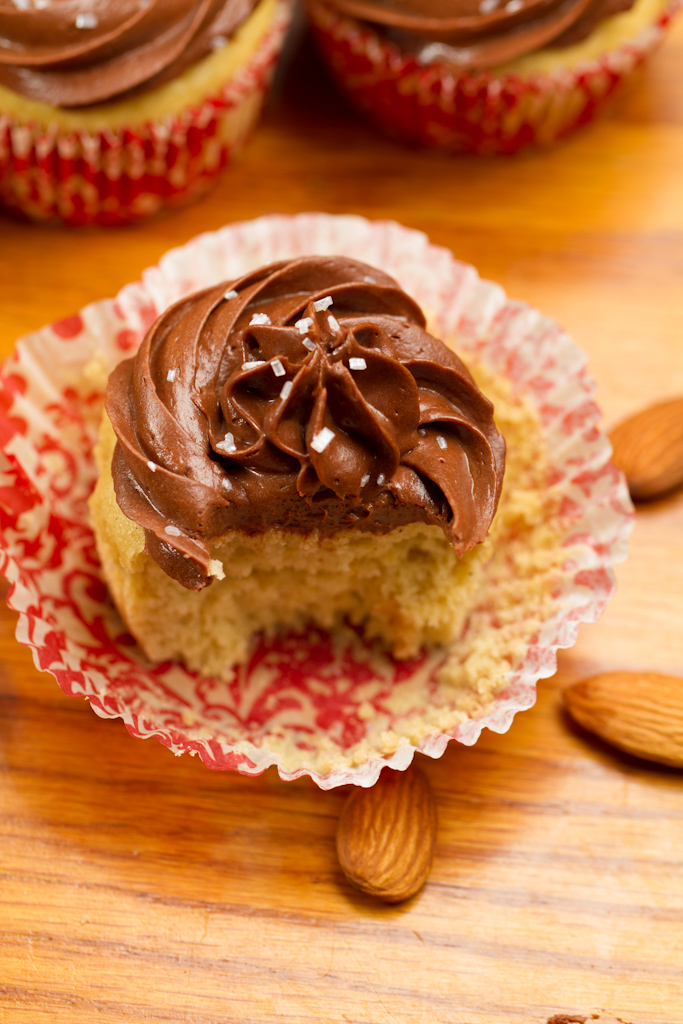
Sometimes gluten free things come with weird textures, but not these babies. Friends and family scarfed them down, and my step dad called them the best cupcakes I’ve ever made! Who knew creating recipes around different diets could be so fun? It makes me want to explore more with gf, vegan, paleo and any other fancy diet recipes. I found that I really like creating things for people who eat a certain way and may not always have foods on their plan provided.

Gluten Free Almond Joy Cupcakes

yield 24 cupcakes

For the coconut cupcakes:

  • 1 cup raw cane sugar
  • 1 cup Splenda
  • 1 cup egg substitute
  • 2 1/2 cups brown rice flour mix (see below)
  • dash salt
  • 1 tbs baking powder
  • 1 tsp xanthan gum
  • 1 cup unsweetened apple sauce
  • 1 cup unsweetened coconut vanilla almond milk
  • 1 teaspoon pure vanilla extract
  • 1 teaspoon coconut extract

Brown rice flour mix:

  • 1 cup brown rice flour
  • 1 cup sweet white sorghum flour
  • 2/3 cup potato starch (not potato flour)
  • 1/3 cup tapioca flour

Directions:

  1. Preheat oven to 350. Line 2 muffin tins with cupcake liners and lightly spray with nonstick spray.
  2. Beat sugar, Splenda, and egg substitute at medium speed for approx 1 min. Add in all remaining ingredients and beat at medium speed for 1 min.
  3. Evenly divide the batter between your 24 lined cups. Each one should be about 2/3 full.
  4. Bake for 18-20 min, until top springs back when you press lightly on the middle, or toothpick inserted in center comes out mostly clean.
  5. Cool completely on wire rack, then frost with chocolate almond cream cheese frosting.

For the Chocolate Almond Cream Cheese Frosting:

yield enough to frost at least 24 cupcakes

adapted from How Sweet It Is (I love pretty much every single one of her recipes)

  • 3 x 8 oz blocks reduced fat cream cheese (you could also use fat free, I just had red fat on hand)
  • 3/4 cup unsweetened cocoa powder
  • 3 cups powdered sugar
  • 2 1/2 oz grain sweetened chocolate chips, melted and cooled
  • 1-2 tsp almond extract

Directions:

  1. Beat cream cheese on medium speed in a stand mixer until smooth. Add almond extract.
  2. On low speed, add in powdered sugar 1/2 cup at a time, followed by cocoa powder.
  3. Increase to medium speed and add melted chocolate.
  4. Beat until smooth, scraping down sides of bowl often.
  5. Frost and enjoy!

Optional Toppings:

  • raw sugar
  • almonds
  • shredded coconut


Filed Under: Cupcakes, Dessert, Gluten-free · Tagged: almond, almond joy, baking, chocolate, coconut, cupcakes, dessert, gluten free, recipe

Cookie Butter Brownie Bars

February 17, 2012 · by Ari ·

Please don’t tell me you’re sick of the cookie butter already. You can’t be. This is only recipe #2. In fact, recipe #1 happened because the first time I tried this recipe it absolutely failed. I mean, it was delicious, but the brownies didn’t bake all the way through, and you couldn’t get it out of the pain, so you kind of had to sit there with a fork chowing down on a 9×13 pan of gooey half baked goodness. It kind of became a problem, and I had to give them away–well give it away, since it was kind of like one big bar. Anyway, I knew I was onto something with the taste, so I tried again.

Try #1 went brownie batter on bottom, cookie butter bar layer on top, bake. Try #2 included baking the brownie layer a little bit first, but still somehow came out looking like try #1. Third time’s a charm, I guess 😉

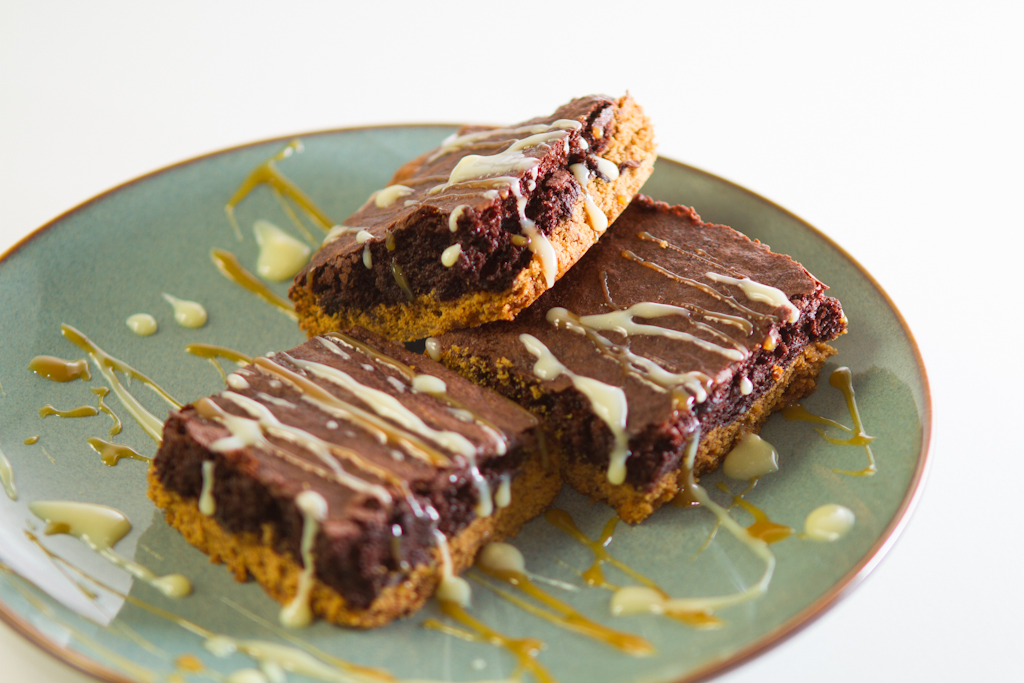
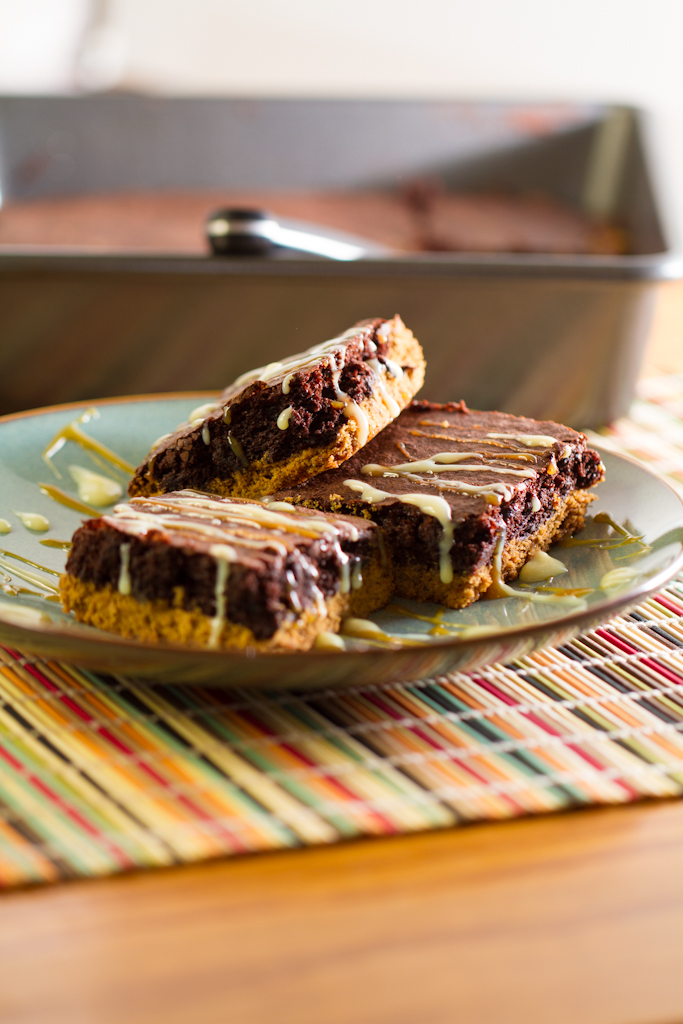
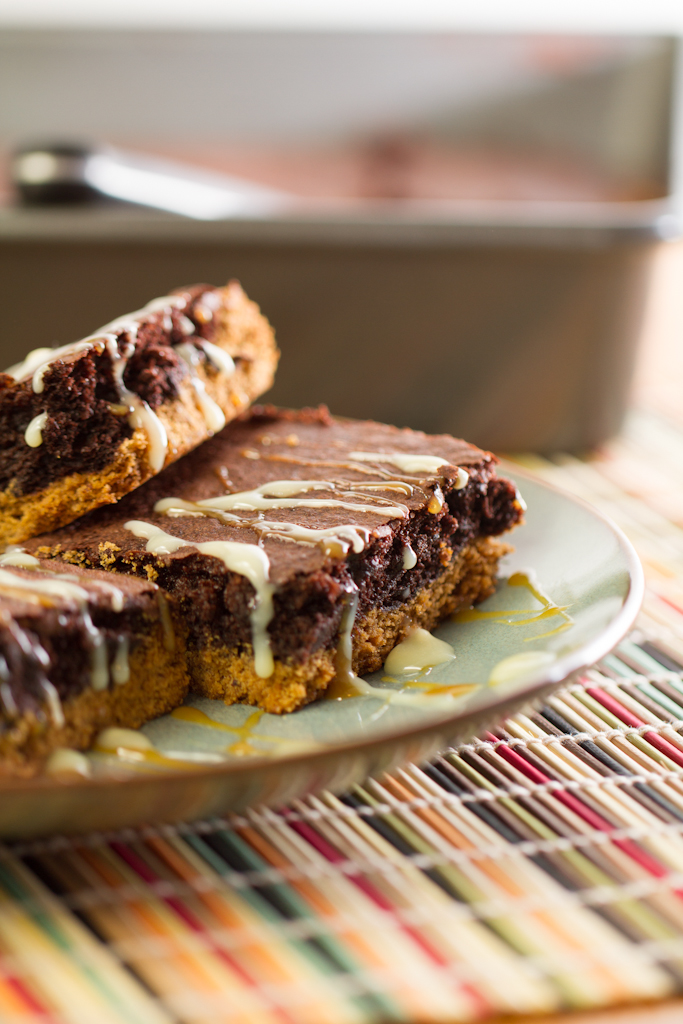
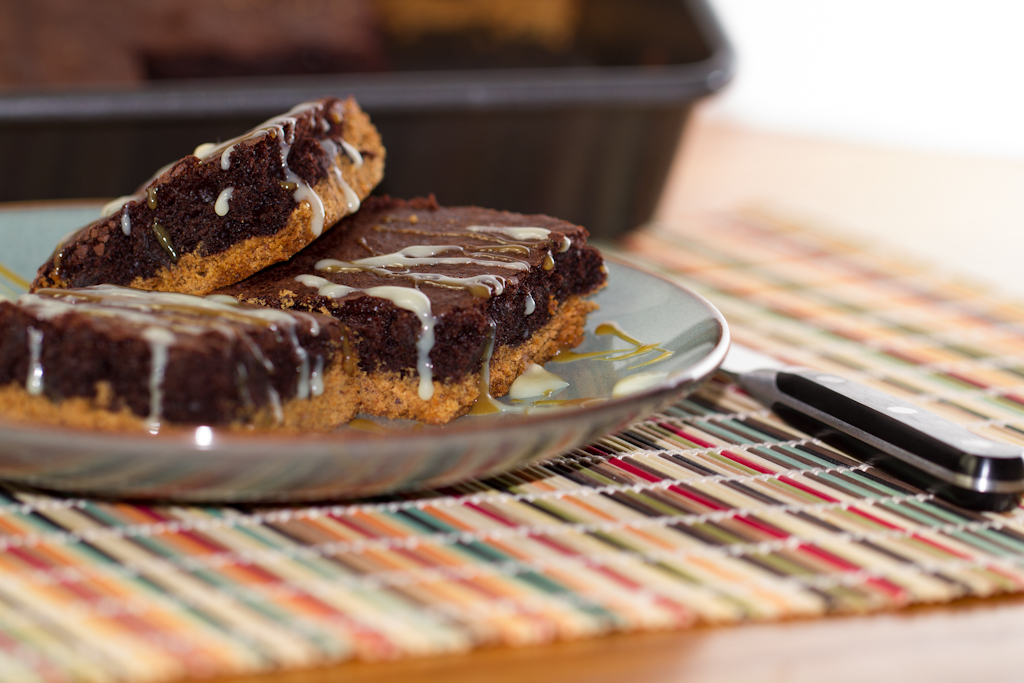
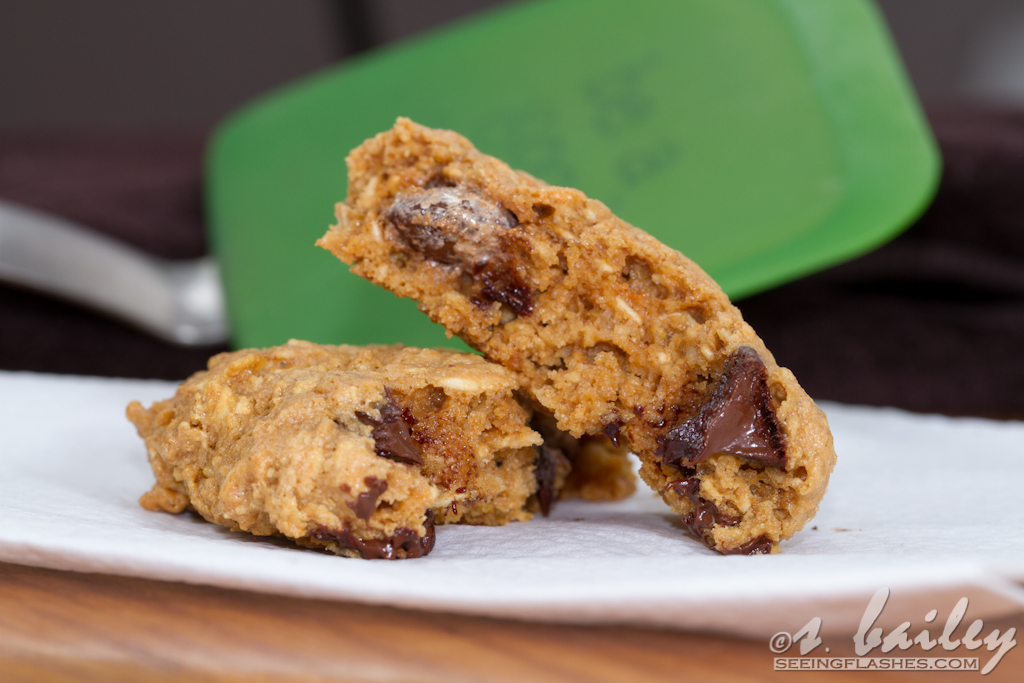
Cookie layer on the bottom because brownies cook more slowly–duhhh, Ari! The result? Gooey, brownie, cookie butter deliciousness that can actually be plated and served. See?


Cookie Butter Brownie Bars

yield approx 32 bars

  • 1 box TJ’s reduced guilt brownie mix or No Pudge Brownie Mix
  • 6oz nonfat vanilla yogurt (some other flavors also taste good mixed with brownie like red velvet–yum!)
  • 1 cup cookie butter
  • 1/2 cup apple butter
  • 1/2 cup packed brown sugar
  • 1/2 cup + 2 tablespoons granulated sugar
  • 1 teaspoon vanilla
  • 1/4 cup unsweetened vanilla almond milk
  • 1 tsp baking soda
  • 1 1/2 cups white whole wheat flour
  • white chocolate and caramel for drizzling (optional)

Directions:

  1. Preheat oven to 350. Spray to 9×9 baking pans with nonstick spray. Set aside.
  2. Combine brownie mix and yogurt. Set aside.
  3. Beat together cookie butter, apple butter, brown sugar, Splenda, vanilla, milk and baking soda. Slowly beat in flour.
  4. Divide cookie butter dough in half and press into the bottom of each 9×9 baking pan. Smooth out the top as much as possible.
  5. Evenly divide the brownie batter between the two pans, using a spatula to smooth on top.
  6. Bake for 18-22 minutes until a toothpick inserted in the center comes out mostly clean. Careful not to over bake–you still want a little gooeyness in the middle, but you want everything set enough to come out neatly.
  7. Cool on a wire rack, then slice and drizzle with white chocolate and caramel if desired.
 

Filed Under: Brownies & Bars, Dessert · Tagged: baking, bars, brownies, cookie butter, dessert, recipe, speculoos, trader joe's

« Previous Page
Next Page »
Image Map

Popular Posts

Tart Cherry Margaritas: The perfect, refreshing margarita--lightly sweet with a punch of tequila

Tart Cherry Margaritas

90+ Healthy Recipes for Breakfast, Lunch, Dinner & Dessert

90+ Healthy Recipes for Breakfast, Lunch, Dinner & Dessert

The Ultimate Peanut Butter Cup Brownie Cookies: Rich, fudgy, brownie-like chocolate cookies stuffed with melty peanut butter cups!

Ultimate Peanut Butter Cup Brownie Cookies

Drink & Dish: Cafe Au Lait Cupcakes

Crockpot Chicken Enchilada Soup

Subscribe via Email:

Enter your email address:

Save an additional $30 on Blendtec Factory Recertified Blenders + Free Shipping

Featured Here

recipe redux
Certified Yummly Recipes on Yummly.com

Member Of…

FitFluential Is Fitness Found
AZ Bloggers Network
az 150 photo az150_zpsfb093d32.gif

Archives


Image Map

Copyright © 2025 | Innovative Child Theme by The Pixelista | Built on the Genesis Framework


Loading Comments...