• Going Out
    • Phx Restaurants
    • How To Order At Starbucks
  • Running
    • My Running Story
    • Race Calendar
    • Race Recaps & Results
  • Blogroll
  • Bucket List
  • Video

Ari's Menu

Little changes making a big difference.

  • Home
  • Recipes
  • Weight Loss
    • My Story
    • Common Swaps
  • Who’s Who
  • Contact
    • Policies & Disclosure
  • Press

Blueberry Buttermilk Muffins

August 28, 2013 · by Ari ·

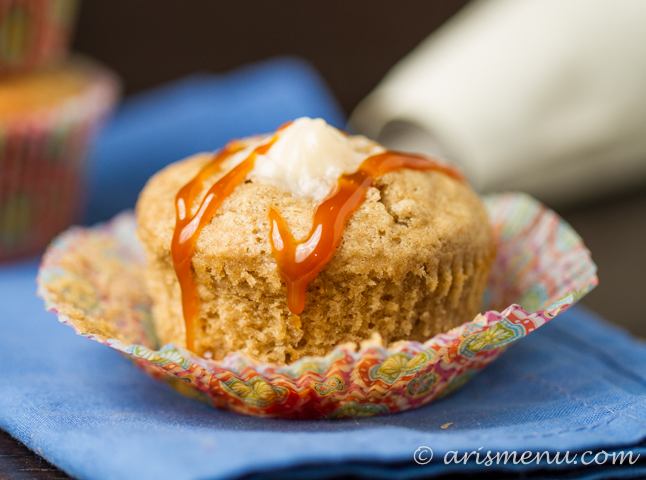
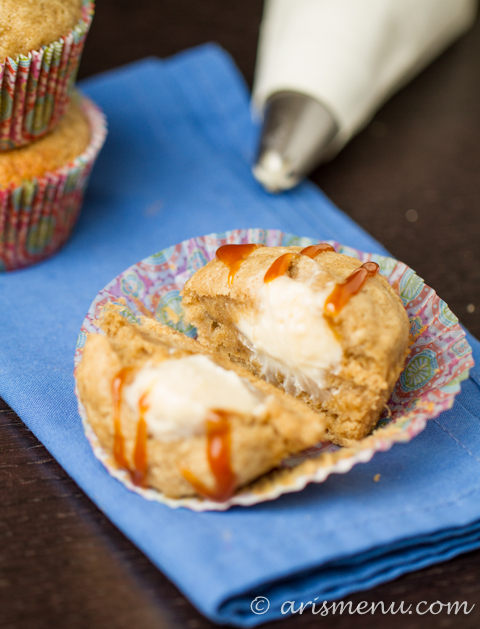
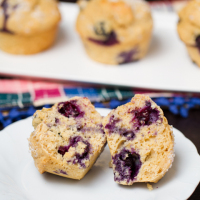
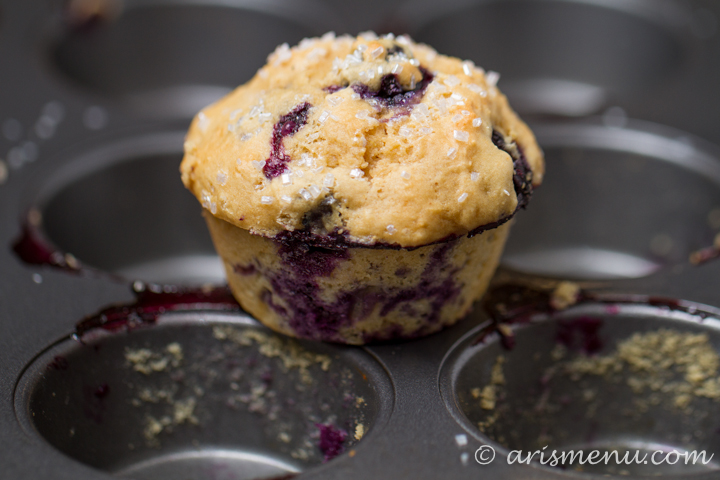
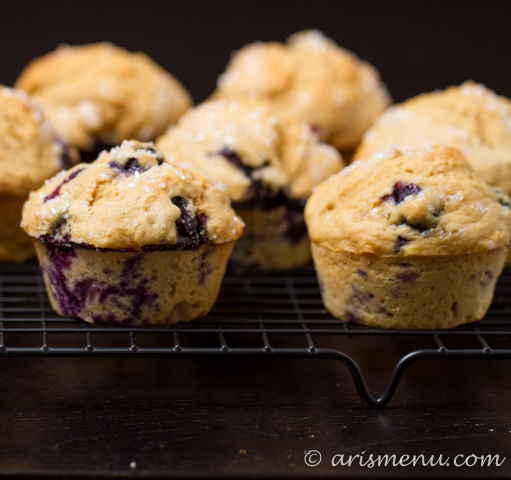
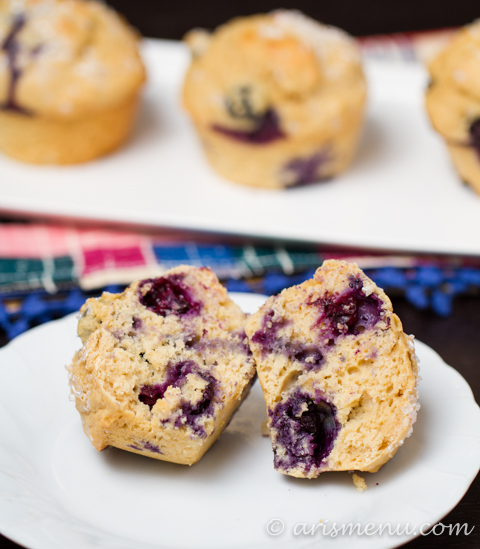
Big, tall, soft and fluffy blueberry buttermilk muffins topped with coarse sugar that will give those bakery muffins a run for their money!Blueberry Buttermilk Muffins

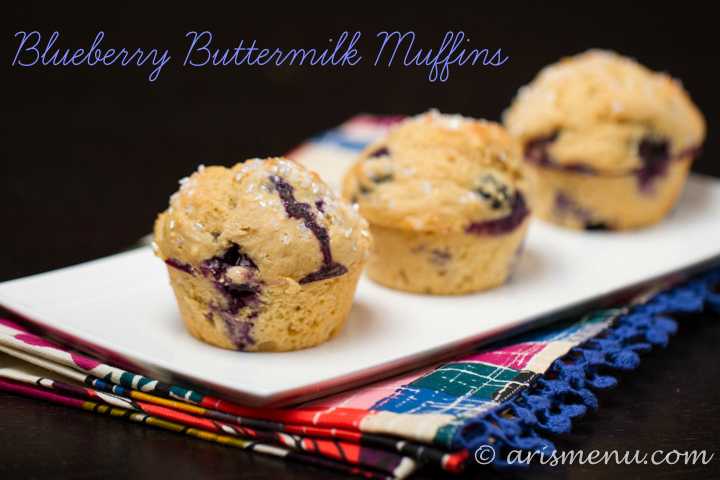
I am out of just about every food imaginable at my house. Yesterday I had frozen enchiladas for breakfast, and today I started a fire in my microwave trying to spice up my oatmeal. Maybe I should explain. I really like drippy peanut butter (or almond, or whatev) on my oatmeal, and I’m completely out of all butters except for a 1 tablespoon packet of almond butter. You know? The kind you have to knead first and it never really gets drippy like the stuff from a jar? So I thought it would be brilliant to put it in the microwave for 10 seconds. It was not the first time I’ve ever made that type of mistake, but it was the first time anything has actually caught on fire.

Blueberry Buttermilk Muffins

I stared at in in disbelief for a moment, then I blew the fire out. It was mildly scary, and also a little funny. You know, one of those times where you’re really glad no one else is at home and has to see how dumb you are, but then you tell the entire internet, and the whole idea of any discrepancy is completely lost.

Blueberry Buttermilk Muffins

It’s funny. You go away for a weekend leaving the man in your house to his own devices, and you come home to find no new groceries, just lots of receipts from Chipotle. And somehow I can’t find the motivation to go grocery shop. Or make more muffins. Or get off the couch? Post adventure hangover is apparently still in play.

Blueberry Buttermilk Muffins

Basically, I wish these muffins had lasted more than 48 hours and magically withstood the 3 months that have now passed since I made them. I would eat the crap out of them, and I wouldn’t even have to burn the house down to do it.

Blueberry Buttermilk Muffins

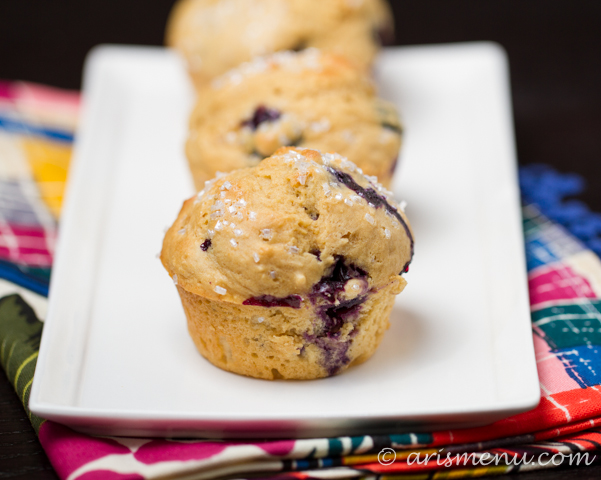
I’d been eyeing my girl Sally’s blueberry muffins for a good long time, and been dyyyying to try to make some muffins as tall and beautiful as her’s, so one day I had some leftover blueberries in my fridge, and just decided they needed to happen already.

Blueberry Buttermilk Muffins

The result was the tallest, most gorgeous muffins I have ever seen come out of my oven! Sally uses extra baking powder and starts with a high oven temp which is the secret to these perfect muffin tops. So much better than my usual muffin top (#whatisgoingonwithmymuffintop)<–Inside joke from Hood to Coast just for you, Laurel. 😉

Print
Blueberry Buttermilk Muffins

Prep Time: 10 minutes

Cook Time: 25 minutes

Total Time: 35 minutes

Yield: 12 muffins

Serving Size: 1 muffin

Blueberry Buttermilk Muffins

Ingredients

  • 3 cups white whole wheat flour
  • 1 tbsp baking powder
  • 1 tsp salt
  • 2 eggs
  • 1 cup sugar
  • 1 cup reduced fat buttermilk
  • 1/2 cup unsweetened applesauce
  • 1 tsp vanilla extract
  • 1 and 1/4 cup fresh blueberries (preferably organic)
  • coarse sugar for sprinkling (optional)

Instructions

  1. Preheat oven to 425. Spray muffin tin with nonstick spray, or line with paper liners. Set aside.
  2. In a large bowl, whisk together flour, baking powder and salt. Set aside.
  3. In a medium bowl, whisk together eggs and sugar until combined. Mix in buttermilk, applesauce and vanilla until well combined.
  4. Gently, fold wet ingredients into dry ingredients until just combined. Do not over mix. Gently fold in blueberries.
  5. Evenly divide batter between 12 standard muffin tins. Sprinkle the top of each muffin with a nice pinch of coarse sugar. Bake for 5 minutes. Reduce heat to 375 and continue to bake for an other 17-20 minutes, until golden and a toothpick inserted in the center comes out mostly clean (with just a few crumbs).
  6. Let stand for 10 minutes, then serve or transfer to a wire rack. Store leftovers in an airtight container for 3-5 days.

Notes

Recipe adapted from Sally's Baking Addiction

3.1
https://arismenu.com/blueberry-buttermilk-muffins/

Filed Under: Breads & Muffins, Breakfast, Dessert · Tagged: baking, blueberries, blueberry muffins, breakfast, buttermilk, buttermilk blueberry muffins, dessert, muffins, recipe

Lemon Crinkle Cookies

August 7, 2013 · by Ari ·

Lemon Crinkle Cookies

Hi friends! I can’t believe this week is almost over. It has been a whirlwind over here. I’ve been back in town for just a little over a week, and I’ve started a new job, adjusted to a new 4am alarm, and tried to start setting up a new routine. It has been great, and challenging, but mostly great! Also, yesterday I had the honored of being featured by one of my favorite bloggers. I answered several questions about my weight loss and running journey. Head over and check it out if you want to learn a little more about me. 🙂

Lemon Crinkle Cookies

Anyway, let’s talk about food! Cookies, specifically. Perfectly tart and sweet, melt-in-your-mouth-soft lemon crinkle cookies. Uggghhhh, you guys…I can’t even explain to you how good these cookies are. They rival those Paradise Bakery gems that I’ve been obsessed with for years. They make you want to convert to lemon desserts forever.

Lemon Crinkle Cookies

The combination of the lemon Greek yogurt + coconut oil = cookie texture perfection. Thick, soft and lightly chewy–you will never miss the butter!

Print
Lemon Crinkle Cookies

Prep Time: 10 minutes

Cook Time: 10 minutes

Total Time: 50 minutes

Yield: 1 1/2 dozen

Serving Size: 1 cookie

Lemon Crinkle Cookies

Ingredients

  • 1 1/2 cups white whole wheat flour
  • 1/4 tsp baking soda
  • dash salt
  • Zest of 1 lemon
  • 3/4 cup sugar
  • 3 tbsp coconut oil, melted
  • 5 tbsp nonfat lemon Greek yogurt
  • 1 tsp vanilla
  • 1 egg
  • 1 tbsp lemon juice
  • 1/4 cup powdered sugar

Instructions

  1. In a medium bowl, whisk together flour, baking soda and salt. Set aside.
  2. In a large bowl, beat together sugar and lemon zest until fragrant. Add coconut oil, yogurt, vanilla, egg and lemon juice. Beat until combined. Add flour mixture and beat until just combined. Cover and refrigerate for 30 minutes.
  3. Preheat oven to 350. Line baking sheet with silpat or parchment paper.
  4. Place powdered sugar in a large shallow bowl. Roll dough into approx 1" dough balls. Roll in powdered sugar to coat completely, then transfer to prepared baking sheet. Repeat with remaining dough.
  5. Bake for 10-12 minutes until edges gave just set. Allow to cool completely on baking sheet. Store in a loosely covered container for 5 days.

Notes

Plain yogurt may be substituted if lemon is unavailable.

3.1
https://arismenu.com/lemon-crinkle-cookies/

Filed Under: Cookies, Dessert, Holiday & Seasonal · Tagged: cookies, dessert, greek yogurt, lemon, recipe, summer

Bourbon Cherry Dark Chocolate Brownies

July 25, 2013 · by Ari ·

Bourbon Cherry Dark Chocolate Brownies

Do you know how many years of my life I wasted believing I didn’t like bourbon? It’s a damn shame.

Bourbon Cherry Dark Chocolate Brownies

I promise, I didn’t mean to put alcohol in my brownies. They started out as just regular chocolate brownies with cherries and dark chocolate for my dad’s birthday. He loves a black forrest cake, but he loves brownies more than cake, and so I wanted a similar flavor profile in brownie form.

Bourbon Cherry Dark Chocolate Brownies

But then I remembered these cookies, and made a game time decision to soak the cherries in bourbon. Of course, if you don’t like bourbon (who are you????), you can totally skip this step and still have some rich and gooey cherry and dark chocolate brownies, but I really feel like the bourbon takes them to the next level.

Bourbon Cherry Dark Chocolate Brownies

One of the secrets to perfect brownies is to just ever so slightly under-bake them. They will continue to bake when you let them cool in your pan. My problem is that I am impatient and I never wait long enough to cut into them. Oh and also that I often over estimate the amount of unbaked that is ideal and end up eating brownie batter because I pulled them from the oven a good 10 minutes too early. These were totally still hot and gooey when I photographed them, but I just couldn’t wait. They firm up a bit as they cool making them easier to serve, but still soft and fudgy.

Bourbon Cherry Dark Chocolate Brownies

I love the crisp brownie top (my favorite thing about brownies and sometimes hard to achieve with no butter!) and the extra melty chunks of dark chocolate with the bold flavor of the bourbon soaked cherries. These were a huge hit, and the entire pan was gone in one evening!

Print
Bourbon Cherry Dark Chocolate Brownies

Prep Time: 10 minutes

Cook Time: 30 minutes

Total Time: 40 minutes

Yield: 9 large or 16 small brownies

Serving Size: 1 brownie

Bourbon Cherry Dark Chocolate Brownies

Ingredients

  • 3/4 cup cherries, pitted
  • Approx 1/2 cup bourbon
  • 5.5 ounces dark chocolate, melted
  • 1/2 cup nonfat coffee yogurt*
  • 3/4 cup sugar
  • 2 eggs
  • 1 tsp vanilla extract
  • 2/3 cup white whole wheat flour
  • 1/2 cup dark chocolate covered cherries**

Instructions

  1. Place cherries in a wide shallow bowl. Cover with bourbon and soak for 1 hour.
  2. Preheat oven to 350. Line a 9" square pan with aluminum foil and spray with nonstick spray. Set aside.
  3. In a large bowl, slowly stir yogurt into melted chocolate. Whisk in sugar, then whisk in eggs one at a time. Add vanilla. Gently fold in flour until just combined. Strain soaked cherries (save the extra liquid and make yourself a drink!) and fold in soaked cherries and dark chocolate covered cherries.
  4. Transfer to prepared baking tin and bake until a toothpick inserted in the center comes out mostly clean with a few crumbs, about 30 minutes. Cool completely in pan then serve. Store in an airtight container for up to 5 days.

Notes

*Vanilla yogurt may be substituted. The coffee enhances the chocolate flavor. I suggest adding 1 tsp espresso powder if you use vanilla yogurt. **I found dark chocolate covered cherries at Trader Joe's. You can always use dark chocolate chunks instead, or add more fresh cherries.

3.1
https://arismenu.com/bourbon-cherry-dark-chocolate-brownies/

Filed Under: Brownies & Bars, Dessert, Holiday & Seasonal · Tagged: bourbon.bars, brownies, cherry, chocolate, dessert, recipe

Banana Cream Pie Shake

July 21, 2013 · by Ari ·

Banana Cream Pie Shake #vegan #glutenfree

Do you guys remember the banana cream pie shake at Sonic?? OMG, I was obsessssssed with it. I would go through the Sonic drive through multiple times a week for that little gem. Creamy banana shake with crushed graham cracker? That is speaking my language. Although I always thought their whipped cream tasted a little weird. Anyone else? I am a whipped cream lover, but theirs always tasted slightly like plastic to me.

Banana Cream Pie Shake #vegan #glutenfree

Anyway, I was obsessed with the shake, and lately my girl Sally has been making a bunch of frozen banana shake recipes. I’d been dying to try the banana soft serve craze anyway, and I was inspired to try my own so I jumped on board to recreate one of my favorite treats.

Banana Cream Pie Shake #vegan #glutenfree

You see, I secretly thought it would never be as good as everyone says. Bananas as ice cream? The ice cream lover in me wanted to be stubborn, and I thought it was like when everyone said mashed cauliflower was like mashed potatoes. I still don’t get that one…

Banana Cream Pie Shake #vegan #glutenfree

But the thing is, this EXCEEDED all of my expectations! In fact, it was so thick at first that I had to use that little stick for my Vitamix to press the banana pieces down and even get it to blend, and the results were so rich and creamy that I added way more milk than I originally planned. Also, I used 3 bananas because I thought I would need that many for one photo. Ummm, nope! It definitely made 3 servings that were nearly impossible to not eat all at once in one sitting (I know bananas are good for me, but somehow I believe 3 at once may be what they call “too much of a good thing”). Then if this dreamy shake wasn’t enough, the combo of the crushed graham cracker and the honey…uuugggghhhh… You guys, I just wanted to put honey and graham cracker crumbs on a huge spoon and eat it along side my shake. I loved it so much that after the first time I made it, I made it about 3 more times that week. It’s so quick, easy and will totally cure your sweet tooth!

Print
Banana Cream Pie Shake

Prep Time: 5 minutes

Total Time: 5 minutes

Yield: 2

Serving Size: About 1 cup

Banana Cream Pie Shake

Ingredients

  • 2 large ripe bananas, chopped and frozen
  • 2/3-1 cup unsweetened vanilla almond milk
  • 1 tsp vanilla bean paste or pure vanilla extract
  • Optional for topping:
  • Honey or agave for lining the glass
  • 3-4 tbsp crushed graham cracker crumbs (use vegan and/or gluten-free graham crackers if desired)
  • Light whipped cream or whipped coconut cream

Instructions

  1. In a high quality blender, blend bananas, 2/3 cup almond milk, and vanilla. If desired, add more milk until milkshake has reached your desired creaminess. This will depend on the size of your bananas and how thick you want your shake.
  2. To prepare the glass, drizzle honey or agave on a small plate. Place graham cracker crumbs on a separate small plate. Roll the top of your glass to just coat it in honey/agave then graham cracker crumbs. Add prepared milkshake, then top with whipped cream or whipped coconut cream if desired. Serve immediately.
3.1
https://arismenu.com/banana-cream-pie-shake/

Filed Under: Breakfast, Dessert, Drinks, Gluten-free, Smoothies & Shakes, Special Diet, Summer · Tagged: banana, banana cream pie, dessert, ice cream, milkshake, recipe, shake

White Chocolate Lemon Blondies

July 18, 2013 · by Ari ·

White Chocolate Lemon Blondies

Before I left for Portland, I made a lot of food. Sometimes, I would spend all day in the kitchen creating recipes, and by the time I left I was pretty sick of the inside of my kitchen. The best day, though? The day I blasted my newly purchased Matilda original cast recording, sang Revolting Children at the top of my lungs and made all lemon desserts. It was literally the best day.

White Chocolate Lemon Blondies

Lemon pastries have always been one of my favorites. The tart lemon pairs perfectly with the sweetness of almost any dessert, but it needs to be a pastry for me. Cookie, cake, blondie, etc. Not lemon creamy things. They don’t do it for me. Lemon bars? Meh, take ’em of leave ’em. I shied away from creating my own because I am so in love with the way lemon and butter taste together. I didn’t think I could recreate a genuinely delicious lemon pastry without rich, flavorful butter. I was wrong. You may want to take note, because I don’t admit to being wrong too often. Just ask my husband.

White Chocolate Lemon Blondies

Maybe it’s the melted white chocolate? Maybe it’s the tiniest bit of butter flavored extract? It’s optional, but when you don’t use butter, I find it can be magical. And that is how I would describe these bars. Magical. I know that’s a bold statement, but when you create a blondie that is ultra soft, gooey, and not the least bit cakey without using even a hint of butter, I call that magic.

White Chocolate Lemon Blondies

These babies are a full on indulgent treat without any of the guilt. They do have quite a bit of sugar that you could absolutely cut down on if you have less of a sweet tooth than me, but other than that, they are 100% whole wheat and fairly low in fat due to the nonfat Greek yogurt. The Greek yogurt is a must. It adds the perfect flavor and texture, and I wouldn’t try to sub it out for applesauce or any other type of fat substitute. If you love lemon pastries even half as much as I do, you will not be able to get enough of these blondies!

Print
White Chocolate Lemon Blondies

Prep Time: 10 minutes

Cook Time: 25 minutes

Total Time: 35 minutes

Yield: 16 small, or 9 large blondies

Serving Size: 1 blondie

White Chocolate Lemon Blondies

Ingredients

  • Zest of one lemon
  • 2/3 cup sugar
  • 5.5 oz white chocolate, melted
  • 1 x 5oz container (or about 1/2 cup) nonfat lemon Greek yogurt
  • 1 tbsp fresh lemon juice
  • 2 eggs
  • 1 tsp vanilla extract
  • 1/8 tsp butter extract (optional)
  • 1/3 cup white whole wheat flour

Instructions

  1. Preheat oven to 350. Line a 9" square pan with parchment paper or tin foil and spray with nonstick spray. Set aside.
  2. In a large bowl, beat together lemon zest and sugar until fragrant, about 1 minute. Whisk in melted white chocolate, yogurt, and lemon juice. Add eggs 1 at a time, whisking until combined. Add vanilla and butter extracts. Gently fold in flour until just combined.
  3. Transfer to prepared pan and bake until golden and a toothpick inserted about 2" from the center comes out with just a few moist crumbs, about 25 minutes. Set pan on a wire rack and allow to cool completely. Store in a loosely covered container for 5-7 days.
3.1
https://arismenu.com/white-chocolate-lemon-blondies/

Filed Under: Brownies & Bars, Dessert, Holiday & Seasonal · Tagged: bars, blondies, dessert, lemon, recipe, white chocolate

Magic Shell Cups

July 7, 2013 · by Ari ·

Magic Shell Cups #vegan #glutenfree

Remember Dibs? They were so popular when they first came out. Dangerously good, and finally brought ice cream as a “snack” to movie theaters. I was pretty obsessed, but as I’ve mentioned, I’m pretty obsessed with anything that includes ice cream. 😉

Magic Shell Cups #vegan #glutenfree

I tried to make you Dibs. I tried to many ways. I made a mess of my kitchen. Chocolate and fro-yo everywhere. And I’m not one of those roll with the punches people who keeps it cool when things don’t work out. No. I work in an embarrassingly fragile state in the kitchen where I am known to have legit freak out when things don’t turn out the way I want them to. It’s really fun being married to me. 😉

Magic Shell Cups #vegan #glutenfree

Anyway, after several failed attempts, I decided to change things up a little. Last year I was obsessed with making these cups. Then after selling hundreds of them for fundraising and spending pretty much every weekend making them, I decided I never wanted to make a single candy cup again for the rest of my life. Good thing these are ice cream cups instead. They did bring back some painful memories, but man were they worth it in the end!

Magic Shell Cups #vegan #glutenfree

These cups are everything you love about a magic shell ice cream cone in tiny, bite-sized cups that are perfect for when you just want a little bit of sweetness. They are also extremely versatile. You could put rice krispies in the chocolate for some added crunch, you can use any type of ice cream/fro-yo you like (I like it best with nonfat vanilla fro-yo or coconut milk ice cream), you can add sprinkles (no brainer for me!) for color and crunch, and you could even put in some peanut butter, granola or pretzels to add some variety!

Print
Magic Shell Cups

Prep Time: 20 minutes

Total Time: 20 minutes

Yield: 26-30 cups

Serving Size: 2 cups

Magic Shell Cups

Ingredients

  • 20 oz dark chocolate, roughly chopped (or dark chocolate chips)
  • 1 tbsp coconut oil
  • Approx 1 cup ice cream/frozen yogurt of choice (I used coconut milk ice cream and nonfat vanilla fro-yo. If vegan, use coconut milk or other nondairy ice cream.)
  • Sprinkles for topping, optional

Instructions

  1. Line mini muffin tins with paper liners.
  2. In a medium bowl, heat chocolate and coconut oil in the microwave in 20 second intervals, stirring after each, until melted.
  3. Spoon enough chocolate to cover the bottom of each baking cup. Add scant tablespoon fro-yo or ice cream. Cover with more chocolate. Add sprinkles if desired.
  4. Freeze for at least one hour or until set. Cups will stay kept in the refrigerator for up to one month.
3.1
https://arismenu.com/magic-shell-cups/

Filed Under: Dessert, Gluten-free, Holiday & Seasonal, Ice Cream & Fro-yo, Snacks · Tagged: candy, chocolate, cups, dessert, fro yo, gluten free, ice cream, magic shell, recipe, sprinkles, vegan

Fro-yo Malt

July 2, 2013 · by Ari ·

Fro-yo Malt

I love to bake, but my #1 hands down favorite dessert will always be anything involving ice cream or fro-yo. In fact, sometimes if I get fro-yo as an afternoon snack, I find myself still eating some after dinner for dessert. I can’t even keep ice cream in the house, or it’s bad news.

Fro-yo Malt

One of my favorite ways to eat ice cream is a thick and creamy malted milk shake. What is it about malt powder that automatically makes things delicious?? I love sitting down at an old school diner and ordering a vanilla malt. I haven’t had one in years because shakes have more calories than almost any dessert out there. I never stopped craving them, so I made my own smaller ones using nonfat fro-yo and almond milk. Let me tell you, they taste exactly like the real deal!

Fro-yo MaltI made them for my mom and she told me they were her favorite thing I’ve ever made! They are definitely on my favorites list also. Thick, creamy and perfect for the summer (not that I don’t drink shakes in December…), these are sure to cool you off and take you back in time without giving you the gross ate-too-much-ice-cream feeling. You can make these whatever flavor you want–chocolate, caramel, the possibilities are endless! Also, this makes a fairly small shake (about 1 cup). You are free to double the portions if desired. I kept it closer to what I consider (and what do I even know? 😉 ) to be a healthy-ish dessert portion, but I’m not going to tell you how much fro-yo to eat. 😉

Print
Fro-yo Malt

Prep Time: 5 minutes

Total Time: 5 minutes

Yield: 3 servings

Serving Size: Approx 1 cup

Fro-yo Malt

Ingredients

  • 2 cups nonfat vanilla frozen yogurt (or chocolate, or any flavor you like), I used Stoneyfield
  • 1 cup unsweetened almond milk
  • 1/4 cup malted milk powder
  • Light whipped cream and sprinkles for topping, optional

Instructions

  1. Blend frozen yogurt, almond milk and malted milk powder in a blender until smooth, about 1 minute. Serve topped with whipped cream and sprinkles if desired.
3.1
https://arismenu.com/fro-yo-malt/


Filed Under: Dessert, Drinks, Gluten-free, Holiday & Seasonal, Ice Cream & Fro-yo, Smoothies & Shakes · Tagged: dessert, easy, fro yo, malt, milk shake, quick, recipe, vegetarian

Chocolate Chip Zucchini Almond Meal Muffins

June 18, 2013 · by Ari ·

Soft & fluffy zucchini muffins stuffed with dark chocolate chips. Grain-free, refined sugar-free, vegan & paleo!

Chocolate Chip Zucchini Almond Meal Muffins #vegan #glutenfree

Did I ever tell you about the time I ate 3 zucchinis in one sitting because I wanted a snack and was trying to be healthy? I called up one of my best friends and said “I think I just over ate zucchinis. Is that even a thing?” I love them. Sauteed, roasted, grilled, BAKED!

zucchinimuffins-19Chocolate Chip Zucchini Almond Meal Muffins #vegan #glutenfree

Okay, these muffins taste nothing like zucchinis. Just like carrot cake doesn’t actually taste like carrots. But the zucchinis add some extra veggie goodness, and also produce some of the softest, (insert gross word) and tender muffins I have ever tasted.

Chocolate Chip Zucchini Almond Meal Muffins #vegan #glutenfree

As soon as I decided I wanted to make zucchini almond meal muffins, I hit up my girl Gina’s blog for some inspiration. She has the best paleo recipes, and although I don’t eat paleo, I love baking with nut flours, and her blog is always a great place to start. She made some ridiculously good looking zucchini bread that I used as a guideline, but ended up with muffins with chocolate chips inside. Shocking, right?

Chocolate Chip Zucchini Almond Meal Muffins #vegan #glutenfree

The muffins tasted EXACTLY like I wanted–lightly sweet, hearty and filling without being heavy. They didn’t last long, and whether you normally use grain-free flours or not, you will absolutely love them!

Print
Chocolate Chip Zucchini Almond Meal Muffins

Prep Time: 10 minutes

Cook Time: 25 minutes

Total Time: 35 minutes

Yield: 1 dozen

Serving Size: 1 muffin

Chocolate Chip Zucchini Almond Meal Muffins

Soft & fluffy zucchini muffins stuffed with dark chocolate chips. Grain-free, refined sugar-free, vegan & paleo!

Ingredients

  • 3/4 cup unsweetened vanilla almond milk
  • 1/2 tsp apple cider vinegar
  • 1 1/2 cups almond meal
  • 1 1/2 tsp baking soda
  • dash salt
  • 1 tsp cinnamon
  • 1 ripe banana, mashed
  • 3 tbsp natural liquid sweetener of choice (honey, agave, maple syrup, etc.)
  • 1 tbsp coconut oil, melted
  • 1 tsp vanilla extract
  • 1 cup finely grated zucchini, squeezed dry
  • heaping 1/2 cup mini dark chocolate chips

Instructions

  1. Preheat oven to 350. Line muffin tins with paper liners. Set aside.
  2. Measure milk in your measuring cup. Add apple cider vinegar and whisk lightly. Set aside.
  3. In a large bowl, whisk together almond meal, baking soda, salt and cinnamon. Add almond milk mixture, banana, sweetener, coconut oil, and vanilla. Mix until just combined. Fold in zucchini and chocolate chips.
  4. Evenly divide batter between between 12 prepared muffin molds.
  5. Bake until golden and a toothpick inserted in the center comes out clean, about 20-25 minutes.

Notes

Adapted from Running to the Kitchen

3.1
https://arismenu.com/chocolate-chip-zucchini-almond-meal-muffins/

Filed Under: Breads & Muffins, Breakfast, Dessert, Gluten-free, Holiday & Seasonal, Paleo, Summer, Vegan · Tagged: almond meal, breakfast, chocolate, dessert, gluten free, grain free, muffin, recipe, vegan, zucchini

PB&J Cheesecake Cups

May 23, 2013 · by Ari ·

PB&J Cheesecake Cups

You.guys. I just…I’m not even sure I can talk about these little gems.

PB&J Cheesecake Cups

I guess that is why we take so many pictures? Because there is no way I could explain in words how out-of-this-world this dessert is.

PB&J Cheesecake Cups

First of all, peanut butter and jelly is my probably favorite combination. Well, peanut butter and chocolate miiiight give it a run for it’s money, but I am totally that person that will go to a restaurant and order a peanut butter and jelly sandwich. Especially if it includes words like “roasted” or other fancy adjectives. I’m a sucker for fancy adjectives.

PB&J Cheesecake Cups

I made these for Steve’s birthday. I think I’ve mentioned that his birthday dessert from last year is my very favorite dessert I’ve ever made. It’s also one of the most popular recipes on this li’l ol’ blog. Well, these cheesecake cups give those vanilla bean cookie butter cup cupcakes a run for their money!

PB&J Cheesecake Cups

You guys are going to love these babies. Creamy peanut butter cheesecake stuffed with raspberry (or whatever flavor you love most) jam on top of my very favorite go-to graham cracker crust. It just doesn’t get much better.

Print
PB&J Cheesecake Cups

Prep Time: 15 minutes

Cook Time: 25 minutes

Total Time: 5 hours, 30 minutes

Yield: 12 cups

Serving Size: 1 cup

PB&J Cheesecake Cups

Peanut butter and jelly meets cheesecake in these perfect, single serving cups.

Ingredients

    For the graham cracker crust:
  • 1 cup old fashioned graham cracker crumbs
  • 2 tbsp coconut oil, melted
  • For the cheesecake:
  • 1 lb reduced fat cream cheese
  • 1/2 cup peanut butter (I used PB&Co white chocolate wonderful)
  • 2/3 cup brown sugar
  • 2 eggs
  • 1/4 cup unsweetened almond milk
  • 1 tsp vanilla extract
  • approx 6 tbsp low sugar raspberry jam (or jam or your choosing)

Instructions

  1. Preheat oven to 350. Spray a standard muffin tin with nonstick spray. Set. Aside.
  2. To make the crust, combine graham cracker crumbs and coconut oil in a medium bowl. Place approx 1 tablespoon of crust into each muffin tin. Press down with your fingers or a shot glass. Bake until set, about 7-10 minutes. Cool on a wire rack while you prepare the filling.
  3. To make the cheesecake, beat cream cheese, peanut butter and brown sugar together in a large bowl or stand mixer. Add eggs one at a time, mixing until combined. Beat in almond milk and vanilla.
  4. Evenly divide half the cheesecake batter (eyeball it) between your 12 muffin tins. Top with approx 1/2 tbsp of jam, then divide remaining cheesecake batter.
  5. Bake until lightly browned and just set, about 15-20 minutes. Turn the oven off and crack the door. Allow cheesecakes to sit in opened oven for an additional 15 minutes.
  6. Cool completely on a wire rack, then refrigerate until fully chilled, about 3-4 hours. Store covered in refrigerator for up to one week.

Notes

Inspired by Gimme Some Oven

If you'd like, you can top the cheesecake cups with extra jam just before serving.

3.1
https://arismenu.com/pbj-cheesecake-cups/

Filed Under: Cheesecake, Cupcakes, Dessert · Tagged: cheesecake, dessert, jelly, peanut butter, peanut butter and jelly, recipe

Banana Cream Cupcakes

May 15, 2013 · by Ari ·

Banana Cream Cupcakes

You guys you guys you guys you guys!!!!! I have the best house guest in the whole world right now!

Banana Cream Cupcakes

So I’m going to keep this short so we can commence with cooking, baking, wine drinking, and goat cheese eating. I made banana cupcakes. Then I stuffed them with cream cheese frosting. Then I topped them with salted caramel. I mean, how could that even possibly be bad?

Banana Cream Cupcakes

Did I mention that my “little” brother turned 16? He is also over 6′ tall, and has this deep man voice. When he calls me he just says “Yooooooooo” in this grumbly, ridiculously low-pitched man voice. Like, what IS that? I remember him being born. HOW CAN HE BE A MAN NOW????

Banana Cream Cupcakes

I try to imitate the “Yo” voice, but ummm, I have a high-pitched little girl voice, so it doesn’t work. At all. Everyone laughs at me. So I just let him stick to the man voice, and I stick to what I’m good at, like making him perfect birthday cupcakes. And they are. The banana makes the cupcakes ridiculously soft, and they are totally stuffed with the cream cheese filling, and that salted caramel is just the icing on the cake. Literally.

Print
Banana Cream Cupcakes

Banana Cream Cupcakes

Ingredients

    For the cupcakes:
  • 2 cups white whole wheat flour
  • 3/4 tsp baking soda
  • 1/2 tsp baking powder
  • 1/2 dash salt
  • 2 medium ripe bananas, mashed
  • 1/2 unsweetened apple sauce
  • 1 1/3 cups sugar
  • 2 eggs
  • 1 1/2 tsp vanilla extract
  • 1/2 cup reduced fat buttermilk
  • fleur de sel caramel for topping, optional
  • For the filling:
  • 8oz reduced fat cream cheese, softened
  • 1 cup powdered sugar
  • 1 tsp vanilla extract

Instructions

  1. To make the cupcakes, preheat the oven to 375. Line 2 muffin tins with 18 paper liners. Set aside.
  2. In a medium bowl, whisk together flour, baking soda, baking powder and salt. Set aside. In a large bowl, beat together apples, apple sauce and sugar. Slowly, beat in eggs one at a time, followed by vanilla. Slowly beat in half the dry ingredients, then buttermilk, followed by the last of the dry ingredients.
  3. Evenly divide batter between 18 muffin tins. Bake until golden and a toothpick inserted in the center comes out clean with just a few crumbs, about 20-25 minutes. Cool completely.
  4. To make the filling, beat cream cheese, powdered sugar and vanilla together until well combined. Transfer to a pastry bag fitted with a large tip. Insert tip into the center of cooled cupcakes and gently squeeze out 1-2 tbsp of filling.
  5. Drizzle with caramel if desired immediately before serving. Cupcakes are best the same day, but can be stored refrigerated in an airtight container for up to 5 days.
3.1
https://arismenu.com/banana-cream-cupcakes/

Filed Under: Cupcakes, Dessert · Tagged: banana, caramel, cream cheese, cupcakes, dessert, recipe, whole grain

Buckeye Brownies

April 25, 2013 · by Ari ·

Buckeye Brownies via arismenu.com

My favorite (and best) cooking inspiration has always been making things for the people I love. Especially birthdays. Birthdays are my favorite thing in the world, and nothing brings me more happiness than making the perfect treat to show my love.

Buckeye Brownies via arismenu.com

In fact, to date my favorite recipe I’ve ever made was for Steve’s birthday last year. I have to tell you, though–these give them a run for their money!

buckeyebrownies-10Buckeye Brownies via arismenu.com

When I saw this post on Brown Eyed Baker a couple of months ago, I immediately sent it to Nicole–the idea is genius, the photos are absolutely gorgeous, and I wanted to jump through my screen and lick every crumb.

Buckeye Brownies via arismenu.com

So when I was deciding what to make Nicole for her birthday this year, I knew exactly where I wanted to start. Of course, I changed a few things to make these a little less indulgent, but they still tasted rich and decadent. The brownie layer is the fudgiest brownie I have ever tasted, and the peanut butter tastes like the inside of a Reese’s cup, and then that perfectly glossy glaze? I diiiieeee.

Buckeye Brownies via arismenu.com

The good thing about cooking for your BBF (best blog friend–I know, we’re totally, like tweens) is they don’t mind that you cut into their birthday dessert to photograph it, and maybe sneak a tiny bite so that you can make sure it’s perfect before you give it to them. 😉 Thanks for taking one for the team blog, Nicole!

Buckeye Brownies via arismenu.com

Print
Buckeye Brownies

Prep Time: 30 minutes

Cook Time: 30 minutes

Total Time: 3 hours

Yield: 32

Serving Size: 1 brownie

Buckeye Brownies

Rich and fudgy brownies topped with creamy sweetened peanut butter, followed by a chocolate peanut butter glaze--these brownies are to-die-for!

Ingredients

    For the brownies:
  • 1/3 cup Dutch-processed cocoa
  • 1 1/2 tsp espresso powder
  • 1/2 cup + 2 tbsp boiling water
  • 2 ounces unsweetened chocolate, finely chopped
  • 2 tbsp coconut oil, melted
  • 3 eggs
  • 1 tbsp vanilla extract
  • 2 1/4 cups sugar
  • 1 3/4 cups white whole wheat flour
  • dash salt
  • 3/4 cup nonfat vanilla yogurt
  • For the peanut butter layer:
  • 1 1/2 cups creamy peanut butter
  • 1 1/3 cups powdered sugar
  • 3 tbsp coconut oil, melted
  • 2-3 tbsp unsweetened almond milk
  • For the chocolate peanut butter glaze:
  • 1 1/2 cups dark chocolate chips
  • 1/3 cup creamy peanut butter

Instructions

  1. To make the brownies, preheat the oven to 350. Line a 9x13 pan with aluminum foil and spray lightly with nonstick spray. Set aside.
  2. In a large bowl, whisk together cocoa powder, espresso powder and water. Add unsweetened chocolate and whisk until combined. Beat in eggs one at a time, then beat in vanilla and sugar. Stir in flour, salt and yogurt until combined. Do not overmix.
  3. Transfer batter to prepared baking dish. Bake set and until a toothpick inserted a couple of inches from the edge comes out with a few crumbs, about 30 minutes. Cool completely on wire rack.
  4. To make the peanut butter layer, beat together peanut butter, coconut oil and powdered sugar until smooth. Add milk 1 tbsp at a time until you reach a smooth, spreadable texture. Spread evenly onto cooled brownies.
  5. To make the glaze, place chocolate and peanut butter in a medium microwave-safe bowl. Heat in 20 second increments, stirring between each, until melted. Spread glaze evenly over peanut butter layer. Cool in the refrigerator for 30 minutes, then serve. Store in an airtight container for up to one week.

Notes

Recipe adapted from Brown Eyed Baked

3.1
https://arismenu.com/buckeye-brownies/

Filed Under: Brownies & Bars, Dessert · Tagged: birthdays, brownies, buckeye, chocolate, dessert, peanut butter, recipe, whole grain

Plain Ol’ Chocolate Chip Cookies {vegan}

April 17, 2013 · by Ari ·

Chocolate Chip Cookies #vegan via arismenu.com


Sometimes you just need plain, simple, classic comfort food. This is one of those times.

Chocolate Chip Cookies #vegan via arismenu.com

Would you believe I didn’t have a chocolate chip cookie recipe on here? I’m actually more intimidated by simple, well-known recipes. I feel like it has to be *perfect* and I don’t want to post it, until I know I’ve gotten it right.

Chocolate Chip Cookies #vegan via arismenu.com

Chocolate chip cookies with no butter is not an easy feat, my friends. You see, with peanut butter cookies, it’s easy–the fat in the peanut butter works perfectly, and you don’t realize you’re missing the butter, but in a plain ol’ chocolate chip cookie? The flavors I associate are butter, brown sugar and, well, chocolate! But honestly, butter is probably number one.

Chocolate Chip Cookies #vegan via arismenu.com

The secret? It’s the combination of apple butter, which gives the perfect texture (far superior to applesauce or yogurt in cookies) and the tiniest bit of butter extract. That stuff is magical. Using cornstarch in place of an egg not only makes them vegan, but helps keep them thick and chewy, and the massive amount of chocolate chips is 100% necessary. Also, a tiny sprinkle of salt on your dough just before it goes into the oven will take your cookie flavor to the next level! Not quite salted, but it evens out the sweetness.

Chocolate Chip Cookies #vegan via arismenu.com

The result is healthier chocolate chip cookies that taste like the real deal. Thick, chewy, with a slight crunch on the outside, and that perfect soft, gooey, and extra chocolatey inside. I am finally ready to share my chocolate chip cookies with you, because I finally got it right.

Print
Chocolate Chip Cookies

Prep Time: 40 minutes

Cook Time: 10 minutes

Total Time: 50 minutes

Yield: 1 1/2 dozen

Serving Size: 1 cookie

Chocolate Chip Cookies

Simple, classic, vegan and whole grain chocolate chip cookies that taste just like the real deal.

Ingredients

  • 1 1/4 cups white whole wheat flour
  • 1 tbsp cornstarch
  • 1/2 teaspoon baking soda
  • dash salt
  • 1/2 cup apple butter
  • 1/2 cup brown sugar
  • 1/4 cup sugar
  • 1/4 cup unsweetened almond milk
  • 1 tsp vanilla extract
  • 1/8 tsp butter flavoring (optional, but recommended)
  • 1 heaping cup dark chocolate chips
  • sea salt for sprinkling

Instructions

  1. In a medium bowl, whisk together flour, cornstarch, baking soda and salt. Set aside.
  2. In a large bowl or stand mixer, beat together apple butter and sugars until combined. Beat in almond milk, vanilla and butter flavoring. Slowly add in dry ingredients, beating until just combined. Beat in chocolate chips. Cover and chill dough for 30 minutes, or up to overnight.
  3. Preheat oven to 375. Line a large baking sheet with silpat or parchment paper.Use a small cookie scoop, or roll dough into 1" balls. Add a tiny pinch (or more if you want them to have the "salted" taste) of sea salt to the top of each cookie dough ball.
  4. Bake for 10-12 minutes until golden and just set. Do not over bake. Allow to cool completely on cookie sheet. Store in a loosely covered container for 5-7 days.
3.1
https://arismenu.com/chocolate-chip-cookies/

Filed Under: Cookies, Dessert, Vegan · Tagged: baking, chocolate, chocolate chip cookies, cookies, dessert, recipe, vegan, whole grain

« Previous Page
Next Page »
Image Map

Popular Posts

Tart Cherry Margaritas: The perfect, refreshing margarita--lightly sweet with a punch of tequila

Tart Cherry Margaritas

90+ Healthy Recipes for Breakfast, Lunch, Dinner & Dessert

90+ Healthy Recipes for Breakfast, Lunch, Dinner & Dessert

The Ultimate Peanut Butter Cup Brownie Cookies: Rich, fudgy, brownie-like chocolate cookies stuffed with melty peanut butter cups!

Ultimate Peanut Butter Cup Brownie Cookies

Drink & Dish: Cafe Au Lait Cupcakes

Crockpot Chicken Enchilada Soup

Subscribe via Email:

Enter your email address:

Save an additional $30 on Blendtec Factory Recertified Blenders + Free Shipping

Featured Here

recipe redux
Certified Yummly Recipes on Yummly.com

Member Of…

FitFluential Is Fitness Found
AZ Bloggers Network
az 150 photo az150_zpsfb093d32.gif

Archives


Image Map

Copyright © 2025 | Innovative Child Theme by The Pixelista | Built on the Genesis Framework


Loading Comments...