• Going Out
    • Phx Restaurants
    • How To Order At Starbucks
  • Running
    • My Running Story
    • Race Calendar
    • Race Recaps & Results
  • Blogroll
  • Bucket List
  • Video

Ari's Menu

Little changes making a big difference.

  • Home
  • Recipes
  • Weight Loss
    • My Story
    • Common Swaps
  • Who’s Who
  • Contact
    • Policies & Disclosure
  • Press

Search Results for: vegan chocolate

2014: Your Favorites

December 30, 2014 · by Ari ·

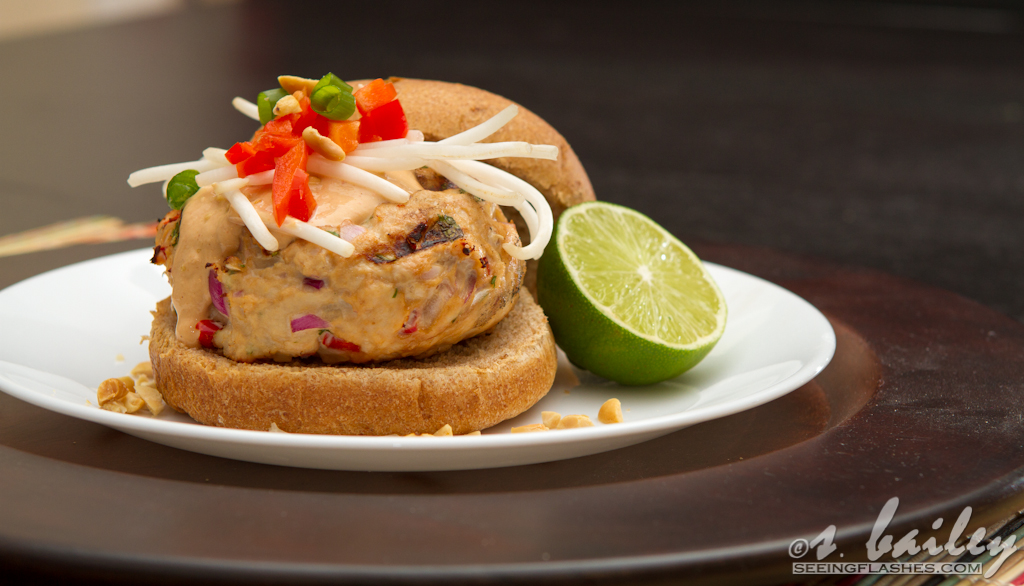
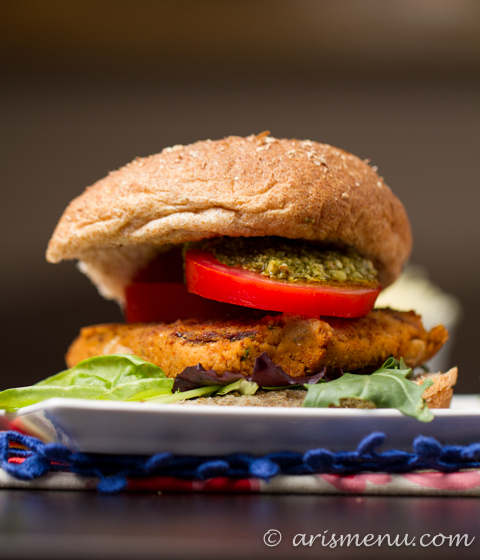
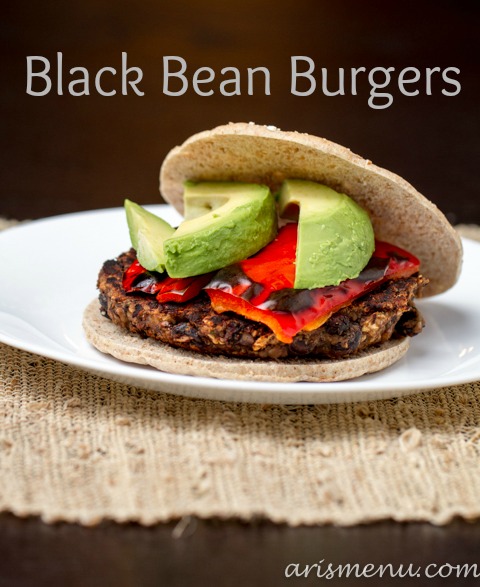
I’ve said it over, and over: 2014 is my favorite. I had an incredible year, and trust me, I can’t wait to tell you all about it in detail for the seventeenth time, but right now we’re going to talk about YOU, and the things you love. And also about me because I made them. 😉 So without further ado, here are you top 10 favorite recipes from 2014:

10. Sweet Potato Black Bean Burgers with Cilantro Avocado Cream

Sweet Potato Black Bean Burgers with Cilantro Avocado Cream

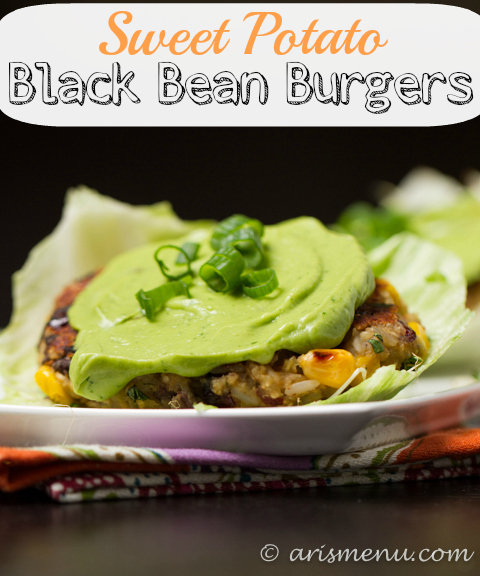
It’s two of my very favorite foods!! Sweet potatoes and cilantro! I’m a huge fan of black bean burgers, and these were out of this world good–sweet and savory, and a nice different take on a traditional veggie burger.

9. Healthy Crockpot Chicken Tikka Masala

Healthy Crockpot Chicken Tikka Masala

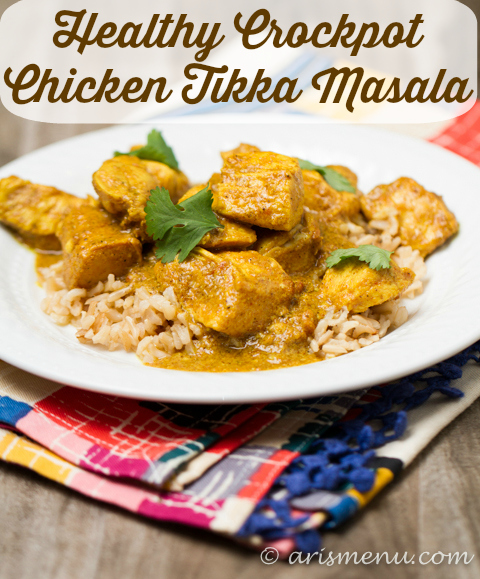
I freaking loved this meal. It’s not my recipe–it comes from my friend Anetta, and so I don’t mind telling you just how brilliant it is. Creamy, hearty and comforting, but totally healthy. It’s the perfect sneakily healthy dinner option.

8. Crockpot Chicken Taco Dip

Crockpot Chicken Taco Dip

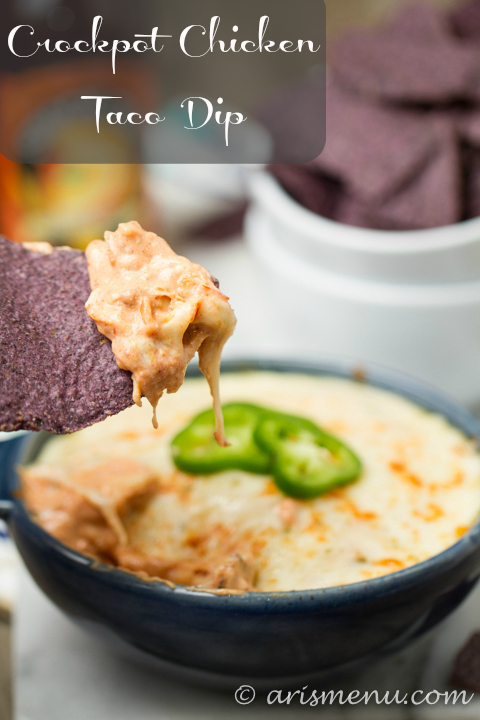
EEEEE!!!! I am SO glad this dip made it into the top 10! I don’t like to play favorites, but this was just over the top, knock your socks off good! I mean, with that much cheese, how can it be bad? It’s so easy to make, and we ended up eating dip for dinner a few nights in a row. 😉

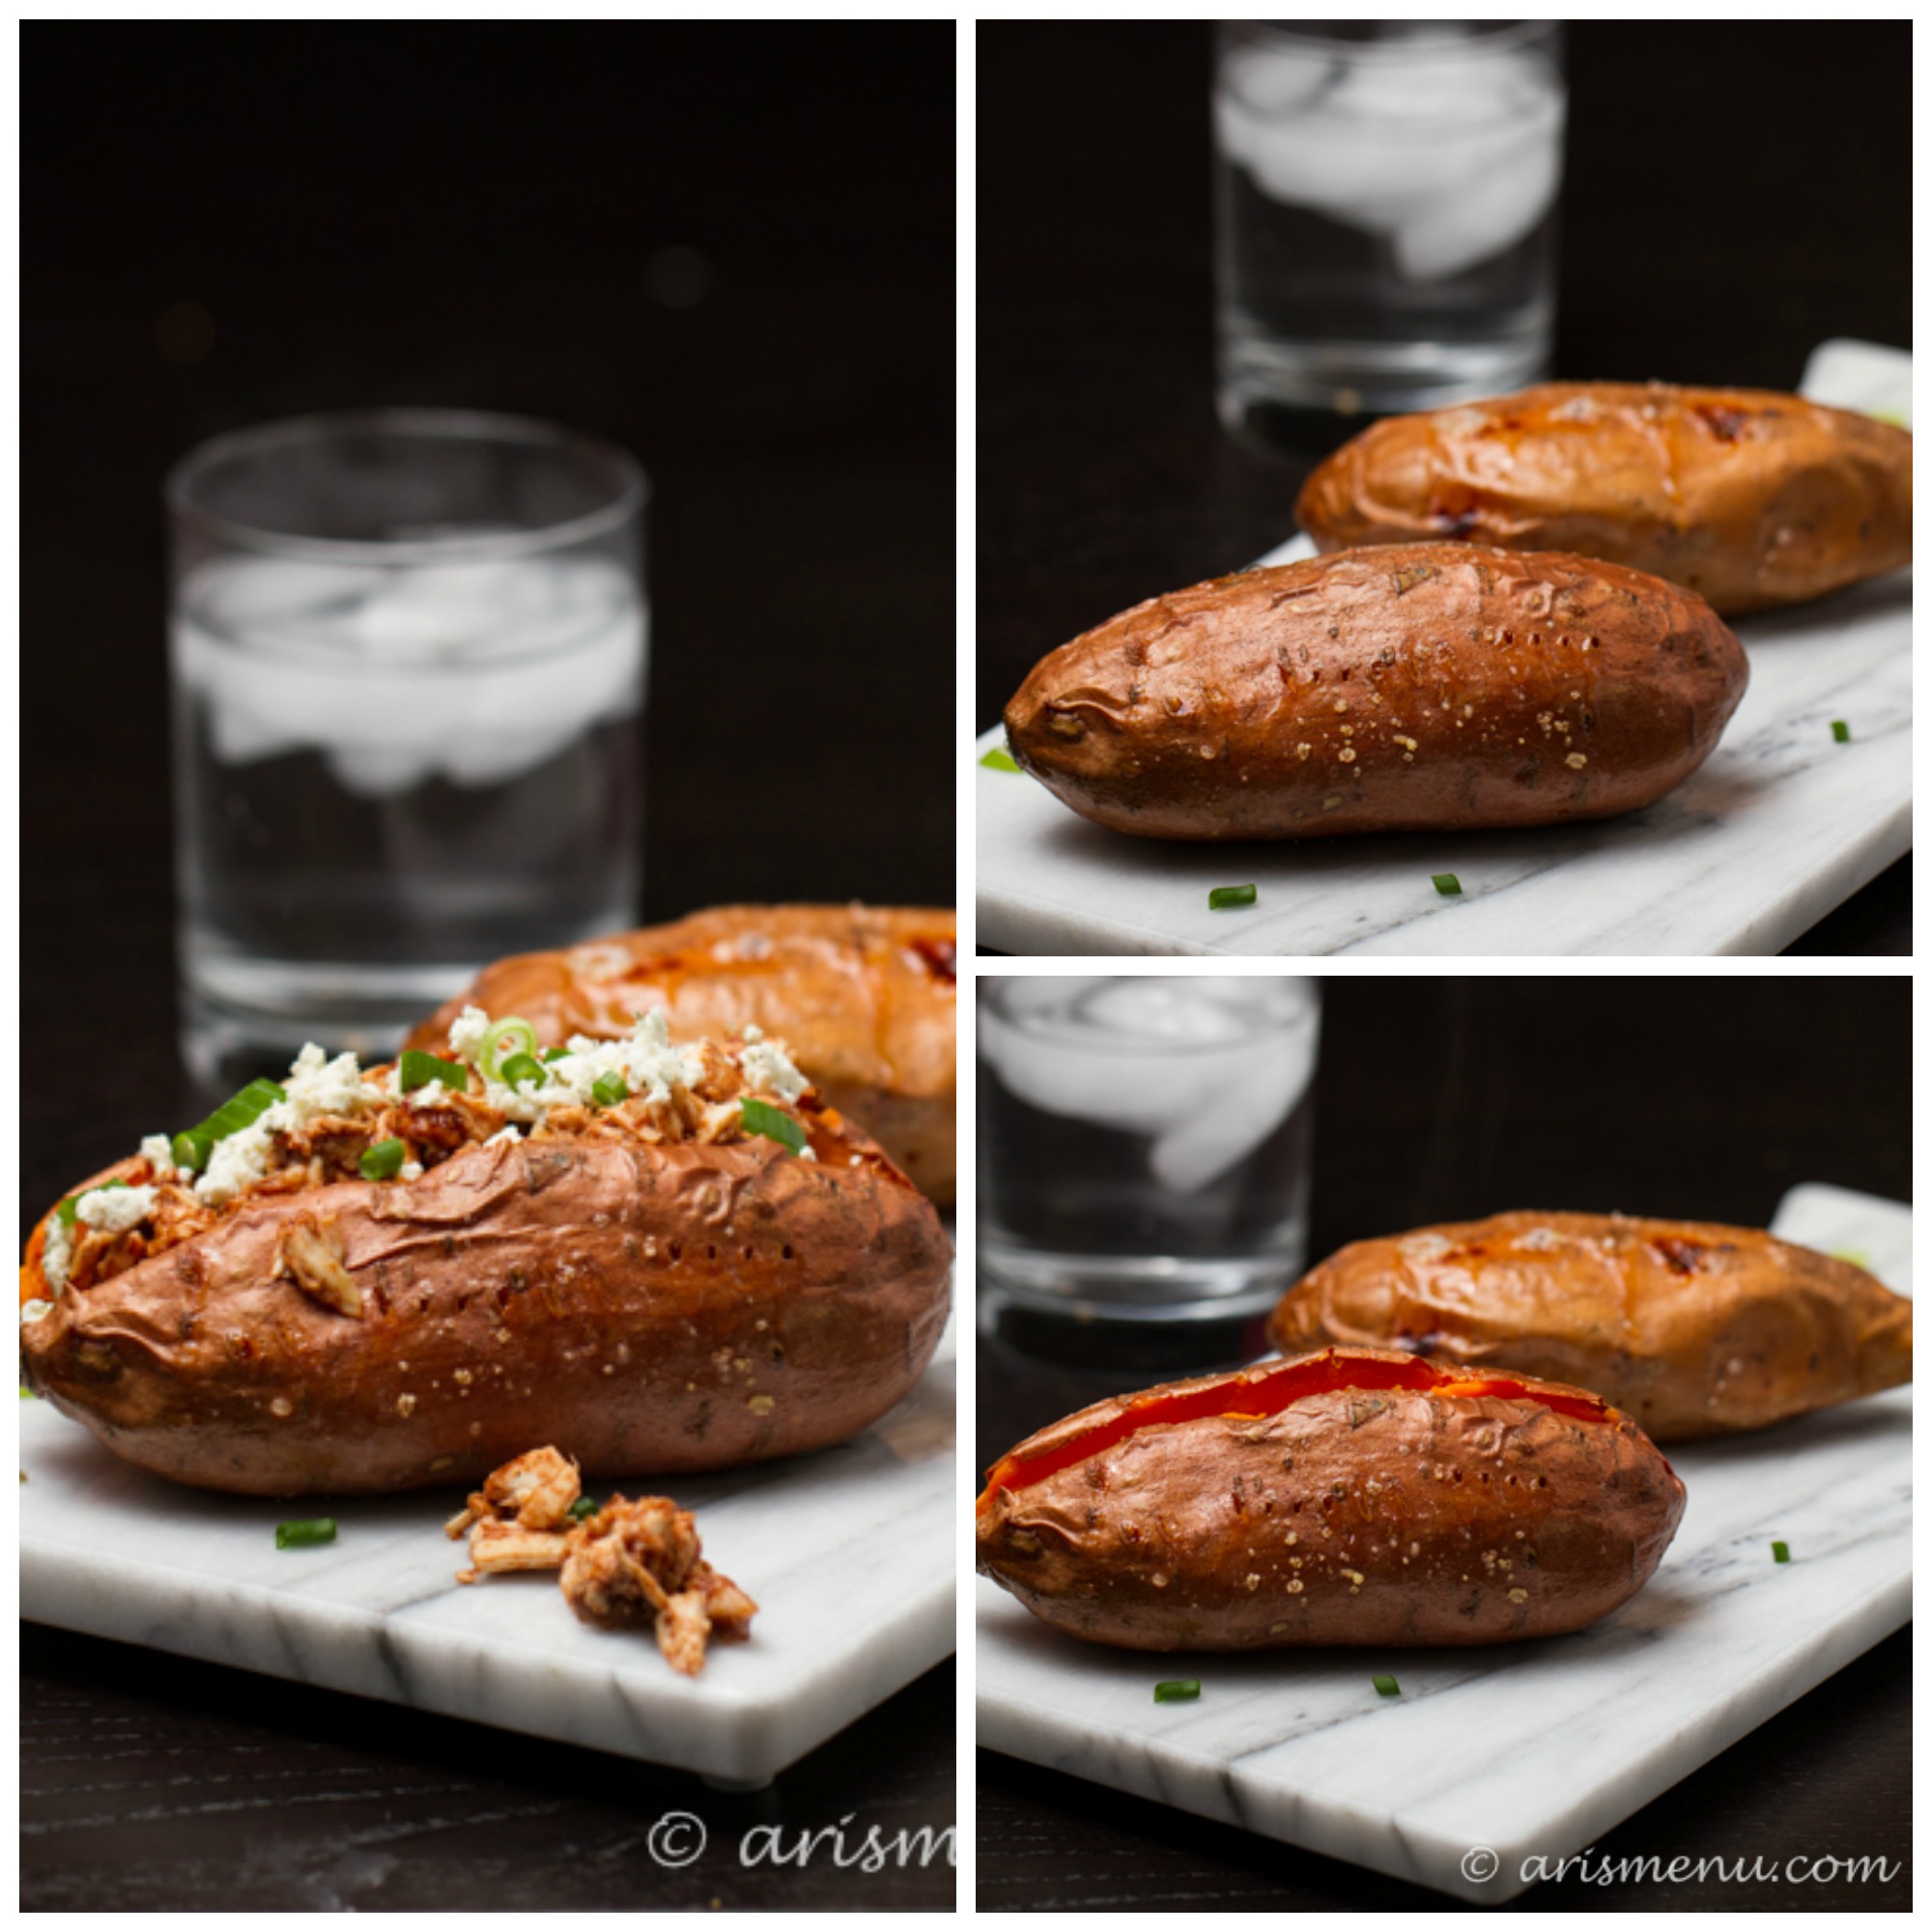
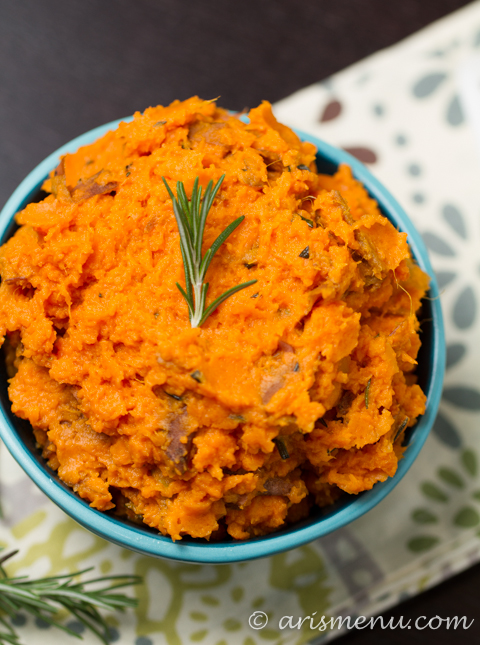
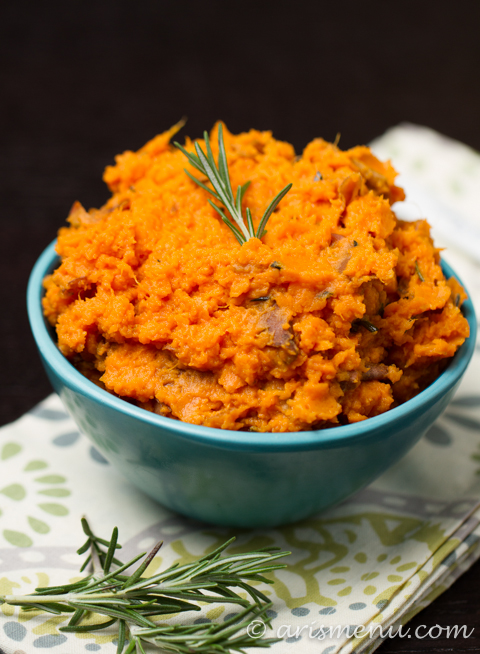
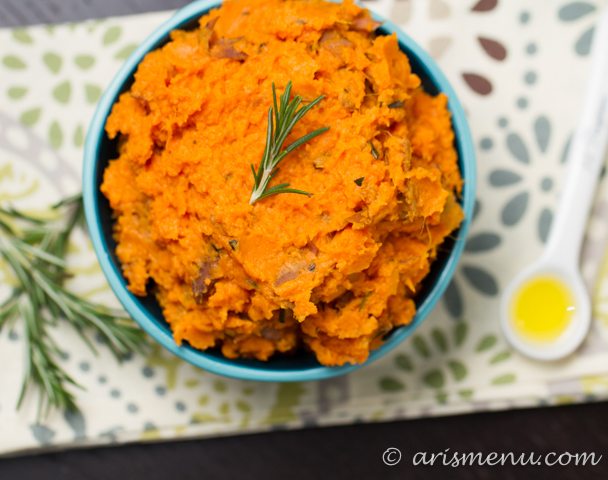
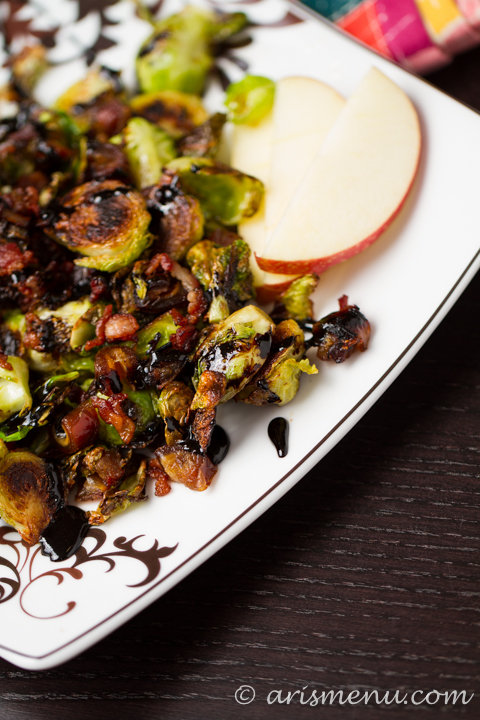
7.  BBQ Chicken Stuffed Sweet Potatoes

BBQ Chicken Stuffed Sweet Potatoes

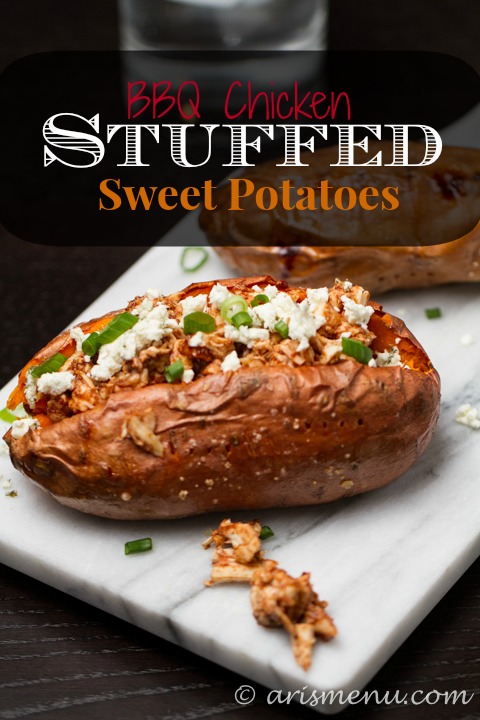
SWEET POTATOES!!! I’m so glad someone out there shares my love. This recipe inspired like 7 bajillion other stuffed sweet potato recipes that I made this year because it was so good and so ridiculously easy. Seriously, I did nothing but stack things. No wonder other people like it. Chances are you have about as much patience for complicated recipes as I do. 😉

6. Peanut Butter Oatmeal Chocolate Chip Cookies

Peanut Butter Oatmeal Chocolate Chip Cookies

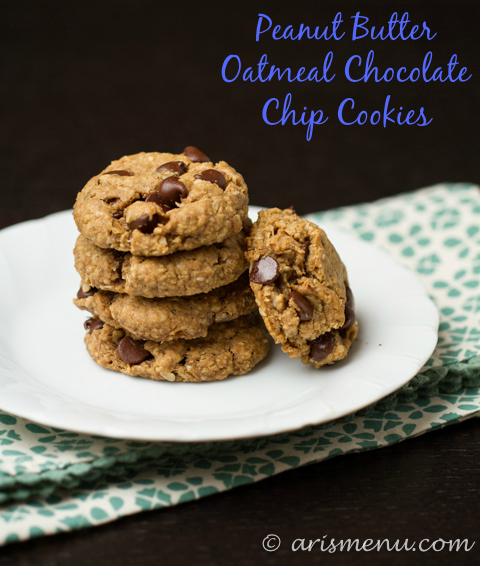
I actually had no idea these were so popular! I’ve made them so many times, and I love that they are a gluten-free and vegan cookie with no flour blends, no foreign ingredients–just a few ingredients that almost everyone keeps at home. And they are soooo soft, chewy and chocolate-y!

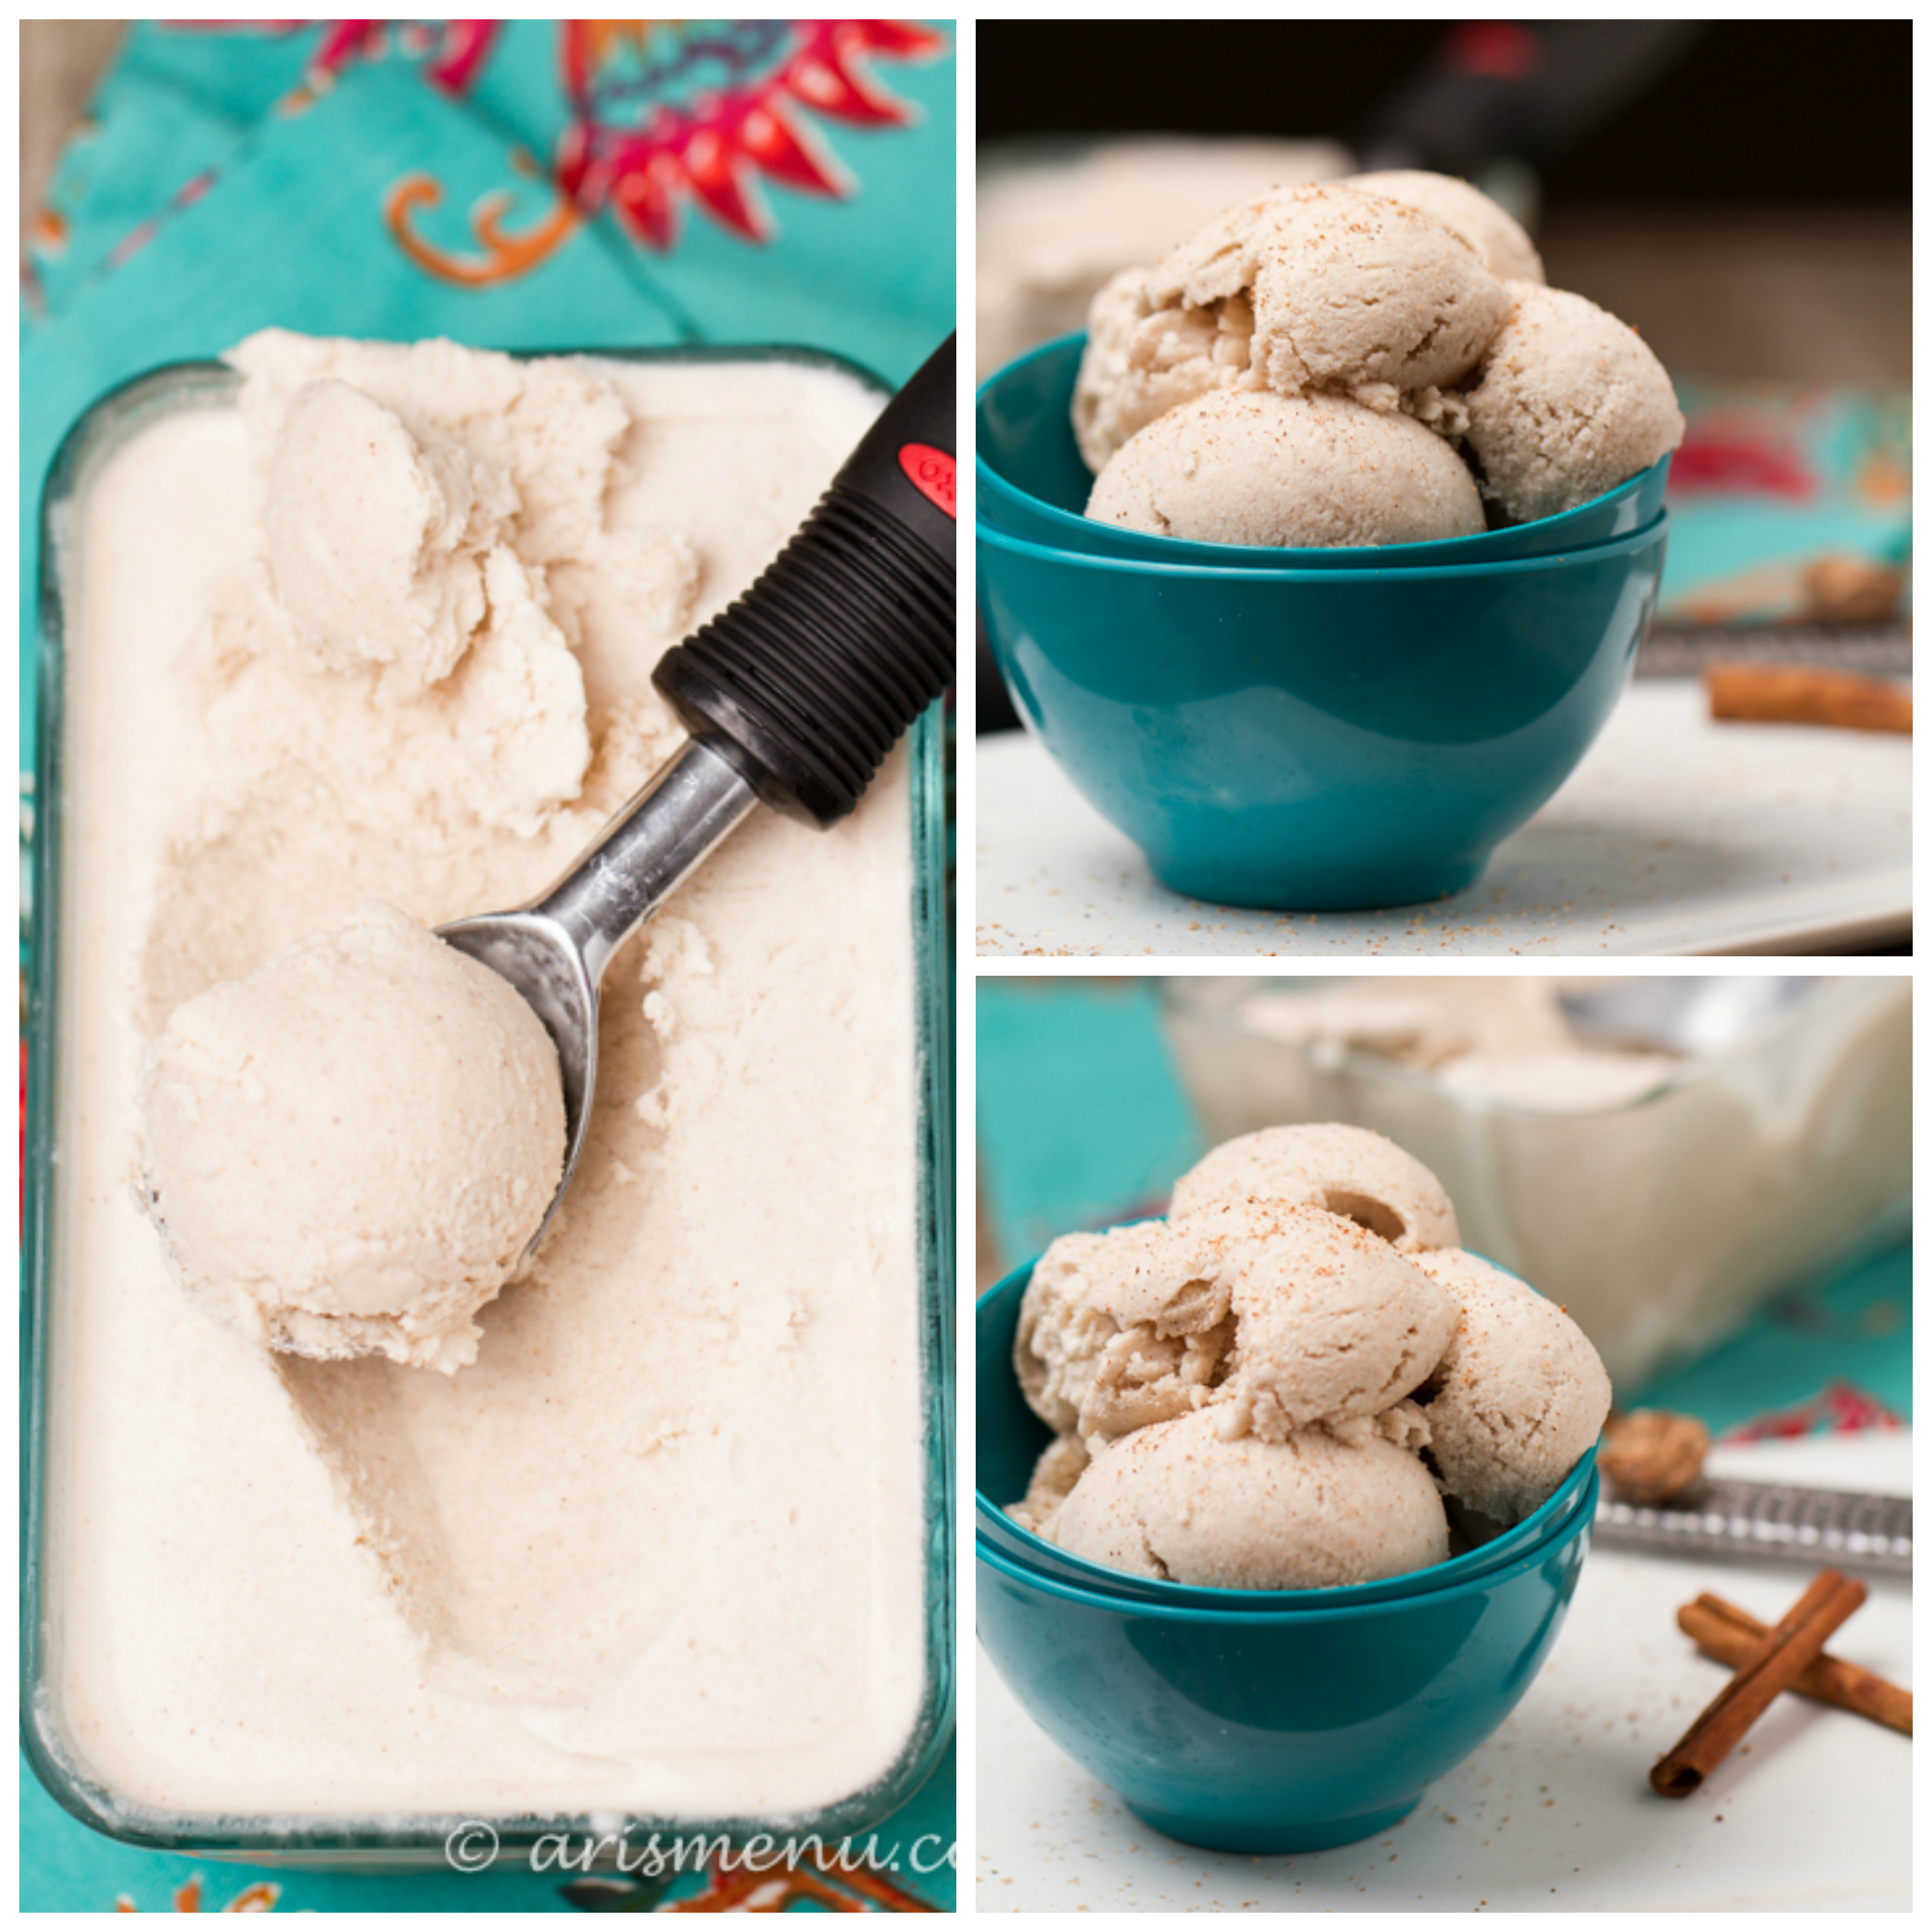
5. Toasted Coconut Cold Brewed Iced Coffee

Toasted Coconut Cold Brewed Iced Coffee

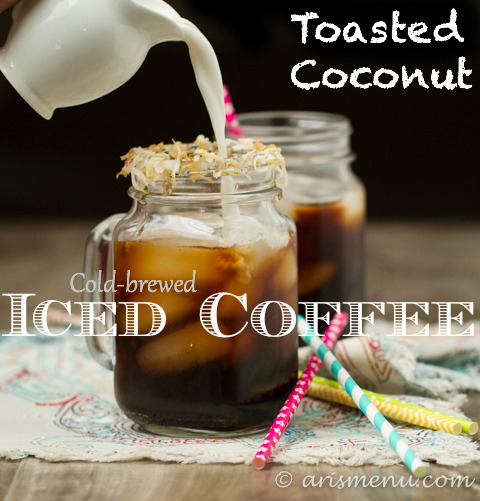
My very favorite iced coffee!!! So many people tell me they make this at home all the time. It has a natural creaminess and smoothness that make it just irresistible.  These were also some of my favorite photos of the year.

4. Homemade Vegan Nutella

Homemade Vegan Nutella

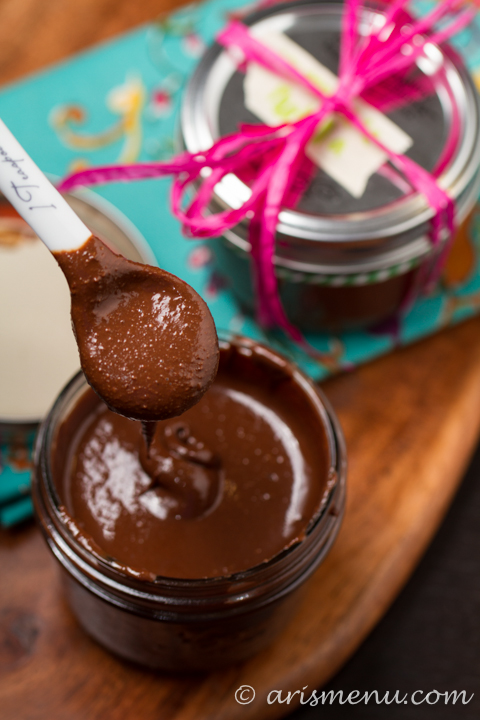
Drippy, chocolate-y,sweet and creamy Nutella made at home with no weird ingredients! It is seriously so easy, and although it’s still a dessert spread, it is so much healthier than buying it at the store. Plus it tastes so much better, if ya ask me!

3.  Guacamole Deviled Eggs

Guacamole Deviled Eggs 

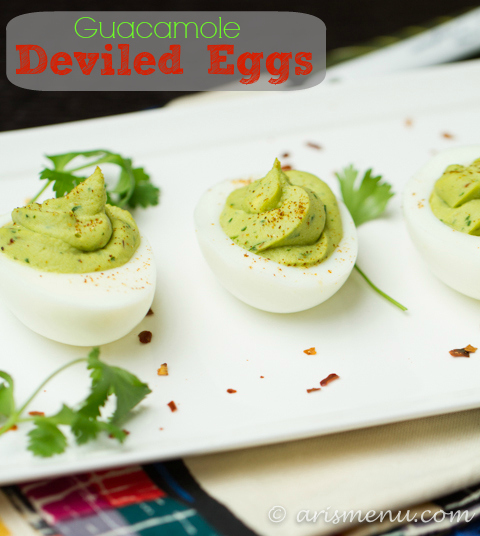
My friend Emily would always make deviled eggs with avocado every time I would go to her house, and I always ate, like, 17 too many, so I knew I had to create something similar for the blog. I freaking love guacamole, and I love deviled eggs–it’s a match made in heaven. Plus, they’re pretty healthy with no mayo!

2. Peanut Butter Chocolate Chip Cookie Dough Bites

Peanut Butter Chocolate Chip Cookie Dough Bites

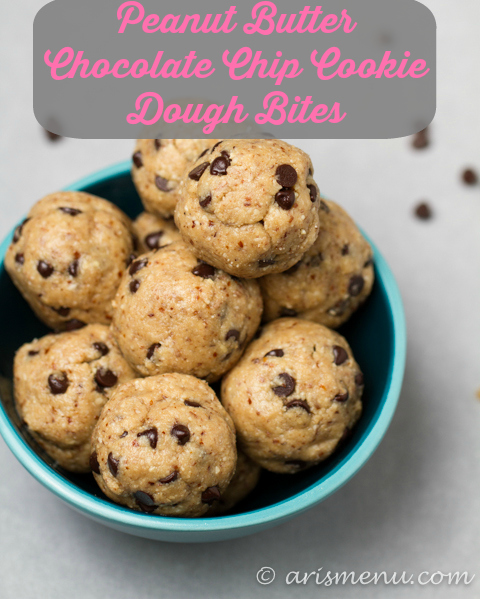
AKA super addicting chocolate peanut butter goodness. These come together in minutes, and they really do taste like cookie dough! I hate when people take healthy things and call them “brownies” or “cookie dough” when you taste them and you’re like “Ummmm that is not a brownie!”, but these actually do taste like cookie dough. They were also my most popular food photo on Instagram!

1. Crockpot Sweet Potato Chicken Chili

Crockpot Sweet Potato Chicken Chili

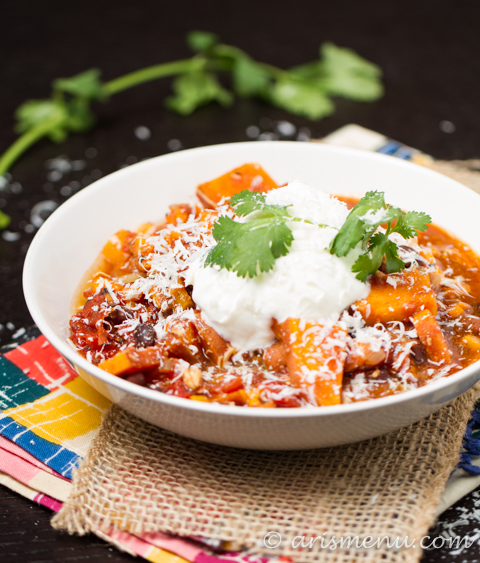
Okay, I have a confession. I still borderline hate the photos I got of this dish. I freaking LOVE the taste, and I fought Steve over the leftovers, but I spent a good hour on the photos, and I’m still not happy with them, but I guess it just goes to show that you guys care more about a great recipe (it is!) than a perfect photo, and I’m so glad this baby took off this year because it is so delicious and healthy!

And because they win out every year it seems by leaps and bounds, here are your top 3 favorite recipes of all time:

Lasagna Stuffed Spaghetti Squash

Spaghetti Squash Boats

French Onion Meatloaf

Happy cooking!

Filed Under: Roundup ·

My Writing Process Blog Tour

June 11, 2014 · by Ari ·

Hi friends! I have something a little different for you today. My friends Kristi and Jenn both recently asked that I take part in this blog tour, and it sounded like a lot of fun! I don’t think I’ve ever actually spoken about writing on here (probably because it scared the crap out of me), so I figured it would be a nice challenge and a little change from ice cream and grilling recipes. 😉

So without further adieu, here are the questions:

1. What am I working on?

Actually posting? Balance? Living life? It’s kind of a strange time right now to be honest. I’ve recently taken a step back and gone from posting 3-4 times a week to closer to 1-2 (if I’m lucky). I’ve been focused on quality over quantity–improving what I give put out all areas (recipes, photos, writing, etc.).

Chai Spiced Coconut Cream Ice Cream: Rich, creamy, vegan, gluten-free & paleo!

At BTP I attended this incredible writing workshop by Cheryl of 5 Second Rule. We were all able to choose from a few prompts, and many people even shared at the open mic at the end of the weekend. There were some really beautiful words, but instead of leaving feeling excited to write, I left with this lingering feeling that my writing is so young and insignificant. I kept wanting to create something meaningful and poetic, but ya know what? That ain’t me. I still talk like a kid, and my youthfulness is a big part of what makes me…me.

I guess that’s a long way of saying I’m working on being me. You’d think that would be so easy, but I feel like, for many of us, it is a constant struggle. Not trying to be someone else. Accepting that we are enough. Not setting unrealistic expectations. God, life is so much more FUN that way!


2. How does my work differ from others of its genre?

Cafe Au Lait Cupcakes: Ultra soft espresso cupcakes with a to die for cream filling

Well….does it really? I don’t know. I feel like being a healthy recipe blog is already pretty specific. I do feel like I have a pretty specific photography style (simple, a surplus of straight-on photos, obsessed with action shots), but I don’t know how different my work is from any of my other favorite healthy recipe blogs. I do think one thing that makes me stand out is that I have lived the life of the people I am trying to reach. I have lived off fast food, been almost 100 lbs overweight, struggled for years, and fought to find success in terms of healthy living. I hope that people like me can connect to that experience, and that this little spot on the internet can inspire them to find health and happiness.

BBQ Chicken Stuffed Sweet Potatoes: An easy, hands-off and healthy weeknight dinner that makes you feel like you're at a fancy restaurant


3. Why do I write what I do?

Simple. I.Love.Food. Always have, always will. This blog went through many stages as I figured out what it was. I originally started out modeling myself after life style healthy living blogs like Carrots n Cake–that was the first blog I ever read and the reason I started one! I wrote a little about recipes, but I would post every day about what was happening in my life and all of my workouts. Some people can continue that for years and years, but I got bored really quickly.

My husband had recently purchased what I so technically refer to as “the fancy camera” and he started photographing my recipes. I quickly became obsessed with the idea of “making it” on Foodgawker, took over the photography of my site and fell in deep, deep love with food photography. What used to stress me out has now become my favorite part of blogging, and honestly I write recipes for 2 reasons: To inspire people to cook healthy meals and because, if I didn’t, taking high res pictures of every recipe I create would feel even more self indulgent than it already does. Plus, I like connecting with you people, and unless I wanted to start a blog about musical theatre, this is pretty much the thing I know the most about. 😉

Chocolate Peanut Butter Cup Cupcakes


4. How does my writing process work?

That is so hard to answer because I feel like I begin “writing” long before I ever get out my laptop. It starts from the moment an idea for a recipe pops into my head, then continues throughout creating that recipe, and into the photography where I do my best to tell you a story and  create a window into my life through a snapshot of the food. The actual words? Uggghhh. That “process” is more like me staring at a blank screen thinking “WTF do I even have to say about anything???” Get me in person and I’ll talk your ear off, but in a post? Sometimes I’d rather just let the photos and the recipe speak for themselves!

Lasagna Stuffed Spaghetti Squash #glutenfree

I try to think of a story or a memory to connect with the recipe I’m sharing, and sometimes that works, but if it doesn’t, I usually just talk about my favorite subject…ME! One time I really couldn’t think of anything to say, and I started writing about how I hate when people say “So what’s going on with you?” because I was feeling the same sense of pressure, and the same feeling of answering “Ummm…nothing.” It actually ended up being one of my favorite posts writing wise, and it taught me the valuable lesson of just taking whatever I’m feeling and going with it, which is a big reason why I don’t blog when I’m in a bad mood!


Well, that’s that! My non-writer process behind a blog not really about the writing. 😉 Next in line I’m tagging my girl Katie from Peace, Love & Oats. Katie writes about her life, workouts, recipes, and her super cute fur niece Molly! Aside from being one of my favorite humans, she also has a unique voice that makes you feel like you’re having coffee with your best friend, and she writes some really great, honest content!

Also, YOU! Anyone who wants to join, please do! I know we’re all busy, but I would love to hear from you guys as well! And thanks again to Kristi & Jenn for getting me on board!

Filed Under: Life ·

Cinnamon Swirl Banana Bread

April 2, 2014 · by Ari ·

Ultra soft and tender banana bread swirled with cinnamon brown sugar and topped with a crunchy cinnamon sugar crust. This banana bread is so irresistible, you’d never guess it’s healthy, vegan & gluten-free!

cinnamon swirl banana bread.jpg

I have this problem. When I like something, I really like it. Like the can’t get enough, want to revolve my entire life around it kind of like it. It’s kinda like how if we become friends and I think you’re really cool, I just want to hang out with you all the time and never leave your side. Some people call that “creepy”. I just call it being an extrovert and knowing what/who I like. 😉

bananabread-26

You may remember that I kinda recently discovered that I like banana bread, and now it’s become that thing I can’t get enough of. Sometimes I purposely don’t eat my bananas so that they can get to that too-ripe stage where I am left with no choice other than making banana bread. It’s kind of a problem.

Cinnamon Swirl Banana Bread1.jpg

I keep trying to decide which one is my favorite, but that’s like asking who I love more: Winston or Clementine. I can’t do it. I will say, however, that the “crust” on this loaf makes it incredibly special and unlike any banana bread I’ve ever tasted. It wasn’t even intentional. I had extra cinnamon sugar left over, and I threw it on top. It was one of those perfect surprises–I took it out of the oven and the top was sweet and crunchy while the rest was perfectly tender and pillowy soft.

bananabread-33

I happened to have a little extra of this molasses dulce de leche glaze lying around when I made it, so to make things even more ridiculous, I drizzled some on top. It totally doesn’t need it, but if you want to add a little extra umph, it certainly doesn’t hurt. Either way, you’ll find yourself going back for “Just one more slice…” until the loaf magically disappears. 😉

Print
Cinnamon Swirl Banana Bread

Prep Time: 20 minutes

Cook Time: 1 hour

Total Time: 1 hour, 20 minutes

Yield: 12-16

Serving Size: 1 slice

Cinnamon Swirl Banana Bread

Ultra soft and tender banana bread swirled with cinnamon-sugar and topped with a crunchy cinnamon sugar crust. This banana bread is so irresistible, you'd never guess it's healthy, vegan & gluten-free!

Ingredients

  • 2 cups gluten-free baking blend (or white whole wheat flour)
  • 2 tablespoons cornstarch
  • 1 teaspoon baking soda
  • 1 teaspoon baking powder
  • 1 teaspoon cinnamon
  • dash salt
  • 3 extra ripe medium bananas, mashed
  • 1/3 cup melted coconut oil
  • 2/3 cup brown sugar
  • 1/2 cup sugar
  • 1 teaspoon vanilla extract
  • 3/4 cup unsweetened almond milk
  • For the cinnamon brown sugar swirl/crust:
  • 1/4 cup brown sugar
  • heaping 1/2 tablespoon cinnamon

Instructions

  1. Preheat oven to 350. Spray a 9x5" loaf pan with nonstick spray. Set aside.
  2. In a small bowl, combine the brown sugar and cinnamon for the cinnamon brown sugar swirl. Set aside.
  3. In a medium bowl, whisk together baking blend, cornstarch, baking soda, baking powder, cinnamon and salt. In a large bowl or stand mixer, beat together bananas, coconut oil, sugars and vanilla until well combined. Stir in half the flour mixture, then almond milk, then remaining flour mixture.
  4. Pour half of the batter into prepared loaf pan. Sprinkle half of the cinnamon brown sugar mixture on top. Pour remaining batter and top with remaining cinnamon brown sugar. Bake until a toothpick inserted in the center comes out with just a few crumbs, about 50-60 minutes. Set loaf pan on a wire rack to cool completely. Store in an airtight container for up to one week. If desired, serve topped with molasses dulce de leche glaze
3.1
https://arismenu.com/cinnamon-swirl-banana-bread/

Filed Under: Breads & Muffins, Dessert, Gluten-free, Vegan ·

Drink & Dish: How to Make Cake Pops

March 19, 2014 · by Ari ·

Extra soft, sweet and delicious cake pops will impress all of your friends, and are much easier than you think! Add fun themed decorations, or keep them simple. Easily made vegan and/or gluten-free. How to Make Cake Pops: Easily made vegan and/or gluten-free

Have I ever told you about the only ever time I tried to make a dessert in “pop” form? Well in total Ari fashion, I just thought about what a cake pop tasted like. I didn’t look up what it was made out of or how to do it, just blindly went for it. I was going for brownie pops, and I had the brilliant idea that I should under bake the brownies because cake pops always tasted so *the M word*. How to Make Cake Pops: Easily made vegan and/or gluten-free

Obviously it was a disaster. They were way too soft, and they just kept sliding down the stick. Then I tried to dip them in caramel sauce because I didn’t know you had to use melted chocolate or candy melts that actually set up instead of staying all gooey. I never tried again since until this past weekend. How to Make Cake Pops: Easily made vegan and/or gluten-free

I had the brilliant idea that I would make basketball cake pops for our March Madness episode of Drink & Dish.


The cake pop part actually went really well–so easy, and although it is time consuming, it would be fun to do again with friends/family. The decorating? Well, I think I gave myself high blood pressure trying to get it right! How to Make Cake Pops: Easily made vegan and/or gluten-free

Perfectionist + not good at visual arts = bad combination. In the end, the basketballs weren’t necessarily difficult  to make, but they were difficult to make look smooth/pretty. At the end of the day, they actually came out okay, but I’m ready to quit my day job and start a cake decorating business, that’s for sure. 😉 How to Make Cake Pops: Easily made vegan and/or gluten-free

But let’s talk about cake pops because they are actually so easy if you give yourself a break. This is the time to cut yourself some slack, and I honestly recommend using *gasp* boxed cake mix. You can always modify the recipe (ex: sub applesauce for oil), but it’s just an easier start. You can also easily buy a vegan or gluten-free variety to suit your dietary needs. I used this gluten-free cake mix from Bob’s Red Mill. You simply bake up your cake, let it cool, mix it with frosting (again–use whatever kind you want to suit your diet), and then roll it into little balls. Freeze those puppies, then stick them on lollipop sticks. Then comes the time consuming part–dipping and lots of tapping which you can see on the video how to make sure you get all the excess coating off and make them look as smooth as possible.

For the coating you can use candy melts, dark chocolate, white chocolate, whatever you like! I recommend adding in a little coconut oil if you use chocolate to help smooth things out, but other than that, they all work about the same. Then if you choose to decorate, the options are endless! The best part? When you bring cake pops to a party, everyone is impressed and they disappear in seconds! Also? There is no comparison as far as deliciousness goes.

Print
How to Make Cake Pops

Prep Time: 1 hour, 30 minutes

Total Time: 2 hours

Yield: varies, approximately 50 cake pops

Serving Size: 1 pop

How to Make Cake Pops

Extra soft, sweet and delicious cake pops will impress all of your friends, and are much easier than you think! Add fun themed decorations, or keep them simple. Easily made vegan and/or gluten-free.

Ingredients

  • 1 prepared 9 x 13" sheet cake or 2 8-9" rounds (equivalent of 1 boxed cake mix)
  • 3/4-1 cup frosting
  • 2 cups candy melts, or dark/white/milk chocolate + 1 tablespoon coconut oil, melted

Instructions

  1. Crumble cake into a large bowl. Add 3/4 cup frosting (you can eyeball it) and mix together with your hands. It's the easiest way--just have fun with it! Once mixed the cake should stick together and easily roll into balls. If it is too dry, add more frosting 1-2 tablespoons at a time. Roll dough into 1" balls and place on a large cookie sheet. Freeze for 30 minutes to set.
  2. Stick lollipop sticks into the center of each cake pop. One at a time, dip cake pops into melted candy or dark chocolate. I suggest using a large measuring cup for this step so it is easy to fully submerge the pop. Lightly tap the stick on the end of your glass while slowly twirling your pop to remove excess coating. This takes about a minute (see the video tutorial to see this process).
  3. To set, you may either buy a cake pop box or use a styrofoam block. Stick the pop into the styrofoam/box and allow to set. Repeat with remaining cake pops. Decorate as desired.
3.1
https://arismenu.com/drink-dish-cake-pops/

And be sure to check out Nicole’s delicious and refreshing Lemon Shandy as well!

Filed Under: Cakes & Pies, Dessert, DIY/How To, Drink & Dish, Gluten-free, Vegan ·

S’mores Hot Cocoa {The Recipe ReDux}

February 22, 2014 · by Ari ·

Rich, hot, comforting hot chocolate with toasty marshmallows and graham cracker crumbs. Everything you love about s’mores in a lightened up, gluten-free and dairy-free hot chocolate {with vegan option}.

S'mores Hot Cocoa: Looks decadent, but healthier than you'd think!

Is it still cold where you are? The high here today is 79*. Please don’t hate me. It’s actually been absolutely gorgeous out lately, and I am trying to live it up because I know it’s only a matter of time until the low is 95 and I’m waking up to run in the middle of the night so I can at least beat the sunlight.

S'mores Hot Cocoa: lightened up, gluten-free & dairy-free..

And it’s still chilly enough in the morning and evening to cozy up with a hot drink. In fact, it’s the perfect dessert for a night in with Netflix. And the puppies. Obviously.

S'mores Hot Cocoa: lightened up, gluten-free & dairy-free

I’m usually a fro yo for dessert person. Even in the cold months. Something about drinking my dessert (even if it’s a milkshake!) seems like I’m being cheated. However, this is a whole different story.

S'mores Hot Cocoa: lightened up, gluten-free & dairy-free

With warm, toasty marshmallows and crushed graham cracker crumbs, this hot cocoa feels like the best of both worlds–eating dessert and drinking hot cocoa.

S'mores Hot Cocoa: lightened up, gluten-free & dairy-free

This drink is pretty decadent, but it comes in right at about 200 calories, which really isn’t that bad for dessert in my opinion. Especially a dessert that has this much going on. It also comes together in less than 10 minutes and includes a very short list of ingredients which, if you’re anything like me, you probably have sitting around anyway.

S'mores Hot Cocoa: lightened up, gluten-free & dairy-free

The almond milk and chocolate chips are responsible for the thick, rich cocoa, but the bruleed marshmallows, bits of graham cracker in every sip, and last minute decision to drizzle it with extra chocolate syrup is what truly takes it to the next level!

Print
S’mores Hot Cocoa {The Recipe ReDux}

Prep Time: 5 minutes

Cook Time: 5 minutes

Total Time: 10 minutes

Yield: 1

Serving Size: 1 cup

S’mores Hot Cocoa {The Recipe ReDux}

Rich, hot, comforting hot chocolate with toasty marshmallows and graham cracker crumbs. Everything you love about s'mores in a lightened up, gluten-free and dairy-free hot chocolate {with vegan option}.

Ingredients

  • 1 cup unsweetened almond milk
  • 1/4 cup dark chocolate chips
  • 1 teaspoon vanilla extract
  • 1 teaspoon honey or other liquid sweetener
  • 1 tablespoon graham cracker crumbs (I used gluten-free)
  • mini marshmallows*
  • light chocolate syrup for drizzling, optional

Instructions

  1. In a small pot, heat milk, chocolate and vanilla over medium heat until chocolate is melted and milk is hot and steaming, whisking constantly.
  2. Drizzle honey on a small plate and roll the top of your mug in honey so it is just coated. Place graham cracker crumbs on a separate plate, and then roll the glass in graham cracker.
  3. Pour in cocoa and top with marshmallows. Heat marshmallows with a brulee torch until browned. Top with remaining graham cracker crumbs and drizzle with chocolate syrup.

Notes

*To make vegan, use vegan marshmallows and agave/maplesyrup/simple syrup in place of honey.

3.1
https://arismenu.com/smores-hot-cocoa/


Filed Under: Dessert, Drinks, Gluten-free, Holiday & Seasonal, Vegan ·

Rosemary, Olive Oil & Sea Salt Mashed Sweet Potatoes

February 17, 2014 · by Ari ·

Simple, easy roasted and mashed sweet potatoes with bold rosemary flavor and no cream or butter! A perfect healthy side dish to accompany any meal.

Rosemary, Olive Oil & Sea Salt Mashed Sweet Potatoes: Simple, healthy, vegan, gluten-free & paleo!

Okay, so first of all, I am a total freak. Pretty much every single time I try a new recipe, I immediately freak out about how it’s not good enough and tell my poor, poor husband that we need to toss it because there is no way I can possibly serve it.

Rosemary, Olive Oil & Sea Salt Mashed Sweet Potatoes: Simple, healthy, vegan, gluten-free & paleo!

Then after the crazy wears off I try it again and realize that I kinda like it. Then I decide to test it out on some guests who inevitably end up loving it, and only then do I decide that I actually did ok.

Rosemary, Olive Oil & Sea Salt Mashed Sweet Potatoes: Simple, healthy, vegan, gluten-free & paleo!

I mean, I guess sometimes it’s love at first bite, but usually there is a whole series of doubt before I decide a recipe is awesome. And to be honest, the first go around of this recipe was good, but it wasn’t great.

Rosemary, Olive Oil & Sea Salt Mashed Sweet Potatoes: Simple, healthy, vegan, gluten-free & paleo!

I was in a hurry and I just threw a big handful of rosemary in there haphazardly without taste testing along the way. It ended up being fixable (a little more salt, and a little of my picking out rosemary like a psycho), but I knew the flavor combination wasn’t quite right yet. But, I mean it’s sweet potatoes. They are pretty much error proof.

Rosemary, Olive Oil & Sea Salt Mashed Sweet Potatoes: Simple, healthy, vegan, gluten-free & paleo!

And don’t worry. I’ve got this little side dish all figured out now. 😉 That being said, rosemary (and salt!) is a very strong flavor, and what tastes good to me may be too strong for you. Doubtful that it won’t be strong enough because I have a super heavy hand, but if you really love one of the flavors more than the others, then ya never know!

Rosemary, Olive Oil & Sea Salt Mashed Sweet Potatoes: Simple, healthy, vegan, gluten-free & paleo!

The good news is that the recipe is so easy to adapt to your own tastes. Add extra rosemary, less salt, add goat cheese (because we all know how I feel about that stuff!), or incorporate anything you’d like really! It’s just one of those things where you can be all individual and make it your own. And also? It is so so so good.

Print
Rosemary, Olive Oil & Sea Salt Mashed Sweet Potatoes

Prep Time: 10 minutes

Cook Time: 1 hour

Total Time: 1 hour, 10 minutes

Yield: 4-6 servings

Rosemary, Olive Oil & Sea Salt Mashed Sweet Potatoes

Simple, easy roasted and mashed sweet potatoes with bold rosemary flavor and no cream or butter! A perfect healthy side dish to accompany any meal.

Ingredients

  • 2 medium sweet potatoes
  • 2 tablespoons olive oil (preferably a good quality extra virgin olive oil)
  • coarse sea salt
  • 1-3 sprigs rosemary, stems removed, finely minced
  • pinch pepper

Instructions

  1. Preheat oven to 400. Brush sweet potatoes with olive oil and sprinkle with sea salt. Roast until fork tender, about 1 hour.
  2. Cut off the ends of each sweet potato. You may remove the skin if desired; I did not. Transfer to a large bowl, add a tablespoon of olive oil and mash with a fork or masher, or use a mixer or immersion blender. Add 1 sprig rosemary and a pinch of pepper, and taste. Add extra rosemary and/or salt small amounts at a time until desired taste is achieved.
3.1
https://arismenu.com/rosemary-olive-oil-sea-salt-mashed-sw/

Filed Under: Dinner, Gluten-free, Holiday & Seasonal, Paleo, Side Dish, Vegan, Vegetarian ·

2013: My Favorites

December 29, 2013 · by Ari ·

Cornbread Sausage Stuffing: My family fights over the the leftovers from this stuffing every Thanksgiving! Big chunks of cornbread, sweet Italian turkey sausage, plenty of veggies and herbs and the secret ingredient -- TRUFFLE OIL -- make this a true, unforgettable classic!

My turn, my turn!! As it turns out we have some very similar tastes, you and I, but there was a serious lack of dessert in your favorites. Don’t worry, I’ve more than made up for that here. So in no particular order, here are my very favorites (and yes, it was SO hard to choose!) of 2013. Also, unintentionally more than half of them happen to be from Drink & Dish. Must be because working with this girl is always exciting, inspiring, and FUN!

Peanut Butter & Jelly Cheesecake Cups {easily gluten-free-able}

I always get my best ideas for Steve’s birthday dessert. You know what they say about love coming through your food and all that hippy dippy stuff? I totally believe it. These tasted like pure love, and are without a doubt one of my favorite desserts of all time.

Caramel Stuffed Ginger Molasses Cookies {gluten-free + vegan}

I still can’t get over these, and I made them twice this holiday season. Everyone at work kept asking me to make more. I love soft and chewy ginger molasses cookies, and with that gooey piece of caramel on they inside, they are just irresistible (<—an other word I ALWAYS spell wrong).

Inside Out Buckeye Cookies {gluten-free + vegan}

So I have a thing about stuffing cookies. Obviously. This was one of those recipes where I truly loved everything about it–from concept to taste, and I even though they looked beautiful which is a rare occurrence for me.

Cookie Butter Cookie Dough Bars {vegan}

Nicole and I talked for hours about what dessert we would make for after we completed our marathon. She made brownies (duh), and in my cookie butter obsession, I came up with these. They were SO good. I literally couldn’t stay away. Graham cracker crust, cookie butter cookie dough, and salted dark chocolate. It’s the stuff dreams are made of.

Brussels Sprouts with Apple, Bacon & Dates {gluten-free, dairy-free, paleo}

My mom always talks about how these are the best veggies she’s ever eaten. They turned my brussels sprouts hating husband into a believer, and they disappear faster than you can say the title (granted the title is super long). I crave them all the time, and there is nothing like a veggie dish that tastes like comfort food.

Cornbread Sausage Stuffing {gluten-free, dairy-free, easily vegan-able}

This is an other family favorite. I’ve also had friends and readers make this to rave reviews. My brother was so skeptical, but he tried it on Thanksgiving and came up to me specifically to tell me that this made him like stuffing. It’s great as a meal any time of year, or the perfect impressive Thanksgiving side dish.

Jalapeno Popper Hot Dogs {gluten-free}

This is what happens when this girl comes to visit. Our brains work like magic, and the best recipe ideas come out of it. I knew I wanted to create a fancy hot dog, but the rest of the magic I can’t even take credit for. The result was definitely the best hot dog I have ever eaten, and something I made multiple times this summer.

Red, White & Blue Grilled Cheese {gluten-free, vegetarian}

In case you didn’t know, melty cheese actually goes perfectly with blueberries and raspberry jam. I don’t just make this for the 4th of July. It’s one of my favorite easy dinners year round. It might sound kinda strange at first, but just trust me, okay? 😉

Loaded Baked Potato Salad {gluten-free}

I don’t know if this one even needs words. Literally a loaded baked potato meets potato salad, and the result is a side dish that will disappear first at your barbecue or get together. My husband is always requesting this as well as the sweet potato salad that came after it. Totally addicting, and a lot healthier than you would expect!

Cookie Butter Streusel Banana Bread {vegan + easily gluten-free-able}

I resisted the banana bread thing for a long time. I really have no idea why because ever since I made this one, I’ve been literally obsessed. I don’t usually like baked goods with cookie butter or nutella baked inside because I feel like the flavor gets muted, but swirled and in a crunchy streusel topping you get the best of both worlds in this ridiculously soft and tender treat.

Gingerbread Granola {gluten-free + vegan}

I have a granola problem. In fact, this is my second favorite granola from 2013, but I haven’t shared my first favorite with you, so that will have to wait until next year. But this granola is right up there. Gingerbread cookie in granola form…let’s just say it didn’t last long. 😉


So, that’s that. I guess I already asked you what your favorite was, so this time tell me your favorite dish that YOU made this year. Or just tell me more things that I made that you like because that’s fun. We all know how I like to be the center of attention. No shame.

Filed Under: Roundup ·

Inside Out Buckeye Cookies

December 11, 2013 · by Ari ·

Soft and chewy peanut butter cookies stuffed with melty dark chocolate and covered with powdered sugar–just like an inside out buckeye! Vegan, gluten-free, and seriously addicting.

Inside Out Buckeye Cookies

You know it’s Christmas time when I post cookies 3 days in a row. Okay, that’s a lie. I always post cookies. I love cookies. Everyone has their “thing”, their go-to dessert, that one thing they feel like they do significantly better than all other baking. Mine is totally cookies. In fact, I mess up brownies more times than I get them right, and I constantly have to remake cupcakes because I under bake them (because that works with cookies…not so much with cakes…).

Inside Out Buckeye Cookies

For part of my segment for Health2Fit (read more about the whole experience here), Natalie asked me to bring in some health(ier) cookies so she could demonstrate some creative ways to package them for swaps. That was awesome for me since I love to bake things, and then I totally fail at packaging in any sort of attractive manner. They were a huge hit at the studio, and everyone said they wouldn’t have been able to tell that they were lightened up, vegan & gluten-free!

Inside Out Buckeye Cookies

I’ve made these with both white whole wheat flour, and then more recently with my gluten-free baking blend. The only adjustment for the gluten-free version included baking time. They cooked about 1-2 minutes quicker than the original. In fact, the first batch I second guessed myself, left them in too long, and ended up with overly chewy (not the good kind of chewy), flat cookies. I was worried that they wouldn’t work, but the next batch, I took out as soon as they set, and they were awesome! Not quiiiite as puffy as these, but certainly not flat, and the taste was identical.

Inside Out Buckeye Cookies

Oh, and I guess maybe we should discuss what buckeyes actually are? Because I had no idea until the last year when I saw them floating around the blog world. It’s kind of like a Reese’s cup crossed with a truffle. They are little balls of peanut butter mixed with powdered sugar covered (mostly) with chocolate, but leaving one little “eye” remaining, So these cookies are…the opposite! Dark chocolate in the middle, with the peanut butter and powdered sugar on the outside. I love melty dark chocolate in the center of my cookies, and I am a peanut butter fanatic. The powdered sugar is that perfect extra touch that makes these cookies the first to go at parties or cookie swaps!

Print
Inside Out Buckeye Cookies

Prep Time: 30 minutes

Cook Time: 10 minutes

Total Time: 1 hour, 10 minutes

Yield: 1 1/2 dozen

Serving Size: 1 cookie

Inside Out Buckeye Cookies

Soft and chewy peanut butter cookies stuffed with melty dark chocolate and covered with powdered sugar--just like an inside out buckeye! Vegan, gluten-free, and seriously addicting.

Ingredients

  • 1 1/4 cup gluten-free baking blend or white whole wheat flour*
  • 3/4 tsp baking soda
  • 1/2 tsp baking powder
  • 1 tbsp corn starch
  • 1/2 cup apple butter
  • 1 cup peanut butter
  • 3/4 cup brown sugar
  • 1/2 cup granulated sugar
  • 1 tsp vanilla extract
  • 4 oz good quality dark chocolate, in small squares or roughly chopped
  • approx 1/2 cup powdered sugar for rolling ( + more for dusting)

Instructions

  1. In a medium bowl, combine flour, baking soda, baking powder, and corn starch. Set aside.
  2. In a large bowl, beat the apple butter, peanut butter, sugars, and vanilla until smooth. Beat in dry ingredients until well combined, scraping down the sides of the bowl as necessary. Refrigerate for 30 minutes.
  3. Preheat oven to 350 degrees. Line 2 large cookie sheets with silpat or parchment paper. Pour powdered sugar in a shallow bowl. Roll dough into 1" balls then press a square of dark chocolate inside. Re-roll dough around chocolate. Make sure no chocolate is showing. Add more dough if necessary. Roll in powdered sugar, then transfer to prepared baking sheet.
  4. Bake until edges are just set, about 8-10 minutes. Do not over bake. Cool completely on cookie sheet. Store in an airtight container at room temperature for up to 1 week.

Notes

*Gluten-free cookies will bake 1-2 minutes faster than if you use white whole wheat flour. Check gf cookies at 7 minutes, and wheat cookies may be in for closer to 11 depending on your oven.

3.1
https://arismenu.com/buckeye-cookies/

PS: Don’t forget to check out the segment this Saturday (12/14) @ 11am AZ time. Local channel 7, cable 13.

Filed Under: Cookies, Dessert, Gluten-free, Holiday & Seasonal, Vegan · Tagged: buckeyes, chocolate, cookies, dessert, gluten free, holidays, peanut butter, recipe, vegan

Vanilla Bean Snickerdoodles + a $500 Amazon Gift Card Giveaway!

December 6, 2013 · by Ari ·

Classic cinnamon sugar snickerdoodle cookies made with bold vanilla sugar. Crunchy on the outside with the perfect soft baked texture inside. Vegan and gluten-free, so almost everyone can enjoy!

Psssst: There is a really sweet giveaway at the end of this post that you don’t want to miss!

Vanilla Bean Snickerdoodles {vegan & gluten-free}

The other day I had a craving for sugar cookies. I almost never make sugar cookies, so it was weird. I asked Steve if he thought that sounded too plain. He thought about it for a second, and then, overly proud of himself for his creative contribution, he said “What about cinnamon sugar cookies???” Silly boy, those are snickerdoodles, and yes, they are awesome.

Vanilla Bean Snickerdoodles {vegan & gluten-free}

I have always been a huge snickerdoodle fan. Have you ever had those huge ones at Paradise Bakery? I can’t even handle them. I’m pretty sure they use something really awful like shortening to get the texture that perfect.

Vanilla Bean Snickerdoodles {vegan & gluten-free}

And can we talk about how my screen keeps yelling at me with that awful red squiggly line every time I type the word snickerdoodle? Snickerdoodle, snickerdoodle, snickerdoodle. I even googled it to make sure I wasn’t spelling it wrong. Get with the program, computer, and stop yelling at me!

Vanilla Bean Snickerdoodles {vegan & gluten-free}

At Healthy Living Summit, my BBFF {blog-best-friend-forever} Nicole gave all the girls in our room this amazing vanilla sugar. It was love at first site smell.

Vanilla Sugar via foodiemisadventures.com

Such a simple idea, but a really easy way to take your baked goods to the next level, especially if you’re as vanilla bean obsessed as I am. More than anything–chocolate, peanut butter, even fro yo, I love all things vanilla bean. It’s such a distinct, clean flavor, and you don’t see it as often as you would think.

Vanilla Bean Snickerdoodles {vegan & gluten-free}

I thought a lot about what I wanted to use it for, and eventually decided snickerdoodles were the perfect vehicle–with the vanilla sugar baked inside and a crunchy, sweet cinnamon vanilla sugar coating, you get the most out of the vanilla flavor. These were some of the best cookies I’ve ever made, and everyone I gave them too was a huge fan. They have the same perfect texture as my chai snickerdoodles that I loved so much, with just the twist of extra vanilla flavor. They are definitely a must for your holiday cookie exchanges!

Print
Vanilla Bean Snickerdoodles

Prep Time: 15 minutes

Cook Time: 10 minutes

Total Time: 25 minutes

Yield: 2 1/2 - 3 dozen

Serving Size: 1 cookie

Vanilla Bean Snickerdoodles

Classic cinnamon sugar snickerdoodle cookies made with bold vanilla sugar. Crunchy on the outside with the perfect soft baked texture inside. Vegan and gluten-free, so almost everyone can enjoy!

Ingredients

  • 2 1/2 cups gluten-free baking blend (or 2 cups white whole wheat flour)
  • 1 1/2 tsp baking soda
  • dash salt
  • 1/2 tsp cinnamon
  • 1/2 cup apple butter
  • 3/4 cup vanilla sugar
  • 1/4 cup pure maple syrup
  • 3 tbsp unsweetened vanilla almond milk
  • 1 tbsp vanilla extract
  • For coating:
  • 1/4 cup vanilla sugar
  • 2 tsp ground cinnamon

Instructions

  1. Preheat oven to 350. Line 2 large baking sheets with parchment paper or silpat.
  2. In a medium bowl, whisk together flour, baking soda, salt and cinnamon. Set aside.
  3. In a large bowl, beat together apple butter, vanilla sugar, maple syrup, and almond milk until well combined. Add vanilla, then add dry ingredients and mix until well combined.
  4. In a wide, shallow bowl, combine remaining vanilla sugar and cinnamon for the coating. Lightly spray hands with nonstick spray, then roll dough into one inch balls. Roll in the sugar mixture to coat completely, then transfer to baking sheet. Repeat with remaining dough.
  5. Bake for 10-12 minutes, until the edges are lightly browned. They may look underdone, but do not over bake. They will set more as they cool. Let stand for 5-10 minutes, then transfer to a wire rack to cool completely.

Notes

If you do not have vanilla sugar, you can easily combine the seeds with 1/2 vanilla bean with your total 1 cup sugar before baking. Mix together thoroughly, then divide out your 1/4 cup for coating.

3.1
https://arismenu.com/vanilla-bean-snickerdoodles/


Giveaway details:
The giveaway will be open from Friday December 6th, 2013 until Wednesday December 11th, 2013 (@ 11:59pm EST). You must be 18 years old to enter and you must live in the USA. One winner will receive a $500 Amazon gift card.

Please check out my fellow healthy recipe blogging buddies that are also hosting! They all have amazing recipe, beautiful photos, and lots of greatness to share with you!

Healthy Seasonal Recipes | Running to the Kitchen | Yeah…imma eat that | The Adventures of MJ and Hungryman | Tasty Yummies | Real Food Whole Health | Texanerin Baking | Beard and Bonnet | With Food + Love | So…Let’s Hang Out | Healthy Green Kitchen

Filed Under: Cookies, Dessert, Gluten-free, Holiday & Seasonal, Vegan · Tagged: cinnamon, cookies, gluten free, snickerdoodles.vanilla, vanilla sugar, vegan

DIY Brownie Mix Jars {gluten-free}

November 21, 2013 · by Ari ·

A simple, easy, DIY gift idea for rich and fudgey gluten-free brownie mix. So easy to make, and a perfect gift for anyone in your life who loves chocolate! Includes dairy-free & vegan options.

DIY Brownie Mix Jars #glutenfree

Every year I do a huge holiday baking day. I usually invite hermano to “help”, and he’ll mix a few things, and then he just lays around…that is until I need a taste tester. 😉

DIY Brownie Mix Jars #glutenfree

I do enjoy it, but I usually end the day totally exhausted and swearing off ever stepping foot in my kitchen again. And don’t even think about getting me to cook dinner. It always ends up being a Chipotle night, even though all I really ever want at the end is greasy, cheesy pizza. But let’s be honest, all I ever want is greasy, cheesy pizza. And chocolate. And fro-yo.

DIY Brownie Mix Jars #glutenfree

The truth is, DIY mixes are so expensive at places like Starbucks or the Hallmark store, and they seem like a novelty item, but they are really easy to put together, far less time consuming than huge batch baking, and really inexpensive. The biggest expense ends up being the jars, but if you go to the dollar store, a thrift store, or hit the clearance section of your craft store, you can get them very reasonably.

DIY Brownie Mix Jars #glutenfree

Not to mention, the store-bought mixes are loaded with refined flours, and often times lots of weird preservatives. By making them yourself, you can control what goes in, and that includes changing things up, and adding your own mix-ins. If you know the person you’re giving it to loves chocolate and peanut butter, you could add some mini peanut butter cups, or Reese’s Pieces.

DIY Brownie Mix Jars #glutenfree

I just joined The Recipe ReDux which is a challenge hosted by dietitians to create unique and delicious recipes that are also healthy. While brownies are still somewhat indulgent, it is the holidays, and these are 100% whole grain, and the butter is replaced with nonfat yogurt. So you can have your cake brownie and eat it too. 😉

I just took my favorite brownie recipe, and layered the dry ingredients in a jar–it literally took less than 5 minutes, and you can easily do the same thing with any of your favorite recipes. I use my gluten-free baking blend, but you could use white whole wheat flour, or almond meal, or any blend of your own. All you need to add are eggs and some nonfat vanilla yogurt–everything else is included. You could also keep it dairy-free by using coconut oil instead of yogurt, or vegan by replacing the eggs with 2 tbsp cornstarch and 1/3 cup almond milk–so it can work for anyone in your life!

Print
DIY Brownie Mix Jars {gluten-free}

Prep Time: 5 minutes

Total Time: 5 minutes

Yield: 16

Serving Size: 1 brownie

DIY Brownie Mix Jars {gluten-free}

A simple, easy, DIY gift idea for rich and fudgey gluten-free brownie mix. So easy to make, and a perfect gift for anyone in your life who loves chocolate!

Ingredients

  • 1 cup + 2 tbsp gluten-free baking blend (or white whole wheat flour
  • dash salt
  • 2/3 cup granulated sugar
  • 2 tbsp brown sugar
  • 2 tbsp cocoa powder, preferably Dutch process
  • 1/2 tsp espresso powder
  • 5 1/2 oz dark chocolate, about 1 scant cup
  • To make brownies:
  • 1/2 cup nonfat vanilla yogurt
  • 2 eggs

Instructions

  1. In a medium bowl, whisk flour and salt together. In a 3.5-4 cup jar, layer ingredients in order listed. You may change the order as long as you leave the chocolate chips on top. Use a tablespoon to smooth down after each layer for the best visual effect.
  2. To make brownies, preheat oven to 350. Line a 9" square pan with aluminum foil and spray with nonstick spray. Set aside.
  3. In a large bowl, melt the chocolate and let cool. Stir in yogurt, whisk eggs in one at a time. Gently fold in remaining ingredients until just combined.
  4. Transfer to prepared baking tin and bake until a toothpick inserted in the center comes out mostly clean with a few crumbs, about 30 minutes. Cool completely in pan then serve. Store in an airtight container for up to 5 days.

Notes

Recipe easily doubled in a larger jar. Feel free to add mix ins of your choosing.

For dairy-free brownies, replace yogurt with melted coconut oil For vegan brownies, also replace egg with 2 tbsp cornstarch and 1/3 cup almond milk.

3.1
https://arismenu.com/diy-brownie-mix-jars-gluten-free/


Filed Under: Brownies & Bars, Dessert, DIY/How To, Gluten-free, Holiday & Seasonal, Vegan · Tagged: brownies, chocolate, christmas, dessert, diy, gifts, gluten free, recipe, vegan

Magic Shell Cups

July 7, 2013 · by Ari ·

Magic Shell Cups #vegan #glutenfree

Remember Dibs? They were so popular when they first came out. Dangerously good, and finally brought ice cream as a “snack” to movie theaters. I was pretty obsessed, but as I’ve mentioned, I’m pretty obsessed with anything that includes ice cream. 😉

Magic Shell Cups #vegan #glutenfree

I tried to make you Dibs. I tried to many ways. I made a mess of my kitchen. Chocolate and fro-yo everywhere. And I’m not one of those roll with the punches people who keeps it cool when things don’t work out. No. I work in an embarrassingly fragile state in the kitchen where I am known to have legit freak out when things don’t turn out the way I want them to. It’s really fun being married to me. 😉

Magic Shell Cups #vegan #glutenfree

Anyway, after several failed attempts, I decided to change things up a little. Last year I was obsessed with making these cups. Then after selling hundreds of them for fundraising and spending pretty much every weekend making them, I decided I never wanted to make a single candy cup again for the rest of my life. Good thing these are ice cream cups instead. They did bring back some painful memories, but man were they worth it in the end!

Magic Shell Cups #vegan #glutenfree

These cups are everything you love about a magic shell ice cream cone in tiny, bite-sized cups that are perfect for when you just want a little bit of sweetness. They are also extremely versatile. You could put rice krispies in the chocolate for some added crunch, you can use any type of ice cream/fro-yo you like (I like it best with nonfat vanilla fro-yo or coconut milk ice cream), you can add sprinkles (no brainer for me!) for color and crunch, and you could even put in some peanut butter, granola or pretzels to add some variety!

Print
Magic Shell Cups

Prep Time: 20 minutes

Total Time: 20 minutes

Yield: 26-30 cups

Serving Size: 2 cups

Magic Shell Cups

Ingredients

  • 20 oz dark chocolate, roughly chopped (or dark chocolate chips)
  • 1 tbsp coconut oil
  • Approx 1 cup ice cream/frozen yogurt of choice (I used coconut milk ice cream and nonfat vanilla fro-yo. If vegan, use coconut milk or other nondairy ice cream.)
  • Sprinkles for topping, optional

Instructions

  1. Line mini muffin tins with paper liners.
  2. In a medium bowl, heat chocolate and coconut oil in the microwave in 20 second intervals, stirring after each, until melted.
  3. Spoon enough chocolate to cover the bottom of each baking cup. Add scant tablespoon fro-yo or ice cream. Cover with more chocolate. Add sprinkles if desired.
  4. Freeze for at least one hour or until set. Cups will stay kept in the refrigerator for up to one month.
3.1
https://arismenu.com/magic-shell-cups/

Filed Under: Dessert, Gluten-free, Holiday & Seasonal, Ice Cream & Fro-yo, Snacks · Tagged: candy, chocolate, cups, dessert, fro yo, gluten free, ice cream, magic shell, recipe, sprinkles, vegan

Bacon Wrapped Gorgonzola Fig Burgers with Balsamic Glaze

June 10, 2013 · by Ari ·

Bacon Wrapped Gorgonzola Fig Burgers with Balsamic Glaze

You can take a moment and judge my insanely long title, per usual. Okay, now that we’ve gotten that out of the way, I’m sure you think I’ve gone off the deep end. When I told my husband what I was making for dinner last week, he raised an eyebrow, and gave me a look that can only be described as “WTF”, then he said “You’re really on a burger kick, aren’t you?”

Bacon Wrapped Gorgonzola Fig Burgers with Balsamic Glaze

Guilty. And I guess after making countless burgers, you have to do something a little weird and put fruit inside. Or at least I do.

Bacon Wrapped Gorgonzola Fig Burgers with Balsamic Glaze

I’m pretty much obsessed with anything sweet and savory. I used to think it was weird, but ever since people starting salting things (I soooo judged that salted caramel hot chocolate at the bux for a good 2 weeks), I haven’t tired of the depth of flavor adding an unexpected taste or ingredient can bring to your dish.

Bacon Wrapped Gorgonzola Fig Burgers with Balsamic Glaze

Did anyone watch that season of Top Chef with the watermelon gorgonzola salad? I don’t remember who made it, but I remember that he tried something unique, something most people would never do. I remember Tom Colicchio hated it, and said it was totally wrong, but Chef Tom ain’t got nothin’ on these burgers. 😉

Bacon Wrapped Gorgonzola Fig Burgers with Balsamic Glaze

I’ve always loved the fig/gorgonzola combo, so I stuffed them inside my burger, then I wrapped that sucker in center cut bacon to add smokiness and some extra bold, salty flavor–wrapped around where it can stand out and be an attention whore, not tucked inside with the lesser-known ingredients. Then to bring it all together, and add an extra hint of sweetness, I reduced some balsamic vinegar on the stove until it was thick, syrupy and sweet. Careful, the fumes are INTENSE (think vinegar straight up your nose), but the end result is totally worth it. A unique burger that you won’t find at you local burger joint, with rich depth of flavor, yet still deceptively simple and easy to put together. There is nothing like it.

Print
Bacon Wrapped Gorgonzola Fig Burgers with Balsamic Glaze

Prep Time: 5 minutes

Cook Time: 30 minutes

Total Time: 35 minutes

Yield: 4 burgers

Serving Size: 1 burger

Bacon Wrapped Gorgonzola Fig Burgers with Balsamic Glaze

Ingredients

    For the burgers:
  • 1 lb extra lean ground beef (96% preferred)
  • 1/3 cup chopped dried mission figs
  • 1/4 cup crumbled gorgonzola cheese
  • pinch each salt and pepper
  • 4 slices center cut bacon
  • For the balsamic glaze:
  • 1/2 cup good quality balsamic vinegar
  • To assemble:
  • 4 whole grain buns (whole wheat, brown rice, etc)
  • 2 roma tomatoes, sliced
  • lettuce of choice

Instructions

  1. Begin with the balsamic glaze by pouring balsamic vinegar into a small sauce pan over high heat. Bring to a boil and reduce to medium-medium high to simmer. Stir occasionally until sauce has reached desired thickness. This took me about 30 minutes for a very syrupy glaze. 20-30 minutes should be all you need. Once desired consistency is reached, remove from heat immediately.
  2. In a large bowl, gently combine ground beef, figs, gorgonzola cheese, salt and pepper until ingredients are just incorporated. Form into 4 equal-sized patties. Press your thumb down into the center of each patty to create a small indent. Wrap each burger with a slice of bacon.
  3. Grill over medium heat beginning with the edge of the bacon side facing down until burgers have reached desired doneness, about 5 minutes each side. Transfer to buns and add lettuce and tomato. Drizzle with balsamic glaze.
3.1
https://arismenu.com/bacon-wrapped-gorgonzola-fig-burgers-with-balsamic-glaze/

Looking for some other burger recipes for summer? Like I said, I’ve been on a bit of a kick…

Buffalo Turkey Burgers

Spicy Chipotle Cheeseburgers

Thai Peanut Turkey Burgers

BBQ Bacon Ranch Burgers


Or if you don’t eat meat, I have a few veggie options too!

Sun-dried Tomato & Basil White Bean Burgers (vegan + gluten-free)

Chipotle Black Bean Burgers (vegan + gluten-free)

Filed Under: Dinner, Entree, Gluten-free, Holiday & Seasonal, Sandwiches, savory, Summer · Tagged: bacon, burger, dinner, figs, gorgonzola, grilling, lunch, recipe, summer

« Previous Page
Next Page »
Image Map

Popular Posts

Tart Cherry Margaritas: The perfect, refreshing margarita--lightly sweet with a punch of tequila

Tart Cherry Margaritas

90+ Healthy Recipes for Breakfast, Lunch, Dinner & Dessert

90+ Healthy Recipes for Breakfast, Lunch, Dinner & Dessert

The Ultimate Peanut Butter Cup Brownie Cookies: Rich, fudgy, brownie-like chocolate cookies stuffed with melty peanut butter cups!

Ultimate Peanut Butter Cup Brownie Cookies

Drink & Dish: Cafe Au Lait Cupcakes

Crockpot Chicken Enchilada Soup

Subscribe via Email:

Enter your email address:

Save an additional $30 on Blendtec Factory Recertified Blenders + Free Shipping

Featured Here

recipe redux
Certified Yummly Recipes on Yummly.com

Member Of…

FitFluential Is Fitness Found
AZ Bloggers Network
az 150 photo az150_zpsfb093d32.gif

Archives


Image Map

Copyright © 2025 | Innovative Child Theme by The Pixelista | Built on the Genesis Framework


Loading Comments...