• Going Out
    • Phx Restaurants
    • How To Order At Starbucks
  • Running
    • My Running Story
    • Race Calendar
    • Race Recaps & Results
  • Blogroll
  • Bucket List
  • Video

Ari's Menu

Little changes making a big difference.

  • Home
  • Recipes
  • Weight Loss
    • My Story
    • Common Swaps
  • Who’s Who
  • Contact
    • Policies & Disclosure
  • Press

Nutella Cheesecake Brownie Bars

March 19, 2012 · by Ari ·

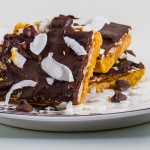
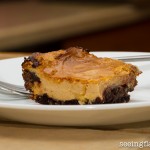
Did you know there are actually people out there who have not tried NUTELLA?!?! That is a shame people. A big, huge, fat shame. Let’s change that by mixing it with cream cheese, sugar, and brownies. Then proceeding to eat the remaining Nutella straight from the jar. Sound like a good plan?

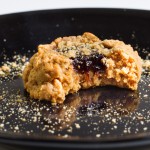
These cheesecake brownie bars are based very closely off my Peanut Butter Cheesecake Brownie Bars, but super chocolatey, and the hazelnut flavor in the Nutella is especially delicious. I gave most of them away (Happy belated birthday KT!!), but the ones in my house didn’t last long 😉

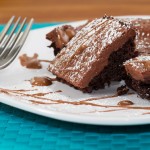
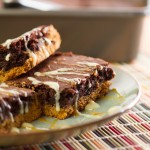
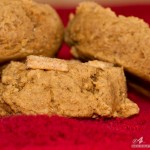
Nutella Cheesecake Brownies Bars

yield approx 30

For the brownie layer:

  • 1 box No Pudge brownie mix or TJ’s Reduced Guilt brownie mix
  • 1 6oz container Yoplait Light fat free red velvet yogurt

For the cheesecake layer:

  • 8oz fat free cream cheese
  • 1/4 cup fat free plain Greek yogurt
  • 1 box fat free, sugar free chocolate pudding mix
  • 2/3 cup granulated
  • 1/2 cup Nutella
  • 1/2 cup unsweetened vanilla almond milk
  • 1 tsp vanilla extract
  • 1/2 tsp almond extract

Directions:

  1. Preheat oven to 350. Spray a 9×13 baking pan well with nonstick spray. Set aside.
  2. In a medium bowl, combine brownie mix and yogurt. Spread in a thin layer to coat the bottom of your baking pan.
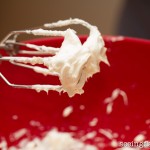
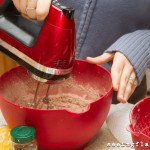
  3. In a large bowl, beat cream cheese, Greek yogurt, pudding mix, sugar, Splenda, and Nutella. Add almond milk, and extracts. Beat until smooth and creamy.
  4. Spread cheesecake mixture evenly over brownie mixture.
  5. Bake for 80-90 minutes until cheesecake layer is set in the center. Yes, that is quite a long time. You may want to pour yourself a glass of wine and catch up on bad reality tv.
  6. Cool on wire rack for 30 minutes, then transfer to refrigerator to cool completely.

Filed Under: Brownies & Bars, Dessert · Tagged: baking, brownies, cheesecake, chocolate, dessert, nutella, recipe

Fro Yo Cake with Nutella Cookie Crust

March 12, 2012 · by Ari ·

Remember this birthday cake gem that Steve got me from Yogurtology?

That cake was perfection. More delicious than ice cream cake, but fro yo, so that makes it healthy, right? Riiiiiight.

What’s even better than a perfectly prepared oatmeal cookie fro yo cake made with love by a Yogurtology employee? One made with more love by ME!

With a butter cookie crust, layers of Nutella and TJ’s Cookie Butter, and topped with Yogurtology’s pretty much famous oatmeal cookie fro yo, this may not be the healthiest cake I’ve ever made, but when you compare to a typical ice cream cake, it definitely can at least hold up to a healthier title, and let me tell you, I would choose this over a regular ice cream cake any day of the week!

Fun fact, ice cream has always been my favorite dessert. I *almost* never eat it now, because I love fro yo so much and never really want to spend the extra calories, but I am of the opinion that if it doesn’t at least include ice cream, it’s not really a dessert. Plain cookie? That’s a snack 😉 Cookie a la mode? Mmmmm….dessert! Fro yo with cookie, Nutella and cookie butter? 3x a day for the rest of my life? Okay….If you insist….

Can we also talk about how this cake takes all of like 20 minutes to make? So easy, and ridiculously hard to mess up! Trust me, I can usually mess up anything 😉

Fro Yo Cake with Nutella Cookie Crust

yield approx 16 slices

  • 1 package Chessman cookies (or any buttery shortbread type cookie), finely crumbled
  • 1/4 cup apple butter
  • 1/2 cup + 2 tbs Nutella, melted & divided
  • 1/3 cup TJ’s cookie butter (or Biscoff spread), melted
  • 1 quart + 1 cup fro yo of choice, softened but not melted

Directions:

  1. Preheat oven to 350. Spray a spring form pan with cooking spray, then wrap tin foil around the bottom to avoid fro yo dripping out.
  2. In a medium bowl, combine cookie crumbs (reserving 1-2 tbs to sprinkle on top) with apple butter. I suggest just using your hands and getting in there.
  3. Press cookie and apple butter mixture into the bottom of the spring form pan and bake for 8-10 min, until set.
  4. Cool for 10-15 minutes, then spread Nutella on top. Let sit for a minute before brushing cookie butter on top of Nutella.
  5. Use a spatula to evenly spread the fro yo on top.
  6. Drizzle with Nutella and sprinkle with remaining cookie crumbs.
  7. Freeze for 2-3 hours until set, then serve and enjoy!

Filed Under: Cakes & Pies, Dessert, Ice Cream & Fro-yo · Tagged: cake, cookie butter, dessert, fro yo, nutella, recipe, yogurtology

Gluten Free Almond Joy Cupcakes

February 20, 2012 · by Ari ·

Happy belated birthday to my super, awesome, lovely, beautiful friend Carolyn! If you haven’t checked out this girl’s blog, you really should. Her work outs are amazing, and she has been a total inspiration to me ever since I met her! She is also super sweet and a truly amazing friend.  She eats gluten free, and I always feel bad that when I make desserts for things, she can never eat them. So Nicole and I put our heads together to plan out some awesome surprise birthday cupcakes for her. Well, then poor Nicole got sick, but still gave me all of the fantastic ingredients I needed to carry out our plan!

My friend Christina sent me a recipe for gluten free coconut cupcakes that I used as a base. I’m not sure who it’s originally from, so dear person who created it, if you read this lil ole blog, please tell me so I can be like “Hey readers! All 3 of you! Go look at ______’s awesome recipes”. Thanks in advance. I’m a big fan of your recipe!

I altered the recipe a bit to make it healthy(ish) and put some of my own touches in. Also, Nicole gave me all of these gf flour options, so I ended up getting a little accidentally creative on the flour mix, but I think it was pretty much the happiest accident ever.

Sometimes gluten free things come with weird textures, but not these babies. Friends and family scarfed them down, and my step dad called them the best cupcakes I’ve ever made! Who knew creating recipes around different diets could be so fun? It makes me want to explore more with gf, vegan, paleo and any other fancy diet recipes. I found that I really like creating things for people who eat a certain way and may not always have foods on their plan provided.

Gluten Free Almond Joy Cupcakes

yield 24 cupcakes

For the coconut cupcakes:

  • 1 cup raw cane sugar
  • 1 cup Splenda
  • 1 cup egg substitute
  • 2 1/2 cups brown rice flour mix (see below)
  • dash salt
  • 1 tbs baking powder
  • 1 tsp xanthan gum
  • 1 cup unsweetened apple sauce
  • 1 cup unsweetened coconut vanilla almond milk
  • 1 teaspoon pure vanilla extract
  • 1 teaspoon coconut extract

Brown rice flour mix:

  • 1 cup brown rice flour
  • 1 cup sweet white sorghum flour
  • 2/3 cup potato starch (not potato flour)
  • 1/3 cup tapioca flour

Directions:

  1. Preheat oven to 350. Line 2 muffin tins with cupcake liners and lightly spray with nonstick spray.
  2. Beat sugar, Splenda, and egg substitute at medium speed for approx 1 min. Add in all remaining ingredients and beat at medium speed for 1 min.
  3. Evenly divide the batter between your 24 lined cups. Each one should be about 2/3 full.
  4. Bake for 18-20 min, until top springs back when you press lightly on the middle, or toothpick inserted in center comes out mostly clean.
  5. Cool completely on wire rack, then frost with chocolate almond cream cheese frosting.

For the Chocolate Almond Cream Cheese Frosting:

yield enough to frost at least 24 cupcakes

adapted from How Sweet It Is (I love pretty much every single one of her recipes)

  • 3 x 8 oz blocks reduced fat cream cheese (you could also use fat free, I just had red fat on hand)
  • 3/4 cup unsweetened cocoa powder
  • 3 cups powdered sugar
  • 2 1/2 oz grain sweetened chocolate chips, melted and cooled
  • 1-2 tsp almond extract

Directions:

  1. Beat cream cheese on medium speed in a stand mixer until smooth. Add almond extract.
  2. On low speed, add in powdered sugar 1/2 cup at a time, followed by cocoa powder.
  3. Increase to medium speed and add melted chocolate.
  4. Beat until smooth, scraping down sides of bowl often.
  5. Frost and enjoy!

Optional Toppings:

  • raw sugar
  • almonds
  • shredded coconut


Filed Under: Cupcakes, Dessert, Gluten-free · Tagged: almond, almond joy, baking, chocolate, coconut, cupcakes, dessert, gluten free, recipe

Cookie Butter Brownie Bars

February 17, 2012 · by Ari ·

Please don’t tell me you’re sick of the cookie butter already. You can’t be. This is only recipe #2. In fact, recipe #1 happened because the first time I tried this recipe it absolutely failed. I mean, it was delicious, but the brownies didn’t bake all the way through, and you couldn’t get it out of the pain, so you kind of had to sit there with a fork chowing down on a 9×13 pan of gooey half baked goodness. It kind of became a problem, and I had to give them away–well give it away, since it was kind of like one big bar. Anyway, I knew I was onto something with the taste, so I tried again.

Try #1 went brownie batter on bottom, cookie butter bar layer on top, bake. Try #2 included baking the brownie layer a little bit first, but still somehow came out looking like try #1. Third time’s a charm, I guess 😉

Cookie layer on the bottom because brownies cook more slowly–duhhh, Ari! The result? Gooey, brownie, cookie butter deliciousness that can actually be plated and served. See?


Cookie Butter Brownie Bars

yield approx 32 bars

  • 1 box TJ’s reduced guilt brownie mix or No Pudge Brownie Mix
  • 6oz nonfat vanilla yogurt (some other flavors also taste good mixed with brownie like red velvet–yum!)
  • 1 cup cookie butter
  • 1/2 cup apple butter
  • 1/2 cup packed brown sugar
  • 1/2 cup + 2 tablespoons granulated sugar
  • 1 teaspoon vanilla
  • 1/4 cup unsweetened vanilla almond milk
  • 1 tsp baking soda
  • 1 1/2 cups white whole wheat flour
  • white chocolate and caramel for drizzling (optional)

Directions:

  1. Preheat oven to 350. Spray to 9×9 baking pans with nonstick spray. Set aside.
  2. Combine brownie mix and yogurt. Set aside.
  3. Beat together cookie butter, apple butter, brown sugar, Splenda, vanilla, milk and baking soda. Slowly beat in flour.
  4. Divide cookie butter dough in half and press into the bottom of each 9×9 baking pan. Smooth out the top as much as possible.
  5. Evenly divide the brownie batter between the two pans, using a spatula to smooth on top.
  6. Bake for 18-22 minutes until a toothpick inserted in the center comes out mostly clean. Careful not to over bake–you still want a little gooeyness in the middle, but you want everything set enough to come out neatly.
  7. Cool on a wire rack, then slice and drizzle with white chocolate and caramel if desired.


Filed Under: Brownies & Bars, Dessert · Tagged: baking, bars, brownies, cookie butter, dessert, recipe, speculoos, trader joe's

Cookie Butter Bars

February 15, 2012 · by Ari ·

Did you hear the news??? Trader Joe’s cookie butter is back! Please don’t ask how many jars I’ve gone through. It’s a little embarrassing. But, honestly, with bars like these, can you blame me? With cookie butter and apple butter, who needs actual butter? These bars have all of the delicious flavor of cookie butter and come as a cross between a cake and a cookie. Like a cookie cake. Cookies + cake + cookie butter. Yes, please.

These were my birthday treat to myself. And everyone (including our waitress) at Barrio Cafe 😉 I hope you enjoy them too!


Cookie Butter Bars

yield approx 30 bars

  • 1 cup TJ’s cookie butter
  • 1/2 cup apple butter
  • 1/2 cup packed dark brown sugar
  • 1/2 cup + 2 tbs Splenda
  • 1 tsp vanilla
  • 1/4 cup unsweetened vanilla almond milk
  • 1 tsp baking soda
  • 1 1/2 cups white whole wheat flour

Directions:

  1. Preheat oven to 350. Spray 9×13 baking dish with nonstick spray. Set aside.
  2. Beat together cookie butter, apple butter, brown sugar, Splenda, vanilla, milk and baking soda.
  3. Slowly, beat in flour.
  4. Press batter evenly into pan. Use a rolling pin to smooth out top.
  5. Bake for 18-22 min until set and a toothpick inserted in the center comes out mostly clean. Do not over bake.
  6. Cool completely on wire rack, then top with white chocolate cream cheese frosting and sprinkles if desired.

White Chocolate Cream Cheese Frosting

yield enough to cover 9×13 pan of baked goods

  • 14 oz reduced fat cream cheese, at room temperature
  • 1 1/2 tbs light, whipped butter, at room temperature
  • 1/3 cup Sunspire white chocolate chips, melted
  • dash almond extract
  • 1 cup powdered sugar (you may add more–I don’t like my frosting to be too sweet)

Directions:

  1. Beat together butter and cream cheese. Beat in white chocolate and almond extract.
  2. Slowly add and beat in powdered sugar, scraping down sides of bowl when necessary.
  3. Spread evenly on top of desired baked good, and enjoy!


Filed Under: Brownies & Bars, Dessert · Tagged: bars, cookie butter, cookies, frosting, recipe, trader joe's

Peanut Butter & Jelly Cookies

February 6, 2012 · by Ari ·

You guys. You don’t even understand. I think this might be my favorite thing I have ever made. Ever. I would rather eat 1 of these than 10 full fat Paradise Bakery cookies. I took one bite and between the perfectly crunchy outside, softy doughy inside, and warm sweet jelly, I was pretty much in cookie heaven. I think this honey apple butter is pretty much the best butter substitute I have ever used. Thanks Carolyn!

I also made these start to finish in about half an hour. They were so easy. It was one of those rare baking times where everything just turns out the way you want it. Happy birthday to me!

Adapted from Pip & Ebby

Peanut Butter & Jelly Cookies

yield approx 16 cookies

  • 1/4 cup apple butter
  • 1/2 cup peanut butter
  • 1/4 cup packed dark brown sugar
  • 1/4 cup + 1 tbsp turbinado sugar
  • 1 1/2 tbs unsweetened vanilla almond milk
  • 1 tsp vanilla extract
  • 1/2 tsp baking soda
  • dash salt
  • 3/4 cups white whole wheat flour
  • approx 8 tbsp jelly/jam of choice (I used reduced sugar grape, no sugar added blackberry, and fig butter and I loved all 3)
  • 2-3 tbs whole wheat graham cracker crumbs

Directions:

  1. Preheat oven to 375.
  2. In a medium bowl, beat apple butter, peanut butter, sugars, almond milk and vanilla.
  3. Beat in baking soda and salt. Beat in flour until combined.
  4. Use a cookie scoop or sprayed tablespoon to drop cookies onto a large baking sheet.
  5. Using your thumb, press down into the center of each cookie dough ball. Fill each center with jelly of choice. Sprinkle all cookies with graham cracker crumbs
  6. Bake for 10 minutes. Let stand for 2 minutes, then transfer to wire rack.


Filed Under: Cookies, Dessert · Tagged: baking, cookie, dessert, jelly, peanut butter, recipe, whole grain

Skinnified Sunday: Samoa Cookie Bars

February 4, 2012 · by Ari ·

You know what? I have not bought a single box of girl scout cookies this year. I mean, I won’t pretend that no matter how many copy cats I make, I don’t still want to eat an entire sleeve of thin mints, but I have to say I have really been enjoying the flavors I love + the freshly baked at home taste that no cookie in a box can ever duplicate. I have a confession. I might actually like these better than real samoas! Sometimes the real ones are just a tad too sweet (if that’s even possible) for my taste, and I felt like these don’t taste healthy at all, just more natural in flavors. I taste real coconut and dark chocolate and I love that.

Original recipe:

My swaps:

  • 1/2 recipe
  • Pumpkin and light whipped butter for butter (-fat, -saturated fat, -calories, -cholesterol)
  • Sugar/Splenda combo for sugar (-sugar, -calories)
  • Egg substitute for egg (-fat, -calories, -cholesterol)
  • Extra vanilla (+yum)
  • Unsweetened coconut (It didn’t specify, but it was hard to find just plain ole coconut. -calories, -sugar)
  • Low fat caramel sauce for chewy caramels (-fat, -calories)
  • Grain sweetened chocolate chips for regular, and less of them (-calories, -sugar)

Skinnified Somoa Cookie Bars

yield 16 bars

for the cookie layer

  • 2 tbs turbinado sugar
  • 2 tbs Splenda
  • 1/4 cup pumpkin
  • 2 tbs light whipped butter, softened
  • 2 tbs egg substitute
  • 1 tsp vanilla extract
  • 1 cups white whole wheat flour
  • dash salt

for the topping

  • 1 1/2 cups unsweetened flake coconut, toasted**
  • 3/4 cup low fat caramel sauce
  • 1/3 cup grain sweetened chocolate chips
  • 1-2 tbs unsweetened coconut almond milk (or any milk)
  • dash coconut extract (optional)

Directions:

  1. Preheat oven to 350. Grease 8×8 pan with nonstick spray. Set aside.
  2. In a large bowl, beat butter, pumpkin, Splenda and sugar together. Beat in vanilla and egg substitute.
  3. Add salt and flour and mix until combined. Dough will be slightly crumbly and may not all come together.
  4. Press dough into greased pan, smoothing with a spatula.
  5. Bake for 20 minutes, then place on wire rack to cool completely.
  6. Spread caramel sauce on top, followed by coconut flake.
  7. In a small microwave safe bowl, heat chocolate chips, milk, and coconut extract in increments of 15 seconds, mixing after each increment until melted. Carefully, spread on top of caramel/coconut layer using a spatula.
  8. Freeze for 2 hours for caramel sauce to set, then transfer to refrigerator, or keep frozen if desired.

**I toasted my own coconut by placing it in a nonstick pan over medium-low heat until golden. Careful to stir constantly and do not burn.


Filed Under: Brownies & Bars, Dessert · Tagged: baking, cookies, girl scout cookies, recipe, samoas, skinnified

Cinnamon Toast Graham Cracker Cookies

January 31, 2012 · by Ari ·

I have a lot of ideas. Sometimes they turn out okay, sometimes they turn out terrible, and sometimes I want to bring cookies to absolutely everyone I know so that they can enjoy the deliciousness. Sometimes I even surprise myself with how delicious something can be, while still being moderately healthy. I mean, these aren’t a great source of nutrients. They are dessert. However, with only 1/4 cup of light butter and 1/2 cup of sugar in the entire batch + being whole grain, I’d say they’re not too shabby on the health scale.

What's that you say? Each of those big gooey cookies only has 75 calories? Oh okay, then I feel less bad about the 3 I demolished today 😉

My very favorite thing about the way these came out is the texture. Slightly crunchy on the outside, while gooey and doughy on the inside with the crunch of graham cracker throughout and an extra crunch of cinnamon cereal on top. Happy birth week to me!!!! Yes, I like to celebrate my birth for months weeks at a time. What can I say? I love my life, and I feel like it’s something to celebrate. To celebrate you wonderful people who are in my life, the goal is to do lots of baking this week. My way of saying you all make my life feel worth celebrating!

Cinnamon Toast Graham Cracker Cookies

yield about 2 dozen cookies

inspired by this recipe

  • 1/4 cup light whipped butter, softened
  • 1/4 cup fat free cream cheese, softened
  • 1/4 cup honey apple butter (I was out of apple sauce and I ended up LOVING this substitution!)
  • 1/2 cup packed dark brown sugar
  • 1/3 cup Splenda
  • 1/4 cup egg substitute
  • 2 tsp vanilla extract
  • 1 1/4 cups white whole wheat flour
  • 1 cup cinnamon whole wheat graham cracker crumbs
  • 1-2 tsp cinnamon
  • dash salt
  • 1/2 tsp baking soda
  • approx 48 pieces organic whole grain copy cat of Cinnamon Toast Crunch (my fav is Cascade Farm Cinnamon Crunch)

Directions:

  1. Preheat oven to 375.
  2. Beat butter, cream cheese and apple butter together in a large bowl.
  3. Add brown sugar and Splenda, and beat until fluffy.
  4. Beat in vanilla, egg substitute, cinnamon, and baking soda.
  5. Add flour and graham cracker crumbs and beat until just combined.
  6. Use a cookie scoop (or your hands) to drop dough onto a large baking sheet in about tablespoon amounts. This dough is not super sticky, so you could also just spray a wide tablespoon and use that.
  7. Flatten slightly and press 2 pieces of cinnamon cereal on top of each cookie.
  8. Bake 8-10 minutes until just set, then remove and let stand 5-10 minutes to finish baking themselves.
  9. Transfer to wire rack and cool completely.

Filed Under: Uncategorized · Tagged: baking, cereal, cinnamon, cookies, graham crackers, recipe

Skinnified Thin Mint Cookies

January 24, 2012 · by Ari ·

Remember when I said in celebration of being self hosted I was going to post a recipe??? Taaaaaddddaaaa!

When I saw a post on facebook yesterday announcing it was Girl Scout Cookie Season (yes, this is an event in my mind), I was equally excited and dreadful. Does anyone else harbor memories of eating an entire sleeve in one sitting straight out of the freezer? What? You exercise self control and don’t freeze your girl scout cookies? Well, I think you’re weird. Those things are addicting! In an attempt to satisfy my craving, I made my own skinnified version. I was pretty nervous, but I have to say they turned out pretty awesome. Chocolate, minty, and almost fudge like. They aren’t quite as crispy and crumbly as the original, but the flavors are 100% there, and I feel like they have more of a fresh baked feel, which I prefer anyway.

I used this recipe for inspiration, but ended up changing a lot of things. They suggested rolling the dough into a log (which looked so terrible I refuse to post pictures) and slicing which I tried, but then also tried my roll and smoosh technique which I actually thought were prettier.

See the difference? If you like the cut look better, then when you refrigerate them, shape the dough into a big log and wrap in plastic wrap, but I think the smooshy ones look more like actual thin mints.

Skinnified Thin Mint Cookies

yield approx 30 cookies

For the cookies:

  • 5 oz fat free cream cheese, at room temperature
  • 1 tbs light whipped butter, at room temperature
  • 1/4 cup raw cane sugar
  • 1/4 cup Splenda
  • 2 tbs egg substitute
  • dash vanilla extract
  • scant 1/2 tsp peppermint extract
  • 3/4 cup white whole wheat (or whole wheat pastry, or whatever you want) flour
  • 1/4 cup + 2 tbs Dutch process cocoa powder (regular unsweetened chocolate will work if you don’t have Dutch process)**
  • dash salt

For the coating:

  • 1/3 cup grain sweetened chocolate chips
  • 1 tsp light whipped butter
  • dash peppermint extract

Directions:

  1. In a medium bowl, whisk together flour, cocoa powder and salt. Set aside.
  2. In a large bowl, beat together cream cheese, butter, sugar and Splenda. Beat in vanilla, peppermint and egg substitute.
  3. Slowly beat dry ingredients into cream cheese mixture, scraping down sides of bowl when necessary. Dough will be thick.
  4. Cover and refrigerate for 2 hours, or even overnight.
  5. Preheat oven to 350. Line a large baking sheet with parchment paper.
  6. Take about a tablespoon of dough at a time and roll in your hands to make a ball, then flatten to about 1/4″ thickness.
  7. Bake for 12-15 min. Cool completely.
  8. Microwave chocolate chips and butter in 20 second spurts, stirring after each time until melted. Stir in peppermint.
  9. Cover cookies completely with melted chocolate and allow to cool on parchment paper.

Talk about wanting to lick the beater! Yesssss please! Just so you know, this is only about half of the dry mixture added. It should not look like this before you bake it.

I experimented, and frosted just the tops of some and covered the entire cookie on others. It's better if you cover the entire cookie. More chocolate = better cookie. As if there could really be any other result.

Happy Girl Scout Cookie Season!

Filed Under: Uncategorized · Tagged: girl scout cookies, recipe, skinnified, thin mints

Peanut Butter Chocolate Chip Cheesecake Brownies

January 18, 2012 · by Ari ·

Well, you know I just haaaaddd to make myself a special dessert to celebrate my half marathon 🙂 Recently, I stumbled across this recipe for Reese’s Cheesecake Brownies–ummm, yes please! Naturally, I couldn’t wait to make my own skinnified version! Let me tell you, these babies do not taste one bit skinny! Luckily, I gave half the pan to Kara, otherwise things would be dangerous in my house right now!

Take gooey, fudgey, rich brownie and top it with creamy, peanut buttery cheesecake goodness and you get one of the most delicious desserts that’s ever come out of this kitchen! I wish I could share some of them with you right now. The only thing I love more than making delicious food is sharing it! And did I mention that the prep time took me about 10 minutes? So unbelievably easy, and guaranteed to be a huge hit.

Peanut Butter Chocolate Chip Cheesecake Brownies

yield approx 30

For the brownie layer:

  • 1 box No Pudge brownie mix or TJ’s Reduced Guilt brownie mix
  • 1 6oz container Yoplait Light fat free red velvet yogurt

For the cheesecake layer:

  • 8oz fat free cream cheese
  • 1/4 cup fat free plain Greek yogurt
  • 1 box fat free, sugar free cheesecake pudding mix
  • 2/3 cup raw cane sugar
  • 1/2 cup PB & Co White Chocolate Wonderful
  • 1/2 cup unsweetened vanilla almond milk
  • 1 tsp vanilla extract
  • 3/4 cups Sunspire chips (I used 1/4 cup chocolate, 1/2 cup white chocolate, but any combo would be good and they even have ones that are like m&m’s now!)

Directions:

  1. Preheat oven to 350. Spray a 9×13 baking pan well with nonstick spray. Set aside.
  2. In a medium bowl, combine brownie mix and yogurt. Spread in a thin layer to coat the bottom of your baking pan.
  3. In a large bowl, beat cream cheese, Greek yogurt, pudding mix, sugar, sugar, and peanut butter together. Add almond milk, and vanilla. Beat until smooth and creamy.
  4. Fold in chocolate chips.
  5. Spread cheesecake mixture evenly over brownie mixture.
  6. Bake for 50-60 minutes until cheesecake layer is set in the center.
  7. Cool on wire rack for 30 minutes, then transfer to refrigerator to cool completely.

Hellloooo, lover.

Is there any better nut butter for baking than White Chocolate Wonderful? If you find one, please send it this way.

Come closer, closer, like inside my stomach close.

Filed Under: Brownies & Bars, Cheesecake, Dessert · Tagged: baking, brownies, cheesecake, chocolate, food, pb&co, peanut butter, recipe, white chocolate wonderful

Barbecue Ranch Bacon Cheeseburger Meatloaf

January 9, 2012 · by Ari ·

You know those barbecue bacon cheeseburgers that you can order at all those greasy hamburger restaurants, and then you smother ranch all over it and it’s even more delicious? This is like that. Only healthy 😉

When I was in NYC, we ate at a restaurant called Chelsea Grill per Mac’s suggestion. On the menu they had “Bacon Wrapped Meatloaf”. Now, I am not the type of person that orders that at a restaurant. Lots of healthy eating folks could, but knowing I could make it so much healthier at home would stress me out. So instead, I did just that and oh my gosh, it was so amazing. I would make it again and again and again. The cheese on top got the perfect amount of melty and the bacon on top got perfectly crispy. It was just like the type of cowboy burger you’d order at a restaurant. In fact, if you made it as a burger, it would also be healthy and delicious!

I made 2 meatloaves for 5 peoples plus roasted sweet potatoes and there wasn’t a single bite left at the end of the night. I was totally looking forward to leftovers this week, but I’ll take the lack thereof as a compliment about my awesome cooking!

Barbecue Ranch Bacon Cheeseburger Meatloaf

yield 4-6 servings

  • 1 1/2 lbs extra lean ground beef/turkey (at least 93% lean)
  • 1/2 cup egg substitute
  • 3/4 cup unsweetened almond milk
  • 2/3 cup raw oats
  • 1/2 cup finely chopped onion
  • generous pinch each of salt, garlic pepper, and your favorite burger seasoning
  • dash ranch reasoning
  • 1/4-1/3 cup reduced fat sharp cheddar cheese
  • 3 slices center cut or turkey bacon

For the sauce:

  • 3/4 cup nonfat plain Greek yogurt
  • 3-4 tbs barbecue sauce
  • 1 1/2 tsp ranch seasoning

Directions:

  1. Preheat oven to 400. Line a cookie sheet with tin foil and spray with nonstick spray.
  2. In a large bowl, whisk together egg substitute, almond milk, and seasonings. Mix in onion and oats.
  3. Add meat **this is the fun part!!** and use your hands to thoroughly combine. (Note: you may add the cheese at this time if you wish. I didn’t, but I imagine it would be especially delicious if you mixed it in and put it on top 🙂 )
  4. Using your hands, remove meat mixture from bowl and make a loaf shape on your prepared cookie sheet.
  5. Top with cheese, then bacon slices.
  6. Bake for 1 hour, or until cooked throughout.
  7. Meanwhile, in a small bowl, whisk together all sauce ingredients. Heat in microwave for 45-60 seconds when meat if ready.
  8. Serve meatloaf and top with barbecue ranch sauce.

To be fair, I made 2 different kinds of meatloaf. Obviously, this is the one on the right 😉

I discovered through the picture process that meatloaf is, in fact, kind of an ugly food. Sorry about that. But I promise you it tastes delicious!

Filed Under: Entree, Gluten-free · Tagged: bacon, barbecue, cheese, meatloaf, ranch, recipe

Skinnified Sunday: Salted Caramel Toffee Crunch Cupcakes

January 1, 2012 · by Ari ·

Happy New Year! Let’s celebrate and make cupcakes! 😉

If there is one thing I really love in a baked good, it’s probably toffee bits. Before the days of the skinnified baking, I would bake the most amazing cookies that had chocolate chips, butterscotch chips, and toffee bits. If you ever feel like baking something delicious and not healthy, just follow the Nestle Tollhouse chocolate chip cookie recipe, add butterscotch chips and toffee bits. So delicious. But you know what’s also delicious and has toffee???? These cupcakes! And they are so much healthier and come with a salted caramel frosting that is more delicious than my beloved salted caramel hot chocolate. I sent some home with my mom and got a text from Hank an hour later asking “Where are the rest of the cupcakes?” I also loved when Jacob announced how great they were with a line of chocolate smearing his teeth. He’s classy. So in case you’re not already in the Christmas sugar coma, here you go 😉

Inspired by Toffee Crunch Cupcakes from Annie’s Eats

Original Recipe:

For the cupcakes:
2 cups all-purpose flour
¾ cup unsweetened cocoa powder
1 tbsp. espresso powder
1 tsp. baking soda
½ tsp. salt
2 cups sugar
1 cup (2 sticks) unsalted butter, at room temperature
4 large eggs, at room temperature
2 tsp. vanilla extract
1 cup brewed coffee
1 cup toffee bits

For the ganache and toffee layer:
8 oz. bittersweet chocolate, finely chopped
1 cup heavy cream
3 tbsp. unsalted butter, at room temperature
1½-2 cups toffee bits

For the frosting:
5 large egg whites
1½ cups sugar
4 sticks unsalted butter, at room temperature
½ tsp. coarse salt
1 tbsp. vanilla extract
1/3 cup caramel sauce

My Swaps:

  • 1/2 recipe
  • Less sugar/some Splenda (-sugar, -calories)
  • Applesauce for butter (-fat, -saturated fat, -calories, -cholesterol)
  • Egg substitute for eggs (-fat, -calories, -cholesterol)
  • Less quantity of ganache and toffee layer (-fat, -sugar, -calories)
  • Grain sweetened chocolate chips  for bittersweet chocolate (-sugar, -calories)
  • 2% milk for heavy cream (-fat, -saturated fat, -calories)
  • Light whipped butter for regular (-fat, -calories)
  • Original salted caramel cream cheese frosting (-fat, -calories)

Skinnified Toffee Crunch Cupcakes

yield 15 cupcakes

For the cupcakes:

  • 1 cup all-purpose flour
  • 1/4 cup + 2 tbs unsweetened cocoa powder
  • 1 packet Starbucks via
  • 1/2 tsp baking soda
  • dash salt
  • 1/2 cup raw cane sugar
  • 1/3 cup Splenda
  • 1/2 cup unsweetened applesauce
  • 1/2 cup egg substitute
  • 1 tsp vanilla extract
  • 1/2 cup strong brewed coffee
  • 1/2 cup toffee bits

For the chocolate toffee layer:

  • 1/4 cup grain sweetened chocolate chips
  • 1/2 tbs light whipped butter
  • 1 tsp vanilla extract
  • 1-3 tbs 2 % milk
  • 1/4 cup toffee bits

For the Salted Caramel Cream Cheese Frosting:

  • 4 oz red fat cream cheese
  • 1 tbs light whipped butter
  • 1 tsp vanilla extract
  • 1 1/2 tbs Fleur de Sel caramel
  • 1/2 cup powdered sugar
  • Fleur de Sel or sea salt for sprinkling

Directions:

  1. Preheat oven to 350. Line muffin tins with paper liners and spray with nonstick cooking spray.
  2. Whisk together flour, cocoa powder, via, baking soda and salt. Set aside.
  3. In a large bowl, beat together applesauce, sugar and Splenda. Add in vanilla and egg substitute.
  4. Slowly alternate beating in dry ingredients with coffee, starting and ending with dry ingredients.
  5. Fold in toffee bits.
  6. Fill liners 2/3-3/4 full and bake for 16-20 minutes until toothpick inserted in center comes out clean.
  7. Let stand for 5 minutes, then transfer to wire rack to cool completely.
  8. Melt chocolate, vanilla and butter for next layer in a microwave safe bowl stirring every 30 seconds until melted. Slowly add in milk until it reaches a smooth and creamy consistency.
  9. Using a butter knife, spread a small amount of chocolate on each cupcake. Sprinkle with a pinch of toffee bits.
  10. Begin frosting by using a hand mixer, beat together cream cheese, butter and vanilla.
  11. Beat in caramel.
  12. Slowly add in powdered sugar (use more or less depending on desired sweetness).
  13. Frost cupcakes. Sprinkle with Fleur de Sel or sea salt.


Filed Under: Uncategorized · Tagged: caramel, chocolate, cupcakes, fleur de sel, recipe, skinnified, toffee

« Previous Page
Next Page »
Image Map

Popular Posts

Tart Cherry Margaritas: The perfect, refreshing margarita--lightly sweet with a punch of tequila

Tart Cherry Margaritas

90+ Healthy Recipes for Breakfast, Lunch, Dinner & Dessert

90+ Healthy Recipes for Breakfast, Lunch, Dinner & Dessert

The Ultimate Peanut Butter Cup Brownie Cookies: Rich, fudgy, brownie-like chocolate cookies stuffed with melty peanut butter cups!

Ultimate Peanut Butter Cup Brownie Cookies

Drink & Dish: Cafe Au Lait Cupcakes

Crockpot Chicken Enchilada Soup

Subscribe via Email:

Enter your email address:

Save an additional $30 on Blendtec Factory Recertified Blenders + Free Shipping

Featured Here

recipe redux
Certified Yummly Recipes on Yummly.com

Member Of…

FitFluential Is Fitness Found
AZ Bloggers Network
az 150 photo az150_zpsfb093d32.gif

Archives


Image Map

Copyright © 2026 | Innovative Child Theme by The Pixelista | Built on the Genesis Framework


Loading Comments...