• Going Out
    • Phx Restaurants
    • How To Order At Starbucks
  • Running
    • My Running Story
    • Race Calendar
    • Race Recaps & Results
  • Blogroll
  • Bucket List
  • Video

Ari's Menu

Little changes making a big difference.

  • Home
  • Recipes
  • Weight Loss
    • My Story
    • Common Swaps
  • Who’s Who
  • Contact
    • Policies & Disclosure
  • Press

Skinnified Sunday: Pumpkin Spice Latte Cupcakes

September 30, 2012 · by Ari ·

Every day is a pumpkin day in the blog world this time of year. Luckily (for me, maybe not for you), I am obsessed with pumpkin. I buy canned pumpkin year round, and eat it almost every day. Weird? Well, yes….I am, but pumpkin is one of my favorite flavors, plus it has tons of health benefits and is a great substitute for oil in baked goods!

I confess, I’ve already started adding pumpkin to my coffee drinks, and cheating on my beloved Dutch Bros with Starbucks because I know *exactly* how I like my flavor pumps at Starbucks and I prefer their pumpkin syrup…

You know what, though? These cupcakes are, like, 5 billion times better than either version. That’s an exact number based on factual evidence. Like surveys, and stuff. Things that people with grown up jobs do to test things. If it were me, they would each do an audition, which I guess they kinda did. The cupcakes get the lead fair and square.

The pumpkin makes them perfectly fluffy and soft, while also adding the perfect fall flavor. And don’t even get me started on my serious love for ground cloves. Ummm, best spice ever maybe??? I love me some cumin, but lately I cannot get enough of the cloves. In my yogurt, in my cupcakes, straight out of the little shaker…

Combine that with cinnamon and nutmeg, and you’ve got a match made in heaven. Brushing the coffee on after they’ve been cooked makes a huge difference. It keeps them soft, and brings out a bold coffee flavor that usually gets lost during baking. You can also control your coffee intensity. I sit there and brush those things over and over and OVER because I have a mild ridiculous wallet blowing obsession with my little caffeinated friend, but if you feel less in love with coffee, you can use less. Just never, ever tell me about it. I can’t handle it.

This is actually not the first go around for these bad boys. They first made their appearance on the blog about a year ago, and they looked a little like this.

Womp womp.

Oh the things you learn in a year. I’m still not an excellent cupcake froster, not like this girl, but I’ve certainly learned a thing or two.

The original recipe for these muffins (which includes all the smart brushing with the coffee, and all that goodness) comes from one of my very favorite recipe blogs Annie’s Eats.

Original recipe

My Swaps:

  • Half the recipe (-temptation)
  • White whole wheat flour for all purpose flour (+fiber, +protein)
  • Apple sauce for oil (-fat, -calories)
  • Egg substitute (ie: egg beaters, liquid egg whites, flax egg, or corn starch egg) for whole eggs (-fat, -calories, -cholesterol)
  • Lighter cream cheese frosting for whipped cream (-fat, -calories)
  • Caramel sauce (-fat, -calories, -sugar)

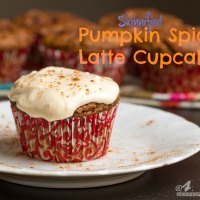
Skinnified Pumpkin Spice Latte Cupcakes

yield 1 dozen

  • 1 1/3 cup whole wheat pastry flour
  • 1 1/2 tbs espresso powder
  • 1 tsp baking soda
  • 1 tsp baking powder
  • 1/2 tsp cinnamon
  • dash nutmeg
  • pinch ground cloves
  • dash salt
  • 1 cup pumpkin puree
  • 1/2 cup raw turbinado sugar
  • 1/2 cup brown sugar
  • 1/2 cup applesauce
  • 1/2 cup egg substitute
  • 1/4 cup strong coffee or espresso for brushing

Directions:

  1. Preheat oven to 350. In a medium bowl, combine flour, espresso powder, baking soda, baking powder, and spices. Set aside.
  2. In a mixer if you have one (if not you can use a hand mixer or your muscles!) combine pumpkin, sugars, and applesauce. Add egg substitute, followed by dry ingredients. Mix until just incorporated.
  3. Fill lined muffin tin 3/4 full with batter and bake for 20-25 minutes, until toothpick inserted in the center comes out clean.
  4. Pierce each cupcake 2-3 times with a fork, then brush with coffee. Wait 2-3 minutes, then brush again.
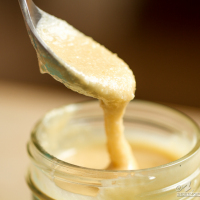
  5. Cool completely on wire racks and then top with Honey Cream Cheese Frosting.


Honey Cream Cheese Frosting

  • 1 8oz package reducated fat cream cheese, softened
  • 1/2 cup honey
  • 1 tsp vanilla extract

Directions:

  1. In an large bowl, beat cream cheese until smooth. Beat in honey and vanilla. Top cupcakes, or store in the refrigerator.


Filed Under: Cupcakes, Dessert, Holiday & Seasonal · Tagged: baking, coffee, cupcakes, dessert, pumpkin, recipe, skinnified, starbucks

Chocolate Chip Coconut Milk Ice Cream

September 20, 2012 · by Ari ·

What? It’s fall where you are? I’m really sorry, but the high here today is still in the triple digits, so I bring you ice cream.

Special creamy coconut milk ice cream that I can share with all my vegan and no dairy friends, because I really like them. This was made special for Bethany who recently gave up dairy and is taking a more paleo approach to eating. This ice cream isn’t paleo–it has sugar, but it is dairy free, and about a billion times more delicious than any soy ice cream I’ve ever tried.

Have I ever mentioned that ice cream is my very favorite thing? Okay, I know I have a lot of very favorite things, but ice cream has been on the list since I was like 1. And I’m kind of old, so that’s a long time. To be honest, light ice creams are tough to make at home. I’ve made a couple I like, but it’s really tough to get the right texture. Coconut milk is so perfectly creamy–it worked as an amazing base, plus the recipe was so simple!

The flavor combination of coconut milk + brown sugar with dark chocolate was ridiculously good. In fact, I ended up having to give the leftovers to my mom and step dad because I knew I couldn’t be trusted. I got the empty container back about 3 days later. I guess they liked it too 😉

Print
Chocolate Chip Coconut Milk Ice Cream

Chocolate Chip Coconut Milk Ice Cream

Ingredients

  • 1x15 ounce can full fat coconut milk
  • 1/4-1/3 cup brown sugar (depending how sweet you like it)
  • 2 teaspoons vanilla extract
  • 1/4 cup mini dark chocolate chips (if you want to keep it vegan, make sure to buy vegan chips)

Instructions

  1. In a medium bowl or blender, combine coconut milk, brown sugar and vanilla.
  2. Freeze mixture according to ice cream maker instructions.
  3. After finished churning, fold in chocolate chips before transferring to storing container.
3.1
https://arismenu.com/chocolate-chip-coconut-milk-ice-cream/

Filed Under: Dessert, Gluten-free, Ice Cream & Fro-yo, Vegan · Tagged: chocolate, coconut milk, dessert, ice cream, recipe, vegan

Skinny Mini Corn Dogs

September 19, 2012 · by Ari ·

Last Thanksgiving, I made and posted these Skinny Mini Corn Dogs. Well, you may have noticed that since then, the photography on the blog has gotten…umm…better.

Then

Now

Although Steve takes most of the photography, I’ve learned oh so much about food styling since I started this blog. It’s still a challenge for me, as I’m not a visual person, and I have always identified with the “I don’t care what it looks like if it tastes good” way of thought, but I’ve definitely come a long way, and I definitely no longer throw my food on the plate and hope for the best 😉

Now, I employ hand models. Thanks Jas 😉 Anyway, THESE CORN DOGS!! I think of all the food I’ve made in my life, these and my cake batter dip are the two things that ALWAYS disappear. What’s even better is they are so easy!! It’s maybe 15 minutes of working time to make a huge amount perfect for any party, or tailgating if you do that sort of thing (says the girl who despises football).

These babies are dangerous. I could easily go through a dozen without even thinking twice! The good news is, they really are healthy–baked, no oil or butter, and the leanest hot dogs around. In fact, you could probably eat the entire mini muffin tin full for the same amount of fat and calories as 1 regular corn dog!

Skinny Mini Corn Dogs

yield 24-36

  • 1 box cornbread of choice (use gluten-free if desired)
  • Fat free plain Greek yogurt (amount depends on box)
  • Unsweetened almond milk (amount depends on box)
  • 1/2 small can medium green chilis
  • 8-10 98% fat free turkey dogs

Directions:

  1. Mix cornbread according to package instructions replacing butter/oil with yogurt and milk with almond milk (reduced fat buttermilk or skim milk would also work), and adding green chilis.
  2. Pour batter into sprayed mini muffin tins, filling only about 1/3-1/2 of each tin.
  3. Divide each turkey dog into 6 equal pieces.
  4. Press a piece of turkey dog into each muffin tin.
  5. Bake according to package instructions until golden brown.


Filed Under: Appetizers, Gluten-free, savory, Snacks · Tagged: baked, corn dogs, hot dogs, party food, recipe

Butterscotch Pecan Butter

September 14, 2012 · by Ari ·

It’s official. I’m never buying nut butter from the grocery store again.

Making my own is so ridiculously easy, and the flavor combinations are endless. You imagine it, you throw everything in the food processor while you read all 900 unread posts on your google reader empty the dishwasher, and voila! NUT BUTTER!!!!

Guess what! It’s also way less expensive this way. It would be…ummm… uncharacteristic of me to not mention saving money 😉

And can we talk about how butterscotch is one of those flavors that never disappoints? Please, tell me a time you’ve eaten something with butterscotch in it, and then thought “Well, that was disappointing.” It doesn’t happen people. Butterscotch can save the worst cookie, and it can take the most delicious pecan spread to the next level.


Butterscotch Pecan Butter

yield 1/2 pint

  • 8 oz pecans (I used raw, but roasted would be amazing)
  • 1 1/2 tbs coconut oil
  • 1/3 cup butterscotch chips, melted
  • heavy pinch sea salt
Directions:
  1. Add pecans to a food processor and blend until a thick nut butter forms (be patient, this takes several minutes). Stream in oil with the processor on, continuing to run it until the mixture is smooth (about 3-4 minutes).
  2. Turn off processor, add melted butterscotch chips and sea salt, and turn processor back on. Blend until smooth.


Filed Under: DIY/How To, Gluten-free, Miscellaneous, Sauces & Spreads, Snacks · Tagged: butterscotch, nut butter, pecan, recipe, spreads

Turkey Club with Creamy Rosemary Spread

September 4, 2012 · by Ari ·

Almost every summer of my life, I’ve spent at theatre camp. You never know what type of food you’re going to get at summer camp, and some years have been better than others, but I’ll never forget the summer we ate sandwiches for lunch for about 2 weeks straight. I think we might have even had sandwiches for dinner some nights too? I do remember thinking that I never wanted to eat an other sandwich again.

It’s funny because now I am ALL ABOUT sandwiches. If you ask me where I want to go to lunch, I will always reply with Dilly’s Deli, Great Harvest Bread Co, or Sacks. I could literally eat sandwiches for breakfast, lunch and dinner.

It can’t be just any sandwich. It has to be special. If you throw me deli meat and a slice of cheese with a packet of mayo, I will not be a fan. I like my sandwiches overflowing with super fresh and flavorful ingredients. Lots of veggies are a must, and so are unique and bold flavors!

And of course the right bread. I rarely buy anything that isn’t 1 million grain, but for the right rye bread, I’ll occasionally make the exception. However, this sandwich would also be fantastic with a seedy multi grain.

With the creamy rosemary spread, smooth avocado, crunchy bacon, soft bread and crisp fresh veggies, this sandwich has the perfect combination of textures, and doesn’t give even a little bit of that sandwich mush that comes from too few ingredients. You know, when it’s just bread and cheese and you think it would be a good idea to throw greasy potato chips on your sandwich because for the love of all things holy, it feels like you might possibly be eating baby food? Just me? Not that chips on a sandwich aren’t delicious….

I just prefer bacon. Story of my life.

I ate this monster sandwich for dinner, and I didn’t need a single thing on the side. It completely filled me up, and fulfilled all of my flavor/texture cravings in one perfect, easy dish. It’s the perfect meal for those nights when all you want to do is run through the Chipotle because you’re hungry enough to eat your arm, and you’d rather lick dirt off the floor than stand in the kitchen and cook. Please tell me that sometimes you feel that way too.


Turkey Club with Creamy Rosemary Spread

yield 1 sandwich

For the sandwich:

  • 2 slices fresh rye bread, lightly toasted (or gluten-free bread)
  • 1.5 oz sliced turkey
  • 1 slice reduced fat muenster cheese
  • 2 slices cooked center cut bacon
  • 1 roma tomato, sliced
  • 1/4 avocado, sliced
  • small handful fresh greens (or sprouts, or both!)
  • 1-2 tsp stone ground spicy mustard

For the creamy rosemary spread:

  • 2 tbs nonfat plain Greek yogurt
  • 1/2 sprig rosemary, stem removed and very finely chopped

Directions:

  1. In a small bowl, combine Greek yogurt and rosemary.
  2. Top 1 slice of toasted rye with creamy rosemary spread, and the other slice with spicy mustard. Layer remaining ingredients as desired, and enjoy!

Filed Under: Gluten-free, Lunch, Sandwiches, savory · Tagged: bacon, dinner, lunch, recipe, rosemary, sandwich, sandwiches, turkey

Loaded Butternut Mac & Cheese

August 30, 2012 · by Ari ·

You know what I love about macaroni and cheese?


I mean aside from the fact that the combination of carbs and cheese  is pretty much the most amazing thing on earth.

I love that there are so many options.

This mac & cheese….ooooooomg. It’s filled with center cut bacon, caramelized onions, and crispy sweet apples for the most amazing and surprising flavor combination. I wish I could tell you it was my idea. It totally wasn’t. I took it from this awesome lady, and changed a few things around.

Steve claims to not like butternut squash, but he definitely helped himself to seconds of this dish! The thing about adding butternut squash/pumpkin/sweet potato to mac + cheese, is that is just adds some creaminess, fullness and a hint of sweetness. You can use less cheese, but still get a thick, creamy, cheesy sauce that feels like you are breaking every diet rule you’ve ever followed.

I love how all of the textures come together in this dish too. Creamy, silky cheese sauce with crunchy bacon, crispy apples and perfectly tender onions. Opposing flavors and textures = my favorite thing ever. This dish has both. Excellent.

Drrrrroooooool.


Loaded Butternut Mac & Cheese

yield 6 servings

adapted from Butternut Squash Mac n’ Cheese with Bacon, Caramelized Onions, and Apples

  • 2 cups dry whole grain pasta (brown rice, whole wheat, etc.–I had rotini on hand, but macaroni or penne also hold cheesey sauce really well)
  • 1 cup butternut squash puree (I steamed chopped butternut squash and pureed it with my immersion blender, but you could buy canned, or even better, roast it first!)
  • 1/2 cup unsweetened almond milk
  • 1/4 cup dry white wine
  • 1 oz low fat cream cheese
  • pinch salt
  • 1/2 cup shredded 75% reduced fat cheddar cheese + extra for topping
  • 1 tablespoon light whipped butter
  • 1/2 yellow onion, sliced thinly
  • 1 large crispy apple, chopped
  • 4 slices center cut bacon, crumbled

Directions:

  1. Melt butter in a medium skillet over medium heat. Add onions, cover and cook on low-medium low for 30 min, tossing occasionally. When fully cooked, remove from pan and set aside.
  2. Cook the pasta according to package instructions. In a large skillet over medium heat, whisk together butternut squash, wine, milk, and cream cheese. When combined, add in salt, then stir in cooked pasta.
  3. Add onions and apples to the pasta. Stir to combine and add a dash more milk if needed.
  4. Stir in cheddar cheese, then transfer to a n 8×8 cooking dish. Top with cooked bacon and a small handful of extra cheese. Broil for 2-3 minutes until the top browns slightly. Serve immediately.


Filed Under: Entree, Gluten-free, Pasta · Tagged: bacon, butternut squash, dinner, mac and cheese, pasta, recipe, whole grain

Hawaiian Macadamia Butter Cookies

August 29, 2012 · by Ari ·

Sometimes you make a cookie that you just don’t want to share with anyone.


Well, if you’re Heather, that is every cookie. I’m sorry Heather, but I will never stop teasing you no matter how good you get at sharing. My friend Heather used to have a sharing problem. She’s worked on it, and recently shared some amazing food with me in Seattle. I was so proud of her. My mom also has a sharing problem. If you ask for a bite of her ice cream, she goes all food aggression and practically growls at you like Clementine. Basically, that was me with these cookies.

Every once in a while, a recipe just turns out so perfect that you can’t wait to make it for every event for the rest of your life, and make double because half of it will never even make it out the front door.

I was really inspired by all of the food in Hawaii. I came home with a full out list. Some people relax on vacation. I wrote lists. And you know what, awesome things came out of it. I like lists.

So let’s discuss these magical cookies, shall we? They have every single food I loved in Hawaii: macadamia nuts, coconut and banana. Also, they have white chocolate, because how could you have those foods and NOT include white chocolate?! That sounds like a terrible idea. When I was little, I used to eat mass amounts of solid white chocolate. It was my favorite. I also don’t ever remember being a single digit size in elementary school. I’m sure there’s no correlation….

Not only are these babies stuffed with all good things that exist in the world, they are the perfect texture. It’s like they were made with real butter! Okay, so I will never stop believing that fat substitutes are awesome for baking, and that baked goods made with applesauce are still seriously delicious. However, they do not taste like butter. These do. I think it’s something about the oil/fat content of the macadamia butter. It works perfectly, and I love it so much more than a peanut butter cookie.

Soft, gooey and perfectly balanced. These are a guaranteed crowd pleaser.

Make these cookies. Make them today. And tomorrow. And next week. Trust me.


Hawaiian Macadamia Butter Cookies

yield approx 1.5 dozen

  • 1 1/4 cups white whole wheat flour
  • 3/4 tsp baking soda
  • 1/2 tsp baking powder
  • dash salt
  • 1 medium extra ripe banana, mashed
  • 1 cup Roasted Macadamia Butter
  • 3/4 cup turbinado sugar
  • 1/2 cup brown sugar, packed
  • 1/4 cup egg substitute
  • 1 tsp vanilla
  • 1/2 cup white chocolate chips
  • 1/3 cup unsweetened coconut (I found unsweetened low fat, but regular unsweetened is fine too)

Directions:

  1. Preheat oven to 350 degrees. Line a large cookie sheet with parchment paper and set aside. In a large bowl, combine flour, baking soda, baking powder, and salt. Set aside.
  2. In a large bowl, beat the banana, macadamia butter and sugars. Beat until smooth. Add the egg substitute and vanilla and mix well. Add the flour mixture and beat thoroughly. Fold in white chocolate chips and coconut.
  3. Using a small cookie scoop, drop dough onto lined cookie sheet. Use an extra piece of sprayed parchment paper to slightly flatten each dough ball.
  4. Bake for 10 to 12 minutes until just golden. Do not overbake. Let cookies stand on sheet for 2-3 minutes before transferring to a wire rack to cool completely.

Filed Under: Cookies, Dessert · Tagged: baking, banana, coconut, cookies, dessert, hawaii, hawaiian, macadamia nuts, recipe, white chocolate

Crab Fried Quinoa with Spicy Peanut Sauce

August 17, 2012 · by Ari ·

I used to hate Thai food. Well, I thought I hated Thai food. I used to have this thing where I was sure I hated anything I’d never tried that wasn’t a type of cheese or brownie.

One day when I was just starting to branch out in my eating habits, I got coerced into going to a Thai restaurant. Someone once told me that Thai food was healthy, and at that point in my life, that was all it took to make me believe it. I just just barely begun my weight loss journey, and I just assumed everyone knew more than me. Plus they don’t use cheese, so clearly it’s healthy, right?

I tried Chicken Pad Thai and never looked back. It was love at first bite, and I’ve been totally hooked on Thai food ever since! In fact, one of my best friendships is pretty much based off of a mutual love for Thai food. And Seinfeld. Have I ever talked about my love for Seinfeld???? It’s an intense burning love bordering on obsession. I’ve seen every episode at least 10 times, and I own the entire series on DVD. I can recognize a Seinfeld quote at any time, and if I find out you share my love, I immediately consider you my best friend.

Things I love: Seinfeld, Thai food, puppies, peanut butter, cilantro, glitter, polka dots, running skirts, the color green. Now you know the way to my heart. Now if only they made polka-dotted glitter puppies that like to watch Seinfeld while eating Thai food, peanut butter, and cilantro while wearing green running skirts, my life would be made. Okay, that was weird. Let’s talk about the food.

Ohhhhhh my gosh, THE FOOD. The quinoa works as a perfect rice substitute, but you could also use brown rice. I can’t cook rice. I mess it up every.single.time. It’s so annoying. No matter what I do, it turns out crunchy. It’s like I’m missing the rice gene or something. Luckily, I CAN cook quinoa, and it’s so easy. Rice–who needs it???

Not me. Not this dish. So there.

I got the fancy dish and chopsticks in Hawaii, and I knew I needed to make something awesome to put in/eat with them. My last day at CGST, I ate quinoa with peanut sauce on top, and I was basically in heaven. My mind started racing almost immediately “WHAT CAN I MAKE??? MUST HAVE MORE QUINOA AND PEANUT SAUCE!!!!” Oh peanut sauce. I just want to put this stuff on every meal I ever eat for the rest of my life.

This dish was surprisingly easy, and as soon as I took my first bite, I started wondering where it had been all of my life. I’m not always the best about leftovers. If I’m not 100% IN LOVE with the dish, leftovers often sit around in my fridge while I make salads for lunch and try new recipes for dinner. This lasted about 48 hours. Do you ever get sad when your food is gone? Please tell me that’s not weird….

Crab Fried Quinoa with Spicy Peanut Sauce

yield 6 servings

For the Crab Fried Quinoa:

  • 1 cup quinoa
  • 1 tbs canola oil
  • 3-4 cloves garlic, finely chopped
  • 1 yellow onion, thinly sliced
  • 2 eggs
  • 1 zucchini, chopped
  • 1 red bell pepper, chopped
  • 1 1/2 cups broccoli florets
  • 1 tbs reduced sodium soy sauce
  • pinch ground ginger
  • 1/2 lb crab meat (I used imitation–it’s super inexpensive and still delicious)
  • extra cilantro for topping (optional)

For the Spicy Peanut Sauce:

  • 1/2 cup peanut butter (I used chunky)
  • 3 tbs unsweetened almond or coconut milk
  • 2-3 tbs reduced sodium soy sauce (use gluten-free if applicable)
  • 2 tbs fresh lime juice
  • 1 tbs red chili paste
  • handful fresh cilantro,finely chopped

Directions:

  1. Cook quinoa to package instructions.
  2. While quinoa is cooking, prepare the sauce by warming peanut butter and milk in a medium microwave safe bowl for 10-15 seconds. Whisk in all remaining sauce ingredients and set aside.
  3. In a large wok pan over medium heat, sautee garlic and onion in canola oil until golden and fragrant–about 5 minutes. Add eggs stirring constantly to scramble. When eggs have reached scrambled egg consistency, add remaining vegetables, soy sauce and ginger. Cook for 10 minutes.
  4. Add cooked quinoa and crab meat. Cook for an additional 5 minutes, tossing constantly to combine.
  5. Serve topped with spicy peanut sauce and cilantro.

Filed Under: Entree, Gluten-free · Tagged: dinner, peanut sauce, quinoa, recipe, thai

Roasted Macadamia Butter

August 15, 2012 · by Ari ·

I don’t like pineapple. I don’t like the way it looks; I don’t like the way it smells; I don’t like how it’s all spiky and uninviting. As soon as we checked into our hotel/condo in Maui, we were handed a pineapple. Almost all of the drinks contain pineapple juice, and everything you order comes with a pineapple wedge! Steve loves them, so this was pretty much his dream come true. I, however, wanted to only eat coconut and macadamia nuts the entire trip. Oh, and fish. SO MUCH FISH. Anyway, we were given some macadamia nuts on one of our activities, and I was reminded just how delicious they are, and clearly that meant I needed to turn them into butter.

Have you ever seen macadamia butter at the store??? I have not, and I ask you: why not? I don’t get it. If every nut can be made into nut butter, why is the rest of the universe not as obsessed with this idea as I am??? I mean, it’s SO EASY. You just dump some nuts into a food processor

Look at all my red Kitchenaid appliances. They match. They are a happy Kitchenaid family. I love them like my children.

Turn it on

Whisper sweet nothings Stand impatiently in the kitchen for what seems like an hour, but is probably about 4-5 minutes, sighing a lot waiting for it to be done. Then, before you know it, you have this:

In fact, the macadamia nuts worked better than any other nut I’ve used so far. I didn’t have to add any oil, and it turned out the perfect drippy texture.

In fact, depending on your taste, you could make it with just the nuts, and no added ingredients. I like a little more flavor in mine, so I added a little raw turbinado sugar and some extra sea salt.

I put some on my rice cake before my long run on Saturday and I thought I had died and gone to heaven. I kind of wanted to take the entire jar and pour it into my mouth, then go into a deep and peaceful food coma. That sounded much better than running at 4am. I settled for a little extra on my rice cake, and called it a day. Besides, I have big plans for this stuff. BIG PLANS.

No, my big plans aren’t eating it with a spoon. I wish.

Macadamia Butter

yield 1/2 pint

  • 1 1/2 cups salted roasted macadamia nuts
  • 1 tsp turbinado sugar
  • pinch sea salt (optional, depending on taste)

Directions:

  1. Pour all ingredients into your food processor, and process until smooth, scraping down the sides of the bowl as necessary. Transfer to half pint jar and store in refrigerator.

**Note: You may store at room temperature, but macadamias are a very oily nut. Keep refrigerated for best texture, or if keeping for more than 2 weeks.


Filed Under: DIY/How To, Gluten-free, Low Carb, Miscellaneous, Paleo, Sauces & Spreads, Snacks, Vegan · Tagged: easy recipe, macadamia nuts, nut butter, nuts, recipe, spread

Sunflower Butter Cocoa Crispy Treats

August 13, 2012 · by Ari ·

You may remember me stating my recommitment to healthy eating with a focus on whole foods with a short list of understandable ingredients. If you know me even a little bit, you know that I definitely didn’t mean I’d be giving up on dessert! Some say breakfast is the most important meal of the day; I say it’s dessert. We can agree to disagree. Luckily, I returned home to Phoenix to this awesome package from Annelies at Attune Foods.

I was super excited to try both cereal, but it was the Cocoa Crispy Brown Rice that really caught my eye. They have a very small list of  natural ingredients.

And they have more protein than any rice cereal I’ve ever label stalked.

As a kid, I was obsessed with rice crispy treats. Legit obsessed. My mom didn’t make them. She doesn’t really bake. There are some things (cookies, cupcakes) that you can buy at the store, and they will do the trick, but have you tried the store bought rice crispy treats?! Gross. Even Little Kid Ari knew those were no bueno.

LOOK!!! Big Kid Ari can make her OWN rice crispy treats!! Okay, I’ll stop talking in the third person now. Sorry, that was weird. I guess I just got really excited. It’s one of my all time favorite desserts we’re talking about, and we all know I get a little crazy about food. So does Clementine. It’s like I’ve genetically transfered my food agression to my mini dachshund. I believe that’s totally possible.

Okay, okay, maybe not genetically, but parentally. Or something like that. Wait, how did we get here? Oh yeah, if you tried to steal my Sunflower Butter Cocoa Crispy Treat, I would probably growl and give you the stink eye while all of the hair on my head would stand up straight to let you know that we had crossed the line from playing to fighting.

Wow. Sometimes I say such strange things that I even weird myself out. It’s okay, though. I make awesome desserts. That’s why Steve married me. I’m convinced.

Now, I want to tell you about how ridiculously easy these are to make. I spent about 5 minutes. Maybe 6. Then they cooled for a couple of hours while I caught up on trashy reality tv. Let’s be real, I’m lazy and the less work I have to do, the better! Also, I washed a total of a pot and a spatula. I hate dishes. If I had a million dollars, I would throw away every dish I dirtied and immediately buy new ones.

I love this recipe because, not only is the cereal made from only real foods, but the bars are as well. They’re vegan (if you use agave, or if you’re one of those vegans that eats honey), gluten-free, and only require 4 ingredients. I hate to be one of those cliche healthy living bloggers that talks about how much more satisfying real food is, but these bars satisfy my sweet tooth with just a tiny 1″ square. Maybe that’s your normal dessert portion size, but I think we’ve covered the fact that, for me, dessert portion is generally as big as my head. I love sugar. It’s a problem I’m trying to curb, but until then I think I can be happy eating small satisfying treats like these.

And fro yo. Obviously.

Sunflower Butter Cocoa Crispy Treats

Inspired by Trader Joe’s Peanut Butter Rice Crispy Treats

yield approx 32 bars

  • 1/2 cup brown sugar
  • 1/2 cup honey or agave
  • 1/2 cup sunflower seed butter (preferably TJ’s brand–it is by far the best, in my opinion)
  • 3.5 cups Erewhon Cocoa Crispy Brown Rice Cereal

Directions:

  1. Spray a square 8×8 baking pan with nonstick spray. Set aside.
  2. In a small sauce pan, whisk brown sugar and honey/agave over medium high heat until thoroughly combined and no sugar lumps remain–about 5 minutes. Remove from heat. Using a spatula, stir in sunflower butter until well combined. Slowly add in cereal one cup at a time stirring constantly with a spatula until cereal is evenly coated.
  3. Transfer to prepared pan and press with wax paper until evenly spread. Cover and refrigerate for 2-3 hours to set and cool. Once they’ve cooled, feel free to leave them out to be stored at room temperature.
Thanks again Annelies for the awesome package!!


Filed Under: Brownies & Bars, Dessert, Gluten-free, Vegan · Tagged: attune foods, bars, dessert, erewhon, gluten free, recipe, rice crispies, sunflower butter, vegan

Creamy Watermelon Sorbet

August 11, 2012 · by Ari ·

In case my countless hours spent whining about the temperatures (117* on Tuesday in case you forget), it’s, um, hot.

It’s also still watermelon season. Yummmmm.

I’d say that *almost* makes up for it. I usually prefer the super creamy, indulgent frozen yogurt flavors like birthday cake, especially when it tastes like frosting and has peanut butter sauce on top. Mmmmm. However, this sorbet is so light and refreshing–perfect for a hot summer day! It has just a little bit of yogurt to make it slightly creamy, but really tastes more like a sorbet.

I have a story. My dad makes really weird shopping lists. His logic is completely incomprehensible to anyone not living inside his head. One day, he sent me to the store for him with a list left in about 12 messages that got cut off on my voicemail. There were only a handfull of items, but many stipulations about expiration dates, and back up items just in case. Everything has to be exact, and make “the list”. I remember taking my friend Jason with me, walking up and down the aisles (the order of these items was also very specific to the inner workings of his mind), and listening to my 100 voicemails. Yes, I said 12 before. 100 may be a bit of an exaggeration. Maybe. Anyway, we got to watermelon on the list, but it had to be a very specific expiration date, and if I couldn’t find that I was supposed to buy bleu cheese instead. That one was definitely the strangest.

What I’m trying to say is, please don’t use that logic. Please do not make this sorbet with bleu cheese. I will judge you.

BUT, don’t be weirded out by my family. The sorbet is delicious. Sweet and slightly tart, filled with natural watermelon flavor, and not even a hint of cheese. Pinky promise.

Creamy Watermelon Sorbet

yield approx 2 cups

  • 4 cups seedless watermelon, diced
  • 2 tbs turbinado sugar (optional, depending on desired sweetness)
  • 1 cup nonfat lemon Greek yogurt

Directions:

  1. Puree watermelon in a blender or food processor until smooth. Strain juices into a large bowl discard pulp.
  2. Whisk in sugar and yogurt, then freeze according to ice cream maker’s instructions. For a firmer sorbet, freeze for 2-3 hours before serving.


Filed Under: Dessert, Gluten-free, Ice Cream & Fro-yo · Tagged: desert, recipe, sorbet, summer, watermelon

Chocolate Peanut Butter Pretzel Cups

August 8, 2012 · by Ari ·


Sometimes I think that once my fundraising is over, I will never want to make an other cup for the rest of my life.

Then I take one of these out of the freezer, eat it, and head directly to the store to buy more ingredients, so that I can eat 7 more, then make more.

These were probably the most popular. Everyone loves sweet and salty.There’s also a lot of great textures between the pretzel, the chocolate, and the peanut butter. In fact, they’re almost like those chocolate covered peanut butter pretzels from Trader Joe’s. I never buy those, because I know once I opened them, they would last approximately 6 minutes. I know my weakness, ok.

Hungry yet? If you live in the Phoenix area (chocolate doesn’t ship well when it’s 117 out, and yes, that was the temperature an hour ago), you can order them @ $10 a dozen. As always, 100% of that goes directly to Chances for Children, and your purchases are tax deductable.

Chocolate Peanut Butter Pretzel Cups

yield 24 cups

  • 20 oz all natural dark chocolate chips
  • approx 1/2 cup all natural peanut butter
  • 1 scant tbs unrefined virgin coconut oil
  • 24 mini pretzels (gluten-free pretzels work great!), whole or lightly chopped*

Directions:

*Option 1 (for whole pretzels)

  1. Line 24 mini muffin tins with paper liners.
  2. In a medium bowl, melt chocolate and coconut oil in the microwave in 20 second intervals, stirring after each, until melted.
  3. Spoon enough chocolate to cover the bottom of each baking cup. Add 1-2 tsp peanut butter. Top with chocolate until peanut butter is completely covered and top is smooth.
  4. Gently, press the bottom of one pretzel about half way into each cup.
  5. Freeze to set. Keep in freezer or fridge.

*Option 2 (for chopped pretzels)

  1. Line 24 mini muffin tins with paper liners.
  2. In a medium bowl, melt chocolate and coconut oil in the microwave in 20 second intervals, stirring after each, until melted.
  3. Spoon enough chocolate to cover the bottom of each baking cup. Add 1-2 tsp peanut butter. Add one lightly chopped pretzel. Top with chocolate until peanut butter and pretzel are completely covered and top is smooth.
  4. Freeze to set. Keep in freezer or fridge.

*I made the cups both ways, but only photographed them with the pretzel sticking out. I love them both, and continue to make them both ways. I think the pretzel on top looks cool, but with a chopped pretzel, you get more pretzel in each bite. I like to savor my desserts and take many bites 🙂

Filed Under: Dessert, Gluten-free, Snacks, Truffles & Cups, Vegan · Tagged: candy, chances for children, chocolate, cups, dessert, fundraising, peanut butter, recipe

« Previous Page
Next Page »
Image Map

Popular Posts

Tart Cherry Margaritas: The perfect, refreshing margarita--lightly sweet with a punch of tequila

Tart Cherry Margaritas

90+ Healthy Recipes for Breakfast, Lunch, Dinner & Dessert

90+ Healthy Recipes for Breakfast, Lunch, Dinner & Dessert

The Ultimate Peanut Butter Cup Brownie Cookies: Rich, fudgy, brownie-like chocolate cookies stuffed with melty peanut butter cups!

Ultimate Peanut Butter Cup Brownie Cookies

Drink & Dish: Cafe Au Lait Cupcakes

Crockpot Chicken Enchilada Soup

Subscribe via Email:

Enter your email address:

Save an additional $30 on Blendtec Factory Recertified Blenders + Free Shipping

Featured Here

recipe redux
Certified Yummly Recipes on Yummly.com

Member Of…

FitFluential Is Fitness Found
AZ Bloggers Network
az 150 photo az150_zpsfb093d32.gif

Archives


Image Map

Copyright © 2026 | Innovative Child Theme by The Pixelista | Built on the Genesis Framework


Loading Comments...