• Going Out
    • Phx Restaurants
    • How To Order At Starbucks
  • Running
    • My Running Story
    • Race Calendar
    • Race Recaps & Results
  • Blogroll
  • Bucket List
  • Video

Ari's Menu

Little changes making a big difference.

  • Home
  • Recipes
  • Weight Loss
    • My Story
    • Common Swaps
  • Who’s Who
  • Contact
    • Policies & Disclosure
  • Press

Beer Floats

September 12, 2012 · by Ari ·

I have a few favorite things in life. Puppies, my husband, Seinfeld reruns, fro yo, beer, peanut butter, cilantro…. The list goes on. I’m not really someone who feels luke warm about things. There’s “OMG I freaking love ____ so much, I would poke my eyeballs out of my head if I could never see/have/eat it again!!!” and “Ew, gross.” Yes, I have the love scale of a teenage girl.

I don’t want to live in a world where my favorite things can’t go together. In my world, which is a little bit like Neverland–all whimsical and idealistic with no real sense of grown-up-ness, all the things I love fall magically into place, so that after a 15 mile run, I can sit down to pour myself a delicious dark, sweet beer.

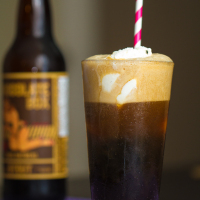
I can scoop fro yo on top, and enjoy a grown up rootbeer float.

Okay, so you might think I’m a total freak, but listen, my first beer float experience was at The Ale House in Moscow (Idaho, not Russia) with my college bestie and foodspiration, Heather. We were both skeptical, and in true fashion of both of our tastes, she ordered hers with the huckleberry ale, and I ordered mine with the vanilla bourbon stout (oh my gosh, vanilla boubon stour, PLEASE COME BACK INTO MY LIFE!!). They were both absolutely delicious, but I’m guessing you know which one was my favorite…

Celebratory dessert done in about 90 seconds, and gone in about an equal amount of time. You better believe this baby will be reappearing after my very first 17 miler that’s coming up this Friday! What can I say? I’m a girl who likes to celebrate 😉

Beer Float

yield 1

  • 1 bottle ice cold sweet beer of choice; stouts and porters work great (I used oatmeal stout. You can also use a lighter, fruity beer, but for the love, please do NOT use Bud Light, or, worse,  PBR. Just don’t do it.)
  • 2 scoops (approx 1/2 cup) nonfat vanilla frozen yogurt

Directions:

  1. Chill your beer glass in the freezer for 30min-1 hour.
  2. Pour beer until glass is 1/2-2/3 full. Top with 2 scoops frozen yogurt.

In case you needed an example of my interpretation of 1/2-2/3 full 😉

Filed Under: Dessert, Drinks, Ice Cream & Fro-yo · Tagged: beer, beer float, dessert, drinks, fro yo, frozen yogurt

Hawaiian Macadamia Butter Cookies

August 29, 2012 · by Ari ·

Sometimes you make a cookie that you just don’t want to share with anyone.


Well, if you’re Heather, that is every cookie. I’m sorry Heather, but I will never stop teasing you no matter how good you get at sharing. My friend Heather used to have a sharing problem. She’s worked on it, and recently shared some amazing food with me in Seattle. I was so proud of her. My mom also has a sharing problem. If you ask for a bite of her ice cream, she goes all food aggression and practically growls at you like Clementine. Basically, that was me with these cookies.

Every once in a while, a recipe just turns out so perfect that you can’t wait to make it for every event for the rest of your life, and make double because half of it will never even make it out the front door.

I was really inspired by all of the food in Hawaii. I came home with a full out list. Some people relax on vacation. I wrote lists. And you know what, awesome things came out of it. I like lists.

So let’s discuss these magical cookies, shall we? They have every single food I loved in Hawaii: macadamia nuts, coconut and banana. Also, they have white chocolate, because how could you have those foods and NOT include white chocolate?! That sounds like a terrible idea. When I was little, I used to eat mass amounts of solid white chocolate. It was my favorite. I also don’t ever remember being a single digit size in elementary school. I’m sure there’s no correlation….

Not only are these babies stuffed with all good things that exist in the world, they are the perfect texture. It’s like they were made with real butter! Okay, so I will never stop believing that fat substitutes are awesome for baking, and that baked goods made with applesauce are still seriously delicious. However, they do not taste like butter. These do. I think it’s something about the oil/fat content of the macadamia butter. It works perfectly, and I love it so much more than a peanut butter cookie.

Soft, gooey and perfectly balanced. These are a guaranteed crowd pleaser.

Make these cookies. Make them today. And tomorrow. And next week. Trust me.


Hawaiian Macadamia Butter Cookies

yield approx 1.5 dozen

  • 1 1/4 cups white whole wheat flour
  • 3/4 tsp baking soda
  • 1/2 tsp baking powder
  • dash salt
  • 1 medium extra ripe banana, mashed
  • 1 cup Roasted Macadamia Butter
  • 3/4 cup turbinado sugar
  • 1/2 cup brown sugar, packed
  • 1/4 cup egg substitute
  • 1 tsp vanilla
  • 1/2 cup white chocolate chips
  • 1/3 cup unsweetened coconut (I found unsweetened low fat, but regular unsweetened is fine too)

Directions:

  1. Preheat oven to 350 degrees. Line a large cookie sheet with parchment paper and set aside. In a large bowl, combine flour, baking soda, baking powder, and salt. Set aside.
  2. In a large bowl, beat the banana, macadamia butter and sugars. Beat until smooth. Add the egg substitute and vanilla and mix well. Add the flour mixture and beat thoroughly. Fold in white chocolate chips and coconut.
  3. Using a small cookie scoop, drop dough onto lined cookie sheet. Use an extra piece of sprayed parchment paper to slightly flatten each dough ball.
  4. Bake for 10 to 12 minutes until just golden. Do not overbake. Let cookies stand on sheet for 2-3 minutes before transferring to a wire rack to cool completely.

Filed Under: Cookies, Dessert · Tagged: baking, banana, coconut, cookies, dessert, hawaii, hawaiian, macadamia nuts, recipe, white chocolate

Sunflower Butter Cocoa Crispy Treats

August 13, 2012 · by Ari ·

You may remember me stating my recommitment to healthy eating with a focus on whole foods with a short list of understandable ingredients. If you know me even a little bit, you know that I definitely didn’t mean I’d be giving up on dessert! Some say breakfast is the most important meal of the day; I say it’s dessert. We can agree to disagree. Luckily, I returned home to Phoenix to this awesome package from Annelies at Attune Foods.

I was super excited to try both cereal, but it was the Cocoa Crispy Brown Rice that really caught my eye. They have a very small list of  natural ingredients.

And they have more protein than any rice cereal I’ve ever label stalked.

As a kid, I was obsessed with rice crispy treats. Legit obsessed. My mom didn’t make them. She doesn’t really bake. There are some things (cookies, cupcakes) that you can buy at the store, and they will do the trick, but have you tried the store bought rice crispy treats?! Gross. Even Little Kid Ari knew those were no bueno.

LOOK!!! Big Kid Ari can make her OWN rice crispy treats!! Okay, I’ll stop talking in the third person now. Sorry, that was weird. I guess I just got really excited. It’s one of my all time favorite desserts we’re talking about, and we all know I get a little crazy about food. So does Clementine. It’s like I’ve genetically transfered my food agression to my mini dachshund. I believe that’s totally possible.

Okay, okay, maybe not genetically, but parentally. Or something like that. Wait, how did we get here? Oh yeah, if you tried to steal my Sunflower Butter Cocoa Crispy Treat, I would probably growl and give you the stink eye while all of the hair on my head would stand up straight to let you know that we had crossed the line from playing to fighting.

Wow. Sometimes I say such strange things that I even weird myself out. It’s okay, though. I make awesome desserts. That’s why Steve married me. I’m convinced.

Now, I want to tell you about how ridiculously easy these are to make. I spent about 5 minutes. Maybe 6. Then they cooled for a couple of hours while I caught up on trashy reality tv. Let’s be real, I’m lazy and the less work I have to do, the better! Also, I washed a total of a pot and a spatula. I hate dishes. If I had a million dollars, I would throw away every dish I dirtied and immediately buy new ones.

I love this recipe because, not only is the cereal made from only real foods, but the bars are as well. They’re vegan (if you use agave, or if you’re one of those vegans that eats honey), gluten-free, and only require 4 ingredients. I hate to be one of those cliche healthy living bloggers that talks about how much more satisfying real food is, but these bars satisfy my sweet tooth with just a tiny 1″ square. Maybe that’s your normal dessert portion size, but I think we’ve covered the fact that, for me, dessert portion is generally as big as my head. I love sugar. It’s a problem I’m trying to curb, but until then I think I can be happy eating small satisfying treats like these.

And fro yo. Obviously.

Sunflower Butter Cocoa Crispy Treats

Inspired by Trader Joe’s Peanut Butter Rice Crispy Treats

yield approx 32 bars

  • 1/2 cup brown sugar
  • 1/2 cup honey or agave
  • 1/2 cup sunflower seed butter (preferably TJ’s brand–it is by far the best, in my opinion)
  • 3.5 cups Erewhon Cocoa Crispy Brown Rice Cereal

Directions:

  1. Spray a square 8×8 baking pan with nonstick spray. Set aside.
  2. In a small sauce pan, whisk brown sugar and honey/agave over medium high heat until thoroughly combined and no sugar lumps remain–about 5 minutes. Remove from heat. Using a spatula, stir in sunflower butter until well combined. Slowly add in cereal one cup at a time stirring constantly with a spatula until cereal is evenly coated.
  3. Transfer to prepared pan and press with wax paper until evenly spread. Cover and refrigerate for 2-3 hours to set and cool. Once they’ve cooled, feel free to leave them out to be stored at room temperature.
Thanks again Annelies for the awesome package!!


Filed Under: Brownies & Bars, Dessert, Gluten-free, Vegan · Tagged: attune foods, bars, dessert, erewhon, gluten free, recipe, rice crispies, sunflower butter, vegan

Chocolate Peanut Butter Pretzel Cups

August 8, 2012 · by Ari ·


Sometimes I think that once my fundraising is over, I will never want to make an other cup for the rest of my life.

Then I take one of these out of the freezer, eat it, and head directly to the store to buy more ingredients, so that I can eat 7 more, then make more.

These were probably the most popular. Everyone loves sweet and salty.There’s also a lot of great textures between the pretzel, the chocolate, and the peanut butter. In fact, they’re almost like those chocolate covered peanut butter pretzels from Trader Joe’s. I never buy those, because I know once I opened them, they would last approximately 6 minutes. I know my weakness, ok.

Hungry yet? If you live in the Phoenix area (chocolate doesn’t ship well when it’s 117 out, and yes, that was the temperature an hour ago), you can order them @ $10 a dozen. As always, 100% of that goes directly to Chances for Children, and your purchases are tax deductable.

Chocolate Peanut Butter Pretzel Cups

yield 24 cups

  • 20 oz all natural dark chocolate chips
  • approx 1/2 cup all natural peanut butter
  • 1 scant tbs unrefined virgin coconut oil
  • 24 mini pretzels (gluten-free pretzels work great!), whole or lightly chopped*

Directions:

*Option 1 (for whole pretzels)

  1. Line 24 mini muffin tins with paper liners.
  2. In a medium bowl, melt chocolate and coconut oil in the microwave in 20 second intervals, stirring after each, until melted.
  3. Spoon enough chocolate to cover the bottom of each baking cup. Add 1-2 tsp peanut butter. Top with chocolate until peanut butter is completely covered and top is smooth.
  4. Gently, press the bottom of one pretzel about half way into each cup.
  5. Freeze to set. Keep in freezer or fridge.

*Option 2 (for chopped pretzels)

  1. Line 24 mini muffin tins with paper liners.
  2. In a medium bowl, melt chocolate and coconut oil in the microwave in 20 second intervals, stirring after each, until melted.
  3. Spoon enough chocolate to cover the bottom of each baking cup. Add 1-2 tsp peanut butter. Add one lightly chopped pretzel. Top with chocolate until peanut butter and pretzel are completely covered and top is smooth.
  4. Freeze to set. Keep in freezer or fridge.

*I made the cups both ways, but only photographed them with the pretzel sticking out. I love them both, and continue to make them both ways. I think the pretzel on top looks cool, but with a chopped pretzel, you get more pretzel in each bite. I like to savor my desserts and take many bites 🙂

Filed Under: Dessert, Gluten-free, Snacks, Truffles & Cups, Vegan · Tagged: candy, chances for children, chocolate, cups, dessert, fundraising, peanut butter, recipe

Starburst Cookies

August 1, 2012 · by Ari ·

That sounds weird, right?

But think about it. Cookies are good. Starburst are good.

You like fruit in your cookies. Starbursts are like fruit, but bad for you. But don’t worry, the cookie part if less than bad for you, so it all evens out. Trust me.

Did you know that now there are packages of Starburst that come with just the red and pink ones??? Amazing. Is there any reason to eat a fruit flavored candy that isn’t red or pink? Like gummy bears…why do they even make the other colors? Why can’t they just stick to the red ones?!

You know what I think is weird? Gummy bears in ice cream! I do not prefer that. The cold ice cream makes them hard, and not gummy at all really. But a warm cookie makes a Starburst warm and gooey, like when you put taffy in the microwave. Yummmm.

Taffy, on the other hand, should only come in yellow. But that’s neither here nor there. As it turns out, Starburst inside a cookie is actually not weird, but delicious.

Especially if the cookie gets just a little crunch on the outside. Then all the textures and flavors work out in harmony and all that crap. Yes, my cookies are freaking harmonious. What are your cookies? Just melodic? Pssshhhh. Okay, I’m sorry. I had a music nerd baker moment. Don’t give up–LOOK AT THE COOKIES!!


Starburst Cookies

yield 1 dozen

  • 2/3 cup white whole wheat flour
  • 1/4 tsp baking soda
  • 1/8 tsp baking powder
  • 3 tbs fat free cream cheese, softened
  • 1 tbs light whipped butter, softened
  • 3 tbs turbinado sugar
  • 3 tbs Splenda
  • 1 tbs egg substitute
  • 1/2 tsp vanilla extract
  • 12 Starburst candies

Directions:

  1. Preheat oven to 375. Line a large cookie sheet with parchment paper. Set aside.
  2. In a small bowl, stir together flour, baking soda, and baking powder. Set aside.
  3. In a large bowl, beat together cream cheese, butter, sugar, and Splenda until smooth. Beat in egg substitute and vanilla.  Gradually blend in the dry ingredients.
  4. Roll dough into 1 inch balls, and stuff each dough ball with 1 Starburst. Re-roll dough around Starburst, so that it is completely covered, then place on prepared cookie sheet,
  5. Bake 8 to 10 min, or until golden. Let stand on cookie sheet for 2 min before serving.
  6. Serve warm, fresh out of the oven for optimal Starburst consistency. If you make them ahead of time, you may wish to rewarm before serving.

Filed Under: Uncategorized · Tagged: baking, cookies, dessert, recipe, starburst, whole grain

Pumpkin Spice Churro Bites

July 25, 2012 · by Ari ·

One of my favorite things about going places like Disneyland, well, aside from the fact that I am freakishly obsessed with Disneyland, was always the churro stand.

Crispy on the outside, and warm and gooey on the inside. How can anyone not like churros??? Seriously. They are so soft on the inside, I used to be convinced that there was actually a filling. I didn’t quite understand the depths, and amazingness of deep frying. Don’t worry, I get it now. Deep frying = instant texture success. Sad, but true.

However, we all know greasy, oily, deep fried food and I are not besties, and, clearly, I need churros in my life. These things are the real deal. Crispy and cinnamony on the outside, while still gooey on the inside with a hint of pumpkin. Pumpkin + cinnamon = always delicious.

Also, why are all foods in life not served dipped in chocolate? That sounds like the cure for all things bad in the world. War. World hunger. People you don’t like. Just serve them dipped in chocolate.

Okay, don’t dip people in chocolate. That’s weird. I am, at least it’s definitely weird if you plan to eat them. This isn’t Silence of the Lambs or anything. In fact, I don’t even like scary movies. And this has taken a turn for the weird, so um, where was I? Chocolate. Cinnamon. Pumpkin. Churros. Mini. Oh yes, they’re mini. Which means you can eat 10 churros instead of 1. We all know I like to eat in volume, so that is obviously a plus.

Okay, before we get to the recipe, I have to tell you a secret about how I messed these up the first time. I made the bites, all was going well, but then I mixed the butter with the cinnamon sugar instead of dipping and rolling. Needless to say, it was delicious, but not quite what I was going for. Also messy, very messy. However, if you don’t mind mess, and don’t care what they look like, I would say that is an equally delicious way to achieve churro love 🙂

Pumpkin Spice Churro Bites adapted from Erica’s Sweet Tooth yield approx 3 dozen

For the churros bites:
  • 1 1/2 cups white whole wheat flour
  • 1 tsp baking powder
  • 1/2 tsp salt
  • dash pumpkin pie spice
  • 1/2 cup turbinado sugar
  • 1/3 cup canned pumpkin
  • 1 tsp pure vanilla extract
  • 1/4 egg substitute
  • 1/2 cup unsweetened vanilla almond milk
For the cinnamon sugar topping:
  • 1/4 cup light whipped butter, melted
  • 1/2 cup brown sugar
  • 1-1/2 tsp cinnamon
Directions:
  1. Preheat the oven to 350 degrees and spray a pan of mini muffin tins with cooking spray.
  2. In a medium bowl, whisk together the flour, baking powder, salt, and pumpkin pie spice.  Set aside.
  3. In a medium bowl, beat sugar and pumpkin together. Add egg substitute and vanilla. Beat until well combined.
  4. Slowly alternate adding the flour mixture and milk, starting and ending with the flour.  Mix until just incorporated.
  5. Use an extra small cookie scoop to fill each muffin tin and bake for 10-15 minutes (depending on how small your cookie scoop is), or until just golden brown.
  6. While the churro bites are baking, melt butter in a small bowl and combine cinnamon and sugar in a shallow dish. When churro bites are finished, immediately remove from the pan and dip each bite in the butter and roll in the cinnamon sugar mixture.  Enjoy immediately or store in an airtight container for 2-3 days.

Filed Under: Dessert, Holiday & Seasonal, Snacks · Tagged: baking, churro, cinnamon, dessert, pumpkin, whole grain

Skinnified Sunday: S’mores Brownies

July 22, 2012 · by Ari ·

My girl Nicole knows her brownies, and when she posted her recipe for her favorite S’mores Brownies, I almost ended my friendship with her because she didn’t share any with me knew I had to make my own version!

Okay, so don’t go look at her blog, because hers are sooooo much prettier. We all know that presentation is not my forte, but they were delicious, so you know…

Honestly, with gooey, browned marshmallows, chocolate and graham cracker, how could that be bad???

These had everything I love about s’mores combined with everything I love about brownies. I had to send them all home with Jason, so I wouldn’t devour them in one sitting!

No, I don’t think it’s weird to add more chocolate to a brownie. I think you’re weird if you don’t always enjoy the idea of more chocolate.

Original Recipe:

via Nicole @ Foodie Misadventures

My swaps:
  • Nonfat vanilla yogurt for butter (-fat, -saturated fat, -calories, -cholesterol)
  • Turbinado/Splenda combo for sugar (-sugar, -calories)
  • Egg substitute for whole eggs (-fat, -calories, -cholesterol)
  • White whole wheat flour for all purpose (+fiber, +protein)
  • Whole wheat graham crackers for regular (+fiber, +protein)
  • Natural dark chocolate for Hershey’s bars (-sugar)


Skinnified S’mores Brownies

yield 16 brownies

  • 3/4 cup nonfat vanilla yogurt
  • 1 cup turbinado sugar
  • 1/2 cup Splenda
  • 3/4 cup egg substitute
  • 1 tsp vanilla extract
  • 1/2 cup unsweetened cocoa powder
  • 1 cup white whole wheat flour
  • 1/2 tsp baking powder
  • dash salt
  • 6 whole wheat graham cracker squares + crumbs for sprinkling
  • 1/2 cup all natural dark chocolate chips
  • 5 oz marshmallows (regular or mini)
Directions:
  1. Preheat oven to 350 F°. Grease an 8 inch square pan.
  2. In a large bowl, beat together yogurt, vanilla, egg substitute, Splenda, and sugar until thoroughly combined. Mix in cocoa powder, flour, baking powder and salt until well blended.
  3. Pour half of the batter into the prepared pan. Layer graham crackers side by side over the top of the brownie batter until completely covered. Next pour chocolate chocolate chips evenly over the graham crackers. Then lay the marshmallows out over the chocolate. Pour remaining batter evenly over the marshmallows, spreading with a spatula if necessary.
  4. Bake at 350 for 35-40 minutes. Let cool completely before slicing and serving.

Filed Under: Brownies & Bars, Dessert · Tagged: brownies, chocolate, dessert, recipe, s'mores, skinnified, whole grain

Gluten Free Cannoli Bars

July 18, 2012 · by Ari ·

When I was a little girl, my dad and I would always eat cannolis at the pizzeria near our house. I love cheese. I love dessert. Cheese + dessert? Done.

I remember one time the pizza place ran out of shells, and I didn’t even care, because honestly, I just love the filling. I used to scrape all of the filling out and leave the shell behind, like weird people do with oreo cookies. That I don’t get. The cookie part of the oreo is the best!! I wish they made them with no cream. Just cookie. And cannolis with no shell. Wait, I made that last thing 😉

All of the delicious flavors of this decadent Italian treat, on top of a brown sugar and oats crust that beats any flavorless deep fried shell I’ve ever tasted. Plus, I love things in bar form. Cheesecake, cookies, you name it.

Also, can we just talk about ricotta cheese for a second? Why is it so freaking good? I could seriously eat it out of the tub with a spoon, and I have. Don’t judge me. I’ve eaten a lot of cheese by itself in my day. Chomped on a block of sharp cheddar, ricotta by the spoonful, it may or may not have been kind of a…problem…

These bars however, are the perfect dessert solution to that problem. That’s me, a super awesome problem solver. Figuring out ways to eat lots of cheese, and not feeling guilty about it always and forever. As Terra would say, you’re welcome the world.


Gluten Free Cannoli Bars

yield approx 3 dozen bars

  • 2 cups gluten free oats
  • 1/2 cup brown sugar, packed
  • 1/4 cup + 2 tbs light whipped butter, melted
  • 1 tsp cinnamon
  • 40 oz part skim ricotta cheese
  • 4 oz light whipped cream cheese, softened
  • 1 cup powdered sugar
  • 1/2 cup mini dark chocolate chips
  • crushed pistachios for topping (about 2 tbs)

Directions:

  1. Preheat oven to 350. Spray a 9×13 pan with nonstick spray, and set aside.
  2. In a medium bowl, combine oats, brown sugar, melted butter and cinnamon. Press into the bottom of 9×13 pan, and bake for approx 25 minutes until golden. Set on a wire rack to cool
  3. In a large bowl, combine ricotta, cream cheese, and powdered sugar. Fold in chocolate chips. Spread ricotta mixture onto completely cooled crust, and sprinkle with crust pistachios. Let set for at least 3 hours, preferably overnight.

Filed Under: Brownies & Bars, Dessert, Gluten-free · Tagged: cannoli, chocolate, dessert, gluten free, italian, oats

Skinnified Sunday: Homemade Nutter Butter Bites

July 15, 2012 · by Ari ·

Remember those cute little mini Nutter Butters? The Nutter Butter Bites? They’re half the size, so you get to eat twice as many. That’s the way it works, right?

Is there anything better than crunchy peanut butter cookie stuffed with sweet, creamy peanut butter filling?

Maybe if you mixed them into peanut butter fro yo. Will you please mix them into peanut butter fro yo??? I WANT TO EAT THAT!!!!

Before I left, I had an order for a dozen cookies from the bike shop, and they said they didn’t care what kind, so I made them these. The next time Steve went in, apparently they were all talking about it, because I got this awesome voicemail while I was in Ashland telling me how much the bike people loved my cookies. Sometimes I can’t even believe how much my life has changed–people buying my cookies?? What????

These totally brought me back to my childhood. Nutter Butters were always one of my favs, and they are even better homemade!

I got the original recipe from one of my very favorite blogs. Here’s the original recipe:

My swaps:
  • Light whipped butter + apple butter for real butter (-fat, -calories, -saturated fat, -cholesterol)
  • Less sugar (-sugar, -calories)
  • Liquid egg whites for real eggs (-fat, -calories, -cholesterol)
  • White whole wheat flour for regular (+ protein, +fiber)
  • Extra sugar (-sugar, -calories)
  • Milk
  • Less filling (-fat, -sugar, -calories)
Skinnified Homemade Nutter Butter Bites
yield about 6 dozen
For the cookies:
  • 1/2 cup light whipped butter, room temperature
  • 1/2 cup apple butter
  • 1 cup creamy peanut butter (I suggest PB&Co White Chocolate Wonderful)
  • 3/4 cup turbinado sugar
  • 3/4 cup light brown sugar, packed
  • 6 tbs liquid egg whites
  • 2 tsp vanilla
  • 2 1/2 cups white whole wheat flour
  • 1 tsp baking soda
  • 1 tsp baking powder
For the filling:
  • 3/4 cup light whipped butter, room temperature
  • 3/4 cup creamy peanut butter (Again, WCW is best)
  • 2 1/2 cups powdered sugar
Directions:
    1. Begin with the cookies. In a large bowl with mixer beat butter, apple butter, peanut butter, and sugars until light and fluffy. Add liquid egg whites, and vanilla. Continuing beating until well combined. Turn mixer to low and add in flour, baking soda and baking powder. Mix until combined. Refrigerate dough for 1 hour.
    2. Preheat oven to 375°. Using an extra small cookie scoop, transfer dough to a baking sheet about 2 inches apart. Using a fork, press down on cookie creating a criss-cross pattern.
    3. Bake for 6-8 minutes until edges are lightly golden. Cool on baking sheet 2-3 minutes and then transfer to wire rack to continue cooling.
    4. To make the filling, beat butter and peanut butter together in a large mixing bowl until smooth. Slowly add in your powdered sugar and turn mixer speed up to medium and beat until filling is smooth.
    5. Spread an even layer of filling onto the bottom of one of the peanut butter cookies and then top with another cookie to create sandwich. Repeat with all remaining cookies.


Filed Under: Cookies, Dessert · Tagged: baking, cookies, dessert, homemade, nutter butters, peanut butter, recipe, skinnified

Red White & Blue Cupcakes

July 3, 2012 · by Ari ·

Happy 4th of July!!!

1 box vanilla cupcake mix, prepared according to package directions, subbing applesauce for oil + cream cheese frosting + red liners + red and blue sprinkles = TAAADDDAAA!!! Super simple festive 4th of July cupcakes!


Filed Under: Cupcakes, Dessert, Holiday & Seasonal · Tagged: 4th of july, baking, cupcakes, dessert, theme

Red White & Blue Cookies

June 24, 2012 · by Ari ·

It’s almost the 4th of July!!!

One of my very favorite things in the world is fireworks. I missed them for years when I was working at camp, and I will never forget the summer I stayed in Idaho, going to see fireworks was a huge deal for me! You know me…I like bright, pretty colors. They make me happy. I’m 5 years old on the inside, so it doesn’t take a whole lot to impress me.

Last year, I stayed in Phoenix for the summer, and we had a big BBQ around the 4th, and that’s when I got the idea for these cookies. In fact, I posted them waaaayyy back when I first started blogging, but the pictures were pretty bad, and I loved them so sooooo much, that I had to make them again!

In fact, a year ago, they were Steve’s very favorite dessert I’d ever made. Now, I think there may be a new favorite, but these cookies are still pretty high up on the list. We took them to the bike shop, and I left with a fundraising order! Sweet!

I realllllly love these cookies. I love the combination of flavors and the soft, gooey texture, but I especially love the way the blueberries burst when you take a bit. It’s like the most amazingly fresh blueberry muffin, but a cookie.

Also, they’re pretty. That pretty much never happens with my food. In fact, the other day Steve told me that my brownies were photogenic, and it was, like, the best compliment ever. Usually my food looks like a kindergartner put it together. Which is almost true. Maturity wise.

And now I want to eat a dozen. And not share. Good thing we don’t have a cookie sheet up here yet…


Red White & Blue Cookies

yield approx 3 dozen

  • 1 cup brandy (to soak the berries in, then saving 2 tsp for later)
  • 2/3 cup dried cranberries
  • 2/3 cup small blueberries
  • 1/2 cup honey apple butter
  • 1/2 cup non fat plain greek yogurt
  • 3/4 cup turbinado sugar
  • 2/3 cup brown sugar
  • 1/4 cup + 2 tbs liquid egg whites (or other egg substitute, or 3 egg whites)
  • 1 tsp baking soda
  • dash salt
  • 2 1/4 cups white whole wheat flour
  • 2/3 cup all natural white chocolate chips
  1. Put the blueberries in a wide and shallow bowl, pour in a bit of brandy. Enough so they’re surrounded by it, but not drowning. Cover and place in the fridge for at least one hour. Afterwards, place a colander over a bowl and pour the berries and brandy through, putting the cranberries and the brandy they soaked in aside.
  2. Preheat oven to 375°F. In a large bowl, beat apple butter, yogurt, and sugars until combined. Add liquid egg whites, and 2 tsp berry soaked brandy. Beat well, scraping sides of the bowl as necessary.
  3. In a separate bowl, whisk together the flour, baking soda, and salt, then slowly add to wet mixture, beating until just incorporated. Fold in the brandy soaked blueberries, dried cranberries, and white chocolate chips. Let chill for 15 minutes in the fridge.
  4. Spray baking sheet with non stick spray or parchment paper. Use a small-medium sized cookie scoop to transfer dough onto the baking sheet. Bake at 375°F for 8-10 minutes until just set, and the edged are slightly golden. Let cool for a minute, then transfer to a wire rack to cool completely.


Filed Under: Cookies, Dessert, Holiday & Seasonal · Tagged: 4th of july, baking, cookies, dessert, recipe, theme, whole grain

Triple Chocolate Cupcakes

June 19, 2012 · by Ari ·

My mom loves chocolate. She used to tell me that a dessert without chocolate was a total waste.

Most of my life, I was more of a vanilla person. I liked chocolate in things, but I never liked chocolate based desserts–I always thought they were too overwhelming. In fact, at one point in my life, I swore off chocolate thinking it would help with my weight loss. It didn’t. Turns out when you replace your mocha with a caramel macchiato, and make your chocolate chip cookies with butterscotch chips, it actually makes no difference at all. Funny how that works.

When I did the awful carb diets and swore off sweets for entirely too long (if you can imagine me eating no dessert–it’s a scary thought), my tastes entirely changed. Suddenly, the richer, deeper, and more intense the flavor was, the more I loved it! Dark chocolate became more appealing than my once favorite white, and I started craving brownies instead of snickerdoodle cookies.

These days, it depends on my mood, and if you offered me a chocolate and a vanilla cupcake, I would probably want a vanilla one with chocolate frosting. Or a chocolate one with vanilla frosting. But my mother–she will choose all chocolate. Well, to be honest, it probably doesn’t matter what kind of cupcake it is, because all she really wants is the frosting 😉

Frosting is an other thing I used to not like. But I think that’s because I was eating store bought frosting, and that’s gross. In fact, I find most buttercream kind of disgusting. So sickeningly sweet that it makes your mouth feel funny. I look at the amount of sugar in most frosting recipes, and usually end up taking almost a cup of it away! Now don’t get me wrong, this frosting has plenty of sugar, but it isn’t overwhelming. You can taste the cream cheese, and the chocolate, and not just get a mouthful of sugar. Cream cheese and whipped cream frostings are something I can get behind. You can keep your buttercream and fondant.

These were my mom’s birthday cupcakes. Chocolate cupcakes made with coffee to enhance the chocolate flavor, filled with white chocolate, and topped with my very favorite chocolate cream cheese frosting. Rich chocolatey flavor, without feeling heavy. That is my kind of cupcake. Especially delicious with a glass of almond milk. Mmmmm.


Triple Chocolate Cupcakes
yield 1 dozen

Cupcakes inspired by Brown Eyed Baker

  • 1 1/3 cup white whole wheat flour
  • 1/3 cup dutch process cocoa powder (or Hershey’s special dark)
  • 1 tsp baking powder
  • 1/2 tsp baking soda
  • dash salt
  • ½ cup unsweetened almond milk
  • 1/2 cup strong brewed coffee
  • 1 tsp vanilla
  • 1/2 cup unsweetened applesauce
  • 1 cup turbinado sugar
  • 1/4 cup egg substitute
  • 1/2 cup all natural white chocolate chips
  • 1/2 batch Chocolate Cream Cheese Frosting
Directions:
  1. Preheat the oven to 350 degrees F. Line 12 muffin tins with paper liners, and spray lightly with nonstick spray.
  2. In a medium bowl, whisk together flour, cocoa powder, baking powder, baking soda and salt. Set aside.
  3. In a large bowl, beat together applesauce, sugar, and egg substitute until well combined. In a measuring cup, combine the milk, coffee, and vanilla. Slowly add the flour mixture, alternating with the coffee mixture, ending with the flour mixture. Fold in white chocolate chips.
  4. Divide the batter evenly between the 12 liners. Baking for 17-20 minutes or until a toothpick inserted in the center of a cupcake comes out clean.
  5. Cool cupcakes completely on wire racks. Meanwhile, prepare frosting. When cupcakes are completely cooled, frost and enjoy.


Filed Under: Uncategorized · Tagged: birthdays, chocolate, cupcakes, dessert, frosting, recipe, white chocolate, whole grain

« Previous Page
Next Page »
Image Map

Popular Posts

Tart Cherry Margaritas: The perfect, refreshing margarita--lightly sweet with a punch of tequila

Tart Cherry Margaritas

90+ Healthy Recipes for Breakfast, Lunch, Dinner & Dessert

90+ Healthy Recipes for Breakfast, Lunch, Dinner & Dessert

The Ultimate Peanut Butter Cup Brownie Cookies: Rich, fudgy, brownie-like chocolate cookies stuffed with melty peanut butter cups!

Ultimate Peanut Butter Cup Brownie Cookies

Drink & Dish: Cafe Au Lait Cupcakes

Crockpot Chicken Enchilada Soup

Subscribe via Email:

Enter your email address:

Save an additional $30 on Blendtec Factory Recertified Blenders + Free Shipping

Featured Here

recipe redux
Certified Yummly Recipes on Yummly.com

Member Of…

FitFluential Is Fitness Found
AZ Bloggers Network
az 150 photo az150_zpsfb093d32.gif

Archives


Image Map

Copyright © 2025 | Innovative Child Theme by The Pixelista | Built on the Genesis Framework


Loading Comments...