• Going Out
    • Phx Restaurants
    • How To Order At Starbucks
  • Running
    • My Running Story
    • Race Calendar
    • Race Recaps & Results
  • Blogroll
  • Bucket List
  • Video

Ari's Menu

Little changes making a big difference.

  • Home
  • Recipes
  • Weight Loss
    • My Story
    • Common Swaps
  • Who’s Who
  • Contact
    • Policies & Disclosure
  • Press

Vanilla Bean Cookie Butter Cup Cupcakes

April 9, 2012 · by Ari ·

I have a serious problem.

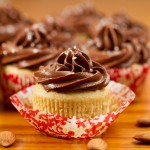
How do you live with a fridge full of this and not eat every last one?? Seriously.

Well, I guess the fact that they were made for someone else is pretty good for the whole self control thing. I canNOT make cupcakes like this that are just for me. I will eat a dozen in about 2 days hours minutes.

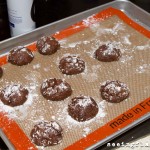
Remember when I made these and said they part one of a special baking project?? Well, I made vanilla bean cupcake batter, swirled in some cookie butter, then pressed one into the center before baking.

I thought they would bake much faster than normal cupcakes, or that the cookie butter cup would just melt right into the cupcake, but they baked for a normal amount of time (18 minutes) and came out looking perfect!

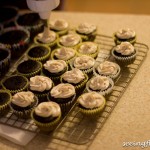
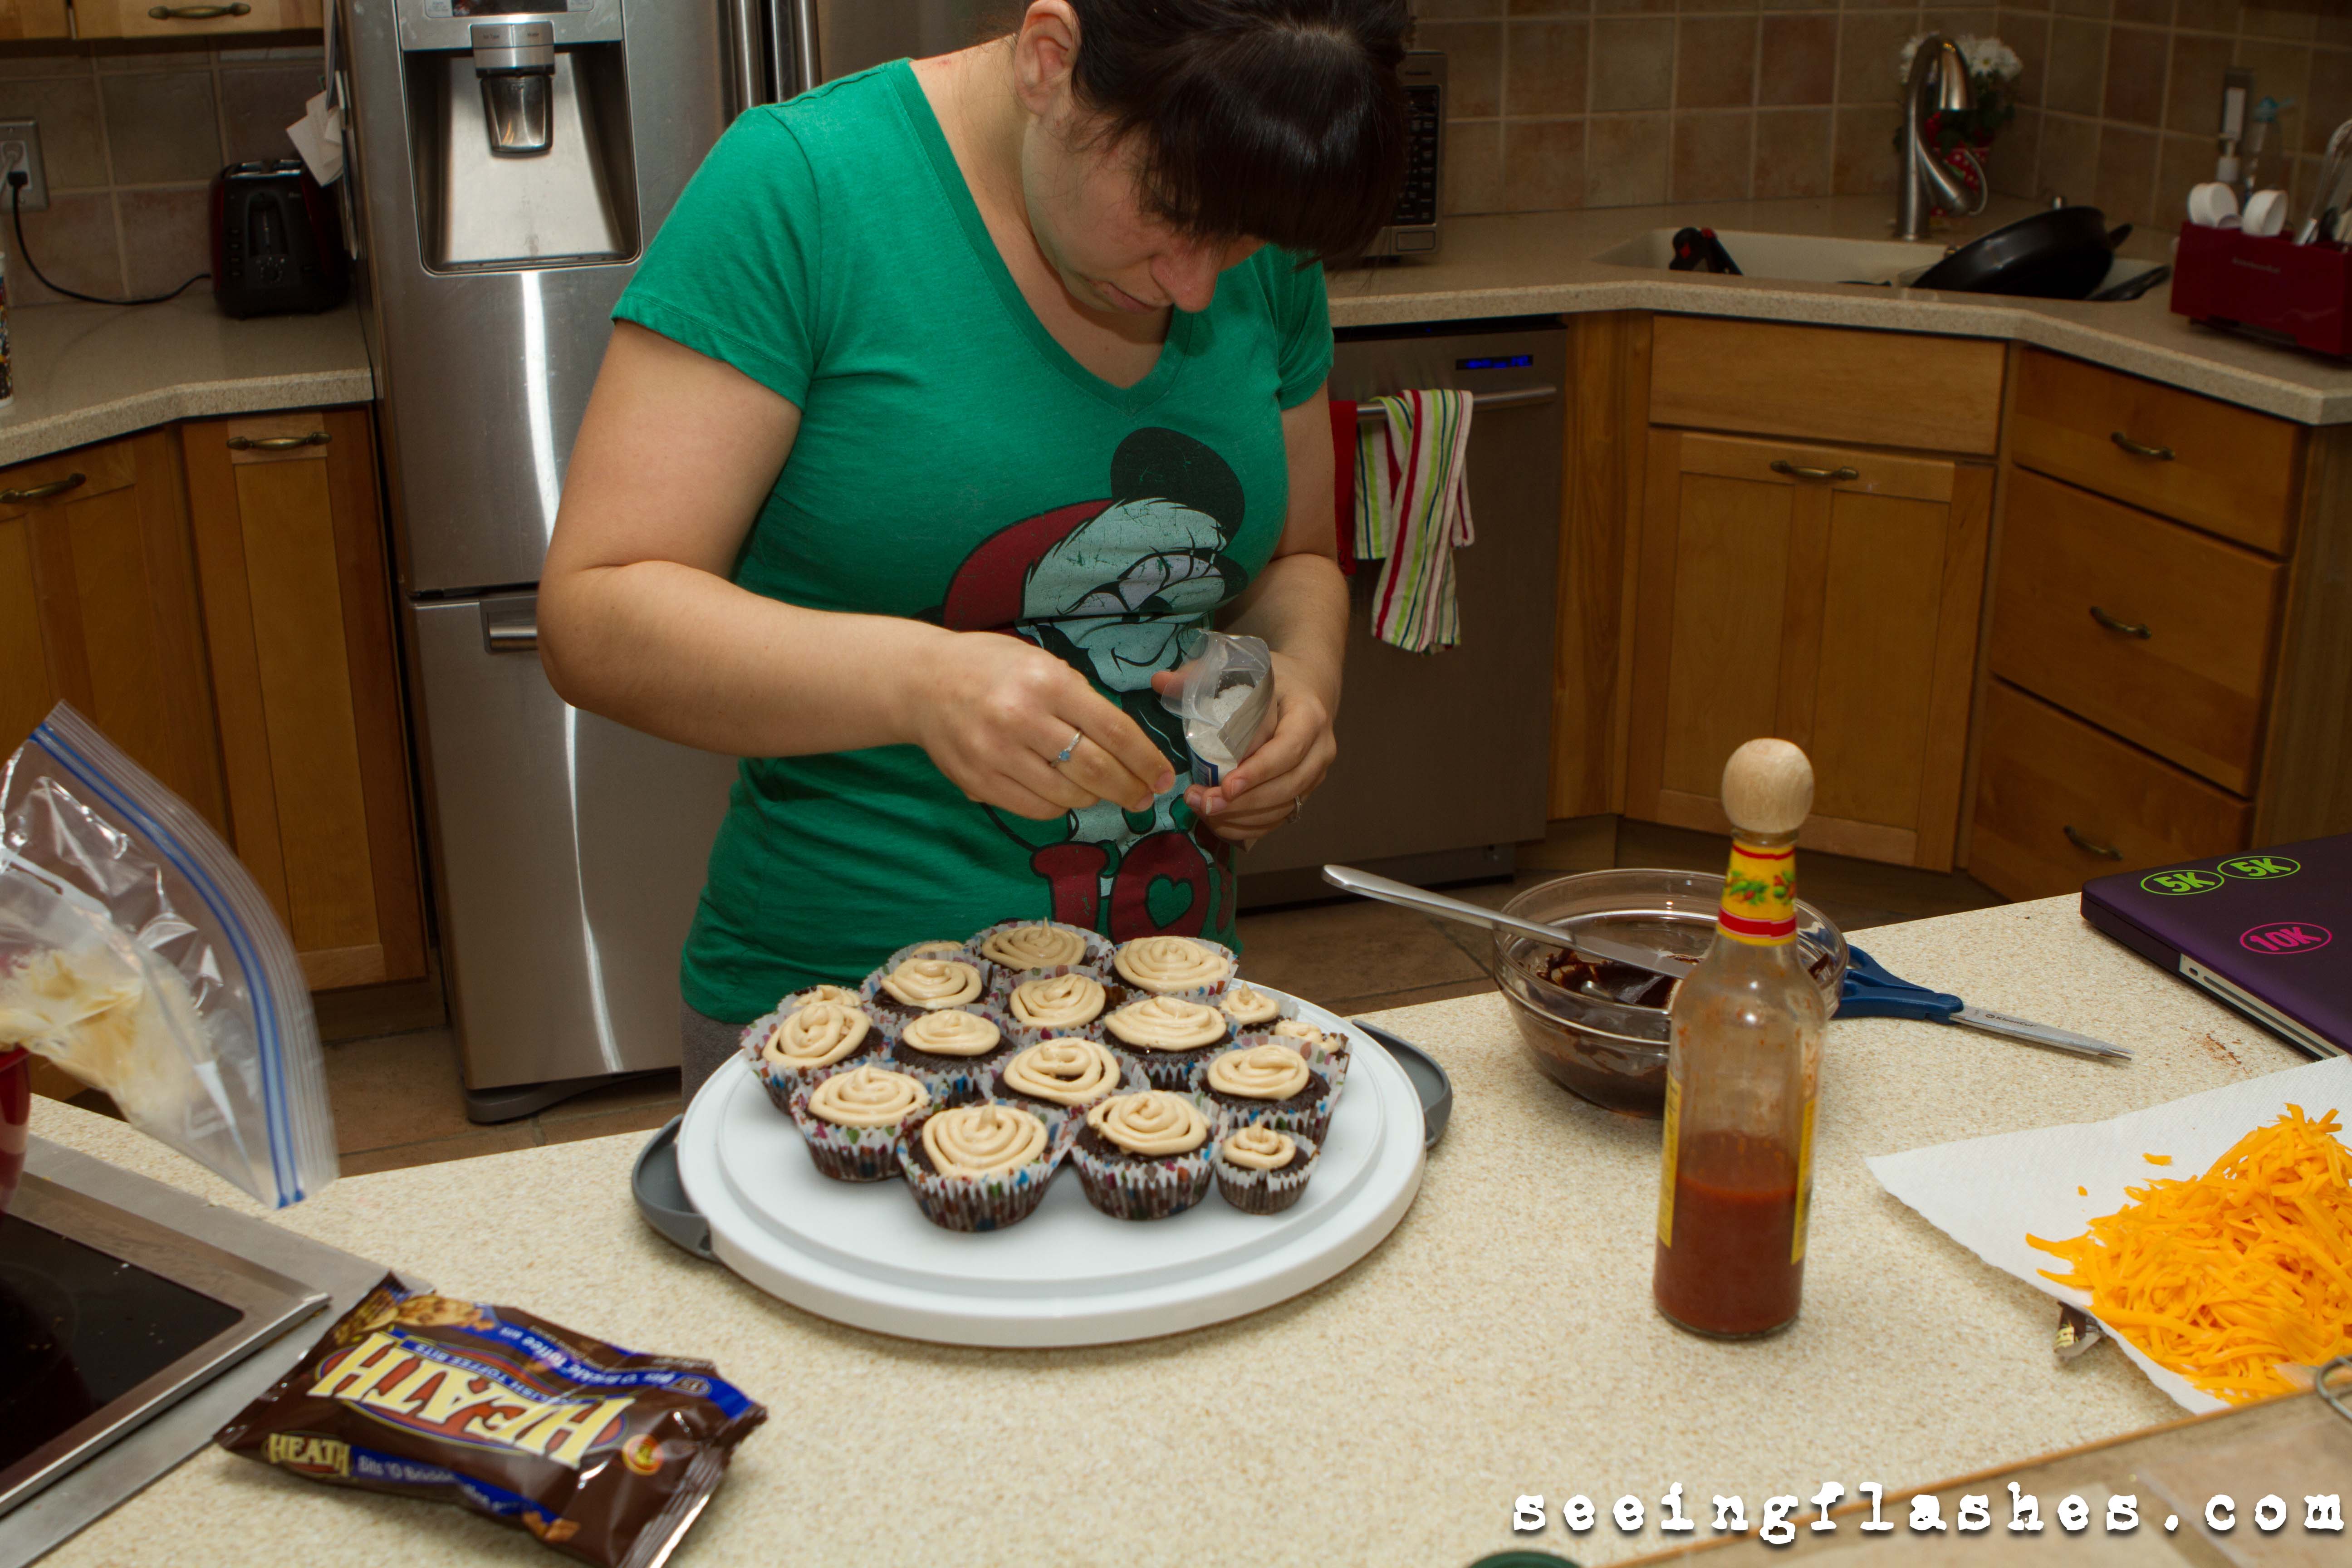
Then I made a Cookie Butter Cream Cheese Frosting and things got REAL over here.

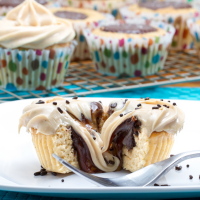
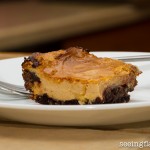
Because what good is a cupcake picture if you don’t cut it in half and show off all the gooey insides?!

Also can we check out all those vanilla bean specs?! In the cupcake and the frosting. Can’t. Get. Enough.

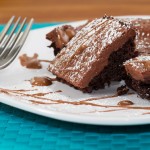
These weren’t completely cooled, so everything just came right out. I love that. If you don’t, just make sure you cool them in the fridge first. But seriously, if you don’t like warm, oozey chocolate, who are you and why are you even reading this blog?!

Just kidding, please keep reading. I can overlook your weird textural preferences. Maybe…

Drrrrooooool.

HAPPY BIRTHDAY STEVE!!!! I couldn’t have picked a better occasion to make probably the best cupcake I have ever created. Obviously, you inspire me 🙂

Vanilla Bean Cookie Butter Cup Cupcakes

yield 15

  • 1 1/2 cups white whole wheat flour (or all purpose)
  • 1/2 tbs baking powder
  • dash salt
  • 1/2 vanilla bean, split lengthwise
  • 1/2 cup unsweetened applesauce (or butter)
  • 3/4 cup sugar
  • 2 eggs
  • 3/4 cup reduced fat buttermilk
  • 1/2 tbs vanilla extract
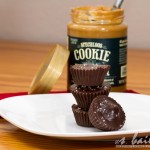
  • 2-3 tbs TJ’s Cookie Butter (or Biscoff spread), melted
  • 15 Salted Chocolate Cookie Butter Cups, frozen

Directions:

  1. Preheat oven to 350. Line cupcake pans with paper liners. Spray lightly with nonstick spray, then set aside.
  2. In a medium bowl, whisk together flour, baking powder and salt. Set aside.
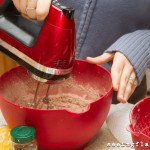
  3. In the bowl of a stand mixer (or you can use a hand mixer if you don’t have a stand one), add applesauce and sugar. Scrape in seeds from vanilla bean and beat on medium speed.
  4. Beat in eggs one at a time.
  5. In a glass measuring cup (or separate bowl) combine buttermilk and vanilla extract.
  6. With mixer on low speed, alternately add flour and buttermilk mixtures, starting and ending with dry ingredients.
  7. Beat until just incorporated, scraping down sides of the bowl when necessary.
  8. Fill 15 cupcake liners 2/3 of the way full. I used a medium sized cookie scoop and it took 1 1/2 scoops per cupcake.
  9. Drizzle in a small amount of cookie butter into each cupcake, and swirl lightly with a toothpick.
  10. Press one Salted Chocolate Cookie Butter Cup into each cupcake.
  11. Bake for 17-19 minutes. (I always turn mine around halfway through to keep even cooking)
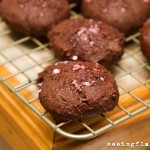
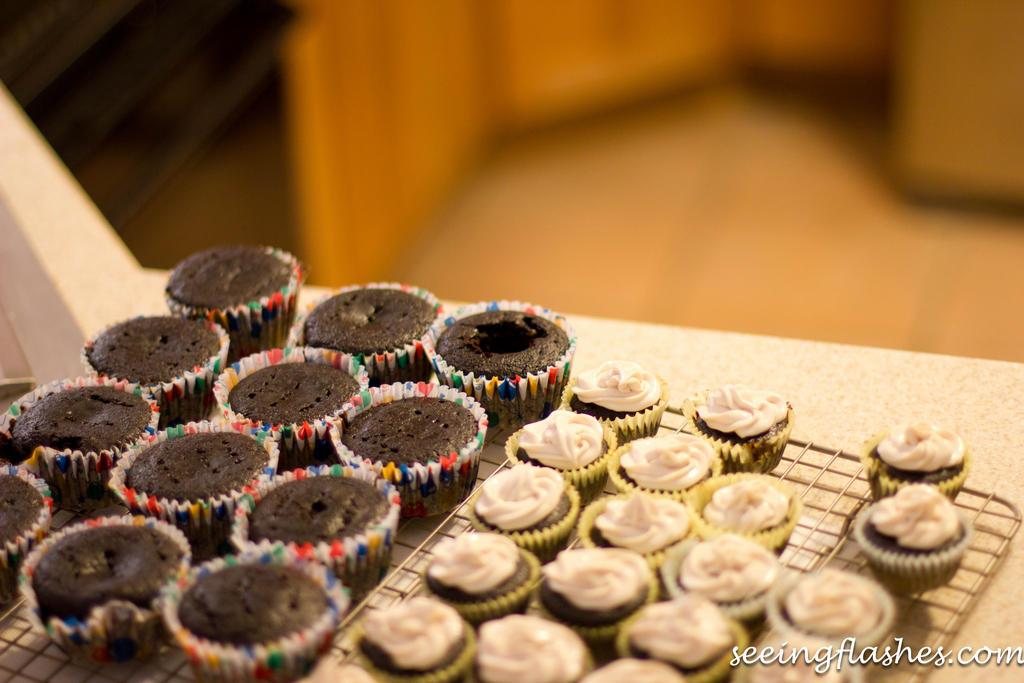
  12. Let stand for 5 minutes, then transfer to a wire rack to cool completely.
  13. Top with Vanilla Bean Cookie Butter Cream Cheese Frosting.

Vanilla Bean Cookie Butter Cream Cheese Frosting

yield enough for 20 cupcakes

  • 16 oz reduced fat cream cheese, softened
  • 1 cup TJ’s Cookie Butter
  • 1 vanilla bean, split lengthwise
  • 3 cups powdered sugar

Directions:

  1. Place cream cheese and cookie butter in a large bowl. Scrape in vanilla bean seeds and beat together for 1 minute.
  2. Slowly beat in powdered sugar, scraping down sides of bowl when necessary.
  3. Frost immediately, or chill in refrigerator.


Filed Under: Cupcakes, Dessert, Popular Posts · Tagged: baking, birthdays, chocolate, cookie butter, cupcakes, recipe, trader joe's, vanilla bean, whole grain

Salted Chocolate Cookie Butter Cups

April 5, 2012 · by Ari ·

Honestly, does it really get any better than chocolate and cookie butter?

The answer you’re looking for is “No. It does not.”

Well unless you add Fleur De Sel. Then it absolutely does.

Freaking yum.

What do you even say about something that is basically a Reese’s Peanut Butter Cup, but made with TJ’s Cookie Butter and sprinkled with Fleur De Sel?

You say “Yes, please” and don’t ask any questions.

These are actually part one of a baking project that will continue tomorrow for a very special person’s birthday. A person so special, that he gets homemade candy inside his birthday cupcakes. He’s a lucky guy, I tell ya.

One of the best things about this recipe is that there are endless combinations. White chocolate, milk chocolate, any type of nut butter that exists, you name it. Trust me, I have about a million variations floating around in my head right now. Just think of it as a ‘coming soon’….

Until then, please join me in drooling over these bad boys and wishing they were magically calorie free. In a perfect world, right? Oh and did I mention they only have 4 ingredients? Almost perfect world…

Salted Chocolate Cookie Butter Cups

yield 24

lightly adapted from Ashley‘s Chocolate Maple Cinnamon Almond Butter Cups

  • 20 oz dark chocolate (chips, or good quality chocolate chopped)
  • approx 1/2 cup Trader Joe’s Cookie Butter
  • 1 scant tbsp coconut oil
  • Fleur De Sel for sprinkling

Directions:

  1. Line 24 mini muffin tins with paper liners.
  2. In a medium bowl, melt chocolate and coconut oil in the microwave in 20 second intervals, stirring after each, until melted.
  3. Spoon enough chocolate to cover the bottom of each baking cup.
  4. Add 1-2 tsp Cookie Butter.
  5. Fill with chocolate until Cookie Butter is completely covered and top is smooth.
  6. Sprinkle with a nice pinch of Fleur De Sel.
  7. Freeze to set. Keep in freezer or fridge.

Filed Under: Dessert, Snacks, Truffles & Cups, Vegan · Tagged: candy, chocolate, cookie butter, fleur de sel, recipe, reese's, sunspire

Nutella Cheesecake Brownie Bars

March 19, 2012 · by Ari ·

Did you know there are actually people out there who have not tried NUTELLA?!?! That is a shame people. A big, huge, fat shame. Let’s change that by mixing it with cream cheese, sugar, and brownies. Then proceeding to eat the remaining Nutella straight from the jar. Sound like a good plan?

These cheesecake brownie bars are based very closely off my Peanut Butter Cheesecake Brownie Bars, but super chocolatey, and the hazelnut flavor in the Nutella is especially delicious. I gave most of them away (Happy belated birthday KT!!), but the ones in my house didn’t last long 😉

Nutella Cheesecake Brownies Bars

yield approx 30

For the brownie layer:

  • 1 box No Pudge brownie mix or TJ’s Reduced Guilt brownie mix
  • 1 6oz container Yoplait Light fat free red velvet yogurt

For the cheesecake layer:

  • 8oz fat free cream cheese
  • 1/4 cup fat free plain Greek yogurt
  • 1 box fat free, sugar free chocolate pudding mix
  • 2/3 cup granulated
  • 1/2 cup Nutella
  • 1/2 cup unsweetened vanilla almond milk
  • 1 tsp vanilla extract
  • 1/2 tsp almond extract

Directions:

  1. Preheat oven to 350. Spray a 9×13 baking pan well with nonstick spray. Set aside.
  2. In a medium bowl, combine brownie mix and yogurt. Spread in a thin layer to coat the bottom of your baking pan.
  3. In a large bowl, beat cream cheese, Greek yogurt, pudding mix, sugar, Splenda, and Nutella. Add almond milk, and extracts. Beat until smooth and creamy.
  4. Spread cheesecake mixture evenly over brownie mixture.
  5. Bake for 80-90 minutes until cheesecake layer is set in the center. Yes, that is quite a long time. You may want to pour yourself a glass of wine and catch up on bad reality tv.
  6. Cool on wire rack for 30 minutes, then transfer to refrigerator to cool completely.

Filed Under: Brownies & Bars, Dessert · Tagged: baking, brownies, cheesecake, chocolate, dessert, nutella, recipe

Gluten Free Almond Joy Cupcakes

February 20, 2012 · by Ari ·

Happy belated birthday to my super, awesome, lovely, beautiful friend Carolyn! If you haven’t checked out this girl’s blog, you really should. Her work outs are amazing, and she has been a total inspiration to me ever since I met her! She is also super sweet and a truly amazing friend.  She eats gluten free, and I always feel bad that when I make desserts for things, she can never eat them. So Nicole and I put our heads together to plan out some awesome surprise birthday cupcakes for her. Well, then poor Nicole got sick, but still gave me all of the fantastic ingredients I needed to carry out our plan!

My friend Christina sent me a recipe for gluten free coconut cupcakes that I used as a base. I’m not sure who it’s originally from, so dear person who created it, if you read this lil ole blog, please tell me so I can be like “Hey readers! All 3 of you! Go look at ______’s awesome recipes”. Thanks in advance. I’m a big fan of your recipe!

I altered the recipe a bit to make it healthy(ish) and put some of my own touches in. Also, Nicole gave me all of these gf flour options, so I ended up getting a little accidentally creative on the flour mix, but I think it was pretty much the happiest accident ever.

Sometimes gluten free things come with weird textures, but not these babies. Friends and family scarfed them down, and my step dad called them the best cupcakes I’ve ever made! Who knew creating recipes around different diets could be so fun? It makes me want to explore more with gf, vegan, paleo and any other fancy diet recipes. I found that I really like creating things for people who eat a certain way and may not always have foods on their plan provided.

Gluten Free Almond Joy Cupcakes

yield 24 cupcakes

For the coconut cupcakes:

  • 1 cup raw cane sugar
  • 1 cup Splenda
  • 1 cup egg substitute
  • 2 1/2 cups brown rice flour mix (see below)
  • dash salt
  • 1 tbs baking powder
  • 1 tsp xanthan gum
  • 1 cup unsweetened apple sauce
  • 1 cup unsweetened coconut vanilla almond milk
  • 1 teaspoon pure vanilla extract
  • 1 teaspoon coconut extract

Brown rice flour mix:

  • 1 cup brown rice flour
  • 1 cup sweet white sorghum flour
  • 2/3 cup potato starch (not potato flour)
  • 1/3 cup tapioca flour

Directions:

  1. Preheat oven to 350. Line 2 muffin tins with cupcake liners and lightly spray with nonstick spray.
  2. Beat sugar, Splenda, and egg substitute at medium speed for approx 1 min. Add in all remaining ingredients and beat at medium speed for 1 min.
  3. Evenly divide the batter between your 24 lined cups. Each one should be about 2/3 full.
  4. Bake for 18-20 min, until top springs back when you press lightly on the middle, or toothpick inserted in center comes out mostly clean.
  5. Cool completely on wire rack, then frost with chocolate almond cream cheese frosting.

For the Chocolate Almond Cream Cheese Frosting:

yield enough to frost at least 24 cupcakes

adapted from How Sweet It Is (I love pretty much every single one of her recipes)

  • 3 x 8 oz blocks reduced fat cream cheese (you could also use fat free, I just had red fat on hand)
  • 3/4 cup unsweetened cocoa powder
  • 3 cups powdered sugar
  • 2 1/2 oz grain sweetened chocolate chips, melted and cooled
  • 1-2 tsp almond extract

Directions:

  1. Beat cream cheese on medium speed in a stand mixer until smooth. Add almond extract.
  2. On low speed, add in powdered sugar 1/2 cup at a time, followed by cocoa powder.
  3. Increase to medium speed and add melted chocolate.
  4. Beat until smooth, scraping down sides of bowl often.
  5. Frost and enjoy!

Optional Toppings:

  • raw sugar
  • almonds
  • shredded coconut


Filed Under: Cupcakes, Dessert, Gluten-free · Tagged: almond, almond joy, baking, chocolate, coconut, cupcakes, dessert, gluten free, recipe

Peanut Butter Chocolate Chip Cheesecake Brownies

January 18, 2012 · by Ari ·

Well, you know I just haaaaddd to make myself a special dessert to celebrate my half marathon 🙂 Recently, I stumbled across this recipe for Reese’s Cheesecake Brownies–ummm, yes please! Naturally, I couldn’t wait to make my own skinnified version! Let me tell you, these babies do not taste one bit skinny! Luckily, I gave half the pan to Kara, otherwise things would be dangerous in my house right now!

Take gooey, fudgey, rich brownie and top it with creamy, peanut buttery cheesecake goodness and you get one of the most delicious desserts that’s ever come out of this kitchen! I wish I could share some of them with you right now. The only thing I love more than making delicious food is sharing it! And did I mention that the prep time took me about 10 minutes? So unbelievably easy, and guaranteed to be a huge hit.

Peanut Butter Chocolate Chip Cheesecake Brownies

yield approx 30

For the brownie layer:

  • 1 box No Pudge brownie mix or TJ’s Reduced Guilt brownie mix
  • 1 6oz container Yoplait Light fat free red velvet yogurt

For the cheesecake layer:

  • 8oz fat free cream cheese
  • 1/4 cup fat free plain Greek yogurt
  • 1 box fat free, sugar free cheesecake pudding mix
  • 2/3 cup raw cane sugar
  • 1/2 cup PB & Co White Chocolate Wonderful
  • 1/2 cup unsweetened vanilla almond milk
  • 1 tsp vanilla extract
  • 3/4 cups Sunspire chips (I used 1/4 cup chocolate, 1/2 cup white chocolate, but any combo would be good and they even have ones that are like m&m’s now!)

Directions:

  1. Preheat oven to 350. Spray a 9×13 baking pan well with nonstick spray. Set aside.
  2. In a medium bowl, combine brownie mix and yogurt. Spread in a thin layer to coat the bottom of your baking pan.
  3. In a large bowl, beat cream cheese, Greek yogurt, pudding mix, sugar, sugar, and peanut butter together. Add almond milk, and vanilla. Beat until smooth and creamy.
  4. Fold in chocolate chips.
  5. Spread cheesecake mixture evenly over brownie mixture.
  6. Bake for 50-60 minutes until cheesecake layer is set in the center.
  7. Cool on wire rack for 30 minutes, then transfer to refrigerator to cool completely.

Hellloooo, lover.

Is there any better nut butter for baking than White Chocolate Wonderful? If you find one, please send it this way.

Come closer, closer, like inside my stomach close.

Filed Under: Brownies & Bars, Cheesecake, Dessert · Tagged: baking, brownies, cheesecake, chocolate, food, pb&co, peanut butter, recipe, white chocolate wonderful

Skinnified Sunday: Salted Caramel Toffee Crunch Cupcakes

January 1, 2012 · by Ari ·

Happy New Year! Let’s celebrate and make cupcakes! 😉

If there is one thing I really love in a baked good, it’s probably toffee bits. Before the days of the skinnified baking, I would bake the most amazing cookies that had chocolate chips, butterscotch chips, and toffee bits. If you ever feel like baking something delicious and not healthy, just follow the Nestle Tollhouse chocolate chip cookie recipe, add butterscotch chips and toffee bits. So delicious. But you know what’s also delicious and has toffee???? These cupcakes! And they are so much healthier and come with a salted caramel frosting that is more delicious than my beloved salted caramel hot chocolate. I sent some home with my mom and got a text from Hank an hour later asking “Where are the rest of the cupcakes?” I also loved when Jacob announced how great they were with a line of chocolate smearing his teeth. He’s classy. So in case you’re not already in the Christmas sugar coma, here you go 😉

Inspired by Toffee Crunch Cupcakes from Annie’s Eats

Original Recipe:

For the cupcakes:
2 cups all-purpose flour
¾ cup unsweetened cocoa powder
1 tbsp. espresso powder
1 tsp. baking soda
½ tsp. salt
2 cups sugar
1 cup (2 sticks) unsalted butter, at room temperature
4 large eggs, at room temperature
2 tsp. vanilla extract
1 cup brewed coffee
1 cup toffee bits

For the ganache and toffee layer:
8 oz. bittersweet chocolate, finely chopped
1 cup heavy cream
3 tbsp. unsalted butter, at room temperature
1½-2 cups toffee bits

For the frosting:
5 large egg whites
1½ cups sugar
4 sticks unsalted butter, at room temperature
½ tsp. coarse salt
1 tbsp. vanilla extract
1/3 cup caramel sauce

My Swaps:

  • 1/2 recipe
  • Less sugar/some Splenda (-sugar, -calories)
  • Applesauce for butter (-fat, -saturated fat, -calories, -cholesterol)
  • Egg substitute for eggs (-fat, -calories, -cholesterol)
  • Less quantity of ganache and toffee layer (-fat, -sugar, -calories)
  • Grain sweetened chocolate chips  for bittersweet chocolate (-sugar, -calories)
  • 2% milk for heavy cream (-fat, -saturated fat, -calories)
  • Light whipped butter for regular (-fat, -calories)
  • Original salted caramel cream cheese frosting (-fat, -calories)

Skinnified Toffee Crunch Cupcakes

yield 15 cupcakes

For the cupcakes:

  • 1 cup all-purpose flour
  • 1/4 cup + 2 tbs unsweetened cocoa powder
  • 1 packet Starbucks via
  • 1/2 tsp baking soda
  • dash salt
  • 1/2 cup raw cane sugar
  • 1/3 cup Splenda
  • 1/2 cup unsweetened applesauce
  • 1/2 cup egg substitute
  • 1 tsp vanilla extract
  • 1/2 cup strong brewed coffee
  • 1/2 cup toffee bits

For the chocolate toffee layer:

  • 1/4 cup grain sweetened chocolate chips
  • 1/2 tbs light whipped butter
  • 1 tsp vanilla extract
  • 1-3 tbs 2 % milk
  • 1/4 cup toffee bits

For the Salted Caramel Cream Cheese Frosting:

  • 4 oz red fat cream cheese
  • 1 tbs light whipped butter
  • 1 tsp vanilla extract
  • 1 1/2 tbs Fleur de Sel caramel
  • 1/2 cup powdered sugar
  • Fleur de Sel or sea salt for sprinkling

Directions:

  1. Preheat oven to 350. Line muffin tins with paper liners and spray with nonstick cooking spray.
  2. Whisk together flour, cocoa powder, via, baking soda and salt. Set aside.
  3. In a large bowl, beat together applesauce, sugar and Splenda. Add in vanilla and egg substitute.
  4. Slowly alternate beating in dry ingredients with coffee, starting and ending with dry ingredients.
  5. Fold in toffee bits.
  6. Fill liners 2/3-3/4 full and bake for 16-20 minutes until toothpick inserted in center comes out clean.
  7. Let stand for 5 minutes, then transfer to wire rack to cool completely.
  8. Melt chocolate, vanilla and butter for next layer in a microwave safe bowl stirring every 30 seconds until melted. Slowly add in milk until it reaches a smooth and creamy consistency.
  9. Using a butter knife, spread a small amount of chocolate on each cupcake. Sprinkle with a pinch of toffee bits.
  10. Begin frosting by using a hand mixer, beat together cream cheese, butter and vanilla.
  11. Beat in caramel.
  12. Slowly add in powdered sugar (use more or less depending on desired sweetness).
  13. Frost cupcakes. Sprinkle with Fleur de Sel or sea salt.


Filed Under: Uncategorized · Tagged: caramel, chocolate, cupcakes, fleur de sel, recipe, skinnified, toffee

Double Chocolate Peppermint Whoopie Pies

December 20, 2011 · by Ari ·

These whoopie pies are intense. Believe it or not, I am not a super chocolatey dessert person. I like chocolate, but I don’t prefer it to be the base flavor. Unless it’s white chocolate. Maybe next time I will experiment with white chocolate and peanut butter. That sounds amazing. Anyway, these are rich, chocolatey and especially delicious if you are a chocolate lover. Don’t get me wrong, I would still happily eat the entire batch in one sitting 😉

Double Chocolate Peppermint Whoopie Pies

yield approx 3 dozen

For the cakes:

  • 1/2 cup light whipped butter
  • 1/2 cup fat free or reduced fat cream cheese
  • 1 cup light brown sugar, packed
  • 2/3 cup Splenda
  • 1 packet Starbucks via
  • 2 tsp baking powder
  • 1 tsp baking soda
  • 1 tsp salt
  • 2 tsp vanilla extract
  • 1/2 cup egg substitute
  • 1 cup dutch process cocoa
  • 2 cups all-purpose flour
  • 2 2/3 cups whole wheat pastry flour
  • 2 cups reduced fat buttermilk
  • 2 candy canes, crushed

For the filling:

  • 1 10 oz bag Sunspire white chocolate chips
  • 1 tbs light whipped butter
  • 1/4-1/3 cup 2 % milk
  • 1 tsp peppermint extract

Directions:

  1. Preheat oven to 350. Line cookie sheets with parchment paper.
  2. Beat together butter, sugar, Splenda, via, baking powder, baking soda, salt, and vanilla until smooth Beat in egg substitute. Stir in cocoa.
  3. Alternately add in flour and buttermilk, starting and ending with flour, scraping down sides of bowl when necessary. Mix until no lumps remain.
  4. Drop rounded tablespoon sized balls onto prepared cookie sheet and flatten slightly (I used a sprayed piece of parchment paper to flatten to avoid sticking).
  5. Sprinkle crushed candy canes on top.
  6. Bake for 7-10 minutes, until cakes spring back when you press lightly with your fingers.
  7. Let stand for 5 minutes, then transfer to wire rack to cool completely.
  8. Meanwhile, melt white chocolate and butter in microwave safe bowl stirring every 30 seconds until melted.
  9. Stir in peppermint. Slowly, add 1/4-1/3 cup milk. Cool completely in refrigerator.
  10. Spread a little white chocolate on the flat side of one cookie, top with the flat side of a second and press together. Repeat with all cookies.

Filed Under: Cakes & Pies, Cookies, Dessert, Holiday & Seasonal · Tagged: chocolate, christmas, peppermint, recipe, whoopie pies

Puppy Chow

December 20, 2011 · by Ari ·

Puppy Chow

only slightly adapted from the back of the Chex box

yield 15-20 servings

  • 9 cups Corn Chex (I label checked and the whole wheat ones were way more calorie dense)
  • 1 cup grain sweetened chocolate chips
  • 1/4 cup light whipped butter
  • 1/2 cup peanut butter
  • dash vanilla
  • 2 cups powdered sugar

Directions:

  1. Measure 9 cups of cereal into the biggest bowl you have, set aside.
  2. Melt butter, pb, and chocolate in a microwave safe bowl, stirring every 30 seconds until melted. Stir in dash vanilla.
  3. Pour melted chocolate mixture over Chex, stirring constantly until evenly coated.
  4. Pour into huge bag (I use a clean trash bag. Please, don’t use a dirty trash bag. Or at least, if you do, don’t offer me any) and pour powdered sugar on top. Shake it like a polaroid picture. Or like a salt shaker.
  5. Spread onto wax paper to cool.

Filed Under: Uncategorized · Tagged: chex, chocolate, peanut butter, puppy chow, recipe

Pumpkin Fudge Crinkle Cookies

December 17, 2011 · by Ari ·

I wasn’t sure what to make for Friendmas dessert, so I asked Nacho if he had any requests and he replied saying something with pumpkin and cinnamon. I had been craving some chocolate crinkle cookies, so I put the two together. The result was gooey, fudgey and gone within 10 minutes 🙂

Pumpkin Fudge Crinkle Cookies

yield 16 cookies

  • 1/4 cup pumpkin puree
  • 5 tbs raw cane sugar
  • 2 tbs Splenda
  • 1/4 cup egg substitute
  • 1 tsp vanilla
  • 1/2 cup cocoa powder
  • 1/2 cup + 2 tbs flour
  • 1/4 tsp baking powder
  • 1 tsp pumpkin pie spice
  • dash salt
  • 1/4 cup powdered sugar
  • 1 tsp cinnamon

Directions:

  1. In a small bowl, whisk together flour, cocoa powder, baking powder, pumpkin pie spice and salt.
  2. Beat pumpkin, sugar and splenda until combined. Add egg substitute and vanilla.
  3. Beat in dry ingredients, then refrigerate covered for 1 hour.
  4. Preheat oven to 350. Combine powdered sugar and cinnamon in a small bowl.
  5. Form dough into small balls, then drop and cover in powdered sugar.
  6. Place on greased baking sheet and bake 10-12 minutes.
  7. Transfer to wire rack or eat immediately when warm (that’s what we did).


Filed Under: Uncategorized · Tagged: baking, chocolate, cookies, pumpkin, recipe

Skinnified Kahlua Mocha Cupcakes

September 19, 2011 · by Ari ·

What would a birthday be without cake? In my group of friends, I am the designated birthday cake baker. I love it. One of my favorite things to do for someone I love is bake something special for them. It feels like I get to give them a piece of myself. Yes, I’m sentimental. In the past, I have made a lot of cakes that I wouldn’t touch myself. It pretty much took all the fun out of it and made me hate life a little. It’s one thing to make someone their favorite cake that happens to be a flavor you don’t like and choose not to eat it, but it is an other to be in such a strict mentality that the entire night is an internal battle. Right now, my feelings are, if I don’t feel okay eating it, I’m not making it. I’m not sure how this will go over with the best friend birthdays that begin next month, but for now, it is only healthy(ish) cupcakes coming from this kitchen!

Luckily, Kara likes my healthy baking so I didn’t feel like I was cheating her by sticking to my guidelines. I really hope some day a piece of real birthday cake won’t cause me a ton of anxiety, but until that day, I just know I need to do what’s best for me 🙂

Sunday afternoon after a fantastic Zumba and coffee date with my friend Christina (we’ve been friends since preschool–pretty amazing, right?), I came home and got to baking! I began by spreading my things all the way across all of our counter space in what Steve refers to as “Hurricane Ariana” Messy cooks are good cooks! Plus, what fun is baking if you don’t get a little messy? Also, I bought some new tools special for the occasion!

This tool is supposed to cut out a hole in the cupcake, to fill with frosting or other deliciousness. It didn’t work as prettily as I would have liked, so I didn’t use it long. Maybe if I made a separate filling and wasn’t just using the frosting it would have been worth it, but it just seemed like unnecessary extra frosting for me. I also bought this decorating set that I tried to fill the minis with and it hardly worked at all, but it did make the tops of the cupcakes a little prettier.

These, like the Pumpkin Spice Latte Cupcakes are based off a recipe from Annie’s Eats. Apparently, this Annie is a genius, and I should add her to my blog reader! Thanks Annie for all the great inspiration!

My Swaps:

  • Double the espresso powder (+YUM)
  • 3 egg whites for 2 whole eggs (-fat, -cholesterol, -calories)
  • Reduced fat buttermilk for buttermilk (-fat, -calories)
  • Applesauce for vegetable oil (- fat, -saturated fat, -calories)
  • Whole wheat pastry flour for all purpose (+fiber, +protein)
  • 1/2 Splenda, 1/2 brown sugar for sugar (-sugar, -calories) **Note: I wouldn’t have swapped the brown sugar for regular, but we were out of regular so I improvised :)**
  • + coconut extract (+YUM)
  • Frosting I had to start from scratch–I bet it was delicious, but this home girl can’t hang with that much butter!

Skinnified Kahlua Mocha Cupcakes

yield 24 servings (I made 12 regular, 24 minis)

  • ¾ cup unsweetened cocoa powder
  • 2 tbsp. instant espresso powder (I used 3 packets of via)
  • 1½ whole wheat pastry flour
  • 3/4 cup sugar or brown sugar
  • 3/4 cup Splenda
  • 1½ tsp. baking soda
  • ¾ tsp. baking powder
  • ¾ tsp. salt
  • 3 egg whites
  • ¾ cup warm water
  • ¾ cup reduced fat buttermilk
  • 3 tbsp unsweetened apple sauce
  • 1/2 tsp vanilla extract
  • 1 tsp coconut extract
  • Kahlua for brushing

Directions:

1) Preheat oven to 350.

2) In an electric mixer, combine flour, cocoa powder, espresso powder, baking soda, baking powder, salt, Splenda, and sugar.

3) Add all other ingredients except Kahlua and mix well for 2-3 minutes, scraping down sides of the bowl as needed.

4) Fill lined baking tins 2/3 full. **Note: The batter is a little runny and messy. It worked best when I transferred it to a freezer bag with a small hole cut at the bottom**

5) Bake for 18-22 minutes (about 3-5 min less for minis) until tops spring back when lightly pressed.

6) Use a fork to poke small holes in each cupcake.

7)  Brush with Kahlua while still warm, repeat.

8) Transfer to cool on wire rack.

9) Once cooled, frost and enjoy!


Kahlua Coconut Cream Cheese Frosting

yield 24 servings

  • 16 oz fat free cream cheese, softened
  • 8 oz reduced fat cream cheese, softened
  • 1 cup powdered sugar
  • 1/4-1/2 cup Kahlua
  • 1-2 tsp coconut extract

Directions:

1) With a hand mixer, beat all ingredients together, scraping down the sides of the bowl as needed.

2) Chill for approx 1 hour.

3) Frost and enjoy!

Attempting to fill…


Filed Under: Cupcakes, Dessert, Holiday & Seasonal · Tagged: baking, birthday, chocolate, cupcakes, kahlua, recipe, skinnified

« Previous Page
Image Map

Popular Posts

Tart Cherry Margaritas: The perfect, refreshing margarita--lightly sweet with a punch of tequila

Tart Cherry Margaritas

90+ Healthy Recipes for Breakfast, Lunch, Dinner & Dessert

90+ Healthy Recipes for Breakfast, Lunch, Dinner & Dessert

The Ultimate Peanut Butter Cup Brownie Cookies: Rich, fudgy, brownie-like chocolate cookies stuffed with melty peanut butter cups!

Ultimate Peanut Butter Cup Brownie Cookies

Drink & Dish: Cafe Au Lait Cupcakes

Crockpot Chicken Enchilada Soup

Subscribe via Email:

Enter your email address:

Save an additional $30 on Blendtec Factory Recertified Blenders + Free Shipping

Featured Here

recipe redux
Certified Yummly Recipes on Yummly.com

Member Of…

FitFluential Is Fitness Found
AZ Bloggers Network
az 150 photo az150_zpsfb093d32.gif

Archives


Image Map

Copyright © 2025 | Innovative Child Theme by The Pixelista | Built on the Genesis Framework


Loading Comments...