• Going Out
    • Phx Restaurants
    • How To Order At Starbucks
  • Running
    • My Running Story
    • Race Calendar
    • Race Recaps & Results
  • Blogroll
  • Bucket List
  • Video

Ari's Menu

Little changes making a big difference.

  • Home
  • Recipes
  • Weight Loss
    • My Story
    • Common Swaps
  • Who’s Who
  • Contact
    • Policies & Disclosure
  • Press

Vanilla Bean Honey Roasted Peanut Butter

June 4, 2014 · by Ari ·

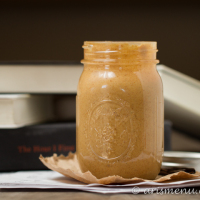
Simple, easy, sweet & delicious homemade peanut butter with just two ingredients! You’re just 5 minutes away from sweet, creamy and drippy peanut butter that is absolutely unforgettable.

Vanilla Bean Honey Roasted Peanut Butter--only 2 ingredients, healthy and made in 5 minutes!.jpg

Can I tell you something embarrassing? This morning I was leaving the pool after my swim, and I unlocked my car and I literally sat at this car wondering why it wouldn’t unlock for a good minute. Then I looked around and was like “Waiiiiiit, I didn’t park over here….”

Vanilla Bean Honey Roasted Peanut Butter--only 2 ingredients, healthy and made in 5 minutes!

This happens way more often than I’d like to admit. I usually am a “beat of my own drum” type, and I don’t like to have the same things as everyone else, so I’m not used to the fact that everyone and their mother has the same car as me. I love my cute little Elantra, but I’m not quite used seeing doubles everywhere I go.

Vanilla Bean Honey Roasted Peanut Butter--only 2 ingredients, healthy and made in 5 minutes!

So that was my morning. I swam, I tried to steal a car, I came home and took pictures of cookies, and now here I am. Avoiding packing. Talking to you. Speaking of packing, I still haven’t officially unpacked from Seattle, so I can probably just keep that suitcase, right???

Vanilla Bean Honey Roasted Peanut Butter--only 2 ingredients, healthy and made in 5 minutes!

Friday morning I’m heading to Blend!!! I’ve been dying to go after reading the recaps for the last two years, and I cannot wait to be reunited with this girl and also see/meet some of my favorites. Also, I’m pretty quick to jump into anything that gets me the heck out of Phoenix right now. Did I mention it’s already 110? Ew.

Vanilla Bean Honey Roasted Peanut Butter--only 2 ingredients, healthy and made in 5 minutes!

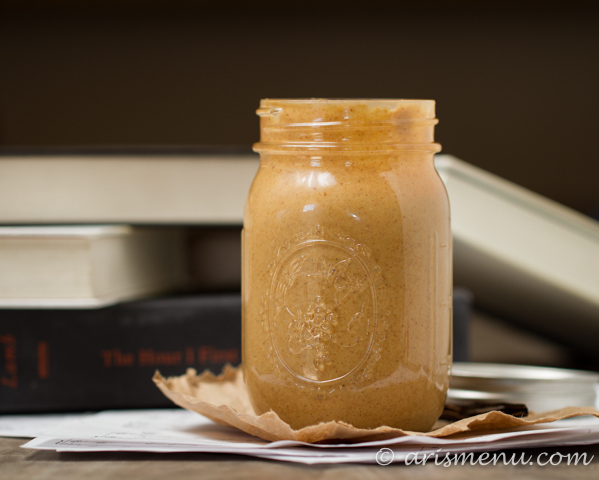
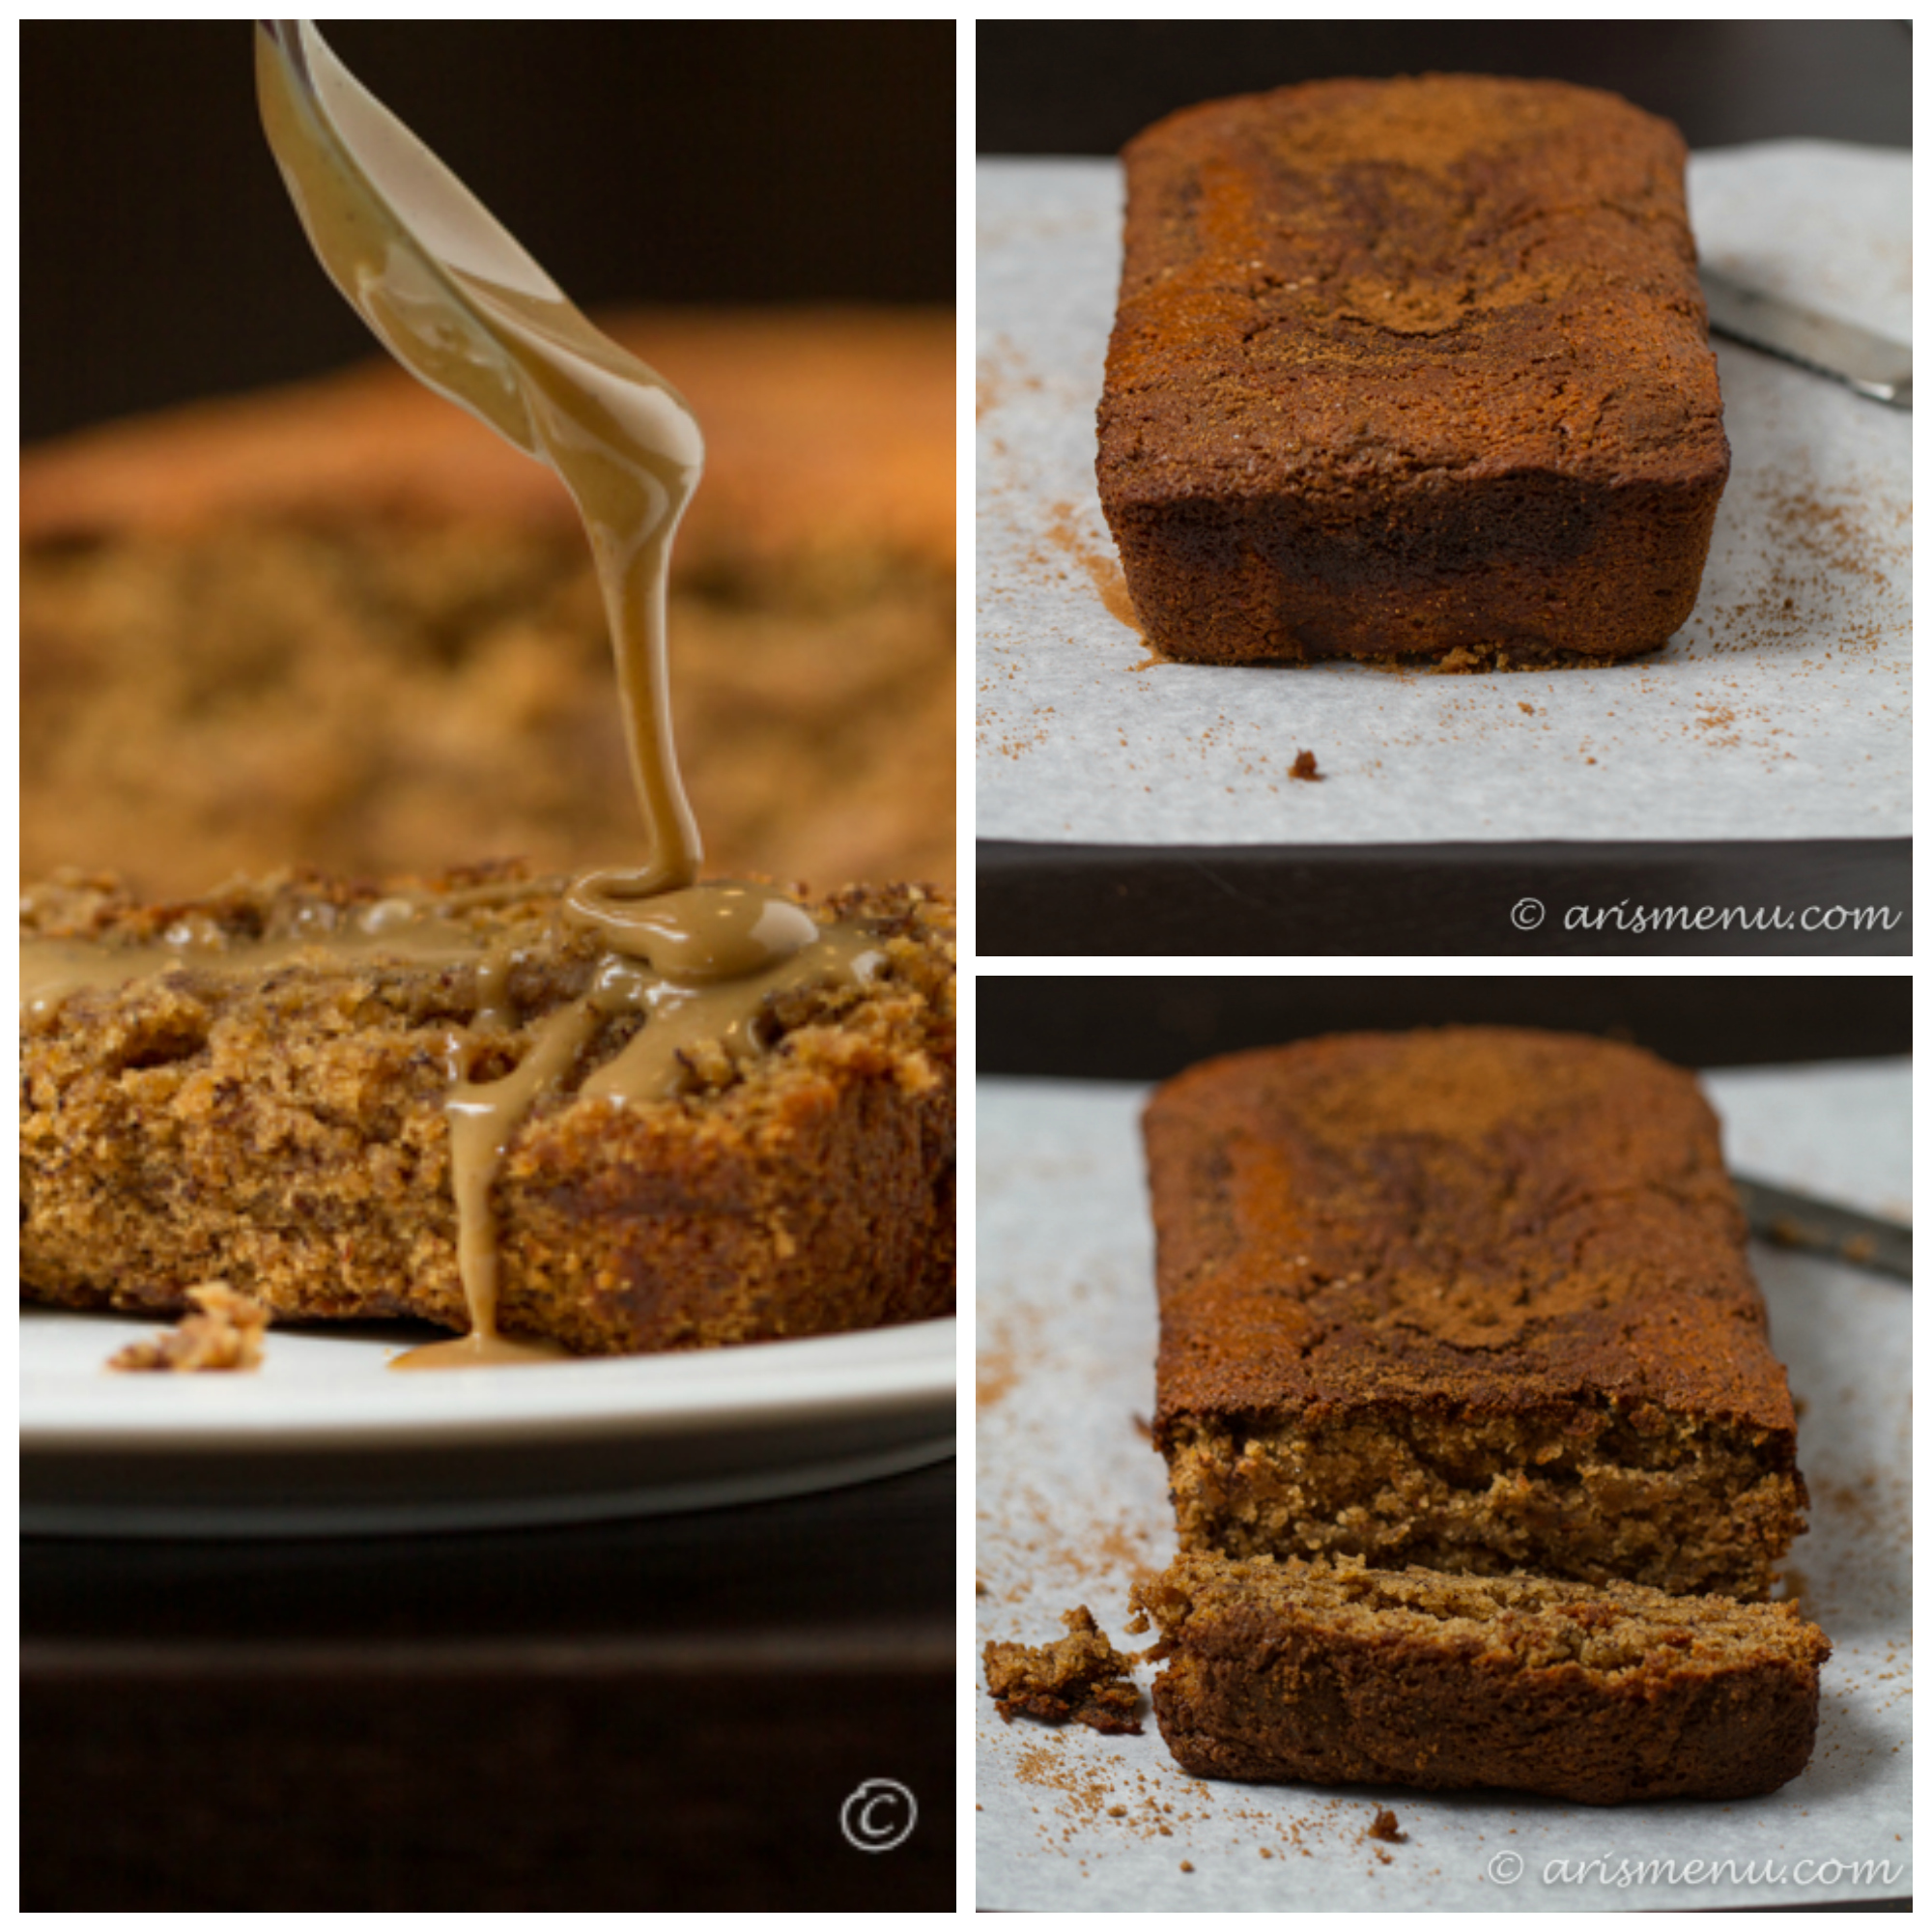
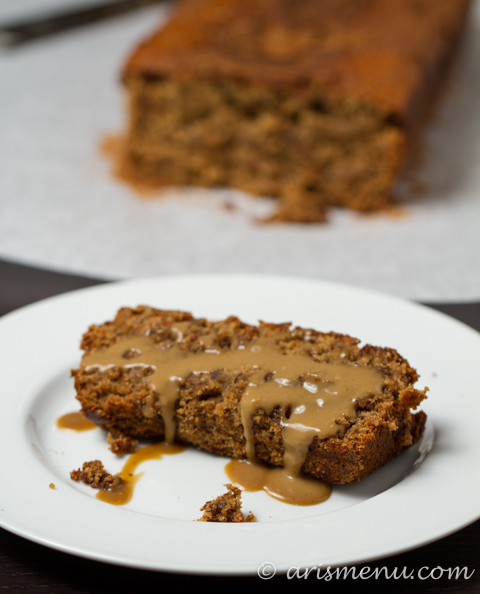
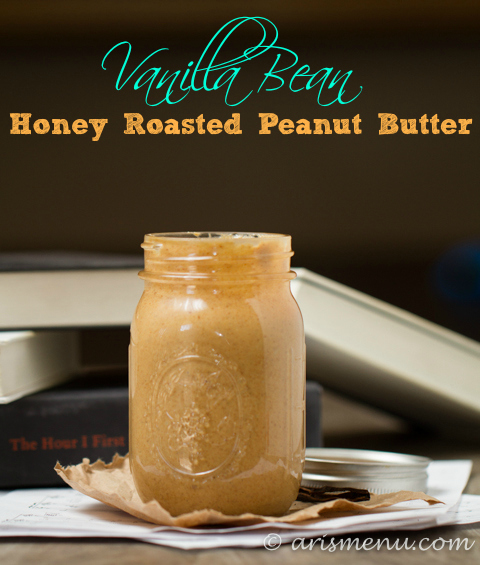
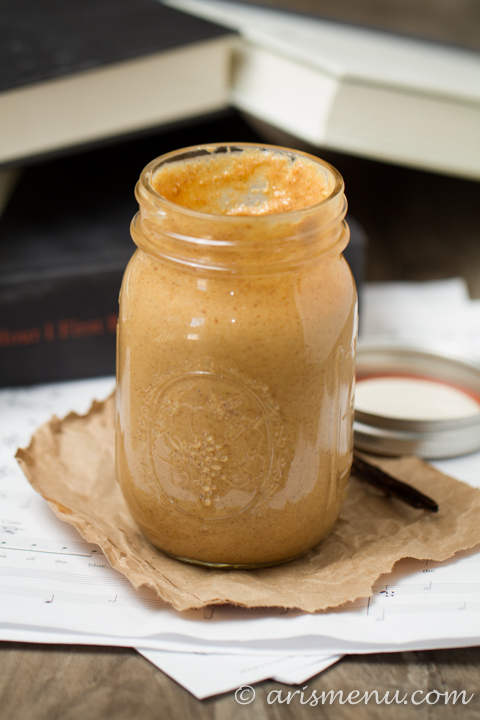
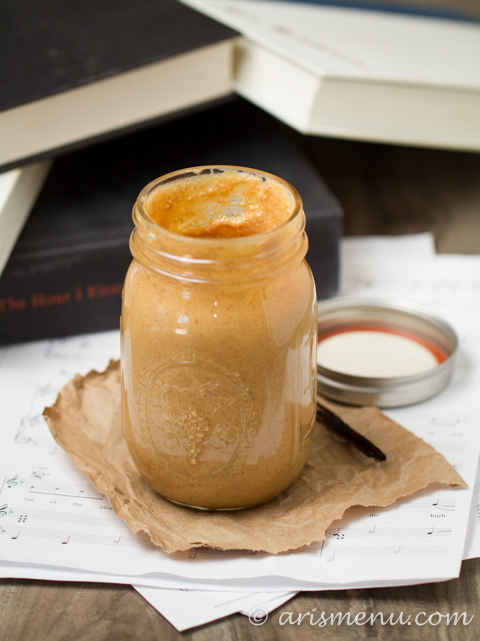
And clearly when it’s 110, I cannot be bothered to turn on the oven or my stove, so I make peanut butter. But not just any peanut butter. Like, the best peanut butter of my life kind of peanut butter. I was kind of obsessed with honey roasted peanut butter as it is, but add the seeds of an entire vanilla bean? Ummm, YES PLEASE. Smooth, creamy, drippy, sweet and totally dreamy; you will make this peanut butter again and again!

Print
Vanilla Bean Honey Roasted Peanut Butter

Prep Time: 5 minutes

Total Time: 5 minutes

Yield: approximately 1 1/2 cups

Serving Size: 1 tablespoon

Vanilla Bean Honey Roasted Peanut Butter

Simple, easy, sweet & delicious homemade peanut butter with just two ingredients! You're just 5 minutes away from sweet, creamy and drippy peanut butter that is absolutely unforgettable.

Ingredients

  • 16 oz honey roasted peanuts (or feel free to swap honey roasted almonds, macadamia nuts, etc.)
  • seeds from 1 vanilla bean
  • pinch sea salt, optional

Instructions

  1. Place peanuts and seeds from vanilla bean in your food processor. Blend until a smooth and creamy butter forms, about 5 minutes, stopping and scraping the sides of the food processor as necessary. Taste and add salt if necessary. Store in an airtight container in a cool, dry place for 2-3 weeks.
3.1
https://arismenu.com/vanilla-bean-honey-roasted-peanut-butter/

Filed Under: DIY/How To, Gluten-free, Sauces & Spreads · Tagged: diy, gluten free, homemade, peanut butter, peanuts, spread, vanilla, vanilla bean

Buffalo Chicken Stuffed Sweet Potatoes

May 26, 2014 · by Ari ·

These buffalo chicken stuffed sweet potatoes are an easy, healthy dinner that pack a powerful punch of flavor! With practically no prep work, they will change your mind on the ease of healthy eating.

Buffalo Chicken Stuffed Sweet Potatoes: Bold, healthy & insanely easy!

Can I just tell you about the moment in my life when I realized I could get the taste of buffalo wings without eating deep friend chicken? I seriously didn’t know for the better portion of my life that you could just buy the sauce at the store and put it on whatever the heck you want. I would venture to call this information life changing.

Buffalo Chicken Stuffed Sweet Potatoes: Bold, healthy & insanely easy!

You see, while I often (read: most of the time) crave buffalo sauce, I practically never crave fried chicken. I know, I know, a lot of people do, but it’s just not my thing. Kinda like I don’t get what the big deal is about mashed potatoes. I mean, I love butter and cream as much as the next girl, but white potatoes are pretty flavorless, and I’d rather just eat the butter on a piece of toast.

Buffalo Chicken Stuffed Sweet Potatoes: Bold, healthy & insanely easy!

I think it’s been pretty clear on this blog that I am all about bold, hit you in the face, stand out in a crowd kind of flavors. I don’t have one of those “sensitive pallets” that enjoys just a hint of spice. I have a heavy hand, and I almost never say things like “The flavors were over powering. I wish it had less spice.”

Buffalo Chicken Stuffed Sweet Potatoes: Bold, healthy & insanely easy!

My other love and probably favorite ingredient ever? SWEET POTATOES. I must have something like 20 sweet potato recipes on here, and I eat them multiple times per week on a regular basis. I love stuffing them with lean protein and bold flavors for a healthy, delicious and FUN dinner option that’s easy to put together any night of the week, and this is definitely one of my favorites!

Print
Buffalo Chicken Stuffed Sweet Potatoes

Prep Time: 5 minutes

Cook Time: 1 hour

Total Time: 1 hour, 5 minutes

Yield: 4 servings

Serving Size: 1 potato

Buffalo Chicken Stuffed Sweet Potatoes

These buffalo chicken stuffed sweet potatoes are an easy, healthy dinner that pack a powerful punch of flavor! With practically no prep work, they will change your mind on the ease of healthy eating.

Ingredients

  • 4 small sweet potatoes
  • 2 tablespoons olive oil
  • coarse sea salt
  • 6 tablespoons buffalo sauce (I recommend Frank's Red Hot)
  • 2 tablespoons nonfat plain Greek yogurt
  • 12 ounces chicken breast, cooked shredded
  • 2 ounces freshly crumbled goat cheese

Instructions

  1. Preheat oven to 400. Use a fork to poke several holes into sweet potatoes. Brush each sweet potato with approx 1/2 tablespoon of olive oil and sprinkle to coat lightly with sea salt. Roast until fork tender (meaning a fork easily slides right into the sweet potato), about 45-60 minutes depending on size of your potatoes.
  2. In a medium bowl, combine chicken, buffalo sauce and yogurt. Slice cooked sweet potatoes down the middle leaving about an inch uncut. Stuff each potato with 1/4 of the buffalo chicken, then top with goat cheese. Serve immediately.

Notes

To reduce cooking time, heat sweet potatoes in the microwave for 2-3 minutes before cooking. This usually reduces my cooking time to about 40 minutes.

3.1
https://arismenu.com/buffalo-chicken-stuffed-sweet-potatoes/


Filed Under: Dinner, Entree, Fall, Gluten-free, Holiday & Seasonal, Lunch, savory ·

Chai Spiced Coconut Cream Ice Cream {The Recipe ReDux}

May 22, 2014 · by Ari ·

Rich and creamy coconut milk ice cream with the warm and comforting spices of a chai tea latte. With just a handful of wholesome ingredients, this ice cream is vegan, gluten-free and paleo, so everyone can enjoy it! Chai Spiced Coconut Cream Ice Cream: Rich, creamy, vegan, gluten-free & paleo!

It’s summer! Well, maybe not technically, but here in Phoenix, summer has arrived in full force including triple digit temps, swimming, grilling, and obviously ICE CREAM! Chai Spiced Coconut Cream Ice Cream: Rich, creamy, vegan, gluten-free & paleo!

I have a love/hate relationship with summer. Grilling get togethers with swimming (and the dogs–totally necessary for fun!) and poolside margaritas are one of my favorite things. And I love the feel  of summer. You know, everything winds down and there just seems to be a more relaxed feeling to life in general. Or maybe it’s just because I work at a school and summer still means SUMMER VACATION!

Chai Spiced Coconut Cream Ice Cream: Rich, creamy, vegan, gluten-free & paleo!

This summer is going to packed with travel and summer teaching, but it still feels like a break because it’s a change from the norm, and I feel like we all need a change every now and then. I am seriously so ready. I have two more days of real classes, then I just have to give finals, and then I’m home free! To drink margaritas! And shovel down this ice cream! Chai Spiced Coconut Cream Ice Cream: Rich, creamy, vegan, gluten-free & paleo!

OMG this ice cream…. So rich and creamy and, with only a few ingredients, it is ridiculously easy. Blend, pour,  and let your ice cream maker do all the work! I’ve been obsessed with my ice cream maker recently. After a chat with my ice cream guru, I feel like I’ve got the hang of it now (silly me used to give up on the churning after a few minutes because I never actually read the instructions…). Chai Spiced Coconut Cream Ice Cream: Rich, creamy, vegan, gluten-free & paleo!

One of my favorite drinks is a warm, comforting chai latte, so when I saw this month’s theme for The Recipe ReDux was tea, I knew a chai dessert was the way to go! I love the chai spices–in a latte, in dessert, in all of the things. This ice cream uses canned coconut milk and only natural sweetener (I recommend honey or maple syrup, depending on what your dietary restrictions are).

Print
Chai Spiced Coconut Cream Ice Cream

Prep Time: 5 minutes

Total Time: 6 hours

Yield: approx 1.5 quarts

Serving Size: 1/2 cup

Chai Spiced Coconut Cream Ice Cream

Rich and creamy coconut milk ice cream with the warm and comforting spices of a chai tea latte. With just a handful of wholesome ingredients, this ice cream is vegan, gluten-free and paleo, so everyone can enjoy it!

Ingredients

  • 3 x 14 ounce cans full fat coconut milk, chilled
  • 2/3 cup honey or maple syrup (or liquid sweetener of your choice)
  • 1 tablespoon vanilla extract
  • 1 teaspoon cinnamon
  • 1 teaspoon cardamom
  • 1/4 teaspoon ginger
  • pinch cloves
  • pinch nutmeg
  • 1 tablespoon bourbon (optional)

Instructions

  1. Blend or whisk all ingredients except bourbon together. Transfer to ice cream maker and freeze according to ice cream manufacturer instructions. If desired, add bourbon during the last 2-3 minutes of freezing. Transfer to freezer safe container to finish freezing completely.
3.1
https://arismenu.com/chai-spiced-coconut-cream-ice-cream-the-recipe-redux/

Filed Under: Dessert, Gluten-free, Holiday & Seasonal, Ice Cream & Fro-yo, Low Carb, Paleo, Vegan ·

Peanut Butter Pretzel Chocolate Chip Granola Bars

May 18, 2014 · by Ari ·

Sweet, healthy and easy no bake peanut butter granola bars stuffed with crunchy gluten-free pretzels and dark chocolate chips. Save money and make your own granola bars at home with simple, wholesome ingredients!

Healthy & gluten-free peanut butter pretzel chocolate chip granola bars

Hi friends! It’s Monday, which I hate, but it’s Monday of a short week, which I love! It’s also tech week (agaiiiiiiin) which I love to hate. I am gearing up to finish my 4th production of 2014 (holy cow!), and immediately after it’s over on Thursday night, I am headed straight to the airport where this girl is picking me up!

Healthy & gluten-free peanut butter pretzel chocolate chip granola bars

My senior year of college, I lived off campus (okay, I always lived off campus) with 3 other theatre majors. Long story short, I introduced my friend and roommate Colie to the boy next door that she had a crush on, they fell in love, and now 5 years later they’re getting married! I’m taking my other roomie and BFF Heather as my date. The wedding is in Camas, WA, but I’m flying into Seattle and making the trip down with Heather to maximize our time together.

Healthy & gluten-free peanut butter pretzel chocolate chip granola bars

We’re going to sing so many show tunes at the top of our lungs, and I’m going to cry big, fat, ugly tears at this wedding. I love weddings. I extra, super duper love them when you’re over-the-moon-happy for the couple getting married. I mean, I know that should always be the case, but some couples are just, extra special. These two totally are.

Healthy & gluten-free peanut butter pretzel chocolate chip granola bars

So I’m gearing up for an other busy week, which means lots of food packing, and planning snacks. This usually results in me spending way too much money on Kind bars and Larabars, but when I’m really on the ball, I make these granola bars. They’re better than any store bought granola bar, and they are really so simple. And even more delicious.

Healthy & gluten-free peanut butter pretzel chocolate chip granola bars

They have just the right amount of sweetness to complement the salty peanut butter and pretzels. The chewy granola bar texture is studded with crunchy pretzel bits for the perfect texture combination. And we all know everything is better with dark chocolate. 😉

Print
Peanut Butter Pretzel Chocolate Chip Granola Bars

Prep Time: 10 minutes

Total Time: 1 hour, 10 minutes

Yield: 8 bars

Serving Size: 1 bar

Peanut Butter Pretzel Chocolate Chip Granola Bars

Sweet, healthy and easy no bake peanut butter granola bars stuffed with crunchy gluten-free pretzels and dark chocolate chips. Save money and make your own granola bars at home with simple, wholesome ingredients!

Ingredients

  • 2 cups oats (use gluten-free is applicable)
  • 1 1/2 cups pretzels, chopped (I love Glutino's gluten-free pretzels!)
  • 3/4 cup brown rice cereal (or regular ol' Rice Krispies)
  • 1/2 cup peanut butter
  • 1/2 cup honey (or other liquid sweetener)
  • 1/3 cup mini dark chocolate chips

Instructions

  1. Line the bottom of an 8" square pan with parchment paper. Set aside. In a large bowl, combine all ingredients. I use my hands to incorporate all ingredients. Evenly press mixture into prepared pan. If desired, press in some extra chocolate chips (I always do!). Let set for 1-2 hours, then cut into bars. Store in an airtight container for 7-10 days. These bars are best stored in the refrigerator, but can also be stored at room temperature.
3.1
https://arismenu.com/peanut-butter-pretzel-chocolate-chip-granola-bars/


Filed Under: Breakfast, Brownies & Bars, DIY/How To, Gluten-free, Granola, Snacks, Vegan ·

Pesto Chicken Salad {without mayo}

May 13, 2014 · by Ari ·

A healthy, simple and flavorful chicken salad that comes together in minutes using NO MAYO! Perfect for a make-ahead lunch or a simple dinner.

Pesto Chicken Salad: Easy, healthy and mayo-free!

You know what’s hard? Convincing yourself to start cooking again after you’ve been in the (bad) habit of endless amounts of TJ’s frozen black bean and corn enchiladas, Chipotle, and cereal for dinner. Yesterday I got home at like 5:30 with plenty of time to make the awesome dinner on my menu plan, but it took a lot of convincing myself to actually put in the effort.

Pesto Chicken Salad: Easy, healthy and mayo-free!

The funniest part? I literally only spent like 10 minutes preparing it. That’s usually my limit when it comes to weeknight dinners. If there’s more than 15 minutes of working time, I’ve already lost interest, and Netflix/my couch are calling my name louder than whatever is on the stove.

Pesto Chicken Salad: Easy, healthy and mayo-free!

Bonus points if a meal is easy to make the first time, and is delicious enough to want to eat all week long. That’s how I feel about this chicken salad. It takes a maximum of 10 minutes to put it together the first time, and once that’s done, you don’t even have to reheat it! Just put it on a plate/some bread/straight to your mouth by utensil, and you’re good to go.

Pesto Chicken Salad: Easy, healthy and mayo-free!

I’m a big fan of salad. Like, the healthy kind and the totally unhealthy why the F are you calling that a “salad” kind. Chicken, egg and tuna salads may not always be popular (they get a bad rap!),  but if I see it on a menu, I always want to order it. Is there anything more comforting than a chicken salad sandwich the way your mom used to make?

Pesto Chicken Salad: Easy, healthy and mayo-free!

Well, maybe this one. With fresh Italian flavor (OMG pesto…you rock my world), and not a drop of may, you get comfort food that makes you feel good even after you’ve finished it. This is the perfect make ahead lunch or dinner, and a great substitute for the mayo-y original.

Print
Pesto Chicken Salad

Prep Time: 10 minutes

Total Time: 10 minutes

Yield: 6-8

Pesto Chicken Salad

A healthy, simple and flavorful chicken salad that comes together in minutes using NO MAYO! Perfect for a make-ahead lunch or a simple dinner.

Ingredients

  • 2/3 cup nonfat plain Greek yogurt
  • 1/4 cup pesto
  • pinch each salt and pepper
  • 10-12 ounces cooked chicken, shredded (I use the meat from a whole rotisserie)
  • 1/2 cup cherry or grape tomatoes, halves

Instructions

  1. In a large bowl, whisk together yogurt, pesto, salt and pepper until combined. Add chicken and tomatoes. Stir to combine. Serve over fresh greens, in a sandwich, or solo! Keep refrigerated in an airtight container for 5-7 days.
3.1
https://arismenu.com/pesto-chicken-salad/

Filed Under: Dinner, Entree, Gluten-free, Low Carb, Salads, Sandwiches ·

Esprit De She Olympic Triathlon Race Recap

May 12, 2014 · by Ari ·

I DID IT!!!!!!!!!!!! I am officially a triathlete!

IMG_1585

I feel like I have so much I want to tell you guys. I totally dropped off the radar with my training recaps. Between work and life and being out there training, I seemed to lose track of time until I was weeks behind. The end of training went really well. I stuck to my plan and I think I only missed one workout for each sport over the entire training cycle. However, after our longest brick workout (3 hours on the bike + 30 min run), I started to lose a little bit of confidence. The weather has been creeping up here, and running in the heat is NOT my forte. Also, I had never actually swam in open water.

Thursday before the race, I signed up for a local splash and dash to try to test the waters (literally) and make sure I felt confident for race day. Well, I had a full blown panic attack in the water and came the closest I’ve ever come to a DNF. I did end up finishing, but only after a lot of crying and talking through it with Steve and a very nice life guard.

I honestly have never felt more doubtful about my ability to finish a race. I never skimp on my training, and go into everything I sign up for having followed my training plan to a tee. I had put in all of the time and mileage, but I was literally terrified that I would panic again in the open water and that my months and hours of training would be for nothing. I was also slightly terrified of getting kicked in the head, passing out and drowning. Logical? Not necessarily, but my brain can come up with some crazy shit.

Okay, race day. So I woke up at some awful hour that started with a 3, got to the start with Nicole and the husbands and before I knew it, it was time for us to head over to get into the water. They gave some pre race announcements, and I still didn’t feel excited, only scared. Then they asked everyone who was a first timer to raise their hand. I tentatively put my hand up, and the people around me looked at me and one lady nicely put her hand on my back, and then I just started crying. I looked at Nicole, and I was like “Ummm, I’m crying and I don’t know why.” It didn’t stop until we got into the water. The combination of nerves and fear and desire to achieve my goal just overwhelmed me, and we all know I’m an emotional human.

IMG_1377

We got into the water and we had to SWIM TO THE START then tread water…wtf??? Maybe no big deal if you’re in a wet suit (it was wet suit legal, but it was warm enough and I’ve never swam with one so I wasn’t about to start on race day). As we started swimming to the start, as soon as I put my face in the water, all of those feelings of panic came back immediately. I did my best to go through every positive mantra I know, breathe, and remind myself that I could do this. I did do this just a few days before. I had panicked, but I stuck it out, and it got better. As soon as we started, I just took it slow, tried to focus on my breathing, and kept repeating to myself that I could do this. We swam in a big rectangle, and about 1/2 way through the first section I started freaking out about the distance. It seemed so far. I wanted to take a break. What if I couldn’t keep going????? Every time I felt my anxiety creep up, I just slowed my stroke and focused on my breathing.

The good thing about being a slow swimmer? I had so much room! I only bumped into other swimmers a few times and it was really nice. Finally, I approached the first turn and when I made that turn something clicked in my mind and I knew I could do it. I was feeling better, more relaxed, and I was even starting to enjoy myself! I just kept doing my own thing (including a lot of zig zagging because that sighting business is hard!) and then all of the sudden I could hear the announcer! I couldn’t believe it! I kept getting nasty lake water in my mouth because I had this dopey grin on my face that I couldn’t get rid of. It was the first moment I really believed I could and would finish this race.

I got out of the water and ran to my transition area. I had finished the swim in about 47 minutes. 3 days before half the distance took me 31 minutes, so I was honestly happy with 1. Not stopping to panic, and 2. Coming in under an hour. It was definitely slower than I swam in the pool, but I was expecting that, and I was just beyond happy to have made it! Plus I was super excited for the bike. I had a feeling this would be my favorite leg, and it absolutely was.

IMG_1443

I made the mistake of getting behind the group of girls I exited transition with. I was trying to be polite, and it took me a little bit to stop being polite and just get around people. I immediately started picking people off on the bike. I tried counting how many people I passed, but I lost count pretty quickly. 😉 I was feeling pretty good, but my bike felt…weird. There was a rubbing and clicking feeling, and I was a little worried something was off with my shifting or derailleur. I just continued on and figured I’d deal with it after the race. I was having a great time and only slightly noticed that my effort and intensity didn’t seem to match my pace. I was riding faster than we had done any of our training rides and passing so many people, and I only got passed by 2-3 people (all of which had aero bars!) that I just figured that was where I was at. I finished the bike in 1:34 and felt good about it.

IMG_1487


IMG_1489

I knew the run wasn’t going to be pretty. I was pretty tired by this point, the high was 102* and I started my run at 9am. There was also zero clouds/shade/etc. I made the decision to do a walk/run approach and allowed myself to walk up all of the hills. While I can’t say I enjoyed the run (it was my least favorite part), it also wasn’t as bad as I was expecting. I was worried I would end up walking the entire 10k, but I stuck to my plan and kept my running pace slow. I also dumped like 100 cups of water over my head and refilled my bottle twice! I finished in 1:12 for a total time of 3:40.

IMG_1572

Going into this race, my only real goal was to finish. That’s how they say you should go into your first races, right? Usually I suck at that, but because triathlons are so new to me, and I picked a fairly big distance for my first one (I kept kicking myself at the expo for not choosing the super sprint–that one sounded so fun!), I knew I just had to focus on surviving. In the back of my mind, I assumed the race would take my over 4 hours, but I secretly hoped to squeeze in before that. My time was definitely not a fast one, but I was so thrilled to come in so far ahead of where I expected!

IMG_1578

When we went over to grab our things, Steve looked at my bike and laughed. He said “Do you want to know why you rode so slow? Your front brake was rubbing the entire time.” So that rubbing/clicking I felt? Yeah, not crazy. I can’t believe I couldn’t tell! When I got to transition that morning, it was obvious someone had moved my bike, and my guess is that they bumped something and my brake had gotten stuck. I guess I need to work on my bike knowledge before next time… 😉

And oh yes, there will be a next time because I absolutely LOVED this race! I had so much fun, and I enjoyed it way more than any of my running races. In fact, I spent the morning looking up which tris were coming up because I’m ready to go again! I’ve already signed up for a sprint with my best friend in June, but my next big goal is….

HalfIron.jpg


Thanks so much for all of your support throughout my training. You guys all keep me motivated and inspired with your kind comments, and I am so grateful for the support! And extra special thanks to everyone who came out to support us, and especially my training buddy. I totally couldn’t have done it without you girl!

Filed Under: Race Recap ·

Crockpot Chipotle Dr. Pepper Pork

May 7, 2014 · by Ari ·

Easy, flavorful and tender pork slow-cooked in Dr. Pepper with spicy chipotle peppers, potatoes and onions. The soda makes the pork melt-in-your-mouth tender, and the chipotle peppers add so much flavor you will never believe how easy it is!

Crockpot Chipotle Dr. Pepper Pork: An easy, flavorful and healthy weeknight meal

HI!!! I missed you guys, and I feel like I have so many things I want to tell you. Things over here have been crazy. I’m in tech week for my third show in less than three months, and this is the biggest one. I successfully completed my first triathlon (more on that coming this week, but OMG I LOVED it!). I traveled to California for The Big Traveling Potluck with a couple of my favorites, and then also met some amazing new friends. Oh, and I’ve cooked maybe 2 meals in the past month.

Crockpot Chipotle Dr. Pepper Pork: An easy, flavorful and healthy weeknight meal

So that’s the quick catch up on life. Oh that and I have an embarrassing new addiction to….Gossip Girl. All of my students told me I need to watch it, and these are the same kids that share my undying love for Breaking Bad so I trusted their taste, and turns out it is as trashy as I was expecting. And equally addicting. It’s like if they expanded Cruel Intentions into an entire series and I can’t get enough. Although, lately it’s been more like get home at 8:30, eat cereal for dinner, then fall asleep by 9:15 half way into an episode.

Crockpot Chipotle Dr. Pepper Pork: An easy, flavorful and healthy weeknight meal

Thank goodness for my crockpot. And leftovers. I don’t remember the last meal I ate at home that didn’t come from the crockpot (minus my brother’s birthday dinner). A lot of people have mixed feelings on slow cookers, and I’ve heard people say that they suck the flavor out of a dish. Maybe it’s my heavy hand when it comes to seasonings, but I’ve never experienced that! In fact, I feel like the crockpot is a fool proof way to deliver big flavor and the most tender meat. Leaner meats like pork tenderloin or chicken breast can be challenging to get juuuussssttt right. Ya know that point where the meat is cooked, but so soft it falls apart with the touch of the fork? That’s what I’m talking about! And you don’t need a fatty cut of meat to make it happen.

Crockpot Chipotle Dr. Pepper Pork: An easy, flavorful and healthy weeknight meal

Now, before you think I’m nuts for putting soda in my meat, let me explain…When you cook meet with soda in a slow cooker, the acidity of the soda breaks down the meat and makes it even more tender. Depending on what else you put in, you will get a hint of the flavor, but it won’t over power the dish. This being said, you could also use root beer, coke, etc. I mean, I wouldn’t suggest sprite or 7-up, but any dark soda should do it. I’ve also tried it with both regular and diet, and honestly I love it both ways. If you’re not a diet soda person, you may get a hint of that diet soda taste and prefer to use regular. Even if you use regular soda, it has less than half the calories of an equal amount of barbecue sauce, so it’s not going to kill the dish health-wise, ya know?  With the soft and tender pork and smokey chipotle peppers, this simple dish will be one you make over and over again!

Print
Crockpot Chipotle Dr. Pepper Pork

Prep Time: 10 minutes

Cook Time: 6 hours

Total Time: 6 hours, 10 minutes

Yield: 12

Crockpot Chipotle Dr. Pepper Pork

Easy, flavorful and tender pork slow-cooked in Dr. Pepper with spicy chipotle peppers, potatoes and onions. The soda makes the pork melt-in-your-mouth tender, and the chipotle peppers add so much flavor you will never believe how easy it is!

Ingredients

  • 3 pounds pork tenderloin (does not have to be exact, slightly more or less is fine too)
  • 1 large sweet onion, chopped
  • 5-6 small yukon gold potatoes, chopped
  • 5-6 ounces chipotle peppers in adobo sauce*
  • ~1 liter Dr. Pepper (regular or diet)

Instructions

  1. Place first 4 ingredients in your slow cooker. Pour soda on top. Make sure pork is completely covered by soda. You may need to use more/less depending on the shape of your tenderloin and the size of your slow cooker. Cook on low for 5-6 hours until potatoes are tender and pork is fully cooked.
  2. Remove pork and shred. Return shredded meat to slow cooker and stir. Use a slotted spoon to serve. Leftovers may be refrigerated in an airtight container for 5-6 days.

Notes

*You may chop chipotle peppers before adding if you want them in smaller pieces. I just left them whole, but they can be overwhelming if you have a milder palate. Either way, just make sure to include the sauce as well!

3.1
https://arismenu.com/crockpot-chipotle-dr-pepper-pork/


Filed Under: Dinner, Entree, Gluten-free, Slow Cooker ·

Brussels Sprouts Fontina Mac & Cheese {The Recipe ReDux}

April 22, 2014 · by Ari ·

Rich, hearty and healthy veggie-packed mac & cheese with fontina cheese, rosemary and garlic. Brussels sprouts fontina mac & cheese is a quick and easy vegetarian meal to throw together that’s filled with flavor and nutrients!

Brussels Sprouts Fontina Mac & Cheese: Easily, healthy veggie-packed comfort food!

For the longest time, I didn’t get the whole deal about cast iron skillets. They just seemed like so much….work. Not to mention–this is embarrassing–but when I first started cooking, I didn’t like to use anything where I couldn’t use that fake “zero calorie” spray. I mean, don’t get me wrong, the diet mentality is a tough one to break, and I still keep that crap in my house (guilty), but my thoughts on cooking and eating have changed quite a bit.

Brussels Sprouts Fontina Mac & Cheese: Easily, healthy veggie-packed comfort food!

My mom had this cast iron pan sitting around for years. She wasn’t exactly sure what to cook with it, and she’s much less adventurous (though still an AWESOME cook!) in the kitchen than I am. She has a few staples and will always make our favorite dishes, where as I cook something new every single time I have anyone over. I can’t help it.

Brussels Sprouts Fontina Mac & Cheese: Easily, healthy veggie-packed comfort food!

Anyway, I started talking about wanting a cast iron skillet and my mom decided to pass hers down to me. She is always giving me the best hand-me-downs. I still have this awesome big red recliner chair that doesn’t match anything that she gave me when I moved into my first apartment. Winston and Clementine have kind of claimed it as their own in the last couple of years, but I still love that chair, and I kinda feel the same attachment towards my cast iron.

Brussels Sprouts Fontina Mac & Cheese: Easily, healthy veggie-packed comfort food!

It’s definitely not an all-the-time dish in my house, but it makes things more special, and once you cook with one, you will absolutely understand what all the fuss is about! So when The Recipe ReDux asked us to tell a story about a treasured piece of cookware, I immediately knew I wanted to share my cast iron with you guys.

Brussels Sprouts Fontina Mac & Cheese: Easily, healthy veggie-packed comfort food!

You don’t have to have a cast iron to make this mac and cheese. Of course it will make it better, and it certainly is a pretty way to present it, but you could easily use any pan you choose. What really makes this dish stand out is the combination of seared brussels sprouts with garlic and olive oil with creamy and sharp fontina cheese and a touch of rosemary. The flavors work flawlessly together, and even if you don’t normally get excited for brussels sprouts, I promise you’ll want to give these ones a chance. In fact, if you still don’t like them after eating this, I will do awesome embarrassing acts of your choosing. Within reason. 😉

Print
Brussels Sprouts Fontina Mac & Cheese

Prep Time: 10 minutes

Cook Time: 30 minutes

Total Time: 40 minutes

Yield: 4-6 servings

Brussels Sprouts Fontina Mac & Cheese

Rich, hearty and healthy veggie-packed mac & cheese with fontina cheese, rosemary and garlic. A quick and easy vegetarian meal to throw together that's filled with flavor and nutrients!

Ingredients

  • 8 ounces uncooked whole grain macaroni (I used gluten-free, use whatever works for you)
  • ~2 tablespoons olive oil, divided
  • 1 pound brussels sprouts, ends removed and halved
  • 3 large cloves garlic, minced
  • salt and pepper
  • 8 ounces reduced fat cream cheese
  • 1/2 cup unsweetened almond milk (or whatever milk you'd like)
  • 1 cup freshly grated fontina cheese
  • 1 large sprig rosemary, stem removed and finely minced

Instructions

  1. In medium pot, cook macaroni according to package instructions. When finished, strain and set aside.
  2. Meanwhile, heat a large pan (8-10", preferably cast iron or stainless steal for best searing) over medium heat. If using a cast iron, keep in mind you do not need to use as much heat. Coat bottom with olive oil using about 1 tablespoon. Place halved brussels sprouts cut side down, season with a generous pinch of salt and pepper and sear until browned, about 5-7 minutes. Flip and cook opposite side until browned, about 5 minutes. Reduce heat to low and stir occasionally.
  3. Once you get your brussels started, heat a medium pot or high rimmed pan over medium low heat. Coat with olive oil using about 1 tablespoon. Add garlic and cook just until fragrant, about 2-3 minutes. Add cream cheese and milk. Season with salt and pepper and whisk constantly until cream cheese is melted and milk and cheese are combined, about 5-7 minutes. Stir in fontina and mix until incorporated.
  4. Stir cooked pasta into prepared cheese sauce then transfer to your cast iron and stir into cooked brussels sprouts. Stir in fresh rosemary. Serve immediately. Leftovers may be stored in the refrigerator in an airtight container for up to 5 days.
3.1
https://arismenu.com/brussels-sprouts-fontina-mac-cheese/


..

An InLinkz Link-up


Filed Under: Dinner, Entree, Gluten-free, Holiday & Seasonal, Pasta, Vegetarian · Tagged: brussels sprouts, comfort food, mac and cheese

Shredded Chicken Taco Salad {+ how to make crockpot salsa chicken}

April 13, 2014 · by Ari ·

Ridiculously easy, juicy crockpot salsa chicken turned into a hearty, healthy and gluten-free taco salad with just 10 minutes of working time. A perfect weeknight meal the whole family will enjoy!

Shredded Chicken Taco Salad: Easy, simple, healthy & gluten-free!.jpg

For the longest time I’ve wanted to share my salsa chicken with you guys. Okay, I hesitate to call it “mine” because I feel like everyone in the world makes salsa chicken, and it’s hardly even a recipe because there are only two ingredients, but it’s one of those things that when I discovered it, it totally changed my life. That sounds dramatic, but it really did.

Shredded Chicken Taco Salad: Easy, simple, healthy & gluten-free!

I make salsa chicken at least once a month and nine times out of ten, I eat it in a taco salad. This last time I finally decided to take pictures of it. Even Steve was like “Ummm haven’t you posted that before?” I mean, it’s entirely possible that I’m going senile and did post it, but forgot, but I swear I only shared this taco salad, which is my other weeknight staple.

Shredded Chicken Taco Salad: Easy, simple, healthy & gluten-free!

To make salsa chicken, literally all you have to do is place uncooked boneless, skinless chicken breast in a slow cooker, cover with salsa then cook on low until done. Most people say 6-8 hours, but mine is usually ready in more like 4-5 hours.

Shredded Chicken Taco Salad: Easy, simple, healthy & gluten-free!

Then you can put it into whatever you’d like–burritos, tacos, enchiladas, or this taco salad! I like to keep things really simple since I usually save this for a night I know I won’t feel like cooking, but you can add whatever you’d like. It’s especially delicious with fresh guacamole. 😉

Shredded Chicken Taco Salad: Easy, simple, healthy & gluten-free!

The combination of the juicy, spicy chicken, smooth beans and creamy avocado and Greek yogurt with crisp fresh veggies is the best of all worlds. Healthy and fresh with the perfect combination of flavors and textures. This salad will totally solve your too-busy-to-cook dilemma!

Print
Shredded Chicken Taco Salad {+ How to make crockpot salsa chicken}

Prep Time: 10 minutes

Cook Time: 5 hours

Total Time: 5 hours, 10 minutes

Yield: 4 large salads

Serving Size: 1 salad

Shredded Chicken Taco Salad {+ How to make crockpot salsa chicken}

Ridiculously easy, juicy crockpot salsa chicken turned into a hearty, healthy and gluten-free taco salad with just 10 minutes of working time. A perfect weeknight meal the whole family will enjoy!

Ingredients

    For the salsa chicken:
  • 1 lb chicken boneless skinless chicken breasts
  • approx 24 ounces salsa
  • For the taco salad:
  • approx 8 cups chopped romaine (I used 3 hearts of romaine)
  • 2 red peppers, diced
  • approx 3 cups cherry tomatoes, halved
  • 2 cups cooked beans (I use canned fat free refried beans, but drained black or pinto beans are also a great choice)
  • 1 cup shredded extra sharp cheddar cheese
  • 1 avocado, sliced, pit and peel removed
  • Greek yogurt and chopped green onion for topping

Instructions

  1. Place chicken in slow cooker and cover completely with salsa. Cook on low until chicken is cooked throughout, about 5-6 hours. Shred chicken and stir back into salsa.
  2. Layer salad ingredients in individual large bowls. I typically layer in order of ingredients listed, adding the chicken after the beans then topping with cheese, avocado, yogurt and green onions, but it won't effect anything if you do it differently. Serve immediately. Store leftovers separately in an airtight container in the refrigerator.
3.1
https://arismenu.com/shredded-chicken-taco-salad-crockpot-salsa-chicken/

Filed Under: Dinner, DIY/How To, Entree, Gluten-free, Low Carb, Salads, Slow Cooker ·

Tri Training Week 5

April 9, 2014 · by Ari ·

Okay, so I’m gonna talk a little bit about burnout, but first let me just say that even though the title of this post says “Week 5”, I started training last fall for the 3 half marathons I ran at the beginning of this year. In January I added CrossFit and swimming and then at the beginning of February I actually started mostly following this training plan, but I didn’t start sharing any of it here until after my last half marathon ended and I switched to focusing solely on the triathlon, so basically I feel like I’ve been training nonstop since about October and I feel….tired. Mentally, physically, in all ways tired. Or at least I did last week.

This week I already feel better mentally because I can see the light at the end of the tunnel. One more hard week and then I get to taper and recover. I actually ended up with a weirdly long taper with an extra week since I started my plan a week early on accident, so I have a free week that I can do whatever I want with. I thought it might come in handy in case I got sick or something, but I’ve actually managed to keep up with the volume of workouts surprisingly well. It’s kind of like every day I look at what’s ahead of me and wonder how I’m going to be capable of all of that, but then I am. I don’t know why I’m still surprised by it. 😉

Okay, here’s how last week went down:

Mon AM: 2:30 bike + 25 min run. I know I’ve been bitching about the wind a ton lately, but it has just been so windy! We had a pretty intense headwind on the way out (like we were going 10 mph and it was hard!), but then we got a nice tailwind for most of the way home. The way out kind of did a number on our pace, but then we killed the run. Transition runs are weird. I know it’s going to be hard, so I just try to get through it and not stalk my garmin. I guess because I expect it to feel hard, I end up running hard? My first mile totally shocked me when it went off at 8:55 and then my second mile surprised me even more when it came in at 8:52! I was only expecting to have to run about 2.5 miles, but we ended up running 2.8 and it was….not easy. It was definitely confidence boosting, though! I haven’t run that fast since marathon training, and I’m finally hopeful that some of my speed is coming back.

Tues AM: Crossfit. This is where I started to notice I was feeling burnt out. I got to crossfit, then sat in my car and thought about driving home. WTF? The hardest part of a workout is usually getting out the door (for me) and I drove all the way there and seriously was debating turning around?? Of course I didn’t, but I was not feeling this workout. The warm up was 3 rounds of 30 double unders (I got 3 in a row!!! A new record!!!) and 21 kettle bell swings. I was already tired just from the warm up! Then the workout looked like it would be easy for me since it was so much running. Ummm, I came in dead last. Of the four of us that were there at that time anyway. We did 800 meter run, 400 meter run BACKWARDS (lots of four letter words happening here), 100 sit ups, 800 meter run, 400 meter run backwards, 100 squats. I finished in 23:17 and was literally sore the entire rest of the week. I don’t know what it was, but this workout killed me! It’s always the high rep body weight workouts that make me sore rather than the heavier lifting days.

Tues PM: 1 hour swim. Tuesday was just not a good day I think. My swim felt miserable. I spent the entire hour convincing myself that it would be okay if I just stopped, and then having to convince myself that it wouldn’t. My neck hurt (I can only breathe on one side…I need to work on that…), my breathing was messed up, my body ached, it just plain sucked. BUT I made it through, didn’t quit and swam 2300 yards which is a new record!

Wed AM: Crossfit. I skipped track. Shhhhh. I rarely skip workouts, but when 4:40am came, I just couldn’t do it. I did get up and go to crossfit, and I was SO GLAD I did because this day was AWESOME!

Okay, first it was really scary, but then it was awesome. I had my first legit terrifying crossfit moment. We were finding our 1 rep max for back squats, and they taught us how to bail out of a weight if necessary, but of course my first time didn’t go as planned. I had worked my way up to 185 lb and I went down, but I was trying to get lower and my lower back went forward just a little bit, but I couldn’t come back from it and the bar ended up rolling over my neck, over my head and onto the floor. The entire room stopped and everyone stared at me, and all I could say was “I’m sorry. I think I have a headache.” Then I gave myself a few minutes and tried it again. And nailed it.

photo 1 (1)

Thurs AM: Crossfit. I was super sore I think from both Tuesday and Wednesday, so I wasn’t exactly looking forward to this workout, and it ended up being even harder than I expected! We had 20 min to do as many rounds as possible of 100 meter lunge / 100 meter run / 21 push ups (I still do them on my knees) / 21 kettle bell sumo dead lift high pulls (I used 35lbs). Ummm, 100 meters is a LONG WAY to lunge! Yikes. I finished exactly 4 rounds.

Thurs PM: 45 min swim. It’s amazing what a difference the day makes! Today I got in the water and felt great, and I think this was the fastest I have ever swam! I did 1800 yards in 45 minutes. That’s a full 10 minutes off the first time I swam the distance about 2 months ago!

Fri AM: 1 hour bike intervals + 10 min run. Today was pretty uneventful other than an interval at 23.1 which made me very happy! Got in almost 15 miles on the bike and 1.1 miles running. Yes, that .1 totally makes a difference when you only run for 10 minutes. 😉

Sat AM: Long run. This run was hard and beautiful and confidence boosting! We went out with BTB to run at South Mountain.

photo 2

I’d only been one other time and I had somehow forgotten how tough those hills are! I definitely had to take a couple of walking breaks on the steeper sections, but I really felt like we had a great run and we ended up running 12 miles in 2:03 which totally surprised me! There were a few miles in there that were almost 12 minutes long, but I guess we made up for it on the downhill sections and finished a lot stronger than I expected. Also, I totally thought I couldn’t do it between miles 8-10, but that’s just an other reminder that I am stronger than I think!

Not sure if we hydrated enough post run. Just 4 bottles of water, 2 G2s, a bottle of lemonade and 2 drinks from Dutch Bros...

Not sure if we hydrated enough post run. Just 4 bottles of water, 2 G2s, a bottle of lemonade and 2 drinks from Dutch Bros…

Sun: Rest. Steve and I had a belated anniversary celebration with a perfect stay-cation in downtown Phoenix that involved zero exercise other than lifting my bourbon to my lips. 😉

Totals:

11 hours of training, 10 workouts (my tri expert Jamie says bricks count as two!), 69 miles (17 running, 49 cycling, 4,100 yards swimming

Fav workout: BACK SQUATS!!!

Hardest workout: That mountain.

Quote of the week: “It’s uphill both ways.”

Filed Under: Training ·

Healthy Crockpot Chicken Tikka Masala

April 7, 2014 · by Ari ·

Soft and tender slow-cooked chicken breast with a thick and creamy masala sauce seasoned with bold Indian spices. So rich, hearty and easy with NO prep work, you will want to make it over and over again.

Healthy Crockpot Chicken Tikka Masala: NO prep, easy, healthy & gluten-free

Ummmm, I don’t think I’ve cooked a single meal in the last week and a half. Today I tried to meal plan for the week and I looked at my calendar and asked my husband if we still had leftover chili in the fridge. He said that we did, and that was the end of that conversation since I don’t think I’ll be home before 8pm again all week. Tech week for my middle school musical and peak training week. I’m gonna be a lot of fun, let me tell ya.

Healthy Crockpot Chicken Tikka Masala: NO prep, easy, healthy & gluten-free

Sometimes life just gets totally crazy, and my crockpot is seriously my life saver. I don’t know how people live without them. I’m all about the no prep work required recipes. Browning meat? No thank you. I literally want to throw everything in 10 minutes before I leave for work and come home to delicious food. Is that too much to ask?

Healthy Crockpot Chicken Tikka Masala: NO prep, easy, healthy & gluten-free

I very rarely find someone else’s recipe and want to make it 100% as written. It’s just not me. I can almost always think of something I want to try to make it my own, or a healthier substitution, but every once in a while something catches my eye that looks perfect just the way it is, and that is how I felt when I saw this recipe on Anetta’s blog.

Healthy Crockpot Chicken Tikka Masala: NO prep, easy, healthy & gluten-free

With less than 10 minutes of working time and the bold, perfectly spiced flavor, this healthy, protein-packed meal is a must make, and something I will be making over and over again. I doubled the recipe and it was one of those times where I was legit excited to eat the leftovers for the rest of the week. I served mine with brown rice and added a little fresh lime juice and sriracha on top, but otherwise followed the recipe exactly. Make sure to check out Anetta’s blog for this fabulous recipe! PS: There’s also a super great note and lesson about using Greek yogurt as a thickener without it curdling–copying it ALL THE TIME now!

Filed Under: Dinner, Entree, Gluten-free, Low Carb, Slow Cooker ·

Cinnamon Swirl Banana Bread

April 2, 2014 · by Ari ·

Ultra soft and tender banana bread swirled with cinnamon brown sugar and topped with a crunchy cinnamon sugar crust. This banana bread is so irresistible, you’d never guess it’s healthy, vegan & gluten-free!

cinnamon swirl banana bread.jpg

I have this problem. When I like something, I really like it. Like the can’t get enough, want to revolve my entire life around it kind of like it. It’s kinda like how if we become friends and I think you’re really cool, I just want to hang out with you all the time and never leave your side. Some people call that “creepy”. I just call it being an extrovert and knowing what/who I like. 😉

bananabread-26

You may remember that I kinda recently discovered that I like banana bread, and now it’s become that thing I can’t get enough of. Sometimes I purposely don’t eat my bananas so that they can get to that too-ripe stage where I am left with no choice other than making banana bread. It’s kind of a problem.

Cinnamon Swirl Banana Bread1.jpg

I keep trying to decide which one is my favorite, but that’s like asking who I love more: Winston or Clementine. I can’t do it. I will say, however, that the “crust” on this loaf makes it incredibly special and unlike any banana bread I’ve ever tasted. It wasn’t even intentional. I had extra cinnamon sugar left over, and I threw it on top. It was one of those perfect surprises–I took it out of the oven and the top was sweet and crunchy while the rest was perfectly tender and pillowy soft.

bananabread-33

I happened to have a little extra of this molasses dulce de leche glaze lying around when I made it, so to make things even more ridiculous, I drizzled some on top. It totally doesn’t need it, but if you want to add a little extra umph, it certainly doesn’t hurt. Either way, you’ll find yourself going back for “Just one more slice…” until the loaf magically disappears. 😉

Print
Cinnamon Swirl Banana Bread

Prep Time: 20 minutes

Cook Time: 1 hour

Total Time: 1 hour, 20 minutes

Yield: 12-16

Serving Size: 1 slice

Cinnamon Swirl Banana Bread

Ultra soft and tender banana bread swirled with cinnamon-sugar and topped with a crunchy cinnamon sugar crust. This banana bread is so irresistible, you'd never guess it's healthy, vegan & gluten-free!

Ingredients

  • 2 cups gluten-free baking blend (or white whole wheat flour)
  • 2 tablespoons cornstarch
  • 1 teaspoon baking soda
  • 1 teaspoon baking powder
  • 1 teaspoon cinnamon
  • dash salt
  • 3 extra ripe medium bananas, mashed
  • 1/3 cup melted coconut oil
  • 2/3 cup brown sugar
  • 1/2 cup sugar
  • 1 teaspoon vanilla extract
  • 3/4 cup unsweetened almond milk
  • For the cinnamon brown sugar swirl/crust:
  • 1/4 cup brown sugar
  • heaping 1/2 tablespoon cinnamon

Instructions

  1. Preheat oven to 350. Spray a 9x5" loaf pan with nonstick spray. Set aside.
  2. In a small bowl, combine the brown sugar and cinnamon for the cinnamon brown sugar swirl. Set aside.
  3. In a medium bowl, whisk together baking blend, cornstarch, baking soda, baking powder, cinnamon and salt. In a large bowl or stand mixer, beat together bananas, coconut oil, sugars and vanilla until well combined. Stir in half the flour mixture, then almond milk, then remaining flour mixture.
  4. Pour half of the batter into prepared loaf pan. Sprinkle half of the cinnamon brown sugar mixture on top. Pour remaining batter and top with remaining cinnamon brown sugar. Bake until a toothpick inserted in the center comes out with just a few crumbs, about 50-60 minutes. Set loaf pan on a wire rack to cool completely. Store in an airtight container for up to one week. If desired, serve topped with molasses dulce de leche glaze
3.1
https://arismenu.com/cinnamon-swirl-banana-bread/

Filed Under: Breads & Muffins, Dessert, Gluten-free, Vegan ·

« Previous Page
Next Page »
Image Map

Popular Posts

Tart Cherry Margaritas: The perfect, refreshing margarita--lightly sweet with a punch of tequila

Tart Cherry Margaritas

90+ Healthy Recipes for Breakfast, Lunch, Dinner & Dessert

90+ Healthy Recipes for Breakfast, Lunch, Dinner & Dessert

The Ultimate Peanut Butter Cup Brownie Cookies: Rich, fudgy, brownie-like chocolate cookies stuffed with melty peanut butter cups!

Ultimate Peanut Butter Cup Brownie Cookies

Drink & Dish: Cafe Au Lait Cupcakes

Crockpot Chicken Enchilada Soup

Subscribe via Email:

Enter your email address:

Save an additional $30 on Blendtec Factory Recertified Blenders + Free Shipping

Featured Here

recipe redux
Certified Yummly Recipes on Yummly.com

Member Of…

FitFluential Is Fitness Found
AZ Bloggers Network
az 150 photo az150_zpsfb093d32.gif

Archives


Image Map

Copyright © 2025 | Innovative Child Theme by The Pixelista | Built on the Genesis Framework


Loading Comments...