• Going Out
    • Phx Restaurants
    • How To Order At Starbucks
  • Running
    • My Running Story
    • Race Calendar
    • Race Recaps & Results
  • Blogroll
  • Bucket List
  • Video

Ari's Menu

Little changes making a big difference.

  • Home
  • Recipes
  • Weight Loss
    • My Story
    • Common Swaps
  • Who’s Who
  • Contact
    • Policies & Disclosure
  • Press

Archives for June 2013

Roasted Corn Black Bean Salad

June 5, 2013 · by Ari ·

Roasted Corn Black Bean Salad #vegan #glutenfree

You guys…it is HOT here. Have I mentioned that? Complained about highs of 110*?? Wahhhh, I live in Arizona and 5 months out of the year, I strongly question my life choices.

sted Corn Black Bean Salad #vegan #glutenfree

It’s okay though, because I’ve only got an other 10 days of this madness before I head to the northwest for SIX WEEKS!!! I’m starting with a little vacation in San Francisco to visit my friend Karisa with my New York Husband, then working at a theatre camp in Portland for 5 weeks. I went last summer, and this actually marks my 11th summer between my time as a first student, then counselor and now teacher. I love it. It’s my happy place, and this time of year I always need the recharge of a new environment to remind me why I love what I do.

sted Corn Black Bean Salad #vegan #glutenfree

Anyway, I guess you were maybe here to read about food? Well, I swear the heat relates to the food. You see….it’s hot (redundant, part of 1), and I don’t want to eat anything that doesn’t taste like summer. You know what is, like, the most summeriest food??? CORN!!!!

sted Corn Black Bean Salad #vegan #glutenfree

I just used the words “most summeriest”. Honestly, sometimes I’m not sure why you guys read a word a say. Oh yeah….the food.

sted Corn Black Bean Salad #vegan #glutenfree

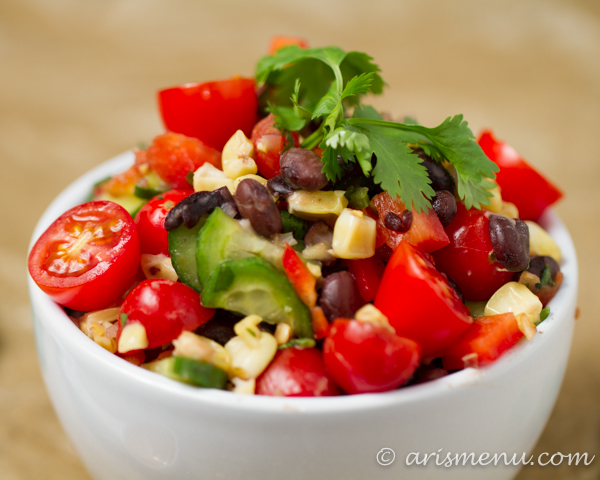
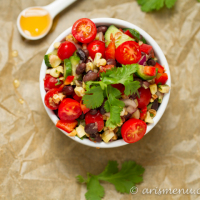
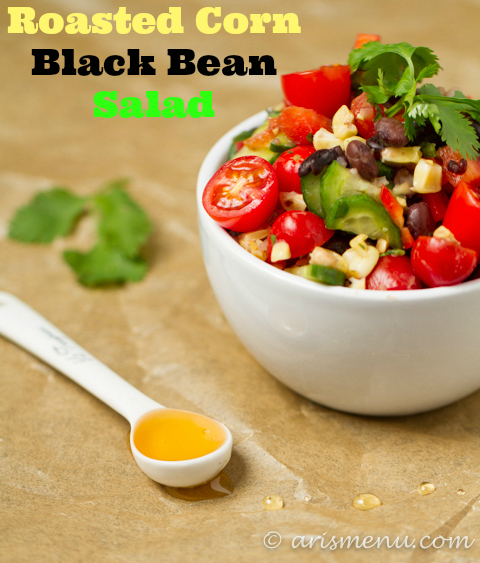
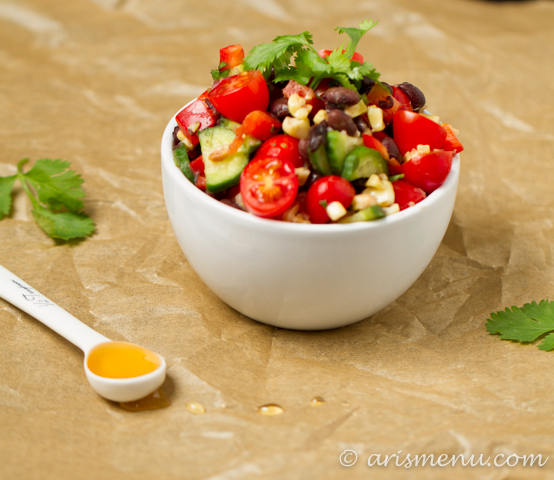
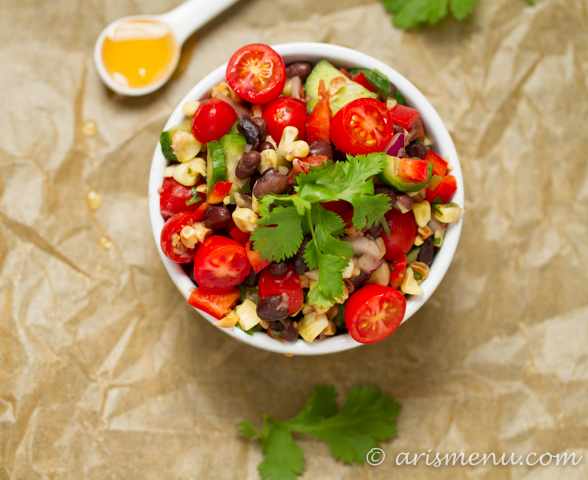
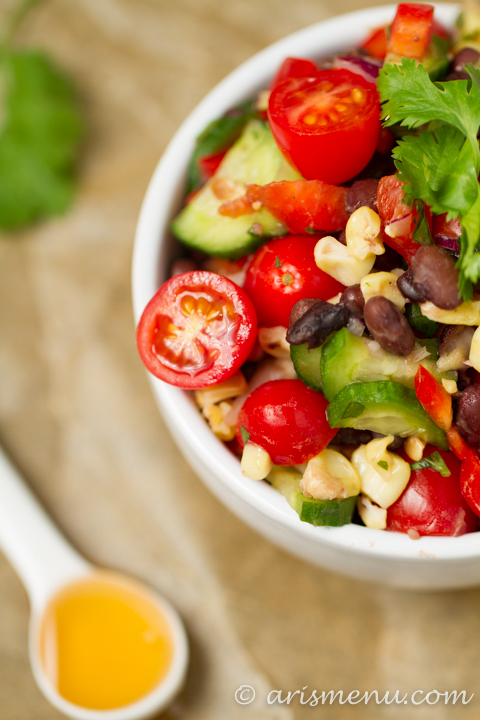
This salad is light, refreshing and filled with “most summeriest” flavor. Fresh roasted corn, cherry tomatoes, crunchy cucumber, sweet red peppers, spicy jalapeno and protein-packed black beans come together with just a little olive oil, vinegar, some honey or agave (I love honey, but my bee loving friends are free to use agave!), fresh lime juice, and of course, my favorite food–cilantro! So many of my favorite things in one summer salad. I also love that with all the protein, it can be used as a meal, or a side dish–your choice. I’ve been eating it on the side with my 5 billion different burgers, but I also like it for lunch. However you eat it, you will love the light, fresh taste and bold flavor profile!

Print
Roasted Corn Black Bean Salad

Prep Time: 10 minutes

Cook Time: 1 hour

Total Time: 1 hour, 10 minutes

Yield: approx 16

Serving Size: 1/2 cup

Roasted Corn Black Bean Salad

This simple, easy, vegan and gluten-free summer salad is refreshing, and easy to put together in bulk for lunches, dinner sides or a BBQ!

Ingredients

  • 3 ears corn, husked
  • 2 1/2 tbsp olive oil, divided
  • 3 tsp rice vinegar
  • 1 tbsp honey or agave
  • 1 1/2 tbsp fresh lime juice
  • 1/2 cup finely chopped red onion
  • 1 cup cherry tomatoes, halved
  • 2 red bell peppers, chopped
  • 3 persian (or 1 large) cucumbers, chopped
  • 1/2 jalapeno, seeded and finely chopped (optional)
  • 2 16 oz cans black beans, drained and rinsed
  • 1/3 cup cilantro leaves, finely chopped
  • 1 tsp cumin
  • generous pinch each salt and pepper

Instructions

  1. Drizzle corn with 1 tbsp olive oil and roast at 400 until golden, about an hour.
  2. Meanwhile, in a medium bowl, whisk together 1 1/2 tbsp olive oil, rice vinegar, honey/agave, and lime juice. Set aside.
  3. Cut kernels from cooked corn and place in a large bowl. Add onion, tomatoes, bell peppers, cucumbers, jalapeno, black beans and cilantro. Season with cumin, salt and pepper. Add prepared dressing and toss lightly. Serve immediately or store in an airtight container in the refrigerator for 7-10 days.
3.1
https://arismenu.com/roasted-corn-black-bean-salad/

Filed Under: Gluten-free, Holiday & Seasonal, Side Dish, Vegan, Vegetarian · Tagged: bbq, black beans, corn, gluten free, lunch.dinner, salad, side, summer, vegan, vegetables, vegetarian

How To: Toddy {Cold Brewed Iced Coffee}

June 3, 2013 · by Ari ·

How to Make Iced Coffee

Have we ever discussed my coffee habit? It’s pretty embarrassing the amount of money I have spent on going out to coffee in my life. I just never got into the habit of making my own in the morning, but I did fall very easily into the habit of going to Dutch Bros TWICE a day. Somehow my bank account and I cannot seem to agree on this habit. Shocking, right?

How to Make Iced Coffee

Anyway, I don’t remember exactly when it was that I discovered toddy–probably a little over a year ago. Toddy is basically the best, smoothest, and most caffeinated way to drink coffee. Pretty much, it wins in every coffee contest ever.

How to Make Iced Coffee

And did I mention it is ridiculously easy to make? It does take just over 24 start to finish, but really most of that time you are sleeping, baking, and eating fro yo. Or…at least that’s what I was doing… 😉

This is literally the best coffee I have ever tasted. Better than any coffee shop, better than any latte. It comes out so smooth with next to no bitterness, and full of bold flavor. It doesn’t need a whole lot–a little sweetener and some almond milk will do ya, but if you like sweeter, creamier coffee, it’s your cup o’ jo! You can make it however you want. Add chocolate syrup and make an iced mocha, blend it up into a homemade frappe, or put some in your brownies!

Okay, let’s get started. The first thing you need is a 2.5 gallon airtight container (or 1.75 for a half batch), and 1 lb of coarsely ground coffee. I like a strong, bold coffee, but use whatever you like. Pour that coffee right into your container.

How to Make Iced CoffeeThen top it with 2 gallons of purified water. If you want, you can also stick a vanilla bean in there to add some flavor. I do sometimes, and I love it!

How to Make Iced Coffee

Give it a little pat down at the top to make sure all of the coffee is incorporated into the water, and not just floating at the top. I don’t mess around with the possibility of losing coffee flavor!

How to Make Iced Coffee

Cover and store for 24 (or up to 36) hours. You can let this happen in the fridge, or at room temperature. It is completely up to you. I usually don’t have room in the fridge, so I stick to room temperature. Once your 24-36 are up, take a fine mesh strainer to scoop out as much of the coffee grounds as possible.

How to Make Iced Coffee

Rinse our your strainer, then set it on top of a 1 gallon jug–you will need two of these because you end up with about 1.75 gallons of coffee when all is said and done. Top the strainer with a double layer of cheesecloth. Use a measuring cup to pour coffee over the strainer. You may just pour from your container if you wish, but that sounds like a coffee disaster for an accident prone gal like yours truly. You might be better at that sort of thing than me, however…

How to Make Iced Coffee

Once you’ve filtered all of the coffee, you are DONE! Store your coffee jugs in the fridge. It is important to note, this recipe creates a coffee CONCENTRATE. When you make your coffee, add an inch or 2 of water to your cup to dilute it a bit. Trust me, I love strong coffee as much as anyway, but it does need to be diluted a bit. Do some trial and error to figure out the best balance for you. Serve it over ice with whatever cream and sweetener you like.

How to Make Iced CoffeeI have officially kicked my coffee shop habit to the curb (with the exception of going with friends on occasion–just like eating out is fun occasionally!) with this stuff. I am in love, obsessed, over the moon for it. It’s super easy, full proof, and super budget friendly. It’s about a $30 investment for all the storage initially, but that’s a one time deal, and then you’re set! Not to mention, there is nothing to brew in the morning! I wake up, poor myself a glass, and go about my breakfasting/blog reading. You will love it!

Print
Toddy {Cold Brewed Iced Coffee}

Prep Time: 30 minutes

Total Time: 24 hours, 30 minutes

Yield: 12-15 cups (approx 1.75 gallons)

Serving Size: 1 cup

Toddy {Cold Brewed Iced Coffee}

Ingredients

  • 1 lb good quality bold coffee, coarsely ground
  • 2 gallons water

Instructions

  1. Pour ground coffee into a 2.5 gallon airtight container. Top with 2 gallons filtered water. Pat down the top to ensure all coffee is incorporated. Cover and store for 24-36 hours.
  2. Scoop out as much of the grounds as possible with a fine mesh strainer. Rinse strainer, then cover with a double layer of cheesecloth. Place covered strainer over a 1 gallon jug Use a measuring cup to pour coffee over your covered strainer to filter any remaining grounds. Repeat until jug is mostly full, then repeat with a second 1 gallon jug. If your coffee begins to have trouble filtering through, change your cheesecloth out for a fresh one.
  3. To serve, fill glass with ice and add 1-2 inches of water. Add coffee, and any desired cream or sweetener.
3.1
https://arismenu.com/how-to-toddy-cold-brewed-iced-coffee/


Filed Under: DIY/How To, Drinks, Gluten-free, Low Carb, Miscellaneous, Paleo, Vegan · Tagged: coffee, cold brew, drinks, gluten free, how to, iced coffee, toddy, vegan

« Previous Page
Image Map

Popular Posts

Tart Cherry Margaritas: The perfect, refreshing margarita--lightly sweet with a punch of tequila

Tart Cherry Margaritas

90+ Healthy Recipes for Breakfast, Lunch, Dinner & Dessert

90+ Healthy Recipes for Breakfast, Lunch, Dinner & Dessert

The Ultimate Peanut Butter Cup Brownie Cookies: Rich, fudgy, brownie-like chocolate cookies stuffed with melty peanut butter cups!

Ultimate Peanut Butter Cup Brownie Cookies

Drink & Dish: Cafe Au Lait Cupcakes

Crockpot Chicken Enchilada Soup

Subscribe via Email:

Enter your email address:

Save an additional $30 on Blendtec Factory Recertified Blenders + Free Shipping

Featured Here

recipe redux
Certified Yummly Recipes on Yummly.com

Member Of…

FitFluential Is Fitness Found
AZ Bloggers Network
az 150 photo az150_zpsfb093d32.gif

Archives


Image Map

Copyright © 2026 | Innovative Child Theme by The Pixelista | Built on the Genesis Framework


Loading Comments...